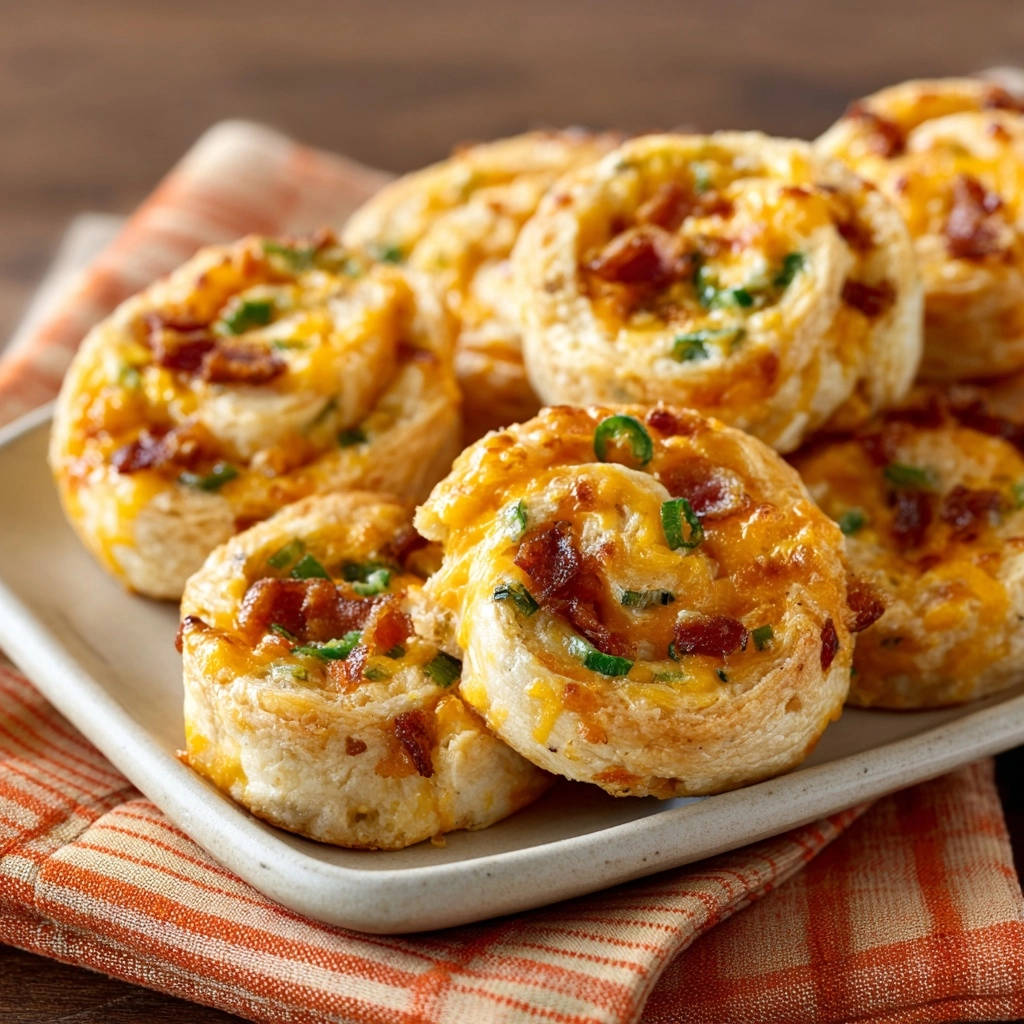
Cheesy Bacon Green Onion Pinwheels: Puffed, Flaky & Easy!
Have you ever spent time meticulously assembling pinwheels, only for them to bake up flat and disappointingly dense? I certainly have, which is why perfecting the art of truly puffed, flaky Cheesy Bacon Green Onion Pinwheels became my mission. This recipe is the culmination of those efforts, guaranteeing beautifully golden spirals with distinct, airy layers every single time.
Get ready to say goodbye to guesswork and hello to your new favorite party bite – a savory, irresistible treat that proves effortless elegance is absolutely achievable in your kitchen.
Say Goodbye to Flat Pinwheels: Why THIS Recipe Delivers Every Time
The Secret to Unrivaled Flakiness and Puffed Layers
The true magic of these pinwheels lies in a combination of precise technique and crucial chill time. We’re not just rolling dough; we’re crafting the foundation for an explosion of texture.
Get Our Best Recipes Weekly!
Join thousands of food lovers and get delicious recipes delivered to your inbox.
This method ensures that the delicate layers of the crescent dough separate and puff beautifully in the oven, creating a light, airy texture that is far from dense or heavy.
Irresistible Flavor in Every Swirl
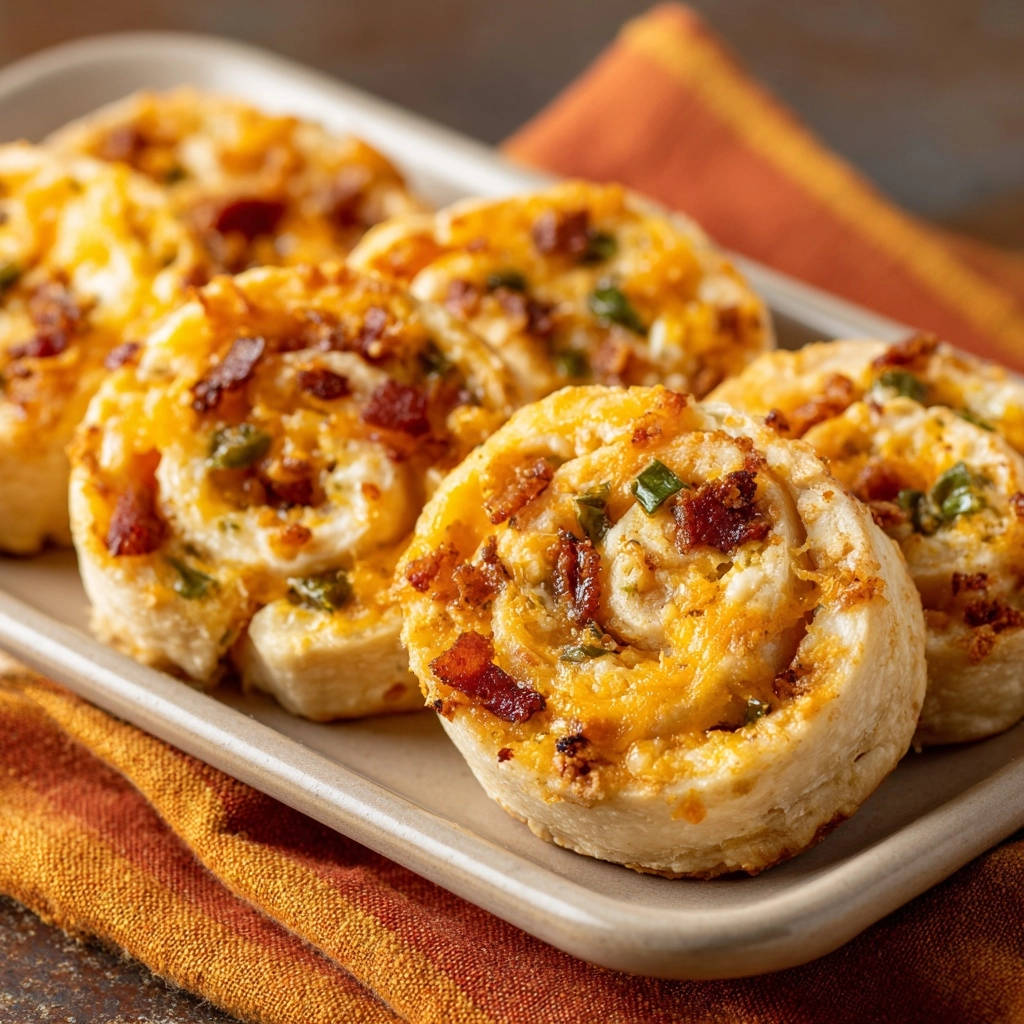
Imagine the perfect balance of sharp, melted cheddar, smoky, crispy bacon, and the fresh, subtle bite of green onions. These flavors are woven throughout every tender, flaky swirl.
The combination is a classic for a reason, delivering a satisfyingly savory experience that appeals to all palates, making these cheesy bacon treats utterly addictive.
Effortless Elegance for Any Occasion
Despite their gourmet appearance and incredible texture, these Cheesy Bacon Green Onion Pinwheels are remarkably simple to prepare. They look impressive on a platter, yet require minimal fuss.
Whether you’re hosting a sophisticated gathering, a casual game night, or simply need a quick, delicious snack, these pinwheels deliver both elegance and ease, making them a versatile staple.
Gather Your Goodies: Simple Ingredients for Big Flavor
The beauty of these flaky pinwheels is how a few common ingredients transform into something truly spectacular. Quality in, deliciousness out!
The Foundation: Refrigerated Crescent Roll Dough
Using refrigerated crescent roll dough is a brilliant shortcut, providing a ready-made, naturally flaky base. Its inherent layers are key to achieving that signature puffed texture.
Opt for the classic crescent rolls, not the seamless sheets, as pressing the seams together helps create a more robust structure for rolling.
For more flaky goodness, check out these mini ham & cheese croissants.
Classic Combos: Shredded Cheddar, Crispy Bacon, and Fresh Green Onions
Shredded Cheddar Cheese: A medium or sharp cheddar provides the perfect tangy, salty kick that melts beautifully. Pre-shredded works, but shredding your own often yields a creamier melt.
Crispy Bacon: Cook your bacon until it’s perfectly crisp, then crumble it into small pieces. This ensures you get that delightful smoky crunch in every bite without making the pinwheels greasy.
Fresh Green Onions: Thinly sliced green onions add a vibrant, mild onion flavor and a pop of color. Use both the white and light green parts for the best balance.
Essential Pantry Staples (Flour & Parchment)
A light dusting of all-purpose flour helps prevent the dough from sticking during prep, ensuring a smooth rolling process. A little goes a long way!
Parchment paper is your best friend for a non-stick baking surface and effortless cleanup. It also helps prevent the bottoms from over-browning.
Tools for Success: What You’ll Need
Having the right kitchen tools makes the preparation of these savory spirals even more enjoyable and efficient.
Baking Essentials
Baking Sheet: A standard rimmed baking sheet is perfect for holding your pinwheels. Choose a lighter colored sheet for more even browning.
Parchment Paper: Crucial for preventing sticking and ensuring easy transfer. It also aids in achieving a perfectly golden crust.
Preparation Helpers
Sharp Knife: A very sharp, non-serrated chef’s knife is essential for clean, precise slices. This prevents squishing the dough and maintains the pinwheels’ beautiful shape.
Rolling Surface: A clean counter or large cutting board, lightly floured, provides the ideal area to unroll and prepare your dough.
Measuring Cups/Spoons: For accurately portioning your delicious fillings.
Your Path to Perfect Pinwheels: Step-by-Step Guide
- Prepping Your Workspace and Oven:
Set your oven to 375°F (190°C) and prepare your baking sheet with parchment paper. This simple step ensures an even bake and easy cleanup.
- Unrolling and Sealing the Dough:
Carefully unroll the crescent dough onto your lightly floured surface or directly onto the parchment paper. Press all seams together firmly to create a single, continuous rectangular sheet. A strong seam prevents your pinwheels from separating during baking, maintaining their integrity.
- Assembling the Flavorful Filling:
Evenly sprinkle the shredded cheddar cheese, crumbled crispy bacon, and thinly sliced green onions over the dough. Remember to leave a small, clean border (about 1/2 inch) along one long edge-this will help seal your log later and keep the filling securely inside.
- The Game-Changer: Rolling Tightly for Flaky Layers:
Starting from the long edge opposite the border, carefully and tightly roll the dough into a firm log. This is the crucial step for achieving those distinct, puffed, and flaky layers that set this recipe apart; a tight roll prevents air pockets and ensures a beautiful spiral.
- The Power of the Chill: Firming for Defined Slices:
Place the rolled log on a plate and refrigerate for 15-20 minutes. This chill time is essential; it firms the dough, making it much easier to slice cleanly without distorting the shape, and ensures your pinwheels hold their form to puff beautifully without spreading excessively during baking.
- Slicing for Uniform Perfection:
Remove the chilled log and use a very sharp, non-serrated knife to slice it into 12 even pinwheels, each about 1/2 inch thick. A sharp knife ensures clean, precise cuts and prevents squishing the delicate layers of the dough, preserving their structure.
- Arrangement and Baking for Golden Excellence:
Arrange the sliced pinwheels cut-side up on your prepared baking sheet, leaving a small space between each for even air circulation. Bake for 12-15 minutes, or until they are beautifully golden brown and the cheese is bubbly. The slightly higher temperature helps activate the dough’s layers for that truly puffed result and a delightful crust.
- Cooling for Optimal Enjoyment:
Allow the pinwheels to cool slightly on the baking sheet before serving. This brief cooling period helps them set, making them easier to handle and preventing them from falling apart, ensuring every bite is perfect.
Chef’s Corner: Pro Tips for Unforgettable Pinwheels
Elevate your Cheesy Bacon Green Onion Pinwheels from great to absolutely extraordinary with these expert insights.
Mastering the Tight Roll: A loose roll will result in gaps and less defined layers, leading to a less satisfying texture. Always aim for a firm, even roll from one end to the other to ensure maximum puff and flakiness in your savory spirals.
The Crucial Chill Time: Do not skip the 15-20 minute refrigeration step! It’s the secret weapon for preventing dough spread, making slicing effortless, and achieving those perfectly light and airy, defined layers. This step makes all the difference.
Use a Sharp, Non-Serrated Knife: For clean, even slices that maintain the pinwheels’ circular shape and delicate layers, a very sharp, smooth-bladed knife is your best friend. Serrated knives can tear the dough and distort the beautiful spiral.
Don’t Overcrowd Your Baking Sheet: Give your pinwheels space to breathe! Proper air circulation ensures they bake evenly, develop a beautiful golden crust on all sides, and puff up optimally. Work in batches if necessary.
Watch for Golden Edges: These delightful bacon and cheese bites can go from perfectly golden to slightly overdone quickly. Keep a close eye on them; when the edges are visibly golden brown and the cheese is actively bubbly, they’re ready for their grand debut.
Serving Your Spirals: Delicious Pairings & Occasions
These versatile and savory pinwheels are perfect for a multitude of occasions, always bringing a touch of homemade goodness.
Round Out Your Meal
If you enjoyed these cheesy pinwheels, consider these other satisfying dishes.
- For a comforting pasta option with similar savory notes, try this Creamy Chicken Penne Bake.
- If you’re looking for another flavorful baked item, these Easy Loaded Baked Potato Halves offer a great complement.
Appetizer Perfection
Serve these flaky pinwheels at your next party, game night, or holiday gathering. They make an incredibly popular and sophisticated starter that guests will rave about.
Consider serving them with a side of ranch dressing, a simple marinara, or even a spicy aioli for an extra kick. Their savory nature pairs well with many dipping options.
Brunch or Breakfast Bites
Brighten up any brunch spread with these warm, cheesy, and bacon-filled bites. They offer a delightful savory contrast to sweeter breakfast items like pancakes or fruit.
They are also fantastic as a quick, satisfying breakfast on the go, providing a delicious start to your day.
Kid-Friendly Snacks
Kids absolutely adore these Cheesy Bacon Green Onion Pinwheels! They’re a fantastic after-school snack or a welcome addition to lunchboxes.
The familiar flavors of cheese and bacon, combined with a fun, spiral shape, make them an instant hit with the younger crowd.
Plan Ahead & Preserve: Storage and Make-Ahead Tips
Maximize convenience and minimize waste with these helpful storage and make-ahead strategies for your delicious pinwheels.
Storing Leftovers
Once baked and cooled, store any leftover Cheesy Bacon Green Onion Pinwheels in an airtight container at room temperature for up to 2 days, or in the refrigerator for up to 4 days.
Reheat gently in a toaster oven or microwave for a few seconds until warm and cheese is melty again.
Can You Freeze Them?
Yes, you can! To freeze unbaked pinwheels: arrange the sliced pinwheels on a parchment-lined baking sheet and freeze until solid. Transfer to a freezer-safe bag for up to 1 month.
Bake directly from frozen, adding a few extra minutes to the baking time until golden and puffed. To freeze baked pinwheels: cool completely, then freeze in a single layer before transferring to a freezer bag for up to 1 month. Reheat in the oven.
Prepping Components in Advance
Save valuable time by preparing your filling ingredients ahead. Cook and crumble the bacon, shred the cheddar cheese, and slice the green onions a day or two in advance.
Store these components separately in airtight containers in the refrigerator, ready to assemble when you are.
Pinwheel Pitfalls? Quick Fixes for Common Issues
Don’t worry if your first batch isn’t picture-perfect. Here are some common issues and how to easily resolve them for future success with your Cheesy Bacon Green Onion Pinwheels.
“My Pinwheels Came Out Flat or Dense!”
This is often due to an insufficiently tight roll or skipping the crucial chilling step. Ensure you roll the dough as tightly as possible, eliminating air gaps, and always refrigerate the log for the full 15-20 minutes.
A properly chilled and tightly rolled log will prevent spreading and guarantee those wonderfully puffed, flaky layers.
“The Filling Fell Out!”
If your filling escapes, it could be that the border left on the dough was too small, or the log wasn’t rolled tightly enough to encapsulate the ingredients. Make sure you leave a generous 1/2-inch border and press the filling gently into the dough before rolling.
Using a very sharp knife for slicing also helps keep everything intact, as a dull knife can push filling out.
“They’re Not Golden Brown!”
Uneven browning can be caused by an oven that isn’t fully preheated, inconsistent oven temperature, or overcrowding the baking sheet. Always ensure your oven reaches the target temperature before baking.
Using parchment paper helps, and if your oven tends to brown unevenly, rotate the baking sheet halfway through the baking time.
Your Pinwheel Questions Answered: FAQ
Can I Use Puff Pastry Instead of Crescent Roll Dough?
While you can use puff pastry, the texture will be different. Puff pastry yields a much crisper, more delicate flake, whereas crescent dough offers a softer, breadier, yet still flaky, experience.
If using puff pastry, thaw it according to package directions and adjust baking time as puff pastry often bakes faster. The tighter roll and chill steps are still crucial.
What Other Fillings Can I Use?
The possibilities are endless! For a vegetarian option, try spinach and feta, or sun-dried tomato and pesto. For another savory twist, consider pepperoni and mozzarella, or a cream cheese and jalapeño mix.
Ensure your fillings aren’t too wet, as this can make the dough soggy. Pat ingredients dry if needed.
Are These Gluten-Free Friendly?
Yes, many brands now offer gluten-free crescent roll dough, which would make these Cheesy Bacon Green Onion Pinwheels accessible. Always check product labels carefully for certified gluten-free options.
The rest of the ingredients are typically gluten-free, but always confirm for any hidden additives.
Can I Bake Them in an Air Fryer?
Absolutely! Air frying can yield incredibly crispy results. Preheat your air fryer to 350°F (175°C).
Arrange the pinwheels in a single layer, ensuring they don’t touch. Air fry for 8-12 minutes, checking frequently, until golden brown and puffed. You may need to work in batches depending on your air fryer’s size.
Ready to Roll? Embrace the Puffed Pinwheel Perfection!
You now possess the secrets to crafting truly exceptional, puffed, and flaky Cheesy Bacon Green Onion Pinwheels. From the crucial tight roll to the indispensable chill time, every step is designed for success.
Don’t wait any longer-gather your ingredients, follow this expert guide, and prepare to impress everyone (including yourself!) with these irresistible savory spirals. Share your triumphant creations and savor every delicious, cheesy, bacon-filled bite!

Cheesy Bacon Green Onion Pinwheels
Course: AppetizerCuisine: AmericanDifficulty: easy4
12 pinwheels15
minutes15
minutes240
kcal50
minutesSay goodbye to flat, sad pinwheels! This recipe reveals a secret technique for perfectly puffed, flaky Cheesy Bacon Green Onion Pinwheels with distinct layers. Get ready for your new favorite party bite, guaranteed to impress with every golden spiral.
Ingredients
1 (8 ounce) can refrigerated crescent roll dough
1 cup shredded cheddar cheese
4 slices cooked bacon, crumbled
2 tablespoons thinly sliced green onions
Directions
- Preheat your oven to 375°F (190°C). Line a baking sheet with parchment paper.
- Unroll the crescent roll dough onto a lightly floured surface or directly onto the parchment paper. Press the seams together firmly to form one large rectangular sheet.
- Sprinkle the cheddar cheese evenly over the dough, leaving a small border (about 1/2 inch) along one long edge. Top with crumbled bacon and thinly sliced green onions.
- This is the game-changer for flakiness and puff! Starting from the long edge opposite the border, carefully and tightly roll the dough into a log. A tight roll is key to distinct, puffed layers.
- Place the rolled log on a plate and refrigerate for 15-20 minutes. This crucial chill time firms up the dough, preventing it from spreading too much and ensuring those beautiful, defined layers bake up perfectly light and airy. It also makes slicing much easier!
- Remove the chilled log and use a very sharp, non-serrated knife to slice it into 12 even pinwheels, about 1/2 inch thick.
- Arrangement the pinwheels cut-side up on your prepared baking sheet, leaving a little space between each.
- Bake for 12-15 minutes, or until the pinwheels are golden brown and the cheese is bubbly. The slightly higher temperature helps activate the dough’s layers for a truly puffed result.
- Let cool slightly on the baking sheet before serving. Enjoy your perfectly puffed and flaky bites!
Notes
- Ensure a tight roll and don’t skip the chill time for guaranteed flaky layers.