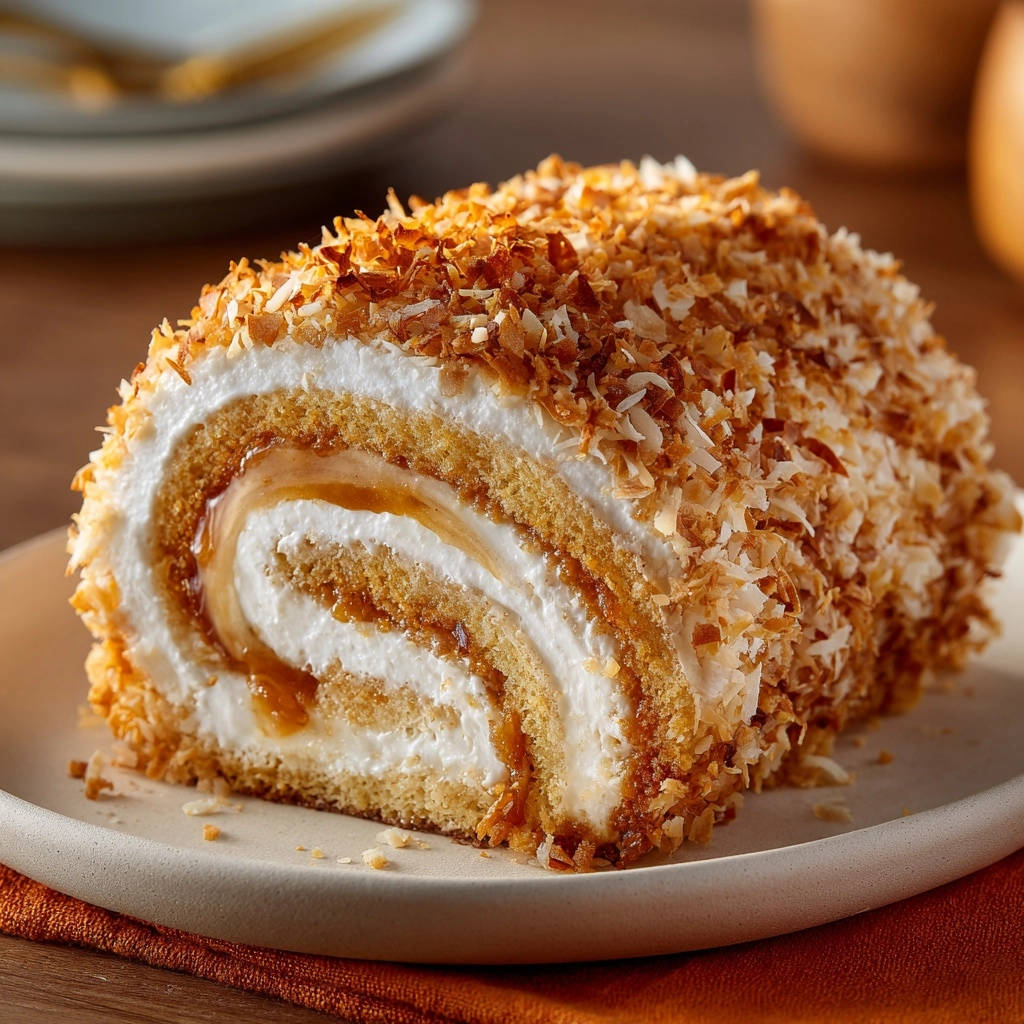
Coconut Caramel Roll Cake: Your Fluffy, Crack-Free Masterpiece
For years, the thought of creating a perfectly swirled roll cake sent shivers down my spine, often resulting in disappointing cracks. However, after much experimentation, I’ve perfected a truly foolproof method that ensures a smooth, stunning spiral every single time. This Coconut Caramel Roll Cake is not only incredibly delicious but also beautifully achievable for any home baker.
Beyond the Bake: Why This Coconut Caramel Roll Cake is Your Next Obsession
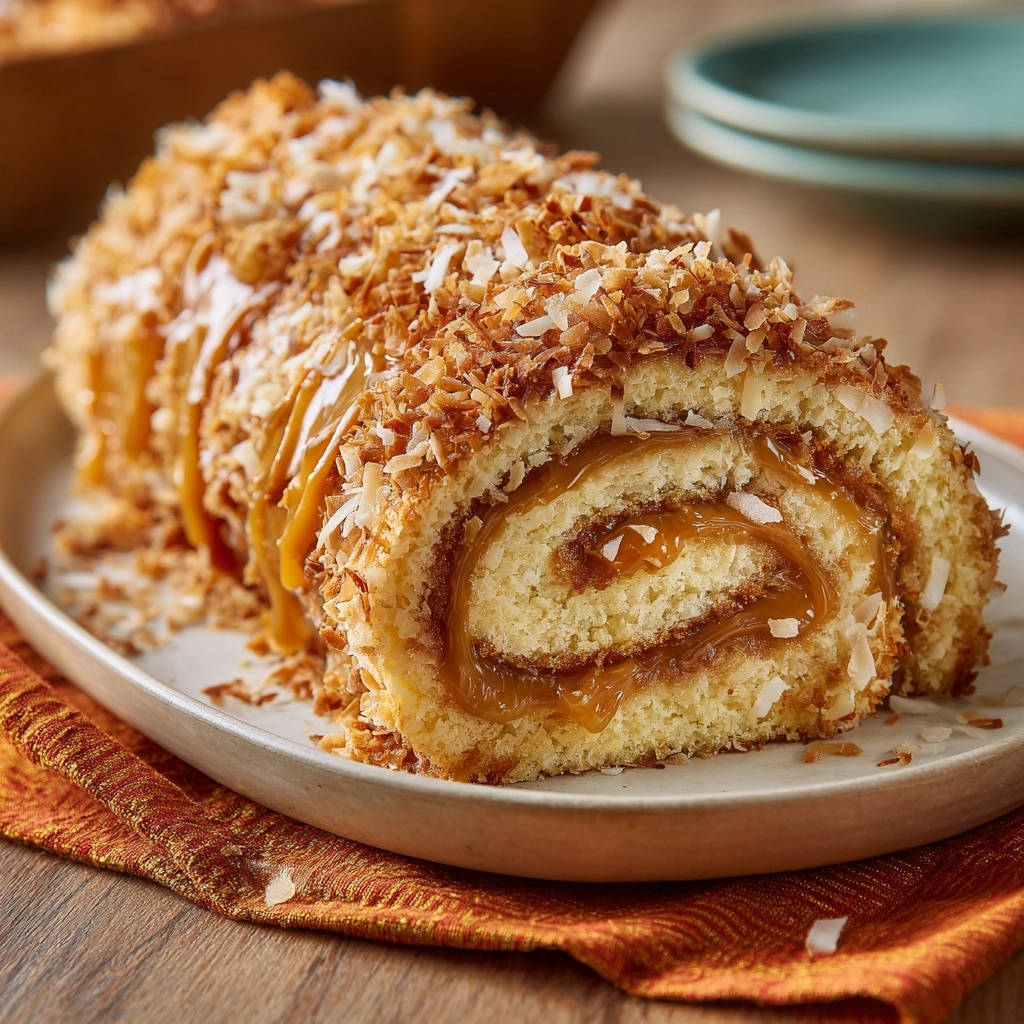
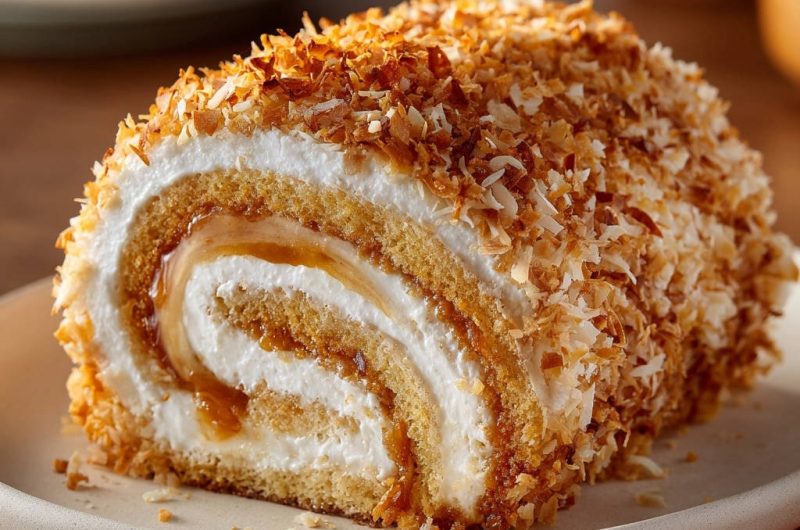
This Coconut Caramel Roll Cake is a symphony of tropical flavors and textures, making it an irresistible dessert. Imagine a delicate, airy sponge cradling a cloud-like whipped filling, all enrobed in luscious caramel and crunchy toasted coconut.
What truly sets this recipe apart is its promise of a crack-free roll, transforming a notoriously tricky bake into an impressive yet achievable triumph. It’s the perfect showstopper for gatherings or a luxurious treat for yourself.
Get Our Best Recipes Weekly!
Join thousands of food lovers and get delicious recipes delivered to your inbox.
For more caramel goodness, check out this fudgy caramel brownie pie.
The harmonious blend of sweet coconut, rich caramel, and a light, fluffy cake creates a dessert experience that is pure tropical indulgence. Every bite delivers a balance of creamy, chewy, and tender textures.
The Crack-Free Roll Secret: Unveiling Our Foolproof Technique
The fear of a roll cake cracking during assembly is a common deterrent for many bakers, but our technique completely eliminates this anxiety. The secret lies in one crucial step: rolling the cake while it’s still warm, directly after baking.
When the cake is hot out of the oven, its structure is pliable and flexible. Rolling it immediately with a kitchen towel “trains” the cake to hold that spiral shape as it cools.
This gentle coiling process prevents the cake from becoming brittle and stiff, which are the main culprits behind cracks. It ensures your Coconut Caramel Roll Cake will unfurl smoothly, ready for its creamy filling.
Crafting the Core Flavors: Ingredients for Your Coconut Caramel Dream
For the Airy Sponge Cake
All-purpose flour forms the structural base; proper measurement is key for a consistent crumb.
Baking powder ensures a perfect lift, contributing to the sponge’s much-desired fluffiness.
Separated eggs are crucial for the cake’s signature light and airy texture, achieved by whipping the whites.
Vanilla extract and granulated sugar add essential sweetness and depth of flavor to the delicate cake.
A touch of warm water helps create a moist crumb, preventing the cake from drying out.
For the Cloud-Like Whipped Filling
Cold heavy cream is essential for achieving stiff peaks and a stable, voluminous filling that won’t weep.
Powdered sugar sweetens the cream, while also helping to stabilize it and prevent a gritty texture.
Vanilla extract enhances the filling’s aromatic profile, complementing the other sweet elements.
The Golden Caramel Swirl
Prepared caramel sauce adds a rich, buttery sweetness that perfectly complements the tropical coconut notes.
Using a good quality, thicker caramel sauce or a homemade version will significantly elevate the overall flavor experience.
The Toasted Coconut Crown
Shredded coconut provides a delightful textural contrast and a distinctly tropical aroma and flavor.
Toasting the coconut intensifies its flavor, deepens its natural sweetness, and gives it a beautiful golden hue.
For a different kind of sweet and crisp treat, consider trying our orange caramel layer cake next.
Essential Gear for Your Roll Cake Adventure
10×15 Inch Jelly Roll Pan: This specific size is crucial for achieving the correct cake thickness for a successful, evenly baked roll.
Parchment Paper: Absolutely essential for preventing sticking and providing convenient “handles” to lift and roll the delicate cake.
Electric Mixer: Necessary for efficiently whipping egg whites to stiff peaks and later for creating a light, fluffy whipped cream filling.
Clean Kitchen Towel: Your “secret weapon” for the crack-free technique, it aids in cooling and shaping the cake without tearing.
Wire Rack: Allows for vital air circulation around the rolled cake, ensuring it cools completely and evenly without becoming soggy.
Rubber Spatula: Indispensable for gently folding delicate mixtures like egg whites into batter, and for smoothly spreading fillings without deflation.
From Batter to Brilliance: Your Step-by-Step Coconut Caramel Roll Cake Journey
Prepping Your Canvas
Preheat your oven to 375F (190C) to ensure it’s at the precise temperature for a quick, even bake. Properly lining your 10×15 inch jelly roll pan with parchment paper, allowing it to extend over the short ends, creates crucial “handles” for easy handling.
Lightly grease the parchment paper to further ensure a non-stick surface. Crucially, dust a clean kitchen towel generously with powdered sugar and set it aside; this towel is your foundation for a crack-free roll.
Building the Airy Sponge: Crafting the Batter
In a medium bowl, whisk together the flour, baking powder, and salt until thoroughly combined. This even distribution prevents pockets of unmixed leavening or salt.
In a large bowl, using an electric mixer, beat the egg yolks with half of the granulated sugar until the mixture is light, pale, and fluffy. This forms a rich, airy base for the sponge.
Gently stir in the vanilla extract and warm water. Then, gradually add the dry ingredients to the egg yolk mixture, mixing only until they are just combined to avoid developing tough gluten.
In a separate, meticulously clean bowl, beat the egg whites until soft peaks begin to form. Gradually add the remaining 1/2 cup of granulated sugar and continue beating until stiff, glossy peaks are achieved; this creates a stable meringue.
Gently fold the stiff egg whites into the cake batter in two additions, using a rubber spatula. The objective here is to incorporate the whites’ airiness without deflating the mixture, preserving the cake’s light texture.
The Critical Warm Roll: Bake and Shape
Pour the prepared batter evenly into your jelly roll pan, spreading it to the edges. Bake for 12-15 minutes, or until the cake springs back lightly when touched and the edges show a slight golden color.
The moment the cake emerges from the oven, immediately and carefully invert the hot cake onto your powdered sugar-dusted kitchen towel. Gently peel off the parchment paper that was lining the pan.
Starting from one of the short ends, tightly roll the warm cake and the towel together. This is THE crucial step that “trains” the cake’s structure to hold its spiral shape without cracking as it cools.
Place the rolled cake, seam-side down, on a wire rack and allow it to cool completely to room temperature. This slow cooling process sets the cake’s new form, typically taking 1-2 hours.
Perfecting the Toasted Coconut
While the cake is cooling, spread the shredded coconut in a single layer on a baking sheet or in a dry skillet. Toast it until it achieves an even golden brown color, which intensifies its flavor.
If using the stovetop, stir constantly over medium-low heat for 5-10 minutes. Watch the coconut very closely, as it can burn quickly due to its high oil content. Once toasted, let it cool completely before use.
Whipping Up Creamy Bliss: The Filling
In a large bowl, combine the cold heavy cream, powdered sugar, and vanilla extract. Using an electric mixer, beat on high speed until stiff peaks form, indicating a stable and airy filling.
Be careful not to overbeat the cream; it can quickly become grainy and separate, losing its smooth texture.
Assembling Your Masterpiece
Once the cake is completely cool, gently unroll it from the towel. It may feel a little stiff initially, but it will relax as you carefully unfurl it.
Evenly spread the prepared whipped filling over the entire surface of the cake, leaving a small 1/2-inch border around the edges.
Drizzle the caramel sauce in a spiral or zig-zag pattern over the whipped cream. This layering ensures a beautiful caramel swirl in every slice.
Starting again from a short end, carefully and gently re-roll the cake (without the towel this time). Roll it as tightly as you can manage without tearing the delicate cake.
The Grand Finale: Chill, Slice & Serve
Transfer the rolled cake, seam-side down, to a serving platter. If desired, you can spread any remaining whipped filling thinly over the top and sides for a polished finish.
Complementary Dishes
To round out your meal, consider these dishes that pair well with sweet coconut and caramel notes.
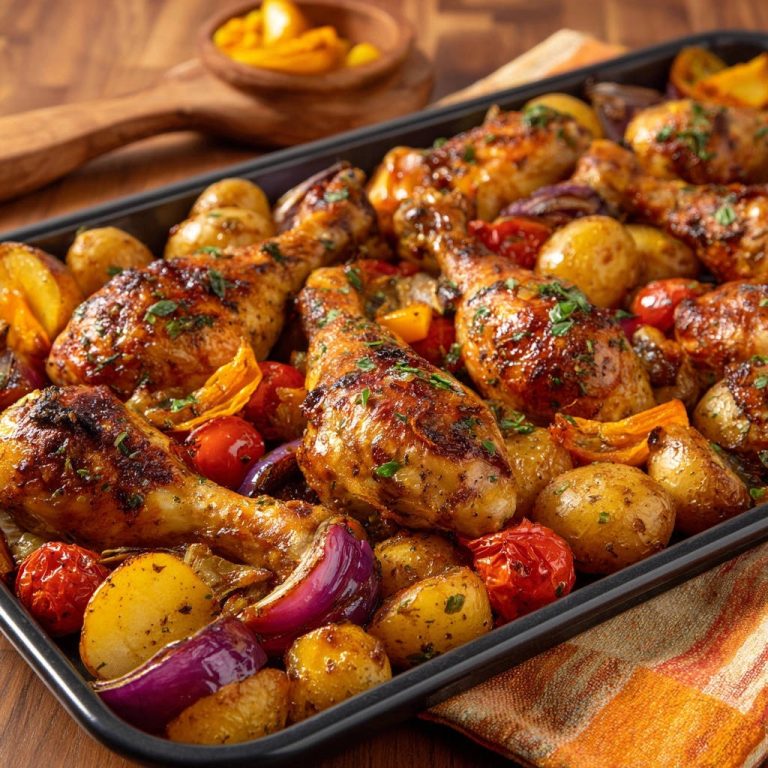
- For a balanced meal, try this Sheet Pan Chicken & Roasted Veggies, offering savory contrast to your coconut caramel roll cake.
- Explore comforting flavors with a vibrant Chickpea & Pea Curry, providing a savory counterpoint that complements the sweetness.
Gently press the toasted coconut onto the top and sides of the cake, ensuring it adheres well to create a visually appealing and flavorful coating.
Chill the cake for at least 30 minutes (or up to 2 hours) before slicing. This crucial chilling time allows the filling to set firmly and ensures cleaner, more defined cuts when serving.
Slice your stunning Coconut Caramel Roll Cake and serve immediately! Enjoy your crack-free masterpiece with pride.
Elevate Your Bake: Expert Tips for Coconut Caramel Roll Cake Perfection
Don’t Overmix the Batter: Overmixing develops gluten in the flour, which can lead to a tough, dense cake. Mix only until ingredients are just combined, leaving it light and tender.
Ensure Eggs are Room Temperature (for Yolks): While egg whites benefit from being cold for whipping volume, egg yolks at room temperature emulsify much better with sugar, resulting in a smoother, fluffier base for your cake batter.
Use a Sifter for Dry Ingredients: Sifting flour, baking powder, and salt together not only ensures they are well combined but also aerates them, contributing significantly to a lighter, more tender sponge cake texture.
The Powdered Sugar Dusting is Key: Do not skimp on dusting your kitchen towel generously with powdered sugar! This creates a vital non-stick surface and prevents the delicate, warm cake from tearing when rolled.
Watch the Coconut Closely: Toasted coconut can go from perfectly golden to completely burnt in a matter of seconds due to its natural oils. Stay by the stovetop or oven and stir frequently for even browning.
Chill Time is Non-Negotiable: Allow the cake ample time to chill in the refrigerator after assembly. This sets the whipped filling and makes for much cleaner, more impressive slices, enhancing both presentation and texture.
Solving Roll Cake Riddles: Common Issues and Quick Fixes
Why Did My Cake Crack While Rolling?
The most common culprit is not rolling the cake while it’s still warm and pliable. The warmth makes the cake elastic and “trains” it to hold the rolled shape without resistance. If it cools too much before the initial roll, it loses its elasticity and becomes prone to cracking.
Another reason could be overbaking, which dries out the cake, making it brittle and less flexible. Ensure you bake for the minimum suggested time until it just springs back when lightly touched, indicating it’s cooked but still moist.
Is My Whipped Filling Too Loose or Grainy?
If the filling is too loose, your heavy cream was likely not cold enough, or it wasn’t beaten to stiff peaks. Always ensure your cream is straight from the fridge, and that your mixing bowl and beaters are clean and chilled for optimal whipping.
If it’s grainy, you’ve overbeat it! Heavy cream can quickly transition from fluffy stiff peaks to a lumpy, grainy texture, especially if beaten past the desired stage. Watch it closely and stop immediately once stiff peaks form.
The Coconut Burned Too Quickly!
Coconut toasts very fast because of its high natural oil content. To prevent burning, ensure your oven or stovetop heat is at medium-low, and stir constantly if toasting in a skillet.
It is always better to toast coconut slowly and patiently than to rush the process and risk it turning from golden to bitter in an instant. Never walk away from it while it’s toasting.
Beyond the Slice: Creative Serving & Storage Wisdom
Presentation Pointers for a Show-Stopping Cake
To achieve perfectly clean slices, use a sharp, thin-bladed knife and wipe the blade clean with a warm, damp cloth between each cut. A gentle sawing motion works best to avoid squishing the cake.
For an extra touch of elegance, garnish individual slices with an additional drizzle of caramel sauce, a tiny sprinkle of fresh shredded coconut, or a small dollop of whipped cream just before serving.
Make-Ahead Magic: Can You Prepare This Roll Cake in Advance?
The Coconut Caramel Roll Cake can be fully assembled and chilled up to 1 day in advance. This allows the various flavors to meld beautifully and the cake to set, making it an ideal make-ahead dessert for entertaining.
You can also bake the cake and perform the initial roll-and-cool step, then store the unrolled sponge (wrapped tightly in plastic wrap) for up to a day before filling and re-rolling, simplifying your baking timeline.
Storing Your Sweet Treat for Lasting Freshness
Store any leftover Coconut Caramel Roll Cake tightly covered in the refrigerator for up to 3-4 days. You’ll often find that the flavors tend to improve slightly on the second day as they continue to meld.
While the cake can technically be frozen (best done un-decorated), the whipped cream filling may alter its texture slightly upon thawing. For the best quality, it’s recommended to enjoy this Coconut Caramel Roll Cake fresh or within a few days of making.
Flavor Twists to Explore
Consider adding a pinch of warm spices like cinnamon, cardamom, or even a tiny hint of nutmeg to the sponge batter for a more complex and inviting aroma.
For an extra burst of tropical flavor, try incorporating a tablespoon of coconut extract or a touch of rum into the whipped filling. This elevates the island-inspired notes beautifully.
Experiment with different toppings! Instead of, or in addition to, the toasted coconut, consider using chopped toasted pecans, macadamia nuts, or delicate white chocolate shavings for a varied texture and taste.
Your Burning Questions Answered: Coconut Caramel Roll Cake FAQs
Can I make this Coconut Caramel Roll Cake gluten-free?
Yes, you can successfully substitute the all-purpose flour with a high-quality 1:1 gluten-free baking flour blend. Ensure the blend you choose contains xanthan gum, as this is crucial for providing structure and elasticity in gluten-free baking. The crack-free rolling technique should still work well.
Can I use store-bought caramel sauce, or should I make my own?
Absolutely! Store-bought caramel sauce is perfectly acceptable and a convenient option, saving you time. For the best flavor and consistency, choose a high-quality, thicker caramel sauce. If you do prefer to make your own, ensure it’s cooled completely to room temperature before you drizzle it onto the whipped cream filling.
How far in advance can I toast the coconut?
You can toast the shredded coconut several days in advance, which can help streamline your baking process. After toasting, ensure it’s completely cool, then store it in an airtight container at room temperature. This prevents moisture from making it soggy and maintains its crispness.
What if I don’t have a kitchen towel for rolling?
While a clean kitchen towel is ideal for its flexibility and absorbency, you can use a large sheet of parchment paper as an effective alternative. Simply dust the parchment paper generously with powdered sugar before inverting the hot cake onto it. The key is to have a flexible, non-stick surface to assist with that initial, crucial warm roll.
How long does the Coconut Caramel Roll Cake last?
When stored properly in an airtight container in the refrigerator, your Coconut Caramel Roll Cake will remain fresh and delicious for 3-4 days. Many people find the flavors actually deepen and improve overnight, making it a wonderful make-ahead dessert.
Your Masterpiece Awaits: Share Your Coconut Caramel Roll Cake Triumph!
You’ve navigated the steps, embraced the “crack-free” secret, and created a truly stunning dessert! This Coconut Caramel Roll Cake is more than just a sweet treat; it’s a testament to your newfound baking confidence and skill.
We encourage you to share your beautiful creation with friends and family, delighting them with this tropical indulgence, or perhaps savor a slice (or two!) all to yourself. Don’t forget to share your baking journey and photos with us online – we absolutely love to see your culinary triumphs!
Dive into this delightful, fluffy, and perfectly swirled Coconut Caramel Roll Cake. Each bite is a little piece of paradise. Happy baking!
Coconut Caramel Roll Cake
Course: DessertCuisine: American CuisineDifficulty: easy1
roll cake (8-10 servings)45
minutes20
minutes180
minutesAmerican Cuisine
Ingredients
For the Sponge Cake:
1 cup all-purpose flour
1 teaspoon baking powder
1/2 teaspoon salt
4 large eggs, separated
1 cup granulated sugar, divided
1 teaspoon vanilla extract
1/4 cup warm water
Powdered sugar, for dusting
For the Whipped Filling:
2 cups cold heavy cream
1/2 cup powdered sugar
1 teaspoon vanilla extract
For the Caramel Swirl:
1/2 cup prepared caramel sauce
For the Toasted Coconut Topping:
1 1/2 cups shredded coconut, toasted
Directions
- Prepare for Baking: Preheat your oven to 375F (190C). Line a 10×15 inch jelly roll pan with parchment paper, extending the paper over the short ends to create “handles.” Grease the parchment paper lightly. Dust a clean kitchen towel generously with powdered sugar and set aside. This towel is your secret weapon for a crack-free roll!
- Make the Sponge Cake Batter: In a medium bowl, whisk together the flour, baking powder, and salt. In a large bowl, using an electric mixer, beat the egg yolks with 1/2 cup of granulated sugar until light and fluffy. Stir in the vanilla extract and warm water. Gradually add the dry ingredients to the egg yolk mixture, mixing until just combined. In a separate clean bowl, beat the egg whites until soft peaks form. Gradually add the remaining 1/2 cup of granulated sugar and continue beating until stiff, glossy peaks form. Gently fold the egg whites into the cake batter in two additions until just combined, being careful not to deflate the mixture.
- Bake and Perform the Crack-Free Roll: Pour the batter evenly into the prepared jelly roll pan. Bake for 12-15 minutes, or until the cake springs back when lightly touched and the edges are lightly golden. The moment the cake comes out of the oven, immediately invert the hot cake onto the powdered sugar-dusted kitchen towel. Carefully peel off the parchment paper. Starting from one of the short ends, tightly roll the warm cake and the towel together. Yes, roll it while it’s still hot! This is THE crucial step that trains the cake to hold its spiral shape without cracking. Place the rolled cake seam-side down on a wire rack and let it cool completely to room temperature, about 1-2 hours.
- Toast the Coconut: While the cake cools, prepare your toasted coconut. Spread the shredded coconut in a single layer on a baking sheet. You can bake it in a preheated oven (at 325F/160C, if the oven is free and adjusted) or, more conveniently, toast it in a dry skillet over medium-low heat on the stovetop for 5-10 minutes, stirring occasionally, until evenly golden brown. Watch it closely, as coconut can burn quickly. Let cool completely.
- Prepare the Whipped Filling: While the cake continues to cool, make your filling. In a large bowl with an electric mixer, beat the cold heavy cream, powdered sugar, and vanilla extract on high speed until stiff peaks form. Be careful not to overbeat, or it will become grainy.
- Assemble the Roll Cake: Once the cake is completely cool, gently unroll it from the towel. It might feel a little stiff, but it will relax. Spread the prepared whipped filling evenly over the entire surface of the cake, leaving a 1/2-inch border around the edges. Drizzle the caramel sauce in a spiral or zig-zag pattern over the whipped cream. Starting from the short end again, carefully and gently re-roll the cake, without the towel this time. Roll it as tightly as you can without tearing the cake.
- Decorate and Chill: Transfer the rolled cake, seam-side down, to a serving platter. Spread any remaining whipped filling thinly over the top and sides of the cake, if desired. Gently press the toasted coconut onto the top and sides, ensuring it adheres well. Chill the cake for at least 30 minutes (or up to 2 hours) before slicing to allow the filling to set and for cleaner cuts. Slice and serve! Enjoy your crack-free masterpiece!
Notes
- The key to a crack-free roll is immediately rolling the warm cake with a powdered sugar-dusted towel.