Easy Skillet Naan: Fluffy, Chewy & Perfect Every Time
I know the disappointment of tough, dense homemade naan. But after countless attempts, I’ve perfected an Easy Skillet Naan recipe that guarantees fluffy, wonderfully chewy results with those coveted bubbly pockets, every single time. This approach transforms a common kitchen challenge into a triumph, promising a consistently soft texture that will impress.
Why This Easy Skillet Naan Will Be Your New Go-To Recipe
Banish Dense Naan: The Secret to Heavenly Texture
Many home cooks struggle with achieving that light, airy texture and perfect bubbly pockets in naan. Our recipe focuses on precise techniques that develop gluten and trap air, ensuring your naan is incredibly soft and wonderfully chewy, never dense.
You’ll enjoy consistently superior results, making every bite a delight.
Get Our Best Recipes Weekly!
Join thousands of food lovers and get delicious recipes delivered to your inbox.
Effortless & Accessible: Perfect for Any Home Cook
Forget the tandoor! This method utilizes a simple cast iron skillet or heavy nonstick pan, making authentic-tasting naan accessible in any kitchen. The ingredients are common, and the steps are clearly laid out for foolproof success.
It’s an approachable recipe, even for beginners, delivering impressive results without complex equipment.
A Versatile Favorite: Pairings & Possibilities
Homemade naan isn’t just a side dish; it’s a culinary canvas. Its neutral yet satisfying flavor makes it the perfect accompaniment to a vast array of cuisines.
From soaking up rich curries to serving as a base for mini pizzas, this fluffy bread enhances countless meals.
What to Try Next
To round out your meal, consider these dishes that pair well with warm, fluffy naan.
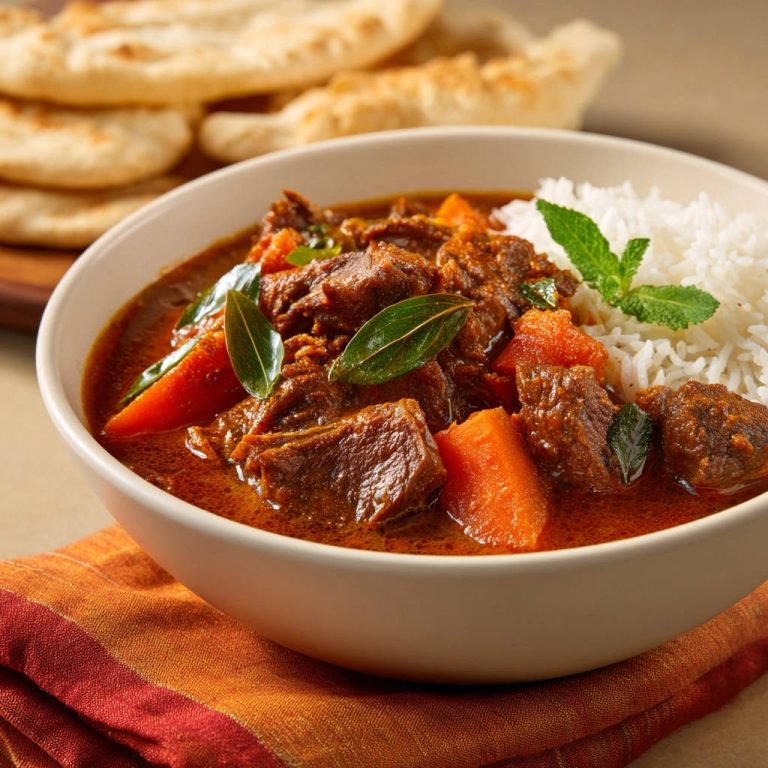
- For a robust main course, serve your naan alongside this savory beef and carrot curry, offering tender chunks of beef in a rich sauce.
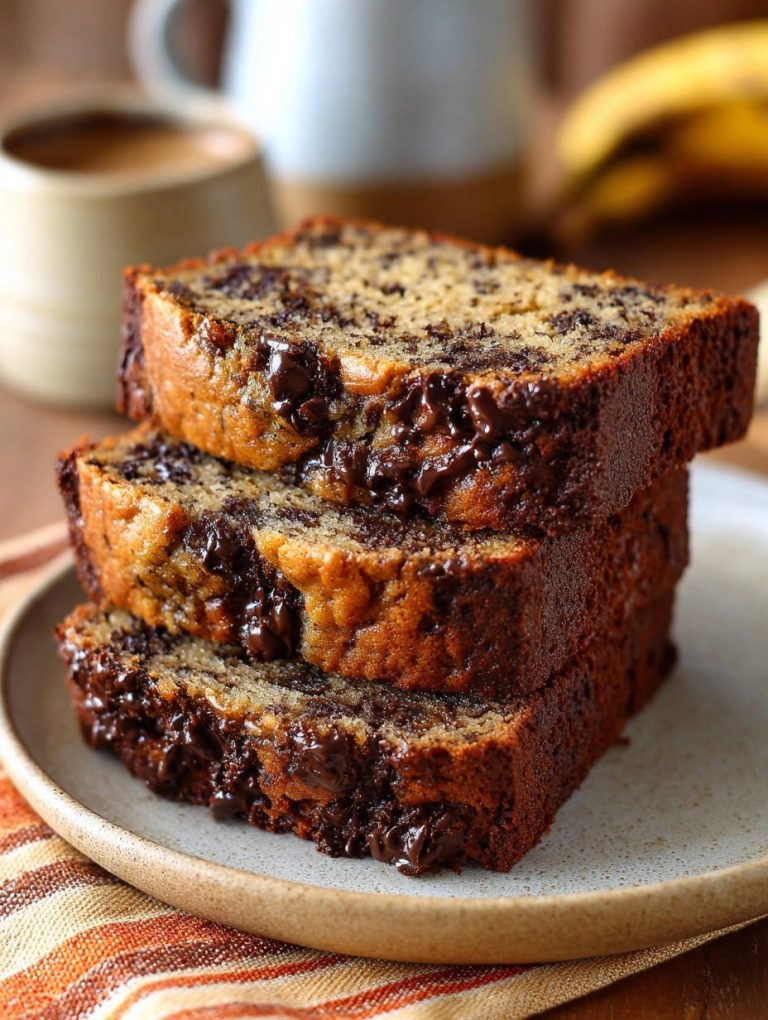
- Finish your meal with a sweet treat like this skillet pecan pie, featuring a satisfyingly crisp crust and a nutty filling.
Your Kitchen Arsenal for Perfect Skillet Naan
Essential Equipment for Naan Success
Large Mixing Bowl: Essential for combining ingredients and allowing the dough to rise comfortably, giving the yeast ample space to work its magic.
Cast Iron Skillet or Heavy Nonstick Pan: Crucial for achieving the high, even heat needed for those signature bubbles and delicious char. Cast iron provides superior heat retention, while a good nonstick pan offers convenience and easy release.
Measuring Cups & Spoons: For accurate ingredient proportions, which are vital for proper dough consistency and yeast activity.
Rolling Pin: To shape the naan evenly, ensuring consistent thickness for uniform cooking and puffing.
Helpful Additions for a Smoother Process
Kitchen Scale: For precise ingredient measurements, especially flour, which can vary significantly in weight when measured by volume. This ensures optimal dough hydration.
Dough Scraper: Makes handling sticky dough much easier during kneading and dividing, minimizing flour usage on your work surface.
Pastry Brush: Ideal for brushing the hot naan with melted butter immediately after cooking, ensuring an even coating and delicious finish.
Crafting Your Skillet Naan: Essential Ingredients Explained
The Foundation: All-Purpose Flour
All-purpose flour provides the necessary structure for your naan, allowing it to hold its shape and develop elasticity as gluten forms. This ensures the naan is both pliable and capable of trapping gas.
Avoid overpacking when measuring; spoon flour into your measuring cup and level it off to ensure the correct consistency and prevent a dense result.
The Magic of Yeast: Activating for Air Pockets
Active dry yeast is the leavening agent responsible for those delightful air pockets and the signature fluffy texture of Easy Skillet Naan. Proper activation with warm water and a touch of sugar is crucial to ensure your naan rises beautifully.
The water temperature (105-115 degrees F) is vital; too cold and the yeast won’t activate, too hot and it will kill it, leading to a flat dough.
Dairy & Fat: For Tenderness and Flavor
Plain yogurt contributes significantly to the naan’s tenderness and imparts a subtle tang, enhancing its flavor profile. It also helps create a moist, pliable dough.
Vegetable oil keeps the dough flexible and prevents sticking during the rising process, while also contributing to a softer crumb. Melted butter brushed on at the end adds rich flavor, a beautiful sheen, and keeps the cooked naan supple.
Vegan Options: Unsweetened non-dairy milk can be substituted for yogurt to make this recipe plant-based, maintaining moisture and contributing to a tender texture.
Flavor Boosters: Salt and Fresh Herbs
Salt isn’t just for flavor; it also helps control yeast activity, preventing over-fermentation, and strengthens the gluten structure in the dough. This contributes to a better rise and overall texture.
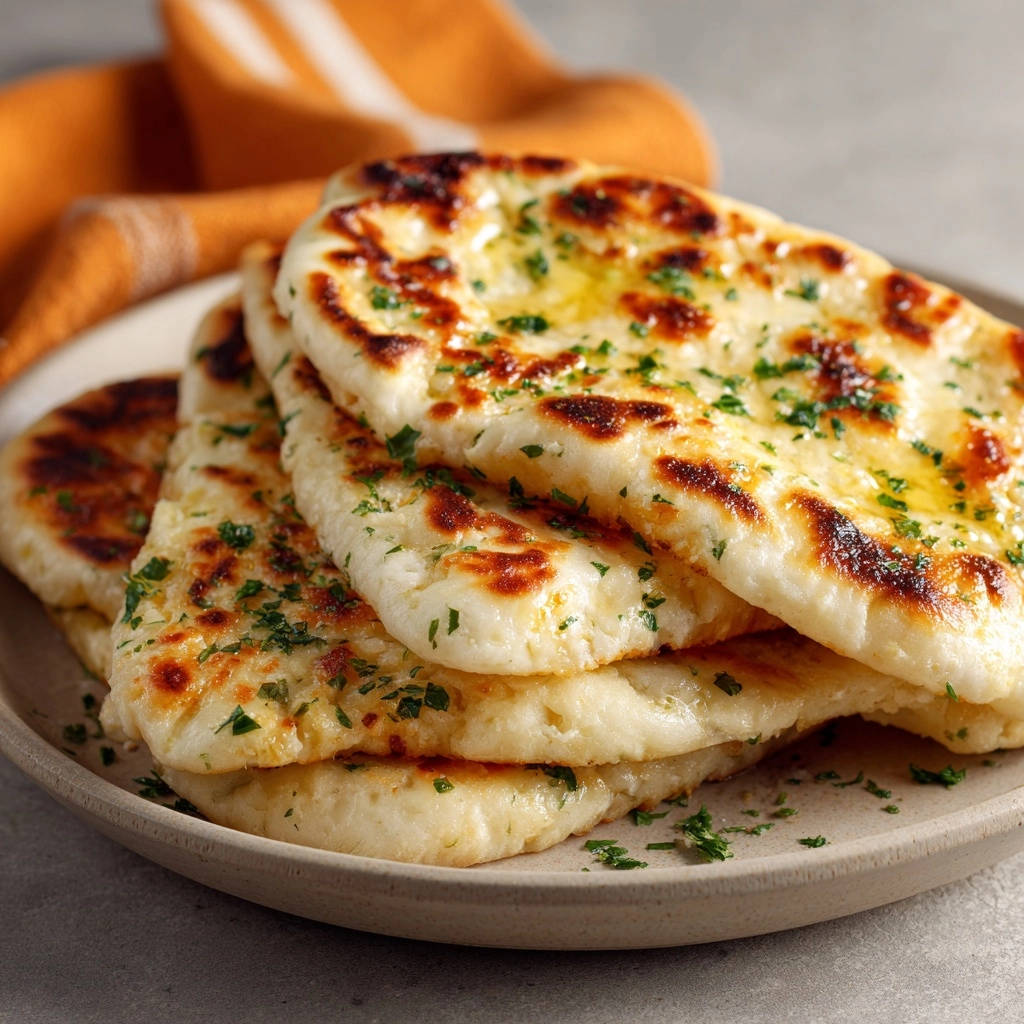
Fresh chopped parsley provides a vibrant, aromatic finish, adding a fresh contrast to the rich naan. Feel free to experiment with other fresh herbs like cilantro for a different flavor profile.
Your Step-by-Step Guide to Fluffy Easy Skillet Naan
- 1. Activate Yeast and Hydrate:
In a large bowl, combine the warm water (105-115°F), granulated sugar, and active dry yeast. Let this mixture stand undisturbed for 5 to 10 minutes.
This period allows the yeast to activate, producing a foamy, bubbly surface. This bubbling is a crucial visual cue that your yeast is alive and ready to make your naan light and airy.
Stir in the plain yogurt, salt, and 1 tablespoon of the vegetable oil. Gradually add the all-purpose flour, mixing with a sturdy spoon until a shaggy, wet dough forms that just comes together.
- 2. Knead for Fluffiness:
Turn the shaggy dough onto a lightly floured surface. Begin to knead the dough vigorously for 8 to 10 minutes without interruption.
This extended kneading time is paramount; it develops the gluten structure which is the “secret” to trapping air and creating an incredibly fluffy and wonderfully chewy naan, preventing a dense result.
The dough should transform, becoming smooth, elastic, and significantly less sticky by the end of this process, indicating proper gluten development.
- 3. First Rise for Air Pockets:
Lightly grease a clean, large bowl with the remaining 1 tablespoon of vegetable oil. Place the kneaded dough in the bowl, turning it once to ensure it’s coated on all sides.
Cover the bowl snugly with a damp kitchen cloth or plastic wrap. Allow the dough to rise in a warm, draft-free place for 1 to 1.5 hours, or until it has doubled significantly in size.
This bulk fermentation is critical for building the foundational internal structure and those coveted air pockets that define great naan, contributing to its light texture.
- 4. Shape and Second Rest:
Gently punch down the risen dough to release some of the accumulated air. Transfer it to a lightly floured surface and divide the dough into 8 to 10 equal pieces, depending on your desired naan size.
Working with one piece at a time, roll each portion into an oval or teardrop shape, aiming for approximately 1/4 inch thickness. Avoid making them too thin, which can lead to dry naan.
Arrange the shaped naan pieces on a lightly floured baking sheet or surface, cover them loosely with a clean towel, and let them rest for another 15 to 20 minutes.
This short second rest is vital as it relaxes the gluten, preventing the naan from springing back when rolled and ensuring it puffs up beautifully when cooked, yielding a soft and pliable texture.
- 5. Cook with High Heat:
Place a cast iron skillet or a heavy nonstick pan over HIGH heat and allow it to heat up for several minutes until it’s almost smoking. The extreme heat is key to achieving the characteristic bubbly surface and charred spots on your skillet flatbread.
Place one piece of shaped naan into the searing hot, dry skillet. Do not overcrowd the pan; cook one piece at a time for best results.
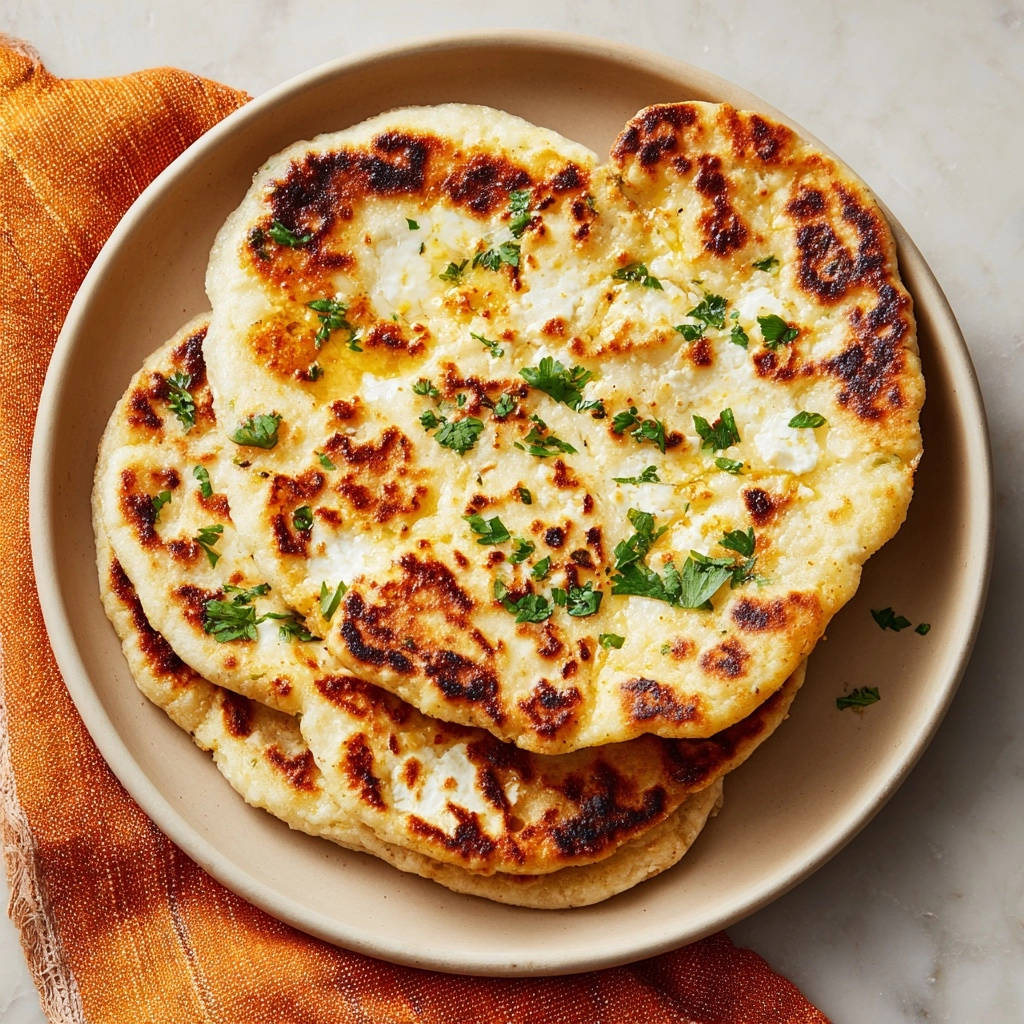
Cook for 1 to 2 minutes on the first side. Look for large bubbles to form rapidly on the surface and the bottom to develop lovely golden-brown to slightly charred spots, indicating proper cooking.
- 6. Flip and Finish:
Using tongs, carefully flip the naan to the second side. Lightly brush the now-cooked, upward-facing side with a little of the melted butter.
Continue to cook for another 1 to 2 minutes until the second side also has inviting char spots and the naan is fully cooked through and wonderfully puffed. It should feel light and airy to the touch.
- 7. Butter and Garnish:
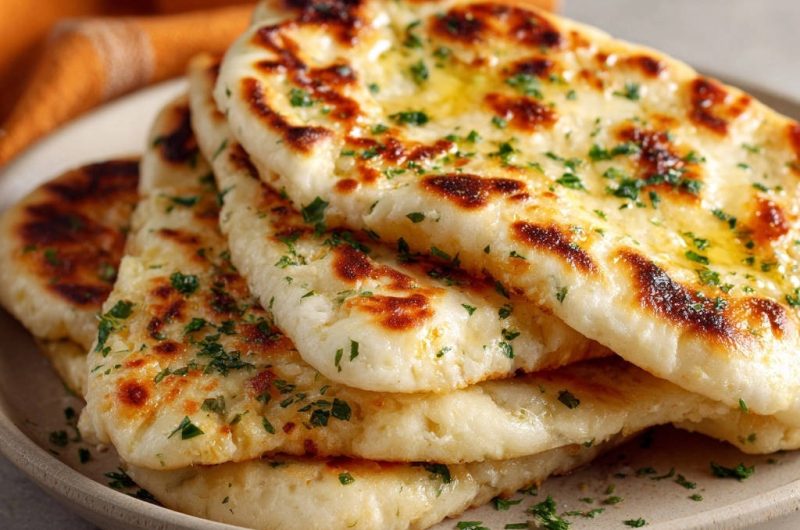
Once cooked, immediately transfer the hot naan to a serving plate. Brush generously with more melted butter and sprinkle immediately with fresh chopped parsley.
Repeat the cooking process with the remaining dough, making sure to maintain the high heat of the skillet between each piece to ensure consistent results for all your homemade naan.
Serve your perfectly fluffy, warm naan immediately and enjoy its incredible freshness!
Chef’s Secrets: Elevating Your Skillet Naan Masterpiece
Don’t Rush the Yeast Activation
The initial foaming of the yeast mixture is your guarantee of success for fluffy bread. If it doesn’t foam after 10 minutes, your yeast might be old or your water temperature incorrect. Don’t proceed; start with fresh yeast to avoid flat naan.
Mastering the Knead for Ultimate Fluffiness
The 8-10 minutes of vigorous kneading is non-negotiable for achieving that incredibly soft and chewy texture. This develops the gluten network, creating elastic strands that trap the gasses from the yeast, leading to those signature air pockets.
The Power of High Heat: Achieving Those Perfect Bubbles
A screaming hot skillet is essential! It cooks the naan quickly, creating steam that puffs up the dough and forms those beautiful bubbles and charred spots. If the pan isn’t hot enough, the naan will cook slowly and become tough or dry.
Resting is Key: Gluten Relaxation Explained
Both the first rise (bulk fermentation) and the second rest after shaping are crucial. These periods allow the gluten to relax and the yeast to produce more gas, resulting in a more pliable dough that puffs up beautifully when cooked, leading to a tender crumb.
Keep Dough Covered for Optimal Moisture
Always keep your dough covered during resting periods (with a damp cloth or plastic wrap). This prevents a dry skin from forming, which can inhibit rising and result in a less tender naan. Proper moisture retention is vital for soft naan.
Butter & Fresh Herbs: The Finishing Touch
Brushing with melted butter immediately after cooking not only adds incredible flavor but also keeps the naan soft and pliable. The fresh parsley adds a burst of freshness and visual appeal, don’t skip it for the ultimate Indian bread experience!
Solving Common Naan Woes: Troubleshooting Tips
Why Isn’t My Naan Puffy?
This is often due to inactive yeast (ensure it foams during activation), insufficient kneading (needs 8-10 minutes for gluten development), or not allowing enough rise time. Also, a skillet that isn’t hot enough will prevent rapid puffing.
My Naan is Tough or Dense!
Over-flouring the dough or surface can lead to a tough naan. Ensure you’re measuring flour correctly and using just enough for kneading. Additionally, under-kneading won’t develop enough gluten for softness, while overcooking will dry it out.
Naan Sticks to the Skillet
Ensure your skillet is thoroughly preheated to high heat before adding the naan. A well-seasoned cast iron skillet or a good quality nonstick pan are best. A tiny amount of oil can be brushed on the skillet if sticking persists, but usually high heat is enough.
Edges are Burning, Center is Raw
This indicates your heat is too high or uneven. Try slightly reducing the heat to medium-high and ensuring your pan is evenly heated before placing the naan. You might also be rolling your naan too thick in the center, requiring longer cooking.
Beyond the Basket: Delicious Ways to Enjoy Your Naan
Classic Pairings for a Taste of India
Curries & Dals: The quintessential accompaniment for soaking up rich sauces and flavorful gravies, making every bite of your Indian bread a delight.
Tandoori Dishes: Perfect for scooping up marinated meats and vegetables straight from the grill or oven, adding a delicious texture.
Hummus & Dips: A fantastic alternative to pita bread for various Mediterranean spreads, offering a soft and chewy contrast.
Creative Appetizers & Meals
Mini Pizzas: Use this Easy Skillet Naan as a quick and delicious base for individual pizzas, perfect for a customizable weeknight meal or party snack.
Wraps & Sandwiches: Fill with grilled chicken, falafel, or fresh vegetables for a unique twist on traditional wraps, creating a portable, satisfying meal.
Naan with Garlic Butter & Herbs: A simple yet irresistible side dish on its own, perfect for sharing or as a flavorful accompaniment to any meal.
Sweet Surprises
Cinnamon Sugar Naan: Brush with butter, sprinkle generously with cinnamon sugar, and lightly toast for a warm, sweet dessert treat that’s easy to make.
Fruit & Honey Naan: Top with fresh fruit like berries or sliced bananas and a drizzle of honey for a light breakfast or a naturally sweet dessert option.
Prepping Ahead & Storing Your Homemade Naan
Can You Make the Dough Ahead?
Yes, you can prepare the dough up to the first rise. After it has doubled in size, gently punch it down, cover tightly with plastic wrap, and refrigerate for up to 24 hours. Let it come to room temperature for about 30 minutes before shaping and cooking for the best results.
Storing Leftover Naan
Cooked naan is best enjoyed fresh. However, leftovers can be stored in an airtight container or a resealable plastic bag at room temperature for up to 2 days, or refrigerated for up to 4 days. For longer storage, freeze individual naan pieces once cooled in a freezer-safe bag for up to 2-3 months.
Reheating for Best Results
To reheat, lightly mist naan with water and warm in a hot skillet for 30 seconds per side, or microwave briefly until soft and warm. For frozen naan, thaw first then reheat in a skillet or a low oven (300°F) until soft and pliable and perfectly warm.
Your Easy Skillet Naan Questions Answered
What kind of flour is best for Easy Skillet Naan?
All-purpose flour works wonderfully for this recipe, providing a good balance of chewiness and softness. While bread flour can be used for a slightly chewier naan, it’s not strictly necessary here. For gluten-free, look for specific gluten-free bread flour blends that are suitable for yeasted doughs.
Can I use instant yeast instead of active dry?
Yes, you can! If using instant yeast, you can typically mix it directly with the dry ingredients (flour, sugar, salt) without the initial activation step. However, ensuring your water is still warm (around 105-115°F) is important for optimal rising. You might also use slightly less instant yeast (e.g., 3/4 teaspoon).
What if I don’t have a cast iron skillet?
A heavy-bottomed nonstick pan or any thick-bottomed skillet that can retain high heat will work effectively for this skillet flatbread. The key is to get it very hot to achieve the characteristic bubbles and char. Avoid thin pans that lose heat quickly, as they won’t give you the desired puffy texture.
Can I make this recipe gluten-free or vegan?
For a vegan version, the recipe already offers unsweetened non-dairy milk as a substitute for yogurt, ensuring a plant-based option. For gluten-free, you would need to use a high-quality gluten-free all-purpose flour blend specifically designed for yeasted breads. Results may vary slightly in texture, but it’s worth experimenting.
How do I know if my water is the right temperature for yeast?
The ideal temperature range is 105-115°F (40-46°C). If you don’t have a thermometer, it should feel comfortably warm to the touch, like a baby’s bath, but not hot. Water that is too cold won’t activate the yeast, and water that is too hot will kill it, preventing your naan from rising.
Ready to Master Your Own Easy Skillet Naan?
You now have all the expert tips and techniques to create truly exceptional Easy Skillet Naan right in your own kitchen. Say goodbye to dense, disappointing results and hello to irresistibly fluffy, bubbly, and perfectly chewy bread that will impress everyone.
Don’t be shy – dive in, follow these steps, and savor the incredible satisfaction of making this beloved flatbread from scratch. Once you try this homemade naan recipe, store-bought naan will be a thing of the past!
We’d love to see your creations! Share your Skillet Naan masterpieces with us in the comments below or tag us on social media.
Easy Skillet Naan
Course: BreadCuisine: Indian cuisineDifficulty: easy8
to 10 pieces35
minutes30
minutes180
minutesIndian cuisine
Ingredients
2 cups all purpose flour, plus more for dusting
1 teaspoon active dry yeast
1 teaspoon granulated sugar
1/2 teaspoon salt
1/2 cup warm water (around 105-115 degrees F)
1/4 cup plain yogurt (or unsweetened non dairy milk)
2 tablespoons vegetable oil, divided
2 tablespoons melted butter
2 tablespoons fresh parsley, chopped
Directions
- Activate Yeast and Hydrate: In a large bowl, combine the warm water, sugar, and yeast. Let this mixture stand for 5 to 10 minutes until it becomes foamy. This bubbling action is CRUCIAL as it confirms your yeast is active and ready to make your naan light and airy. Stir in the yogurt, salt, and 1 tablespoon of the vegetable oil. Gradually add the flour, mixing with a spoon until a shaggy, wet dough forms.
- Knead for Fluffiness: Turn the dough onto a lightly floured surface. Knead the dough vigorously for 8 to 10 minutes. This extended kneading time is the secret to developing the gluten structure that traps air, making your naan wonderfully fluffy instead of dense. The dough should become smooth, elastic, and less sticky.
- First Rise for Air Pockets: Lightly grease a clean bowl with the remaining 1 tablespoon of vegetable oil. Place the kneaded dough in the bowl, turning it once to coat. Cover the bowl with a damp cloth or plastic wrap. Let the dough rise in a warm place for 1 to 1.5 hours, or until it has doubled significantly in size. This bulk fermentation builds the foundation for those lovely air pockets.
- Shape and Second Rest: Gently punch down the risen dough to release some air. Divide the dough into 8 to 10 equal pieces. Roll each piece into an oval or teardrop shape, about 1/4 inch thick. Arrange the shaped naan on a lightly floured surface, cover loosely with a clean towel, and let them rest for another 15 to 20 minutes. This short second rest relaxes the gluten, ensuring the naan puffs up beautifully when cooked.
- Cook with High Heat: Heat a cast iron skillet or heavy nonstick pan over HIGH heat until it’s almost smoking. This extreme heat is key to getting the characteristic bubbles and char. Place one piece of naan in the hot skillet. Cook for 1 to 2 minutes until large bubbles form on the surface and the bottom has developed lovely charred spots.
- Flip and Finish: Flip the naan. Lightly brush the now-cooked side (which is facing up) with a little melted butter. Cook for another 1 to 2 minutes until the second side also has char spots and the naan is fully cooked through and wonderfully puffed.
- Butter and Garnish: Transfer the cooked naan to a plate. Brush immediately with more melted butter and sprinkle generously with fresh chopped parsley. Repeat with the remaining dough. Serve your perfectly fluffy naan warm!
Notes
- Guaranteed fluffy every time with key techniques like extended kneading and proper yeast activation for perfect air pockets.