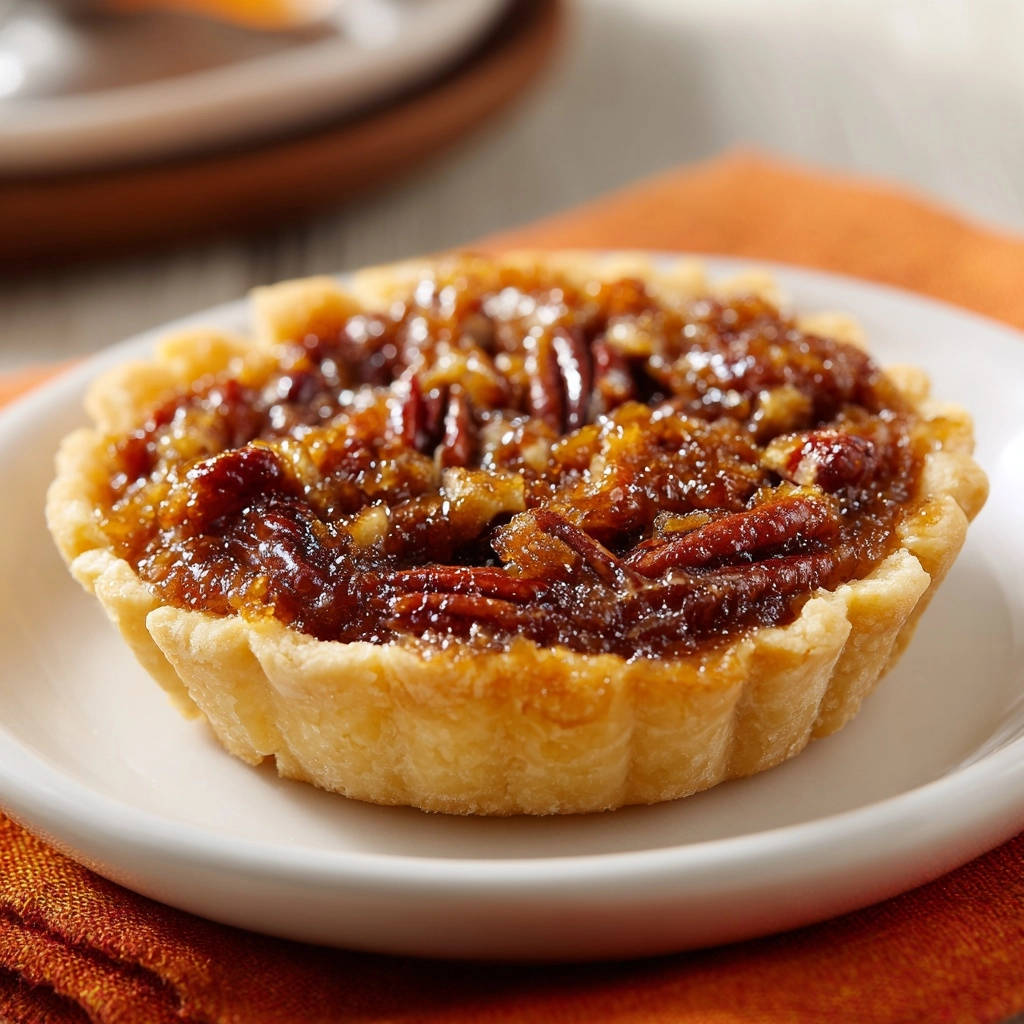
Perfect Mini Pecan Tarts: The Anti-Soggy Bottom Secret
For years, the quest for the ultimate homemade pecan tart was plagued by one persistent nemesis: the dreaded soggy bottom. It’s a disappointment no baker deserves, especially when the promise is a rich, gooey filling balanced with a crisp, flaky crust. My journey to perfect these treats led to this definitive recipe for Perfect Mini Pecan Tarts, engineered to ensure a truly anti-soggy bottom every single time.
This method isn’t just about deliciousness; it’s about solving that age-old baking dilemma with a foolproof technique. Get ready to bake individual Perfect Mini Pecan Tarts that are bakery-quality, visually stunning, and supremely satisfying, proving that a crisp crust and luscious filling can, indeed, coexist harmoniously.
Why This Perfect Mini Pecan Tart Recipe Stands Out
This recipe isn’t just another sweet treat; it’s a meticulously crafted guide designed to elevate your baking experience. We focus on specific techniques that guarantee a superior result, particularly when it comes to crust integrity and balanced flavor.
Get Our Best Recipes Weekly!
Join thousands of food lovers and get delicious recipes delivered to your inbox.
Conquering the Dreaded Soggy Bottom for Good
The nemesis of many homemade pecan tarts is a damp, unappetizing crust. Our method employs a crucial two-step blind bake, followed by an innovative egg wash seal.
This combination creates a robust, moisture-proof barrier, ensuring your crust remains perfectly crisp and golden, even under the rich, gooey filling.
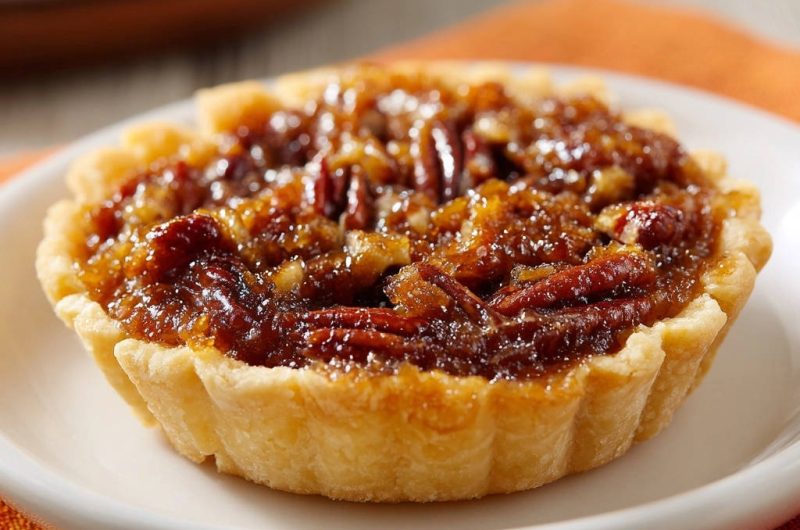
Delightful Individual Portions, Every Time
Making Perfect Mini Pecan Tarts transforms a classic dessert into elegant, perfectly portioned delights. Their individual size makes them ideal for entertaining, gifting, or enjoying a controlled indulgence.
They offer a charming presentation, eliminating the need for slicing and serving a larger tart, while maintaining a consistent, bakery-quality aesthetic.
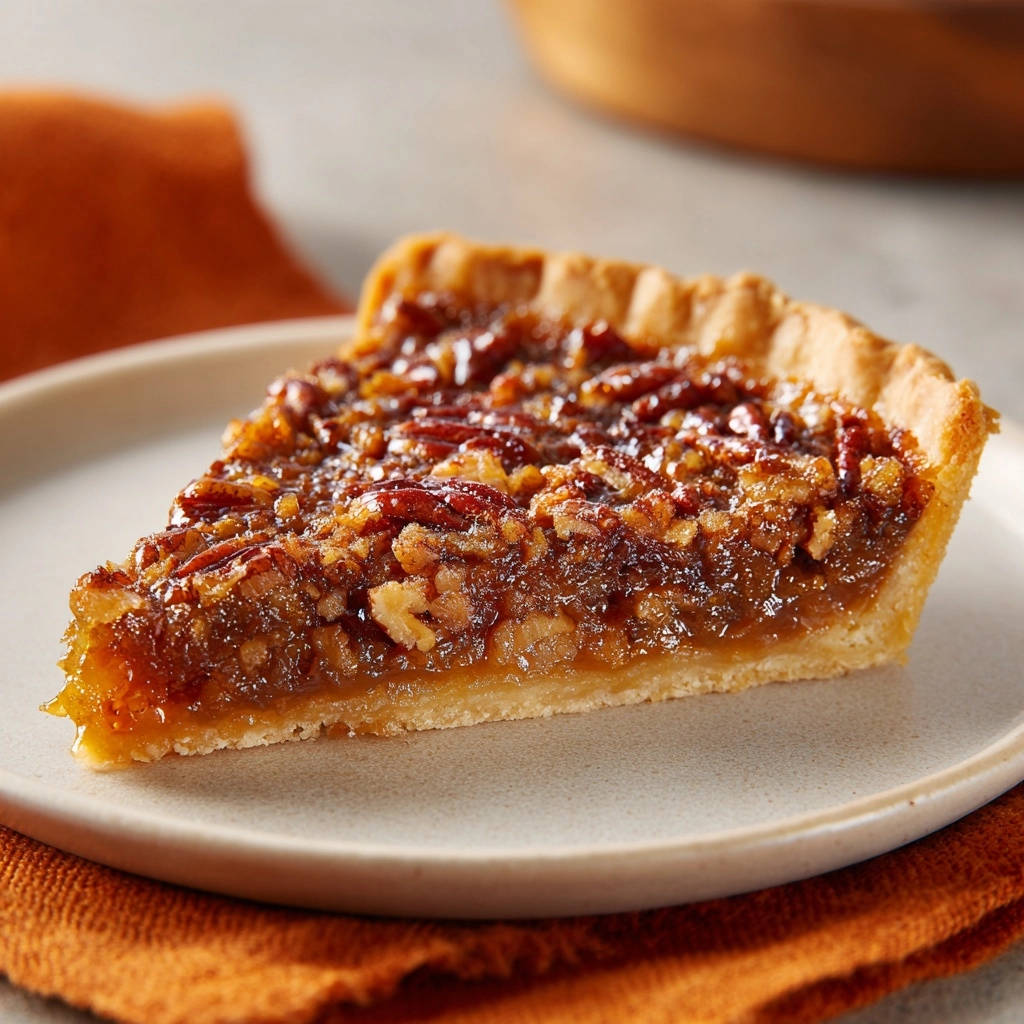
A Blend of Richness and Delicate Flakiness
This recipe achieves a sublime balance between textures and flavors. The filling is a luxurious blend of sweet, gooey goodness and crunchy pecans.
This decadent interior is perfectly complemented by the sturdy, delicately flaky crust, creating a harmonious bite that is deeply satisfying without being overly heavy.
Gather Your Goods: Essential Mini Pecan Tart Ingredients
The foundation of any exceptional dessert lies in its ingredients. Selecting the right components and understanding their role is key to achieving truly Perfect Mini Pecan Tarts.
The Foundation: Crisp Crust Components
A good crust begins with quality dough. A pre-made pie crust dough offers convenience without sacrificing flakiness, though your favorite homemade recipe can also be used for an extra personal touch.
The unsung hero for preventing sogginess is the large egg yolk for the egg wash. This creates a protein barrier that seals the crust, making it impermeable to the wet filling during baking.
Sweet & Gooey Goodness: Filling Essentials
Light corn syrup is crucial for the signature gooey, chewy texture of pecan tart filling, preventing crystallization and adding sweetness. Paired with packed light brown sugar, it contributes deep, caramelized notes that are essential to the classic flavor profile.
Large eggs act as the primary binder, giving the filling its structure and helping it set beautifully. Unsalted butter, melted, infuses the filling with rich, dairy depth, enhancing the overall mouthfeel.
Vanilla extract adds warmth and aromatic complexity, while a pinch of salt balances the sweetness, elevating all the other flavors without making the tart taste salty.
The Star: Pecan Halves
Fresh, high-quality pecan halves are non-negotiable for Perfect Mini Pecan Tarts. They provide the essential crunch and nutty flavor that defines this dessert.
Ensuring your pecans are fresh prevents any stale or bitter notes, contributing directly to the tart’s irresistible taste and texture.
Armory of the Baker: Tools for Seamless Mini Pecan Tart Baking
Having the right tools at hand streamlines your baking process and contributes significantly to the success of your Perfect Mini Pecan Tarts. Each item plays a specific role in achieving precision and perfection.
Key Baking Equipment You’ll Need
-
Mini Tart Pan or Individual Tart Molds:
Essential for shaping your individual tarts, these pans ensure uniform size and even baking. A 6-cavity pan is a common and practical choice for home bakers.
-
Round Cutter:
A round cookie cutter, slightly larger than your tart molds, allows for precise cutting of dough circles, ensuring a perfect fit and consistent edges for your mini tarts.
-
Medium Mixing Bowl & Whisk:
These are fundamental for combining and smoothly incorporating the filling ingredients. A good whisk ensures a homogenous mixture without lumps.
Specialized Aids for Tart Perfection
-
Pie Weights or Dried Beans:
Absolutely critical for blind baking, these weights prevent the pie crust from puffing up and shrinking during the initial bake. They ensure your tart shells maintain their shape and have a flat bottom for the filling.
-
Parchment Paper or Foil:
Used as a liner between the crust and pie weights, it prevents the weights from sticking to the dough and makes for easy removal.
-
Pastry Brush:
Indispensable for applying the egg wash evenly to the par-baked tart shells. This brush ensures a thin, protective barrier is formed, which is key to preventing a soggy crust.
Baking Brilliance: Your Step-by-Step Guide to Anti-Soggy Tarts
- Preheat & Prepare Your Pans:
Preheat your oven to 375°F (190°C) and lightly grease your 6-cavity mini tart pan or individual molds. Proper pan preparation ensures your tarts release effortlessly after baking, preventing any sticking or breakage.
- Forming the Tart Shells:
On a lightly floured surface, roll out your pie crust dough. Use a round cutter (slightly larger than your molds) to cut out circles. Gently press each circle into the prepared tart molds, crimping the edges as desired for a polished finish and to prevent excessive shrinkage.
- The Critical First Blind Bake: Setting the Foundation:
This is the initial secret to a crisp crust! Prick the bottom of each tart shell several times with a fork; this prevents air bubbles from forming. Line each shell with parchment paper or foil, then fill with pie weights or dried beans. Bake for 15 minutes to begin drying and setting the crust’s structure.
- The Second Blind Bake: Achieving Golden Hue:
Carefully remove the parchment and weights from the shells. This prevents the crust from over-browning underneath. Return the tart shells to the oven and bake for another 5-7 minutes, until the crusts are lightly golden. This step further dries out and sets the crust’s structure, enhancing its flakiness.
- Sealing the Deal: The Protective Egg Wash Barrier:
While the shells are still warm, whisk the egg yolk with water to create an egg wash. Brush the inside bottom and sides of each par-baked tart shell with this wash. Return to the oven for 2-3 minutes, just until the egg wash is set and forms a protective, moisture-proof barrier against the wet filling; this is the ultimate anti-soggy bottom secret!
- Mixing the Luscious Pecan Filling:
While the crusts cool slightly, prepare the filling. In a medium bowl, whisk together the corn syrup, brown sugar, eggs, melted butter, vanilla extract, and salt until smooth. Stir in the pecan halves, ensuring they are evenly distributed for consistent nutty bites.
- Adjust Oven Temperature:
Reduce your oven temperature to 350°F (175°C). This slightly lower temperature is ideal for baking the filling gently, allowing it to set without over-browning the crust or scorching the pecans.
- Filling and Final Bake:
Divide the pecan filling evenly among the pre-baked and sealed tart shells. Bake for 20-25 minutes, or until the filling is set but still slightly jiggly in the center, much like a perfectly baked custard. The crust edges should be golden brown, signaling doneness.
- Cooling for Optimal Set:
Let the tarts cool completely in the pan on a wire rack before carefully removing them. The filling will continue to set and firm up as it cools, ensuring a perfect, sliceable texture and preventing the tarts from breaking apart when lifted.
Elevate Your Baking: Expert Tips for Perfect Mini Pecan Tarts
Achieving truly Perfect Mini Pecan Tarts goes beyond just following the steps; it involves understanding nuances that can make a significant difference. These expert tips will help you master every aspect of your bake.
Ensuring a Consistently Crisp Crust
-
Handle Dough Gently: Overworking pie dough develops gluten, leading to a tough, less flaky crust. Work quickly and minimally when rolling and shaping to maintain tenderness.
-
Prevent Shrinkage: After pressing dough into molds, chill them for 15-20 minutes before blind baking. This helps the butter firm up and prevents the crust from shrinking excessively in the oven.
-
Alternative Weights: If you don’t have ceramic pie weights, dried beans, uncooked rice, or even small metal ball bearings can work effectively. Just ensure they fully fill the parchment-lined shells to support the crust.
Achieving the Ideal Gooey Filling Texture
-
Accurate Measurements: Baking is a science. Use proper measuring cups and spoons, especially for the corn syrup and sugar, to ensure the filling sets correctly and has the perfect sweetness.
-
Avoid Overmixing: Whisk the filling ingredients until just combined and smooth. Overmixing can incorporate too much air, which might lead to a less dense, almost cake-like texture rather than the desired gooeyness.
-
The Jiggle Test: For perfect doneness, the filling should be set around the edges but still have a slight, delicate jiggle in the very center when gently shaken. This indicates it’s cooked through but not overbaked, which would result in a tough texture.
Flavor Boosts and Creative Variations
-
A Splash of Spirit: For an extra layer of sophisticated flavor, add 1-2 teaspoons of bourbon or dark rum to the filling mixture. It beautifully complements the pecans and caramel notes.
-
Chocolatey Twist: Stir in a tablespoon or two of mini chocolate chips (dark or milk) into the filling. The melting chocolate adds a decadent richness that pairs wonderfully with the pecans.
-
Spiced Warmth: A pinch of cinnamon or a tiny grating of fresh nutmeg can add a subtle, warming spice to the filling, enhancing its overall depth without overpowering the pecan flavor.
The Importance of Patience in Cooling
-
Structure and Stability: Allowing your Perfect Mini Pecan Tarts to cool completely is non-negotiable for their structural integrity. The filling continues to set and firm up as it cools, preventing breakage.
-
Optimal Texture: The gooey texture of the filling reaches its peak when fully cooled. Rushing this step can result in a runny filling and a tart that doesn’t hold its shape.
Troubleshooting Your Mini Pecan Tarts: Solutions for Common Snags
Even seasoned bakers encounter challenges. Here are solutions to common issues you might face when making your Perfect Mini Pecan Tarts, ensuring you achieve delicious results every time.
My Tart Crust Isn’t Crisp Enough!
The anti-soggy bottom method is key. Ensure you performed both blind baking steps thoroughly, giving the crust sufficient time to dry out and firm up. The egg wash creates a vital seal; verify it was applied evenly and baked until set, forming that protective barrier.
Also, make sure your oven temperature is accurate. An under-heated oven might not adequately dry the crust. Check your oven thermometer for precision.
Why is My Filling Runny or Not Setting?
A runny filling is typically due to underbaking. The filling needs enough time at the correct temperature to coagulate and set. Trust the “slight jiggly center” test for doneness; if it’s too liquid, it needs more time.
Incorrect ingredient measurements, especially for eggs or corn syrup, can also impact setting. Always measure precisely. Oven temperature inconsistencies can also be a culprit, so ensure your oven runs true to its setting.
Edges Are Burning While the Center Remains Raw
This often indicates uneven heat distribution. Loosely tenting the tarts with aluminum foil once the edges are golden can protect them while the center finishes baking. You might also try rotating the pan halfway through the bake or adjusting the oven rack position to a slightly lower spot.
Tarts Sticking to the Pan
Proper greasing is crucial before pressing in the dough. Even with non-stick pans, a light coating of butter or cooking spray provides extra insurance. Most importantly, ensure the tarts cool completely in the pan before attempting to remove them; the filling needs to fully set, and the crust needs to firm up for easy release.
Beyond the Bake: Storage, Serving, and Make-Ahead Mini Pecan Tarts
Planning ahead and knowing how to store and serve your Perfect Mini Pecan Tarts ensures you can enjoy them at their best, whenever the craving strikes or guests arrive.
Make-Ahead Magic: Prepping Your Tarts in Advance
You can prepare the tart shells a day in advance. Blind bake and egg wash them as instructed, then cool completely and store them loosely covered at room temperature. The filling can also be mixed a day ahead and stored, covered, in the refrigerator.
If making the entire tarts ahead, bake them completely, allow them to cool, and store them as described below. They’re excellent prepared a day before an event, allowing flavors to meld.
Storing for Freshness: Keeping Your Tarts Delicious
For short-term storage, Perfect Mini Pecan Tarts can be kept at room temperature in an airtight container for up to 2-3 days. For longer freshness, refrigerate them in an airtight container for up to 5 days.
For long-term storage, freeze cooled tarts individually on a baking sheet until solid, then transfer to a freezer-safe bag or container for up to 3 months. Thaw in the refrigerator overnight before serving.
Presentation Perfect: Serving Suggestions
These individual Perfect Mini Pecan Tarts are beautiful on their own. For an extra flourish, dust them lightly with powdered sugar just before serving. A dollop of freshly whipped cream, perhaps infused with a hint of vanilla or bourbon, makes a luxurious accompaniment.
A small scoop of high-quality vanilla bean ice cream or a drizzle of caramel sauce can turn these delightful treats into an even more decadent dessert experience.
Complementary Dishes
Round out your meal with these dishes that pair well with the nutty sweetness of pecan tarts.
- For a savory counterpoint, consider the Roasted Sweet Potato & Brussels Sprouts, offering a grounding earthiness that complements the sweet pecans.
- Brighten your plate with a Fresh Apple & Pecan Arugula Salad, where the crisp fruit and peppery greens echo the nuts in your tarts.
Your Burning Questions Answered: Mini Pecan Tart FAQs
What if I don’t have pie weights for blind baking?
No pie weights? No problem! You can use dried beans, uncooked rice, or even small metal coins (wrapped in foil) as suitable alternatives. Just ensure they completely fill the parchment-lined tart shells to hold the crusts down effectively.
Can I use dark corn syrup instead of light?
Yes, you can use dark corn syrup, but be aware it will impart a slightly stronger, more robust molasses flavor and a darker color to your filling. Light corn syrup offers a milder sweetness and maintains the classic, lighter hue of pecan pie filling.
How do I know when the filling is perfectly set?
The key indicator is a delicate jiggle. When you gently shake the pan, the edges of the filling should appear set and firm, while the very center might still have a slight, almost custardy movement. It will continue to firm up as it cools completely.
Can I make these mini pecan tarts gluten-free?
Absolutely! Simply substitute your favorite gluten-free pie crust dough for the traditional one. Ensure your chosen gluten-free crust is suitable for blind baking and can hold its shape during the process.
What’s the best way to reheat leftover tarts?
To restore some crispness to the crust, reheat leftover tarts gently in an oven. Place them on a baking sheet in a preheated oven at 300°F (150°C) for about 5-10 minutes, or until just warmed through. Avoid microwaving, which can make the crust soggy.
Ready to Impress? Share Your Perfect Mini Pecan Tarts Masterpiece!
Now that you’re equipped with all the secrets to baking truly Perfect Mini Pecan Tarts, it’s time to unleash your inner pastry chef! Experience the joy of serving a dessert that not only tastes incredible but also boasts a flawless, anti-soggy crust.
We can’t wait to see your creations! Share your beautiful mini pecan tarts on social media and tag us. Celebrate your success in conquering the dreaded soggy bottom and delighting everyone with these exquisite individual treats.
Perfect Mini Pecan Tarts
Course: DessertCuisine: American CuisineDifficulty: easy4
6 mini tarts30
minutes45
minutes60
minutesAmerican Cuisine
Ingredients
1 pre-made pie crust dough (or your favorite homemade recipe)
1 cup pecan halves
1/2 cup light corn syrup
1/2 cup packed light brown sugar
2 large eggs
1/4 cup unsalted butter, melted
1 teaspoon vanilla extract
Pinch of salt
1 large egg yolk (for egg wash)
1 tablespoon water (for egg wash)
Pie weights or dried beans
Directions
- Preheat oven to 375F (190C). Lightly grease a 6-cavity mini tart pan or individual tart molds.
- On a lightly floured surface, roll out the pie crust dough. Using a round cutter slightly larger than your tart molds, cut out circles. Gently press each circle into the prepared tart molds, crimping the edges as desired.
- This is the CRITICAL first step for a crisp crust! Prick the bottom of each tart shell several times with a fork. Line each shell with parchment paper or foil, then fill with pie weights or dried beans. Bake for 15 minutes.
- Carefully remove the parchment and weights. Return the tart shells to the oven and bake for another 5-7 minutes, until the crusts are lightly golden. This initial bake helps dry out and set the crust.
- While the shells are still warm, whisk the egg yolk with water to create an egg wash. Brush the inside bottom and sides of each par-baked tart shell with this egg wash. Return to the oven for 2-3 minutes, just until the egg wash is set and forms a protective, moisture-proof barrier. This seals the crust against the wet filling!
- While the crusts cool slightly, prepare the filling. In a medium bowl, whisk together the corn syrup, brown sugar, eggs, melted butter, vanilla extract, and salt until smooth. Stir in the pecan halves.
- Reduce oven temperature to 350F (175C).
- Divide the pecan filling evenly among the pre-baked and sealed tart shells.
- Bake for 20-25 minutes, or until the filling is set but still slightly jiggly in the center. The crust edges should be golden brown.
- Let the tarts cool completely in the pan on a wire rack before carefully removing. The filling will continue to set as it cools, ensuring a perfect texture.
Notes
- Follow critical steps (3-5) for a perfectly crisp, anti-soggy bottom crust.