Classic Biscuits & Gravy: The Secret to Smooth, Rich Gravy
Few dishes evoke such warmth and comfort as a plate of Classic Biscuits & Gravy, yet so many struggle with thin, bland, or notoriously lumpy gravy. I’ve refined this foolproof method over years to guarantee a smooth, rich, and intensely flavorful gravy every single time. Get ready to banish culinary frustration and create a breakfast so satisfying, you’ll want it for every meal.
Why This Classic Biscuits & Gravy Recipe Wins Every Time
This recipe isn’t just about following steps; it’s about understanding the “why” behind each action, ensuring a perfect outcome. We tackle the common pitfalls head-on, delivering a gravy that’s consistently velvety and full of depth.
The “no more lumpy gravy” promise is real, thanks to specific techniques for building a flawless roux and incorporating cold milk. This method ensures complete satisfaction and ease of execution, making you a biscuit and gravy master.
Get Our Best Recipes Weekly!
Join thousands of food lovers and get delicious recipes delivered to your inbox.
Beyond the flawless gravy, this guide includes perfectly prepared scrambled eggs, completing a balanced and hearty meal. It’s a comprehensive approach to a beloved dish, ensuring this Classic Biscuits & Gravy stands out.
Gathering Your Essentials: Ingredients for Biscuit & Gravy Perfection
The Hearty Foundation: Sausage & Fat
The cornerstone of incredible sausage gravy is, naturally, quality ground breakfast sausage. Choose beef, turkey, or a plant-based alternative that you love for its flavor profile.
Critically, the rendered sausage drippings are paramount; they form the flavorful base of our roux. If your sausage is very lean, have a little extra butter or cooking oil on hand to supplement.
The Gravy’s Backbone: Flour & Milk
All-purpose flour creates the essential roux, thickening the gravy and adding a nutty depth when properly cooked. It provides the structure for a luxurious texture.
The secret to lump-free gravy lies in using cold milk, which prevents the flour from clumping when introduced to the hot roux. This temperature contrast is a non-negotiable technique for smoothness.
Savory Seasonings & Aromatic Enhancers
Salt and black pepper are fundamental, bringing out the inherent flavors of the sausage and milk. They balance the richness beautifully.
Dried sage adds a traditional, warm, and earthy note that is quintessential to Classic Biscuits & Gravy. Consider fresh sage leaves or dried parsley for an optional, aromatic garnish.
The Fluffy Sidekick: Biscuits & Eggs
Prepared biscuits, whether convenient store-bought or your favorite homemade recipe, provide the perfect tender foundation for soaking up the rich gravy. Their flakiness is key.
Fresh large eggs, gently scrambled with a touch of butter or cooking oil and seasoned with salt and pepper, complete this hearty breakfast. They add a creamy counterpoint to the savory gravy.
Essential Tools for a Smooth Biscuits & Gravy Experience
Large Skillet: A sturdy, large skillet is essential for browning the sausage evenly and creating the gravy base.
Whisk: Your most vital tool for creating lump-free gravy, ensuring constant agitation for a smooth texture.
Measuring Cups & Spoons: Accuracy in measurements ensures the perfect consistency and flavor for your gravy.
Separate Non-Stick Skillet: Ideal for preparing the scrambled eggs without interfering with the gravy-making process.
Heat-Resistant Spatula: Useful for crumbling and stirring the sausage as it cooks.
Crafting Your Classic Biscuits & Gravy: Step-by-Step Directions
Biscuit Prep & Warm-Up
If using refrigerated biscuits, preheat your oven according to package directions and bake them until they are golden brown and beautifully fluffy. Once baked, set them aside to keep warm while you prepare the rest of your breakfast masterpiece.
Browning the Breakfast Sausage
In your large skillet over medium-high heat, crumble and cook the ground breakfast sausage until it’s fully browned. Make sure to break up any large pieces as it cooks for even texture.
Once cooked, drain off all but about 1/4 cup of the drippings from the skillet. Carefully remove the cooked sausage to a plate and set it aside, leaving the precious drippings in the skillet. If you have less than 1/4 cup of drippings, simply add a little butter or cooking oil to make up the difference – this fat is crucial for your roux!
The Crucial Roux: Your Smooth Gravy Secret
This is the game-changing step for creamy, lump-free gravy: With the skillet still over medium heat and the reserved drippings, sprinkle the 1/4 cup of all-purpose flour evenly over the fat. Begin to whisk constantly for 1-2 minutes.
Allow the flour to cook and form a light golden roux. This essential process eliminates the raw flour taste and is absolutely key to preventing lumps in your finished gravy.
Building the Creamy Gravy Base
Slowly, while whisking vigorously and continuously, pour in the cold milk a little at a time. The contrast in temperature between the hot roux and cold milk is a brilliant trick that actively helps prevent lumps from forming.
Keep whisking without interruption until all the milk is fully incorporated and the mixture is perfectly smooth.
Thickening to Perfection
Bring the gravy mixture to a gentle simmer, continuing to whisk occasionally to prevent sticking. Let it cook for 5-7 minutes, or until it has thickened to your desired consistency. It should be thick enough to generously coat the back of a spoon.
If it gets too thick, you can whisk in a little more milk; if it’s too thin, simply let it simmer a bit longer, whisking frequently, until it reaches the ideal texture.
Flavor Infusion & Seasoning Adjustment
Stir in the cooked sausage, salt, black pepper, and dried sage. Taste the gravy and adjust the seasonings as needed to suit your personal preference – don’t be afraid to add a little more!
Keep the finished gravy warm while you prepare the eggs.
Perfectly Scrambled Eggs on the Side
Just before serving, prepare the scrambled eggs. In a separate non-stick skillet over medium heat, melt the butter or heat the cooking oil. Crack the eggs into the pan, season with salt and pepper.
Gently stir and fold the eggs until they are set but still soft and moist. Avoid overcooking them, as this can lead to a rubbery texture.
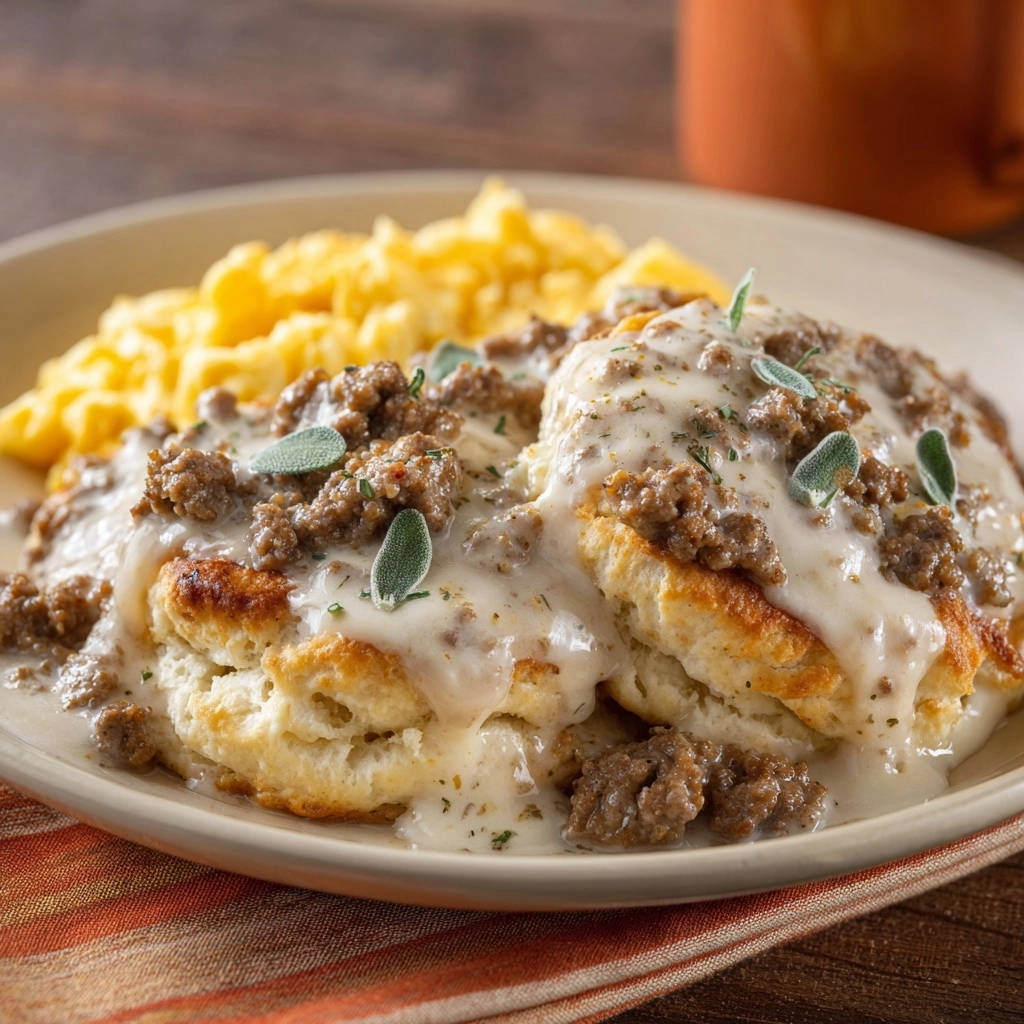
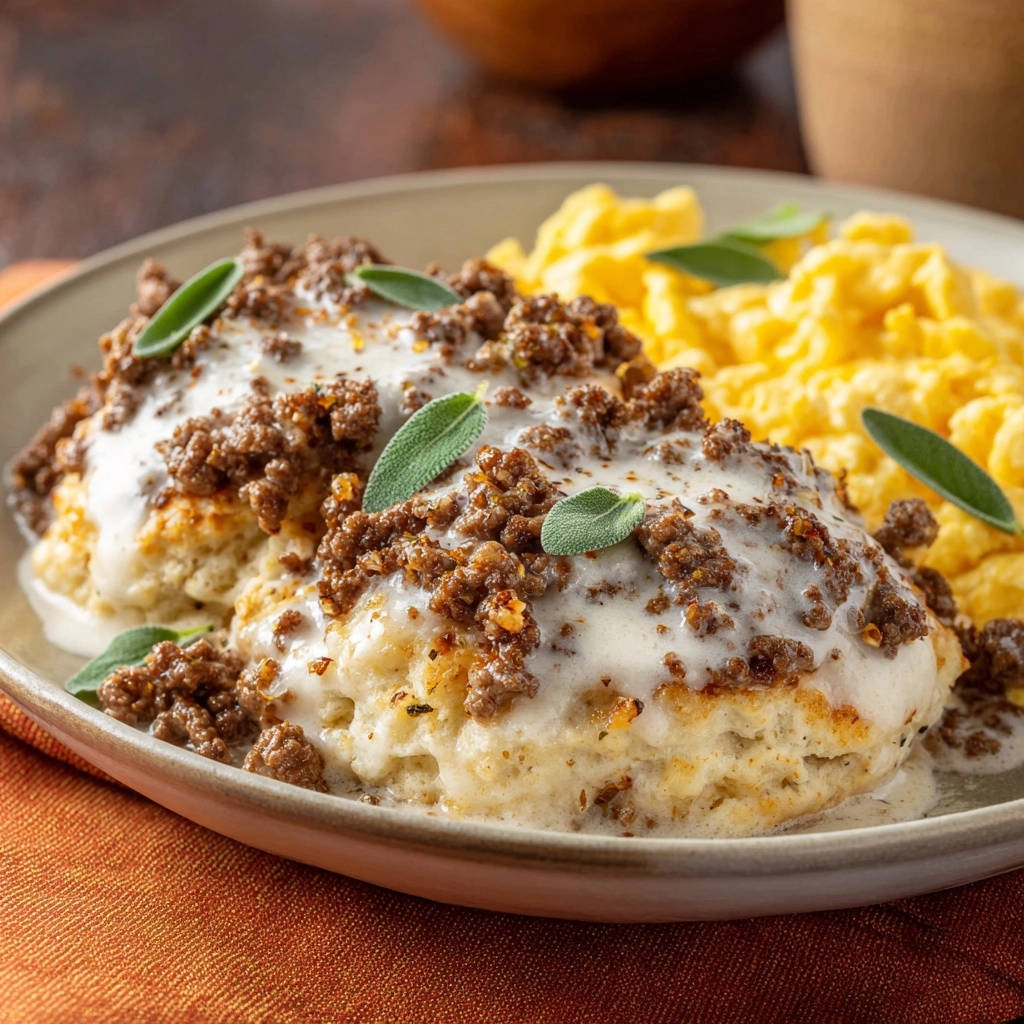
Assembling Your Delicious Plate
To serve, carefully split the warm biscuits in half and arrange them on individual plates. Ladle a generous amount of the rich, smooth sausage gravy over the biscuits.
Serve immediately with a hearty side of the perfectly scrambled eggs. For an extra touch of freshness, garnish with fresh sage leaves or a sprinkle of dried parsley if desired.
Beyond Biscuits and Gravy
After enjoying this hearty breakfast, consider these sweet finales.
- For a cool, fruity finish, try this No-Bake Cherry Dream Pie, offering a refreshing contrast.
- If you’re craving something warm and nutty, this Skillet Pecan Pie provides a satisfying crunch.
Chef’s Secrets: Mastering Your Classic Biscuits & Gravy
The Golden Roux Rule: Do not rush cooking the flour. A properly cooked roux, lightly golden, is crucial for eliminating raw flour taste and guaranteeing a lump-free, deeply flavorful gravy.
Temperature Matters (Milk): Always add cold milk to a hot roux. This sudden temperature contrast helps prevent the flour from clumping, ensuring your gravy achieves that coveted velvety smoothness.
Whisk, Whisk, Whisk: Constant and vigorous whisking, particularly when you add the flour and milk, is your ultimate defense against lumps. Do not stop until the mixture is entirely smooth!
Taste and Adjust: Seasoning is a personal journey. Always taste your gravy after adding the initial salt, pepper, and sage, and then adjust to your exact preference. A pinch more can make all the difference!
Biscuit Choice Elevates: While store-bought biscuits are convenient, remember that tender, flaky homemade buttermilk biscuits will truly elevate this classic dish to new heights. Consider them if you have the time!
Don’t Overcook Eggs: For the best texture, remove your scrambled eggs from the heat when they are just set but still wonderfully soft and moist. Overcooked eggs become dry and rubbery.
Troubleshooting Your Biscuits & Gravy: Common Hurdles & Fixes
Why is My Gravy Lumpy?
Lumps in gravy usually stem from insufficient whisking when the flour or milk is added, or from using warm milk instead of cold. To remedy, vigorously whisk the gravy over medium-low heat. If stubborn lumps persist, you can carefully pour the gravy through a fine-mesh sieve, pressing any clumps through, then return it to the pan to re-warm.
My Gravy is Too Thin!
If your gravy isn’t thick enough, it simply needs more time to simmer and reduce. Continue cooking it over medium-low heat, stirring frequently, until it reaches your desired consistency. Keep in mind it will thicken further as it cools.
My Gravy is Too Thick!
Should your gravy become overly thick, simply whisk in a tablespoon or two of milk (or even water or broth) at a time until it reaches your preferred consistency. Add gradually to avoid thinning it too much.
Serving Suggestions & Storing Your Delicious Leftovers
Creative Ways to Serve This Comfort Classic
Beyond the traditional scrambled eggs, consider topping your Biscuits & Gravy with a perfectly fried egg for a rich, runny yolk. A dash of your favorite hot sauce or a sprinkle of fresh chives can add a delightful kick. For a balanced brunch, pair it with fresh fruit or a simple side salad.
Storing & Reheating Tips for Freshness
Store leftover gravy and sausage (separately from the biscuits, as biscuits are best fresh) in an airtight container in the refrigerator for up to 3-4 days. For longer storage, the gravy can be frozen.
To reheat gravy, gently warm it in a saucepan over low heat, whisking frequently. You will likely need to add a splash of milk or water to restore its creamy consistency as it tends to thicken upon refrigeration.
Classic Biscuits & Gravy FAQs: Quick Answers
Can I Make This Gravy Ahead of Time?
Yes, the sausage gravy can be prepared a day in advance. Store it in an airtight container in the refrigerator. When ready to serve, reheat gently over low heat, adding a splash of milk or water to achieve the desired consistency.
What if I Don’t Have Sausage Drippings?
If you don’t have enough sausage drippings (e.g., if using very lean sausage or a plant-based alternative), simply use an equal amount of unsalted butter, bacon fat, or your preferred cooking oil to create the roux. The gravy will still be wonderfully flavorful!
Can I Use Gluten-Free Flour for the Gravy?
Many all-purpose gluten-free flour blends (especially those containing xanthan gum) can be successfully substituted for wheat flour in the roux. The thickening power might vary slightly, so you may need to adjust the amount or simmering time.
Can I Freeze Leftover Gravy?
Yes, sausage gravy freezes quite well! Allow it to cool completely, then transfer to an airtight, freezer-safe container or bag. It can be stored for up to 2-3 months. Thaw overnight in the refrigerator before gently reheating and whisking in milk as needed.
What Kind of Biscuits Are Best for Classic Biscuits & Gravy?
While any prepared biscuit works, a fluffy, tender, and slightly savory buttermilk biscuit is traditionally considered the ultimate pairing for rich sausage gravy, offering the best texture and flavor combination.
Ready to Impress? Share Your Biscuits & Gravy Creation!
Now that you hold the secrets to truly smooth, rich, and flavorful Classic Biscuits & Gravy, it’s time to bring this comfort food masterpiece to your table. You’ll be amazed at how easily you can achieve restaurant-quality results, completely free of those dreaded lumps.
Don’t just make it; savor it! We’d love to see your creations and hear about your success. So go on, whip up this incredible breakfast and share the joy of perfectly prepared biscuits and gravy with those you love!

Classic Biscuits & Gravy
Course: BreakfastCuisine: American CuisineDifficulty: easy4
servings15
minutes30
minutes45
minutesAmerican Cuisine
Ingredients
4 large prepared biscuits (store-bought or homemade)
1 pound ground breakfast sausage (beef, turkey, or plant-based)
1/4 cup all-purpose flour
2 1/2 cups cold milk
1/2 teaspoon salt
1/4 teaspoon black pepper
1/4 teaspoon dried sage (or fresh sage leaves for garnish, as pictured)
4 large eggs
1 tablespoon butter or cooking oil for eggs
Salt and pepper to taste for eggs
Directions
- If using refrigerated biscuits, preheat your oven according to package directions and bake them until golden brown and fluffy. Set aside to keep warm.
- In a large skillet over medium-high heat, crumble and cook the ground breakfast sausage until fully browned. Break up any large pieces as it cooks. Once cooked, drain off all but about 1/4 cup of the drippings from the skillet. Remove the cooked sausage to a plate and set aside, leaving the drippings in the skillet. If you have less than 1/4 cup, add a little butter or oil to make up the difference.
- This is the crucial step for creamy, lump-free gravy: With the skillet still over medium heat and the reserved drippings, sprinkle the 1/4 cup of flour evenly over the sausage drippings. Whisk constantly for 1-2 minutes, allowing the flour to cook and form a light golden roux. This eliminates the raw flour taste and helps prevent lumps.
- Slowly, while whisking vigorously, pour in the cold milk a little at a time. The contrast in temperature helps prevent lumps from forming. Keep whisking continuously until all the milk is incorporated and the mixture is smooth.
- Bring the gravy mixture to a gentle simmer, still whisking occasionally. Let it cook for 5-7 minutes, or until it has thickened to your desired consistency. It should be thick enough to coat the back of a spoon. If it gets too thick, you can whisk in a little more milk; if too thin, let it simmer a bit longer.
- Stir in the cooked sausage, salt, black pepper, and dried sage. Taste and adjust seasonings as needed. Keep warm.
- Just before serving, prepare the scrambled eggs. In a separate non-stick skillet over medium heat, melt the butter or heat the oil. Crack the eggs into the pan, season with salt and pepper, and gently stir and fold them until they are set but still soft and moist.
- To serve, split the warm biscuits in half and place them on plates. Ladle a generous amount of the rich, smooth sausage gravy over the biscuits. Serve immediately with a side of scrambled eggs. Garnish with fresh sage leaves or a sprinkle of dried parsley if desired.
Notes
- The recipe provides a crucial step for lump-free gravy by cooking the flour into a roux before slowly adding cold milk.