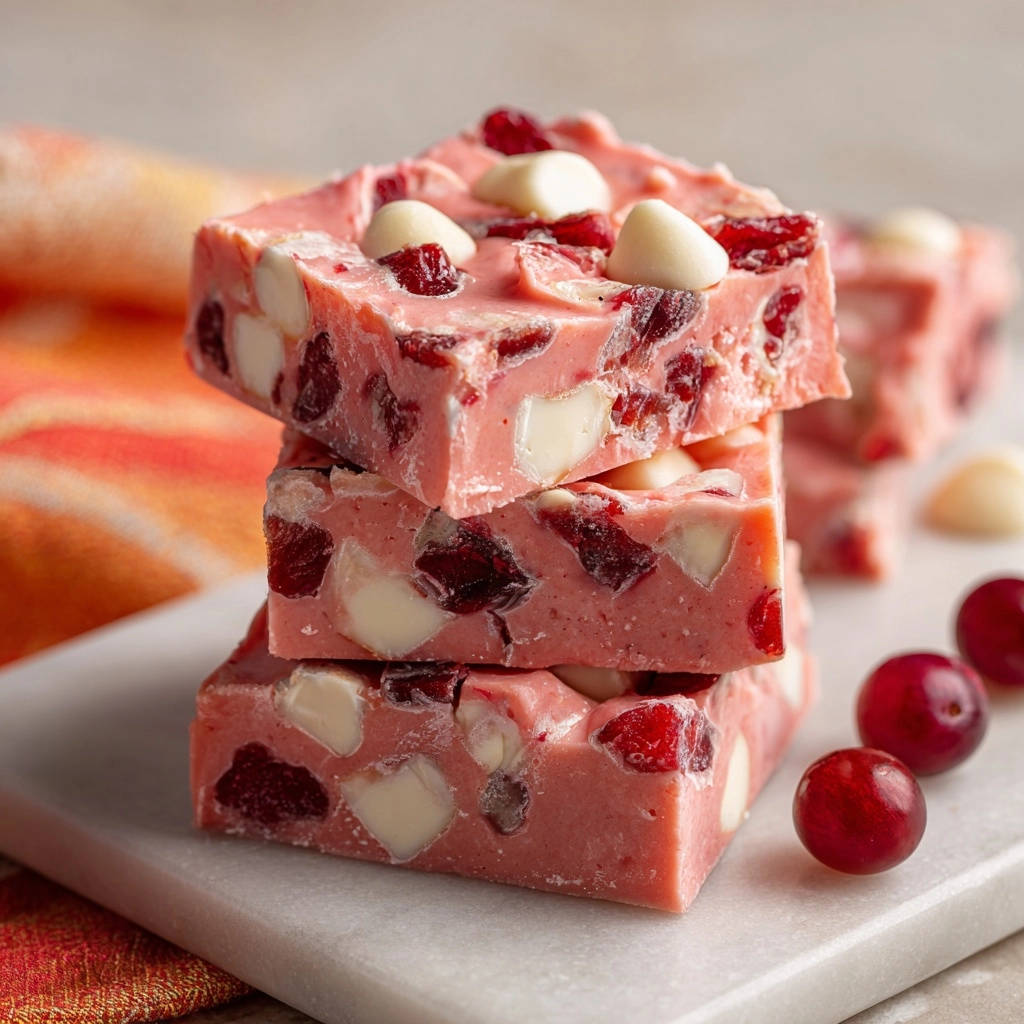
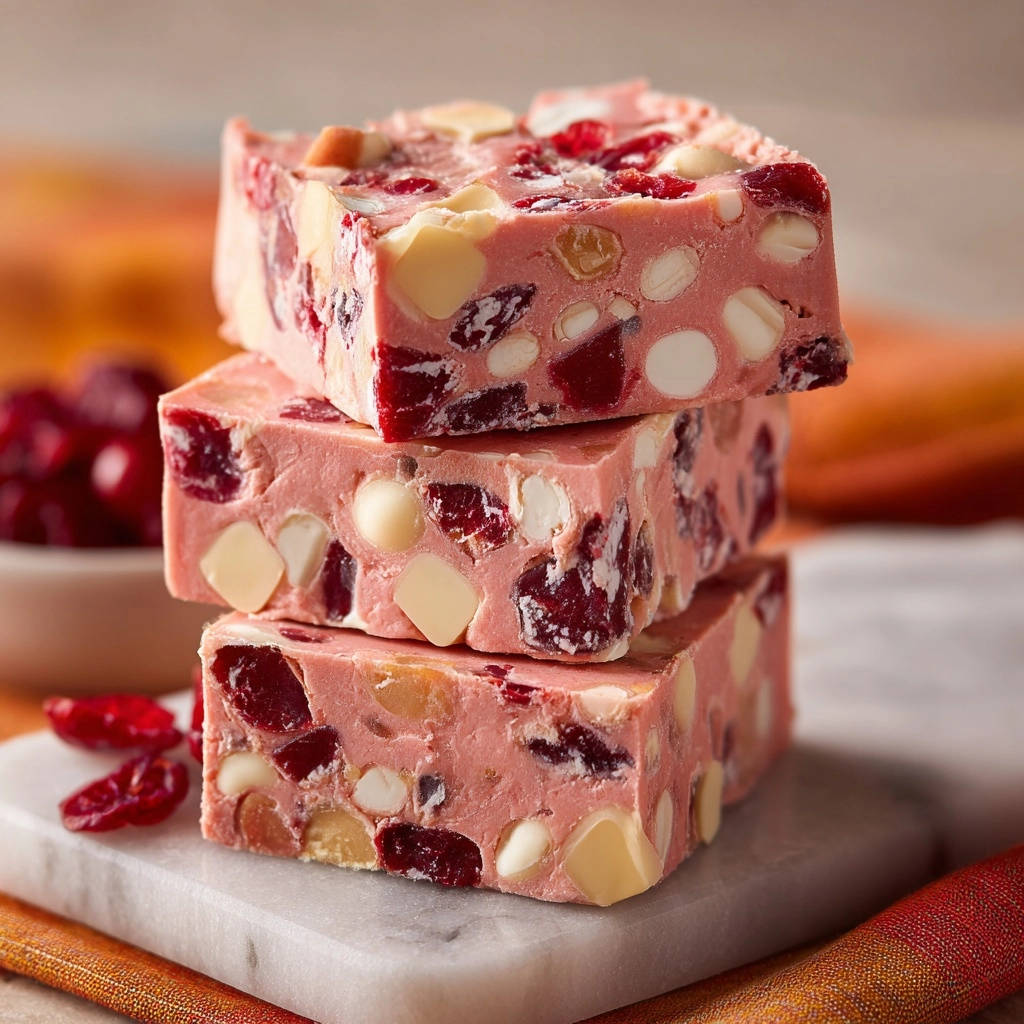
Cranberry White Chocolate Fudge: Easy & Perfectly Firm
Experience Fudge Perfection: Why This Recipe Stands Out
This isn’t just another fudge recipe; it’s a promise of success. Forget the frustration of soft, uncooperative fudge. This method simplifies the process while guaranteeing a stellar result, making you a confident fudge artisan.The Guaranteed-to-Set Secret
The biggest challenge with homemade fudge is often achieving that perfect, firm set. This recipe specifically tackles that common frustration, ensuring your Cranberry White Chocolate Fudge comes out beautifully sliceable and holds its shape, thanks to precise ingredient ratios and a critical chilling period.
Simple Ingredients, Stunning Results
You don’t need a pantry full of obscure items to create this impressive confection. With just a handful of readily available ingredients, you can produce bakery-quality fudge that will surprise and delight everyone who tastes it.
A Festive Treat for Every Occasion
Whether you’re looking for a delightful holiday gift, a vibrant addition to a dessert platter, or just a sweet craving satisfied, this Cranberry White Chocolate Fudge fits the bill. Its beautiful pink hue and sweet-tart flavor make it a versatile favorite.
Get Our Best Recipes Weekly!
Join thousands of food lovers and get delicious recipes delivered to your inbox.
For a similar taste, try cranberry white chocolate biscotti for perfectly firm slices.
Building Blocks of Deliciousness: Essential Ingredients
Every ingredient in this recipe plays a crucial role in the texture, flavor, and overall success of your homemade fudge. Choosing quality and understanding their function is key.Sweetened Condensed Milk: The Foundation
This sweet, thick milk is the indispensable base for our fudge. It provides both the primary sweetness and a rich creaminess, acting as a binding agent that helps the fudge set into its wonderfully firm texture.
White Chocolate: For Creamy Bliss
The quality of your white chocolate directly impacts the flavor and smoothness of your fudge. Whether you choose high-quality white chocolate chips or finely chopped white chocolate bars, ensure it’s a type you enjoy eating on its own for the best results.
Dried Cranberries: A Zesty Pop
Dried cranberries are more than just a pretty splash of color. Their tart, chewy nature provides a delightful textural contrast and a zesty counterpoint to the sweetness of the white chocolate, balancing the entire flavor profile.
Vanilla & Optional Red Food Coloring
Vanilla extract deepens and rounds out the overall sweetness, adding a warm, aromatic note. The optional red food coloring is a simple trick to enhance the visual appeal, transforming the fudge into a vibrant, festive pink that’s especially inviting.
Gear Up: Your Essential Fudge-Making Tools
Having the right tools ready makes the fudge-making process smooth and enjoyable. These simple items are critical for a flawless finish.An 8×8 Inch Baking Pan
This specific pan size is ideal for achieving the perfect thickness for your fudge squares. It ensures each piece is substantial and satisfying.
Parchment Paper
Parchment paper is a non-negotiable item here. It’s absolutely critical for easily lifting the set fudge out of the pan, making clean removal a breeze without any sticking.
Microwave-Safe Bowl
A good-sized, microwave-safe bowl is essential for the gentle, controlled melting process, allowing the ingredients to heat evenly without scorching.
Heat-Resistant Spatula
A sturdy, heat-resistant spatula is perfect for thorough stirring and ensuring every bit of white chocolate is melted. It also helps in spreading the warm fudge mixture smoothly.
Crafting Your Fudge: Step-by-Step for a Flawless Finish
Creating perfect Cranberry White Chocolate Fudge is a straightforward process when you follow these steps carefully. Attention to detail ensures a magnificent end result.Preparation is Key: Lining Your Pan
Start by lining an 8×8 inch square baking pan with parchment paper. Be sure to leave some overhang on the sides; this foresight will make lifting the firm fudge out of the pan significantly easier later.
Melting Method: Gentle Heat for Smooth Chocolate
In a large microwave-safe bowl, combine the sweetened condensed milk and your white chocolate chips or chopped white chocolate. This combination forms the creamy base for your fudge.
Microwave the mixture on 50% power for 1-minute intervals, stirring thoroughly after each minute. This gentle, controlled heating is crucial to prevent the white chocolate from seizing or overheating, which can compromise the fudge’s ability to set properly. Continue until the chocolate is completely melted and the mixture is smooth and glossy, typically taking 2 to 3 minutes total.
Infusing Flavor: Adding Cranberries and Vanilla
Once your white chocolate mixture is smooth, stir in the dried cranberries, vanilla extract, and the optional red food coloring. Mix until all these vibrant ingredients are evenly distributed throughout the fudge and a uniform pink hue is achieved.
Setting the Stage: Pouring and Smoothing
Promptly pour the warm fudge mixture into your prepared pan. Use your spatula to spread it evenly from corner to corner, creating a consistent layer.
Gently tap the pan on your counter a few times. This action helps to release any trapped air bubbles and ensures a beautifully smooth, flat top surface for your Cranberry White Chocolate Fudge.
The Critical Chill: Patience for Perfection
Transfer the pan to the refrigerator and chill for a minimum of 4 hours. Ideally, leave it overnight.
This extended and uninterrupted chilling time is absolutely critical for the fudge to completely firm up. It ensures your Cranberry White Chocolate Fudge solidifies into that delightful, non-sticky, sliceable texture you crave, so do not skip or shorten this vital step.
Cutting and Storing Your Masterpiece
Once thoroughly chilled and firm, use the parchment paper overhang to easily lift the entire slab of fudge from the pan. Place it onto a clean cutting board.
Cut the fudge into uniform 1-inch squares. Store any leftover homemade fudge in an airtight container in the refrigerator to maintain its freshness and perfect texture.
Elevate Your Fudge Game: Expert Tips & Tricks
Mastering Cranberry White Chocolate Fudge involves a few key insights that will take your creation from good to absolutely outstanding. These expert tips ensure success every time.Preventing Seized Chocolate: The Microwave Magic
The “gentle heat” technique for melting chocolate is paramount. Controlled microwave intervals and thorough stirring between each burst are essential. This prevents the delicate white chocolate from overheating and seizing, which would result in a grainy, unworkable fudge base.
Why You CANNOT Rush the Chill Time
The extended chilling period of 4 hours to overnight is non-negotiable for perfectly firm fudge. This allows the ingredients to fully set and solidify, directly ensuring the desired sliceable, non-sticky texture that is the hallmark of this reliable recipe.
Achieving a Smooth Top: Bubble-Free Finish
After pouring, tapping the pan vigorously on the counter releases trapped air, preventing unsightly bubbles. For an even smoother finish, you can gently run a slightly damp spatula over the top before chilling, creating a perfectly polished surface.
Creative Variations and Add-Ins
While this Cranberry White Chocolate Fudge is perfect as is, feel free to experiment. Consider adding a sprinkle of chopped pistachios, a hint of orange zest, or a drizzle of dark chocolate over the top for extra flair and flavor.
If you’re looking for another fruit-forward treat, consider this decadent chocolate berry tart.
Cutting Like a Pro: For Perfect Squares
For clean, even cuts, use a warm, sharp knife. Heat the blade under hot water, wipe it dry, and then make your cuts, cleaning the blade between each slice. A pizza cutter can also yield beautifully straight lines for your fudge squares.
Looking for More?
If you enjoyed the sweet and tart notes of cranberry in your fudge, consider these other dishes that highlight the fruit.
- For a savory twist on cranberries, try our Juicy Cranberry Apple Chicken Salad, which offers a delightful mix of textures and flavors.
- If you appreciate cranberry in baked goods, our Cranberry Pistachio Loaf is a wonderful choice, ensuring the fruit stays moist and evenly distributed.
Fudge Fails Solved: Common Problems & Quick Fixes
Even seasoned bakers encounter hiccups. Here’s how to troubleshoot common homemade fudge issues and ensure your Cranberry White Chocolate Fudge is always perfect.“My Fudge Didn’t Set Firmly!”
The most common culprit is insufficient chilling time; always ensure a minimum of 4 hours, preferably overnight, in the refrigerator. Overheating the white chocolate during melting can also affect its setting ability, so stick to gentle, controlled microwave intervals.
“The Chocolate Became Grainy or Seized!”
White chocolate seizes when exposed to too much direct heat or even a tiny drop of water. Ensure your bowl and spatula are completely dry before you begin. If it happens, you might be able to salvage it by stirring in a tablespoon of hot heavy cream until smooth, but prevention through gentle melting is best.
“My Fudge is Too Sticky”
Stickiness often points to incomplete setting. If your fudge is sticky, return it to the refrigerator for several more hours, or even overnight, to allow it to fully firm up. Proper storage in an airtight container also prevents it from becoming overly moist or sticky from ambient humidity.
Your Top Fudge Questions Answered
Here are some frequently asked questions about making and enjoying Cranberry White Chocolate Fudge, helping you get the most out of your homemade treat.How long does Cranberry White Chocolate Fudge last?
When stored correctly in an airtight container in the refrigerator, your Cranberry White Chocolate Fudge will stay fresh and delicious for up to 2-3 weeks. Its firm texture and vibrant flavor hold up beautifully.
Can I freeze this fudge?
Absolutely! This fudge freezes exceptionally well. Wrap individual pieces or the entire block tightly in plastic wrap, then place them in an airtight freezer-safe container for up to 3 months. Thaw in the refrigerator overnight before serving to maintain its quality.
What are the best ways to store homemade fudge?
Always store homemade fudge in an airtight container. This prevents it from drying out, absorbing refrigerator odors, or becoming sticky from humidity. Keeping it in the refrigerator ensures it maintains its firm, sliceable texture for optimal enjoyment.
Can I use fresh cranberries instead of dried?
While dried cranberries are recommended for this recipe, fresh cranberries can introduce too much moisture, potentially affecting the fudge’s set and texture. The tartness might also be more intense. For consistent results, stick with dried cranberries.
Savoring Your Creation: Serving & Storage Wisdom
Your delicious Cranberry White Chocolate Fudge deserves to be enjoyed to the fullest. Thoughtful serving and storage enhance its appeal and freshness.Presentation Perfect: Serving Suggestions
Serve your beautiful Cranberry White Chocolate Fudge on a festive dessert platter alongside other holiday treats. It also makes a delightful accompaniment to coffee or tea, or as a charming addition to homemade gift boxes.
Optimal Storage for Lasting Freshness
To ensure your fudge remains delightfully firm and flavorful, always store it in an airtight container in the refrigerator. This protects it from external elements and maintains its exquisite texture for an extended period.
Gifting & Make-Ahead Tips
This Cranberry White Chocolate Fudge is an ideal make-ahead treat, perfect for busy holiday preparations or thoughtful gifting. Prepare it several days in advance, chill thoroughly, cut into squares, and store until ready to package or serve.
Time to Indulge: Share Your Cranberry White Chocolate Fudge!
You’ve now mastered the art of perfectly set Cranberry White Chocolate Fudge. This recipe proves that exceptional homemade treats don’t have to be complicated. The satisfaction of slicing into these firm, festive squares is unmatched. Go ahead, create a batch for your next gathering, surprise a loved one with an edible gift, or simply treat yourself to a moment of sweet indulgence. Share your success, spread the joy, and savor every bite!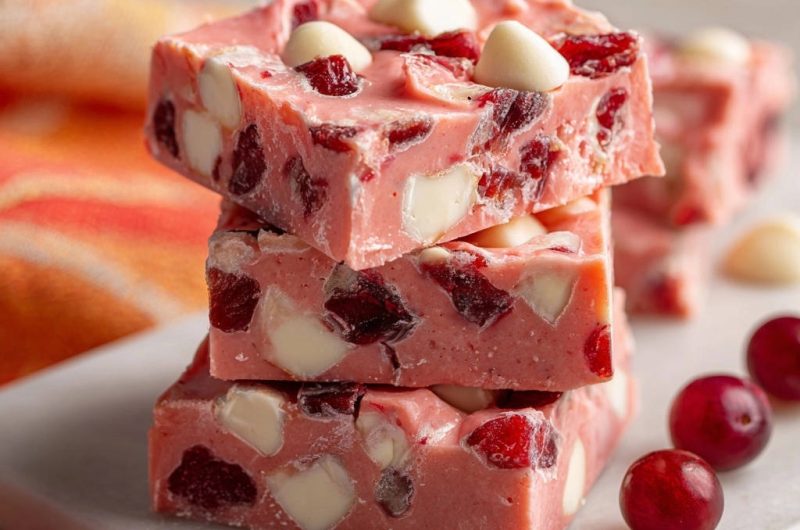
Cranberry White Chocolate Fudge
Course: DessertCuisine: American CuisineDifficulty: easy4
64 (1-inch) squares10
minutes2
minutes240
minutesAmerican Cuisine
Ingredients
1 (14 ounce) can sweetened condensed milk
2 cups white chocolate chips or chopped white chocolate
1/2 cup dried cranberries
1/4 teaspoon vanilla extract
2 drops red food coloring (optional, for vibrant pink color)
Directions
- Line an 8×8 inch square baking pan with parchment paper, allowing some overhang on the sides. This makes lifting the fudge out much easier once set.
- In a large microwave-safe bowl, combine the sweetened condensed milk and white chocolate chips.
- Microwave the mixture on 50% power for 1 minute intervals, stirring thoroughly after each minute. Continue until the white chocolate is completely melted and the mixture is smooth and glossy. The key here is gentle, controlled heating to prevent the chocolate from seizing or overheating, which can compromise the fudge’s ability to set properly. This usually takes 2 to 3 minutes total.
- Stir in the dried cranberries, vanilla extract, and red food coloring (if using) until all ingredients are evenly distributed and the fudge has a uniform pink hue.
- Pour the warm fudge mixture into the prepared pan and spread it evenly with a spatula. Gently tap the pan on the counter a few times to release any air bubbles and create a smooth top surface.
- Transfer the pan to the refrigerator and chill for a minimum of 4 hours, or ideally overnight, until the fudge is completely firm. This extended and uninterrupted chilling time is absolutely critical for the perfect set, ensuring your fudge solidifies into that delightful, non-sticky, sliceable texture you crave. Do not skip or shorten this step!
- Once thoroughly chilled and firm, use the parchment paper overhang to lift the fudge from the pan. Place it on a cutting board and cut into 1-inch squares. Store any leftover fudge in an airtight container in the refrigerator.
Notes
- Guaranteed to set firmly with proper chilling.