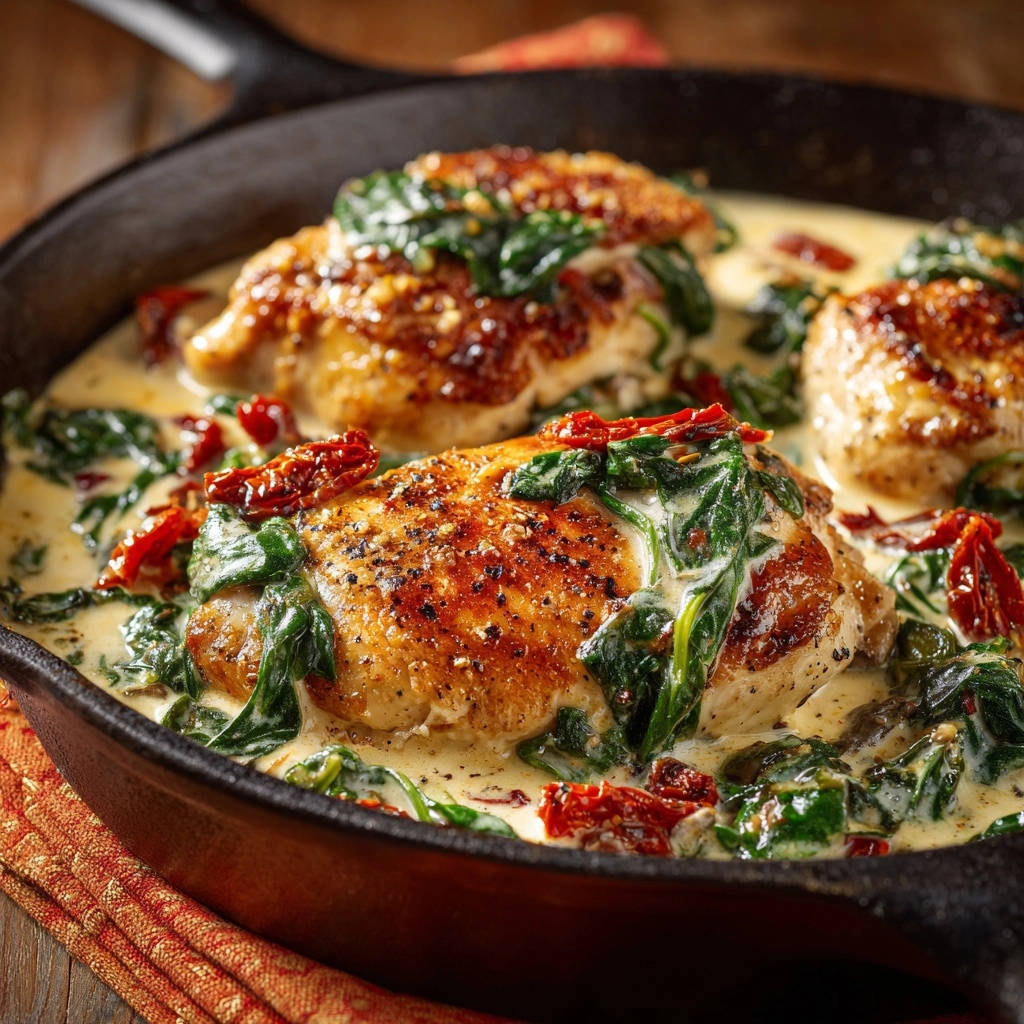
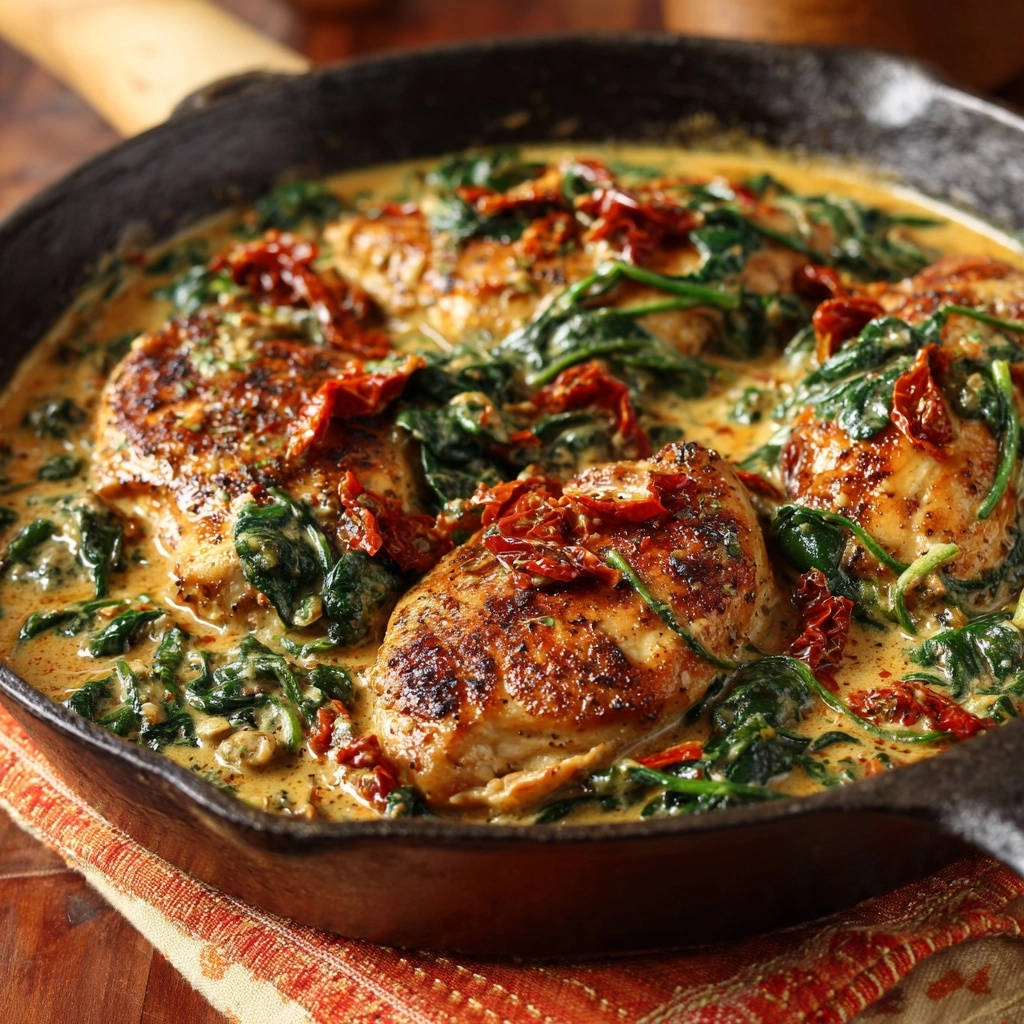
Creamy Tuscan Chicken Skillet: Juicy Perfection, Every Time
There’s nothing more disheartening than slicing into a beautiful chicken breast, only to find it disappointingly dry. I’ve been there countless times, but this Creamy Tuscan Chicken Skillet is my personal triumph over that common kitchen woe.
This recipe doesn’t just promise incredible flavor from sun-dried tomatoes and spinach; it delivers unbelievably juicy, tender chicken every single time, thanks to a foolproof method. Get ready to banish dry chicken from your kitchen forever with this inviting one-pan meal.
The Secret to Succulent Chicken: Why You’ll Adore This Tuscan Skillet
This isn’t just another dinner recipe; it’s a testament to achieving culinary perfection with ease. Our Creamy Tuscan Chicken Skillet guarantees moist, tender chicken by employing strategic searing and gentle simmering in a rich sauce.
Get Our Best Recipes Weekly!
Join thousands of food lovers and get delicious recipes delivered to your inbox.
The flavor profile is a harmonious blend of savory sun-dried tomatoes, vibrant spinach, and a luxurious creamy sauce that clings to every bite. It tastes gourmet but is surprisingly simple to prepare, making it ideal for busy weeknights or impressing guests.
Its versatility and crowd-pleasing appeal stem from its balanced ingredients and comforting, rich flavors. This dish truly transforms basic chicken breasts into a succulent masterpiece.
The Building Blocks of Flavor: Essential Ingredients for Your Skillet
Boneless, Skinless Chicken Breasts
We choose boneless, skinless chicken breasts for their lean protein and quick cooking time. The key to this recipe’s success is ensuring they remain incredibly juicy, a common challenge we’ve expertly overcome.
The Golden Touch: Olive Oil
Olive oil is essential for achieving that crucial golden-brown sear on your chicken. It also provides a flavorful fat base for building the sauce.
A Symphony of Spice: Salt, Pepper, & Italian Seasoning
Liberal seasoning with salt, freshly ground black pepper, and dried Italian seasoning is paramount. These spices build the foundational flavor for your tender chicken.
Aromatic Depth: Minced Garlic
Minced garlic provides a warm, aromatic base for the entire dish. Sautéing it briefly releases its fragrance, but be careful not to burn it.
Bursting with Umami: Sun-Dried Tomatoes
Sun-dried tomatoes offer an intense, sweet-tart umami punch that defines the Tuscan flavor. Opt for oil-packed varieties for the best texture and depth, draining them before chopping.
Fresh Greens: Vibrant Spinach
Fresh spinach adds a touch of earthy freshness and vibrant color. It wilts down significantly, so don’t be afraid of the initial large volume.
Liquid Gold: Chicken Broth
Chicken broth forms the savory liquid base for our creamy sauce. It deglazes the pan, capturing all the delicious browned bits from the chicken.
Richness Personified: Heavy Cream
Heavy cream is non-negotiable for achieving that luscious, velvety consistency in our creamy sauce. It binds all the flavors together beautifully.
Parmesan Perfection: Grated Cheese
Grated Parmesan cheese melts into the sauce, adding a salty, nutty, umami depth. Freshly grated Parmesan offers superior flavor and melting qualities.
Gear Up for Greatness: Essential Tools for Your Skillet Success
The Right Skillet: Cast Iron & Oven-Safe Options
A large, oven-safe skillet, ideally cast iron, is perfect for this one-pan meal. Its ability to retain heat evenly is crucial for achieving that perfect sear and gentle simmer.
Beyond the Basics: Tongs, Whisk, & More
Good quality tongs are invaluable for safely turning the chicken during searing. A whisk ensures a smooth, lump-free creamy sauce, and a meat thermometer guarantees your chicken is cooked perfectly without guesswork.
Mastering the Method: Your Path to a Flawlessly Juicy Skillet
Step 1: Prep for Perfection – Dry, Season, & Pound
Pat chicken breasts thoroughly dry with paper towels. This step is absolutely crucial; dry chicken ensures a superior sear, forming a flavorful crust that helps lock in moisture.
Season generously on both sides with salt, pepper, and Italian seasoning. Don’t be shy with the seasoning, as it infuses flavor deeply into the chicken before cooking.
For thicker breasts, lightly pound them to an even 1-inch thickness. Pounding ensures uniform cooking, preventing thinner edges from drying out while the thicker parts cook through, ensuring tenderness throughout.
Step 2: The Golden Sear – Locking in Flavor (Part 1)
Heat olive oil in a large oven-safe skillet over medium-high heat until shimmering. A properly hot skillet is essential for an immediate, effective sear.
Carefully place chicken breasts in the hot skillet. Sear for 4-5 minutes per side until golden brown and a beautiful crust forms. This golden crust is not just for appearance; it’s the first layer of flavor and helps seal in the chicken’s natural juices.
Crucially, do NOT cook the chicken all the way through at this stage. We’re aiming for a gorgeous color and rich flavor development; the gentle simmer in the creamy sauce will finish it, keeping it incredibly moist.
Remove chicken from the skillet and set aside on a plate. This initial sear creates a foundation of tenderness and is key to the “Juiciness Secret Part 1” for this Creamy Tuscan Chicken Skillet.
Step 3: Building the Aromatic Base – Garlic & Tomatoes
Reduce heat to medium. Add minced garlic to the skillet and sauté for 30 seconds until fragrant. Watch the garlic carefully; it should be aromatic but not browned, which can turn bitter.
Stir in the chopped sun-dried tomatoes and cook for another minute. This step allows the sun-dried tomatoes to release their intense, concentrated flavors, infusing the pan base.
Step 4: Incorporating Fresh Greens – Wilted Spinach
Add the fresh spinach to the skillet in batches, stirring until it wilts down completely. Spinach has a large volume when fresh, so adding it in stages prevents overcrowding and ensures even wilting.
Step 5: The Luscious Creamy Finish – Broth, Cream, & Parmesan
Pour in the chicken broth and heavy cream. Bring the sauce to a gentle simmer. Combine these liquids gradually, allowing them to warm and begin forming the luxurious creamy base.
Scrape up any browned bits from the bottom of the pan to infuse maximum flavor. This deglazing technique incorporates all the caramelized goodness left behind by the chicken, deepening the sauce’s complexity.
Stir in Parmesan cheese until fully incorporated. The Parmesan melts seamlessly, adding a rich, savory depth and helping to slightly thicken the sauce.
Step 6: Gentle Simmer – The Juiciness Secret Unveiled (Part 2)
Return the seared chicken breasts to the skillet, nestling them into the sauce. Position the chicken so it’s largely submerged, allowing it to absorb the creamy liquid.
Reduce heat to low, cover the skillet, and let it simmer gently for 5-7 minutes, or until the internal temperature of the chicken reaches 165°F. This low and slow simmering in the sauce is “Juiciness Secret Part 2,” ensuring the chicken finishes cooking without drying out, absorbing moisture for ultimate tenderness.
Step 7: The Art of Resting – Maximum Moisture
Remove the skillet from heat and let the chicken rest in the sauce for 5 minutes before serving. This critical resting period allows the muscle fibers to relax and redistribute juices throughout the meat, ensuring every bite is incredibly moist and tender.
Serve hot, spooning plenty of that delicious creamy sauce over the chicken. Enjoy your perfectly tender, flavorful Creamy Tuscan Chicken Skillet, a truly satisfying weeknight dinner.
Chef’s Secrets: Elevate Your Creamy Tuscan Chicken Skillet
The Power of Pounding: Even Thickness, Even Juiciness. Pounding chicken breasts to an even thickness isn’t just a suggestion; it’s a vital step. It ensures every part cooks uniformly, eliminating dry edges and guaranteeing tender chicken throughout.
Don’t Crowd the Pan: Why Space Matters for Searing. Overcrowding the skillet drops the pan’s temperature, leading to steaming rather than searing. For that beautiful golden crust and maximum flavor, sear chicken in batches if necessary, allowing ample space around each piece.
Beyond Chicken Breasts: Adapting the Recipe. While breasts are fantastic, chicken thighs offer an even juicier, richer result thanks to their higher fat content. You could even adapt this method for pork tenderloin by slicing it into medallions and adjusting cooking times slightly.
Spice It Up: Customizing Your Seasoning Blend. Feel free to experiment with your seasoning. Add a pinch of dried oregano or basil for more herbaceous notes, or a tiny amount of red pepper flakes for a subtle, warming kick. Tailor it to your personal taste.
Making it Ahead: Storage & Reheating for Best Results. To store leftovers, cool the Creamy Tuscan Chicken Skillet completely and transfer to an airtight container in the fridge for up to 3-4 days. Reheat gently on the stovetop over low heat, adding a splash of broth to prevent drying out the chicken or thickening the sauce too much.
Perfect Pairings: What to Serve with Your Tuscan Masterpiece
Classic Comfort: Pasta & Rice
Serve your Creamy Tuscan Chicken Skillet over al dente fettuccine, penne, or creamy risotto. The pasta or rice perfectly soaks up every last drop of the luxurious, flavorful sauce.
Round out your meal
For more comforting chicken dishes that pair well with creamy flavors, explore these options.
- If you enjoy tender chicken in a rich sauce, you’ll appreciate the fluffy dumplings in Homestyle Chicken & Dumplings.
- For another satisfying chicken preparation, consider this Creamy Chicken Stew, offering a different take on rich, comforting chicken.
Healthy & Light: Vegetables & Salads
Balance the richness with a vibrant side. Roasted asparagus, sautéed green beans, or a crisp mixed green salad with a light vinaigrette all make excellent complements to this hearty dish.
Crusty Complements: Bread for Sopping
No Creamy Tuscan Chicken Skillet is complete without a crusty bread. A warm baguette or ciabatta is essential for sopping up all that delectable, savory sauce from your plate.
Skillet Savvy: Common Questions & Quick Fixes
“My Chicken is Dry!”
To prevent dry chicken, always remember to pound thicker breasts to an even 1-inch thickness for uniform cooking. The gentle simmering process, rather than high-heat cooking, is also key.
Crucially, use a meat thermometer to pull the chicken from the heat precisely when it reaches 165°F. Allowing the chicken to rest in the sauce for a few minutes after cooking also helps redistribute juices.
“My Sauce is Too Thin/Thick!”
If your sauce is too thin, simply simmer it uncovered for a few extra minutes to allow it to reduce and thicken naturally. For a quicker fix, you can stir in a cornstarch slurry (1 tsp cornstarch mixed with 1 tbsp cold water) and simmer until thickened.
If your sauce becomes too thick, especially upon reheating, just stir in an extra splash of chicken broth or heavy cream until it reaches your desired silky consistency.
“How Do I Get a Good Sear?”
The secret to a beautiful sear begins with thoroughly patting your chicken dry. Any moisture will prevent browning and lead to steaming instead.
Ensure your skillet is properly preheated over medium-high heat until the oil shimmers. Also, avoid overcrowding the pan; sear the chicken in batches if necessary to maintain high heat and achieve that perfect golden crust.
Your Creamy Tuscan Chicken Skillet Questions, Answered
Can I use chicken thighs instead of breasts?
Absolutely, chicken thighs are an excellent alternative and often result in an even juicier dish dueue to their higher fat content. You may need to adjust the searing and simmering times slightly, as thighs can take a little longer to cook through.
Is this recipe gluten-free/dairy-free friendly?
This recipe is naturally gluten-free, as no flour or gluten-containing ingredients are used. For a dairy-free version, you could try substituting full-fat coconut milk or a dairy-free cream alternative for the heavy cream, and nutritional yeast for the Parmesan, though the flavor profile will shift.
How long does Creamy Tuscan Chicken Skillet last in the fridge?
When stored properly in an airtight container, your Creamy Tuscan Chicken Skillet will remain fresh and delicious for 3-4 days in the refrigerator.
Can I freeze leftovers?
While dairy-based sauces can sometimes separate or change texture upon freezing and reheating, you can freeze this dish. Cool completely, then transfer to an airtight, freezer-safe container for up to 2-3 months. Thaw overnight in the fridge before reheating.
What’s the best way to reheat it?
For best results, gently reheat your Creamy Tuscan Chicken Skillet on the stovetop over low heat. Add a splash of chicken broth or cream if the sauce has thickened during storage. Avoid high heat, which can dry out the chicken and cause the sauce to separate.
Your Next Family Favorite Awaits: Share Your Tuscan Triumph!
You now possess the secrets to creating an exceptional Creamy Tuscan Chicken Skillet, guaranteed to yield juicy, tender chicken every single time. This flavorful skillet is not just a meal; it’s a confident step towards mastering a truly rewarding dish.
Don’t let dry chicken be a culinary roadblock any longer. Embrace this recipe, savor every delicious bite, and share your Tuscan triumph with friends and family. I can’t wait to hear how this becomes your new weeknight dinner favorite!

Creamy Tuscan Chicken Skillet
Course: Main CourseCuisine: Italian-American cuisineDifficulty: easy4
servings15
minutes25
minutes45
minutesItalian-American cuisine
Ingredients
4 boneless, skinless chicken breasts (about 1.5 lbs total)
1 tablespoon olive oil
Salt and freshly ground black pepper, to taste
1 teaspoon dried Italian seasoning
4 cloves garlic, minced
1/2 cup sun-dried tomatoes, packed in oil, drained and chopped
5 ounces fresh spinach
1 cup chicken broth
1/2 cup heavy cream
1/4 cup grated Parmesan cheese
Directions
- Prep the Chicken Right: Pat chicken breasts thoroughly dry with paper towels. This is crucial for a good sear. Season generously on both sides with salt, pepper, and Italian seasoning. For thicker breasts, lightly pound them to an even 1-inch thickness for more even cooking, preventing edges from drying out while the center cooks.
- Achieve the Perfect Sear (The Juiciness Secret Part 1): Heat olive oil in a large oven-safe skillet (like cast iron) over medium-high heat until shimmering. Carefully place chicken breasts in the hot skillet. Sear for 4-5 minutes per side until golden brown and a beautiful crust forms. Crucially, do NOT cook the chicken all the way through at this stage. We’re aiming for a gorgeous color and flavor development; the sauce will finish it gently. Remove chicken from the skillet and set aside on a plate. This initial sear locks in juices and sets up for tenderness.
- Build the Flavorful Sauce: Reduce heat to medium. Add minced garlic to the skillet and sauté for 30 seconds until fragrant (do not burn!). Stir in the chopped sun-dried tomatoes and cook for another minute.
- Wilt the Spinach: Add the fresh spinach to the skillet in batches, stirring until it wilts down completely.
- Creamy Finish: Pour in the chicken broth and heavy cream. Bring the sauce to a gentle simmer, scraping up any browned bits from the bottom of the pan to infuse maximum flavor. Stir in Parmesan cheese.
- Gentle Finish for Juiciness (The Juiciness Secret Part 2): Return the seared chicken breasts to the skillet, nestling them into the sauce. Reduce heat to low, cover the skillet, and let it simmer gently for 5-7 minutes, or until the internal temperature of the chicken reaches 165°F. The key here is low and slow simmering in the sauce, allowing the chicken to absorb moisture and finish cooking without drying out.
- Rest and Serve: Remove the skillet from heat and let the chicken rest in the sauce for 5 minutes before serving. This allows the juices to redistribute throughout the meat, ensuring every bite is moist and tender. Serve hot, spooning plenty of that delicious creamy sauce over the chicken.
Notes
- Features a foolproof method for perfectly juicy and tender chicken, ensuring no more dry results!