Chocolate Banana Crepe Roll-Ups: The Tear-Proof Secret
Ever found yourself battling flimsy crepes, only for them to tear right as you attempt to flip or roll them? I’ve been there, but those days are over! This definitive guide to Chocolate Banana Crepe Roll-Ups unveils the simple, ingenious trick for perfectly pliable, tear-proof crepes every single time, ensuring your culinary efforts always yield stunning results.
Why Our Tear-Proof Chocolate Banana Crepe Roll-Ups Will Be Your New Favorite
Imagine effortlessly crafting delicate, golden crepes that never tear, forming the perfect embrace for a luscious chocolate-banana filling. This recipe empowers you to master crepe making with confidence, transforming what was once a tricky endeavor into a pure joy.
Beyond the flawless texture, these roll-ups offer an irresistible fusion of creamy banana and rich chocolate hazelnut spread, creating a symphony of flavors that delights the palate. They’re a truly decadent treat that feels incredibly special yet surprisingly simple to achieve.
Get Our Best Recipes Weekly!
Join thousands of food lovers and get delicious recipes delivered to your inbox.
Perfect for a show-stopping breakfast, an elegant brunch, or a comforting dessert, these Chocolate Banana Crepe Roll-Ups are a versatile indulgence. They’re designed for anyone seeking to elevate their home cooking with a recipe that promises both ease and spectacular results.
Your Crepe-Making Toolkit: Must-Have Essentials
Non-Stick Skillet or Crepe Pan: Essential for easy release and even cooking. An 8-inch pan is ideal for perfectly sized crepes for this recipe.
Whisks (Large and Small): Crucial for thoroughly combining wet and dry ingredients, ensuring a lump-free, silky-smooth batter.
Thin, Flexible Spatula: Absolutely necessary for gently loosening the edges and confidently flipping delicate crepes without any tearing.
Measuring Cups and Spoons: For accurate ingredient proportions, which are fundamental to achieving the correct crepe consistency and pliability.
Mixing Bowls: At least two are needed to keep wet and dry ingredients separate before combining them seamlessly.
Pastry Brush or Paper Towel: For lightly and evenly oiling the pan between each crepe, preventing sticking without making them greasy.
Crafting Perfection: The Ingredients Behind These Irresistible Crepes
For the Silky-Smooth Crepe Batter
All-Purpose Flour: This provides the essential structure for your crepes. Proper hydration of the flour, achieved through resting, is key to developing a pliable, non-tearing texture.
Large Egg: The egg acts as a crucial binder, holding the crepe together while adding a desirable richness. It significantly contributes to the crepe’s elasticity, making it easy to roll.
Milk: Provides necessary moisture and thins the batter to the perfect consistency. For dietary needs, feel free to use non-dairy alternatives like almond or oat milk.
Granulated Sugar: A subtle touch of sugar not only sweetens the crepe but also helps achieve that beautiful golden-brown color during cooking.
Pinch of Salt: A tiny bit of salt is vital for balancing the sweetness and enhancing the overall depth of flavor in the crepe batter.
Melted Butter or Vegetable Oil: Incorporated into the batter, this adds a lovely flavor and ensures a tender finish. It also plays a role in preventing crepes from sticking and imparts a desirable richness.
The Decadent Filling & Finishing Touches
Ripe Bananas: Essential for their natural sweetness and soft, creamy texture. Selecting ripe bananas is important for optimal flavor and ease of slicing and rolling.
Chocolate Hazelnut Spread: This is the star of your filling, providing a rich, comforting, and undeniably delicious core. Opt for a good quality spread to elevate the flavor experience significantly.
Shredded Coconut: Adds a delightful tropical aroma, a subtle chewiness, and an elegant visual garnish. Lightly toasting the coconut beforehand can further enhance its nutty flavor.
Mastering the Tear-Proof Crepe: A Step-by-Step Guide
Perfecting Your Batter: The Foundation of Tear-Proof Crepes
Batter Perfection is Key: Begin by whisking together the flour, sugar, and salt in a large bowl. In a separate bowl, combine the egg, milk, and 2 tablespoons of melted butter or oil, whisking until perfectly uniform.
Gradually pour the wet mixture into the dry, whisking continuously until you achieve a completely smooth batter with absolutely no lumps. This smooth consistency is paramount for an even, strong crepe that resists tearing.
Now for a vital “tear-proof” trick: allow the batter to rest for at least 15 minutes at room temperature, or up to an hour in the refrigerator. This crucial resting period fully hydrates the flour, resulting in wonderfully pliable crepes less prone to tearing during cooking and rolling.
Pan Prep Power: Place an 8-inch non-stick skillet or crepe pan over medium-low heat. Before cooking each crepe, lightly brush or wipe the pan surface with a minuscule amount of butter or oil.
A properly heated, thinly oiled non-stick surface is absolutely critical for effortless release, preventing your delicate crepes from sticking and ultimately tearing.
The Gentle Dance: Pouring, Swirling, and Flipping
The Perfect Pour: Pour approximately 1/4 cup of batter into the hot pan. Immediately tilt and swirl the pan to ensure the bottom is evenly coated with a thin layer of batter, working quickly and efficiently.
Achieving a thin, even layer is your secret weapon against thick, rigid crepes that are notorious for cracking and tearing when folded or rolled.
Cook Smart, Not Hard: Cook each crepe for 1-2 minutes until you observe the edges starting to crisp and gently pull away from the pan, and the surface appears set and dry.
This is your indicator! Use a thin, flexible spatula to carefully loosen the edges all the way around the crepe.
Gentle Flip Magic: Slide your spatula entirely underneath the crepe and, with a swift yet confident wrist flick, gracefully flip it over. Allow it to cook for an additional 30-60 seconds on the second side, just until it achieves a light golden hue.
Exercise caution not to overcook, as excessive heat can render the crepes brittle, significantly increasing their susceptibility to tearing.
The Golden Rule: Cooling for Strength
Cool for Control: As each crepe finishes cooking, slide it onto a plate. Continue this process with the remaining batter, stacking the cooked crepes one on top of the other.
It is imperative to let them cool slightly before you begin handling them. Warm crepes are inherently more delicate, whereas those that have cooled slightly become much sturdier and less prone to incident during filling and rolling.
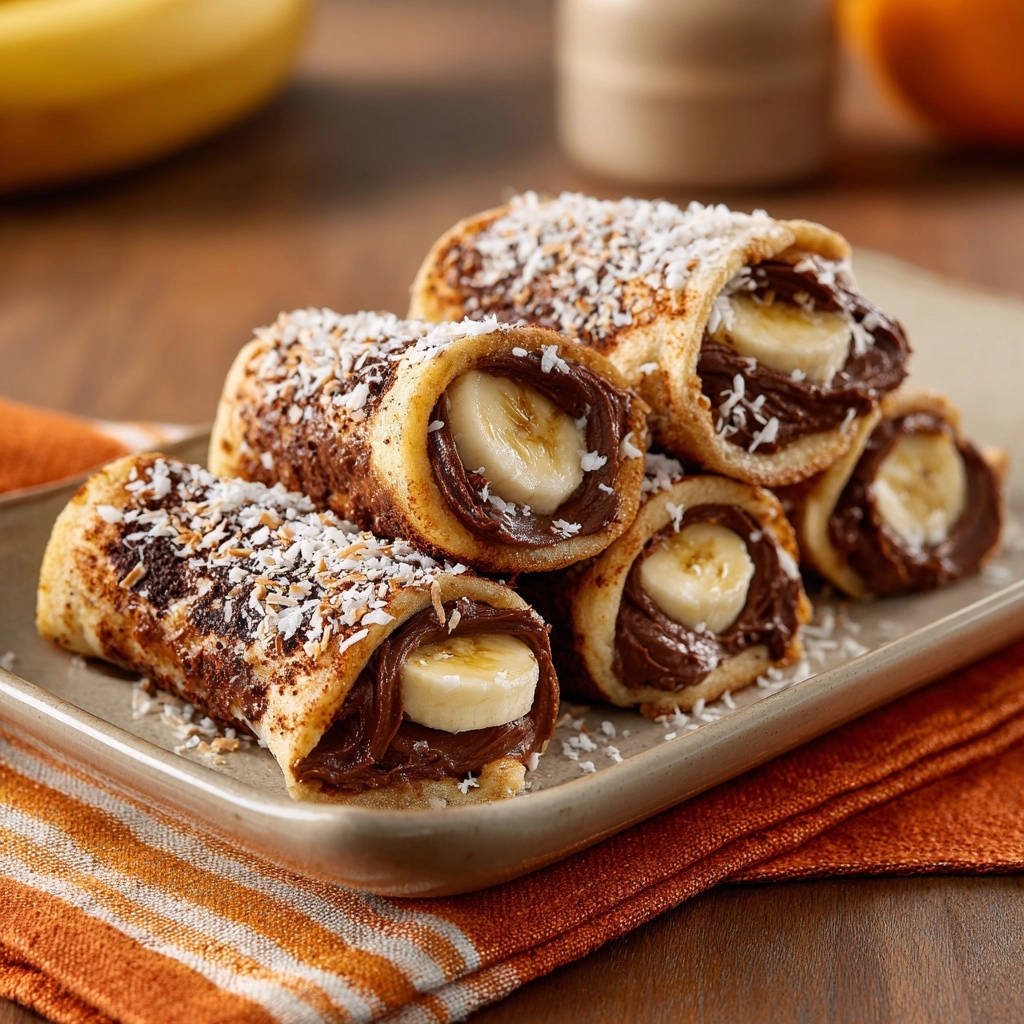
From Crepe to Roll-Up: Bringing Your Creation Together
Layering Decadence: Spreading Chocolate Hazelnut: Take a cooled crepe and lay it flat on your work surface. Spread about 1 tablespoon of chocolate hazelnut spread evenly over approximately two-thirds of the crepe’s surface, consciously leaving a small border uncovered around the edges.
Strategic Slicing: Arranging the Bananas: Arrange a few banana slices in a neat, single line near one edge of the chocolate-spread portion. Be mindful not to overfill, as this can lead to tearing during the rolling process.
The Roll-Up Reveal: Creating Perfect Cylinders: Starting from the banana-covered edge, begin to tightly roll the crepe into a neat cylinder. A firm but gentle rolling motion is key to ensuring it holds its shape and prevents unraveling.
Optional Toasting & Coconut Flourish: For an extra layer of warmth and texture, you can lightly toast the assembled roll-ups. Place them in a clean, dry skillet over medium heat for 1-2 minutes per side until they are lightly browned and warm throughout.
This quick toasting step beautifully melts the chocolate slightly and adds a delightful crispness. Finish by sprinkling generously with shredded coconut just before serving these delightful Chocolate Banana Crepe Roll-Ups.
Elevate Your Crepe Game: Expert Tips for Flawless Roll-Ups
Don’t Skip the Batter Rest: This is arguably the most crucial “tear-proof” trick you can employ. The resting time allows the gluten to relax and the flour to fully hydrate, resulting in an incredibly flexible, easy-to-handle crepe batter. Aim for at least 15 minutes, but longer is even better.
Monitor Pan Temperature Closely: Maintaining a consistent medium-low heat is ideal for crepe cooking. If the pan is too hot, your crepes will burn before cooking through; too cool, and they won’t brown properly or release easily. Adjust the heat as needed between batches to maintain that perfect temperature.
Master the Thin Pour: The key to delicate and pliable crepes lies in the thinness of the batter layer. Practice the quick pour and swirl technique to achieve a consistent, even thickness across the pan, which prevents thick, doughy results.
Avoid Overcooking: Crepes should be lightly golden, retaining their soft, flexible texture, not becoming crisp. Overcooked crepes quickly turn brittle and are significantly more prone to tearing during assembly and rolling.
Room Temperature Bananas: Using slightly softer, ripe bananas makes them much easier to slice thinly and roll smoothly within the crepe. Very firm bananas can create sharp edges that might inadvertently pierce the delicate crepe surface.
Experiment with Fillings: While chocolate and banana are a classic pairing, feel free to unleash your creativity! Consider other delicious sweet crepes fillings like Nutella, creamy peanut butter, fruit preserves, or even a sprinkle of cinnamon with the banana for a warm spice note.
Common Crepe Conundrums Solved: Expert Troubleshooting
Why Are My Crepes Tearing When I Flip or Roll Them?
This common issue is most frequently attributed to insufficient batter resting time, which results in less pliable crepes. It can also be a clear sign of overcooking, making them brittle, or an inconsistent, overly thin batter layer that lacks structural integrity. Ensure your spatula is thin and flexible, sliding completely under the crepe before a confident flip.
My Crepes Are Sticking to the Pan!
If your crepes are sticking, the pan might not be sufficiently hot, or it could be improperly oiled. Verify your non-stick pan is adequately heated to a medium-low temperature, and apply a very thin, even layer of butter or oil for each crepe. Paradoxically, too much oil can also cause sticking due to residue buildup.
Help! My Crepes Are Too Thick and Doughy!
This usually indicates you’re pouring too much batter into the pan, or you’re not swirling it quickly and widely enough to create a thin, even layer. Practice using a precise 1/4 cup of batter and immediately tilting the pan to cover the entire bottom as thinly as possible.
My Roll-Ups Fall Apart When Assembled!
Crepes require slight cooling before assembly to develop their strength; warm crepes are considerably more delicate. Additionally, ensure you are not overfilling them, and always roll tightly from one end to the other for a secure, stable cylinder that holds its shape.
Beyond Banana: Creative Twists for Your Crepe Roll-Ups
Fruity Alternatives
Elevate your sweet crepes by substituting bananas with other fresh fruits. Try thinly sliced strawberries, plump raspberries, sweet peaches, or a vibrant mix of berries for a burst of fresh flavor. A small squeeze of lemon juice over fruit fillings can add a delightful brightness.
Sweet & Savory Spreads
Venture beyond chocolate hazelnut spread! Experiment with different chocolate varieties, creamy almond butter, classic peanut butter, or a tangy cream cheese filling. For a more sophisticated flavor profile, consider a light dusting of cinnamon or aromatic cardamom with your banana slices.
Dietary Adaptations (Gluten-Free, Dairy-Free)
To create delicious gluten-free crepes, simply substitute the all-purpose flour with a high-quality 1:1 gluten-free flour blend. For a dairy-free version, swap out traditional milk for a non-dairy alternative like almond or oat milk, and use vegan butter or additional vegetable oil.
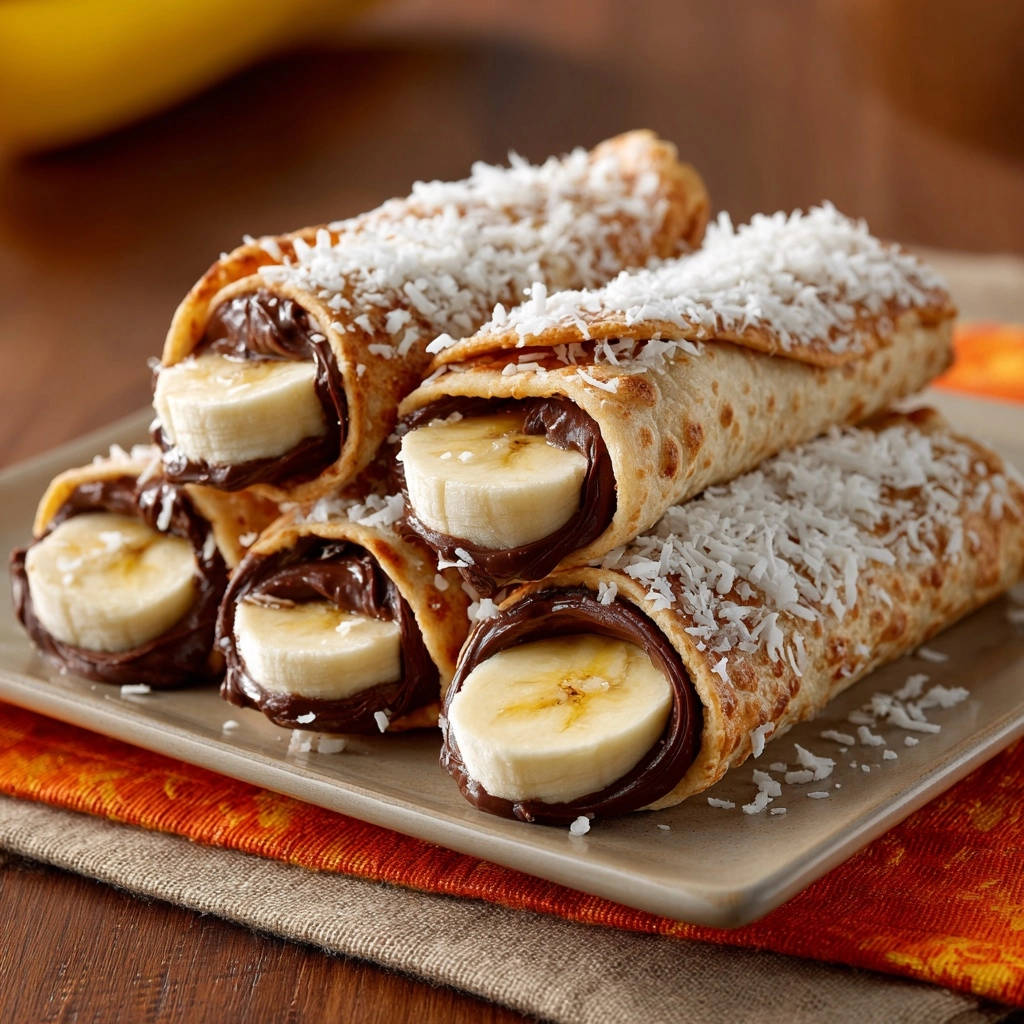
The Perfect Presentation: How to Serve Your Chocolate Banana Crepe Roll-Ups
These delightful Chocolate Banana Crepe Roll-Ups are exceptionally versatile, making them perfect for a special breakfast, an indulgent brunch, or an elegant dessert. For the best experience, serve them warm, especially if you’ve given them a light toast, and ensure they are generously dusted with shredded coconut.
More Sweet Ideas
Round out your dessert spread with these chocolate and banana treats.
- If you loved the banana and chocolate in your crepe roll-ups, you’ll want to try the Ultimate Chocolate Chip Banana Bread for another satisfying bite.
- For a different chocolate experience that still brings the gooey factor, bake up a batch of Ultimate Marshmallow Drizzle Brownies.
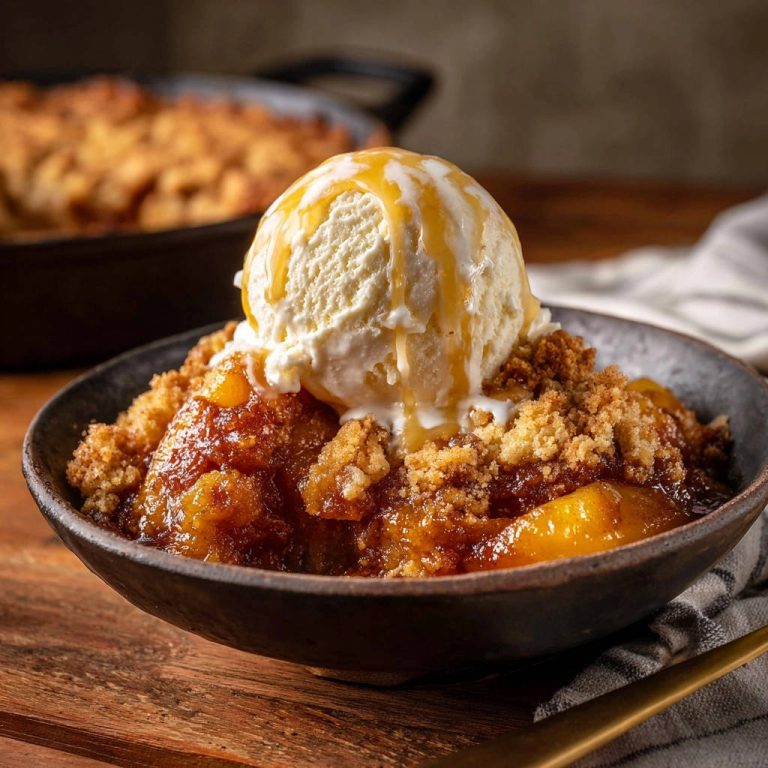
To enhance the presentation and flavor, consider offering a side of fresh berries, a luxurious scoop of vanilla ice cream, or an extra drizzle of chocolate sauce. Pair these comforting treats with a freshly brewed coffee, a calming cup of tea, or a tall glass of cold milk.
Plan Ahead: Storing and Preparing Your Crepes in Advance
Storing Unfilled Crepes
Cooked, unfilled crepes are remarkably convenient for make-ahead meal prep. You can store them in the refrigerator for up to 3-4 days. To prevent sticking, stack them with a sheet of parchment paper placed between each crepe, then wrap the stack tightly in plastic wrap or place them in an airtight container.
Best Way to Store Assembled Roll-Ups
For optimal flavor and texture, assembled roll-ups are truly best enjoyed fresh. If you need to store them, place them in an airtight container in the refrigerator for a maximum of 1-2 days. Be aware that the bananas may soften and exhibit slight discoloration over this time.
Reheating for Freshness
To reheat unfilled crepes, gently warm them in a lightly oiled non-stick pan over medium-low heat until they become pliable again. Assembled roll-ups can be carefully warmed in a dry skillet, following the toasting instructions, or briefly in a microwave for 15-30 seconds until they are pleasantly warm.
Your Top Crepe Questions Answered
Can I make the batter ahead of time?
Absolutely! Preparing the crepe batter ahead of time is not only permissible but actually highly encouraged. You can mix the batter up to 24 hours in advance and store it in an airtight container in the refrigerator. This extended rest allows the flour to fully hydrate, significantly enhancing the desirable “tear-proof” quality.
What if I don’t have a non-stick pan?
While a non-stick pan is strongly recommended for ease, you can certainly achieve great results using a well-seasoned cast-iron skillet. Ensure the skillet is perfectly clean and very lightly oiled, and meticulously manage the heat to prevent any sticking.
How do I get my crepes perfectly round?
The secret to perfectly round crepes lies in a swift, confident pour of the batter directly into the center of the hot pan, immediately followed by an even and wide swirl to thoroughly coat the entire bottom surface. Like many culinary skills, practice makes perfect for achieving that ideal round shape.
Are these good cold?
While best served warm to fully appreciate the melted chocolate and softened banana, these Chocolate Banana Crepe Roll-Ups are indeed delicious at room temperature. This makes them an excellent option for packed lunches, picnics, or a convenient on-the-go snack, though the chocolate hazelnut spread will be firmer when cold.
Can I freeze crepes?
Yes, cooked, unfilled crepes freeze beautifully! To do so, stack them with a piece of parchment paper placed between each crepe. Then, wrap the entire stack tightly in plastic wrap and a layer of aluminum foil. They can be frozen for up to 2 months. Thaw them thoroughly in the refrigerator overnight before you’re ready to use them.
Ready to Impress? Share Your Chocolate Banana Crepe Roll-Ups Masterpiece!
Now that you’re armed with the secret to tear-proof crepes, there’s truly no limit to the deliciousness you can create. These Chocolate Banana Crepe Roll-Ups aren’t just a recipe; they’re an experience waiting to happen, promising perfect results and delight every single time you make them.
Go ahead, whip up a batch for your next breakfast, brunch, or dessert. Your family and friends will undoubtedly be amazed by your newfound crepe-making prowess! We’d absolutely love to see your beautiful creations-share your Chocolate Banana Crepe Roll-Ups with us in the comments below!

Chocolate Banana Crepe Roll-Ups
Course: BreakfastCuisine: American CuisineDifficulty: easy8
crepes25
minutes30
minutes55
minutesAmerican Cuisine
Ingredients
1 cup all-purpose flour
1 large egg
1 cup milk
2 tablespoons sugar
Pinch of salt
2 tablespoons melted butter or vegetable oil (for batter), plus more for the pan
2 ripe bananas, sliced
1/2 cup chocolate hazelnut spread
2 tablespoons shredded coconut, for topping
Directions
- The Tear-Proof Crepe Trick!
- Batter Perfection is Key: In a large bowl, whisk together the flour, sugar, and salt. In a separate bowl, whisk the egg, milk, and 2 tablespoons of melted butter or oil. Gradually pour the wet ingredients into the dry, whisking constantly until smooth. NO LUMPS! This smooth batter ensures an even, strong crepe. Let the batter rest for at least 15 minutes at room temperature (or up to an hour in the fridge). Resting allows the flour to fully hydrate, making the crepes more pliable and less prone to tearing.
- Pan Prep Power: Heat a 8-inch non-stick skillet or crepe pan over medium-low heat. Lightly brush or wipe the pan with a tiny bit of butter or oil for each crepe. Too much oil makes them greasy, too little makes them stick! A properly heated, lightly oiled non-stick surface is crucial for easy release.
- The Perfect Pour: Pour about 1/4 cup of batter into the hot pan, immediately tilting and swirling the pan to coat the bottom evenly with a thin layer of batter. Work quickly. A thin, even layer is your secret weapon against thick, rigid crepes that crack.
- Cook Smart, Not Hard: Cook for 1-2 minutes until the edges start to crisp and pull away from the pan, and the surface looks set and dry. This is your moment of truth! Use a thin, flexible spatula to gently loosen the edges all the way around.
- Gentle Flip Magic: Slide your spatula completely under the crepe and, with a quick, confident wrist flick, flip it over. Cook for another 30-60 seconds on the second side, just until lightly golden. Don’t overcook, or they’ll get too brittle!
- Cool for Control: Slide the cooked crepe onto a plate. Repeat with remaining batter, stacking crepes as you go. Let them cool slightly before handling. Warm crepes are more delicate, slightly cooled ones are much sturdier for filling and rolling.
- Assemble Your Roll-Ups:
- Lay a cooled crepe flat. Spread about 1 tablespoon of chocolate hazelnut spread evenly over approximately two-thirds of the crepe’s surface, leaving a small border uncovered.
- Arrange a few banana slices in a line near one edge of the chocolate-spread portion.
- Starting from the banana-covered edge, tightly roll the crepe into a cylinder.
- If desired, lightly toast the assembled roll-ups in a clean, dry skillet over medium heat for 1-2 minutes per side until lightly browned and warm, then sprinkle with shredded coconut before serving.
Notes
- This recipe includes a special technique for ‘tear-proof’ crepes by resting the batter and using specific cooking steps.