Chocolate Peanut Butter Crunch Bars: Guaranteed Clean Slices!
Every home baker knows the frustration of a beautiful dessert bar that crumbles or smears the moment the knife touches it. I’ve been there, but after countless batches, I perfected these Chocolate Peanut Butter Crunch Bars, designed for absolute deliciousness and, crucially, guaranteed clean slices every single time.
This recipe ensures you’ll achieve that irresistible combination of crunchy, creamy, and chocolaty layers with picture-perfect presentation, making it your new go-to for impressive, stress-free treats.
Beyond Basic: Why These Chocolate Peanut Butter Crunch Bars Shine
These aren’t just any no-bake bars; they are crafted for a superior experience. We’ll dive into the unique elements that make this crunch bar recipe stand out from the rest.
Get Our Best Recipes Weekly!
Join thousands of food lovers and get delicious recipes delivered to your inbox.
The Secret to Perfectly Clean Slices, Every Time
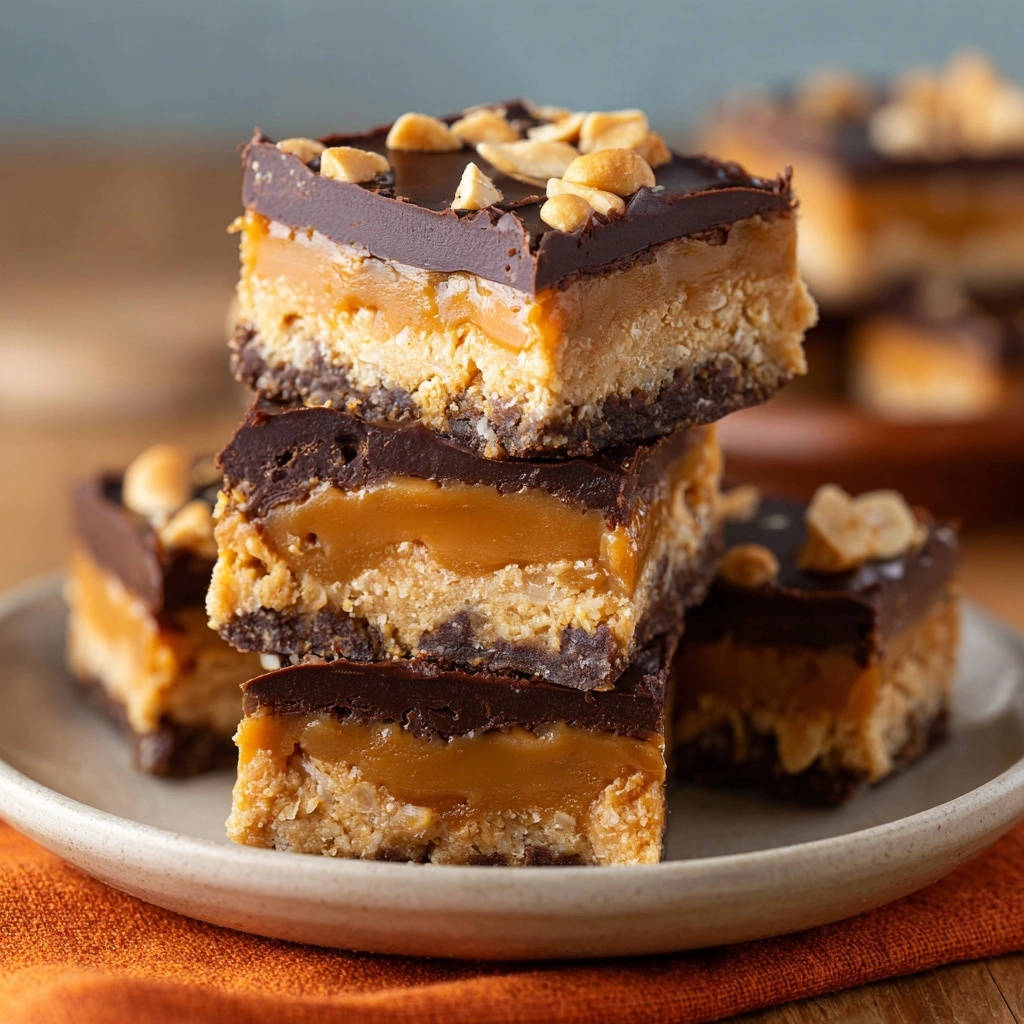
The common frustration of cracked chocolate or smeared layers is completely eliminated with my method. This recipe combines meticulous chilling with a simple yet revolutionary hot knife technique.
Each slice reveals distinct, beautifully defined layers, transforming a potentially messy dessert into an elegant and easy-to-serve treat. You’ll be proud to present these pristine chocolate peanut butter treats.
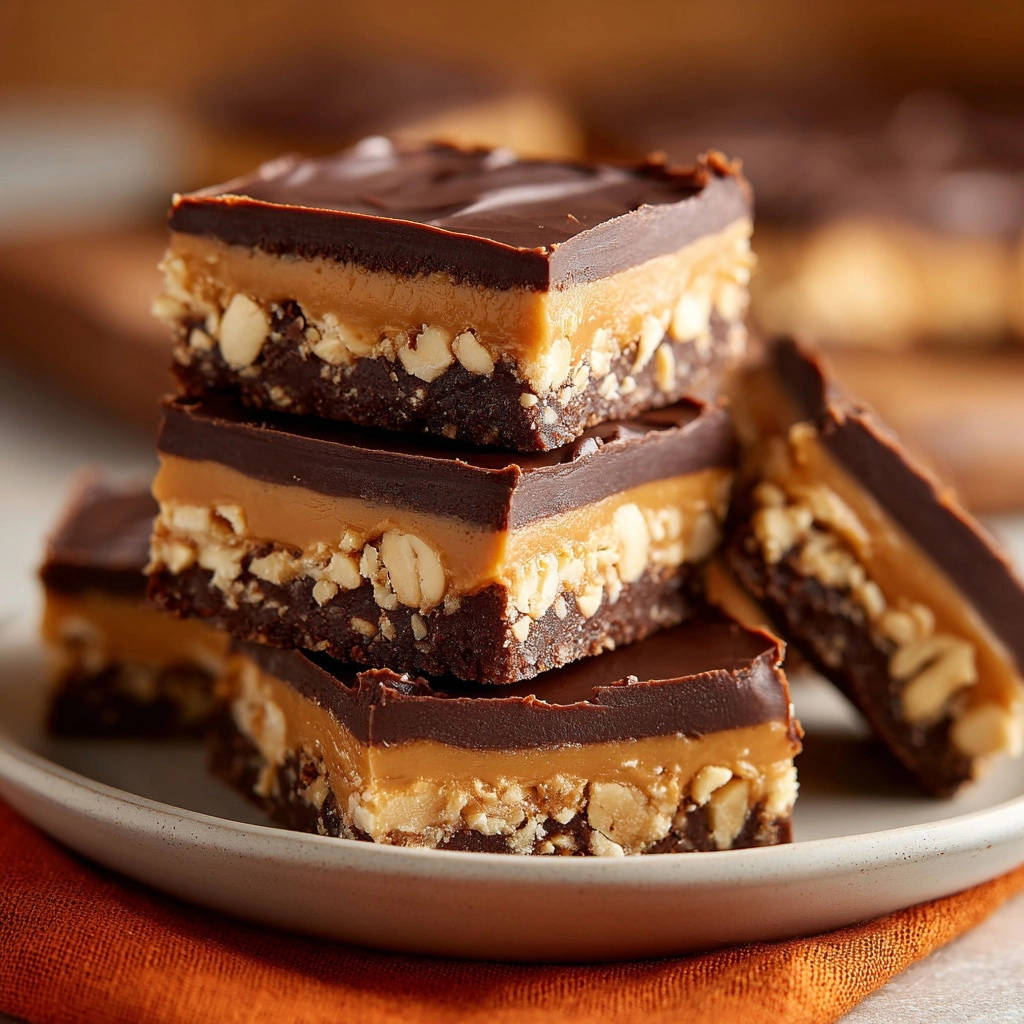
Irresistible Layers: A Symphony of Flavor and Texture
These bars deliver a delightful textural contrast in every bite. A rich, firm chocolate cookie and peanut base provides a satisfying crunch.
Nestled atop is a thick, velvety smooth peanut butter layer, perfectly balanced in sweetness. Finally, a crisp, decadent chocolate ganache-style topping completes this harmonious trio, offering a melt-in-your-mouth finish.
Your Go-To Recipe for Stress-Free Dessert Bars
Beyond their stunning appearance and flavor, these Chocolate Peanut Butter Crunch Bars are surprisingly simple to assemble. The no-bake nature means no oven guesswork, just straightforward mixing and chilling.
They are ideal for parties, potlucks, or a simple afternoon craving, consistently delivering reliable, impressive results without the fuss. This recipe ensures success, even for beginner bakers.
Your Essential Toolkit for Crunch Bar Success
Having the right tools makes all the difference in achieving bakery-quality results. Here’s a concise list of what you’ll need to prepare these magnificent peanut butter dessert bars.
Pans & Preparation: Setting the Stage
-
8×8 Inch Baking Pan: This size is crucial for achieving the perfect thickness in your layers. A sturdy metal pan works best for even chilling.
-
Parchment Paper: Essential for easy removal of the entire bar block. The overhang acts as lifting handles, protecting your pristine layers.
Mixing & Spreading: Key for Even Layers
-
Mixing Bowls: You’ll need at least one medium and one large bowl for the various components of the bars.
-
Electric Mixer: A hand or stand mixer is highly recommended for achieving a silky smooth, lump-free peanut butter layer.
-
Offset Spatula: While not strictly mandatory, an offset spatula is invaluable for smoothly and evenly spreading both the peanut butter and chocolate layers, ensuring a professional finish.
The Secret Slicing Weapon: A Sharp, Warm Knife
-
Sharp, Thin-Bladed Knife: The sharper and thinner the blade, the cleaner your cuts will be. A chef’s knife or a long slicing knife is ideal.
-
Tall Glass of Hot Water: This is the key to the famous hot knife technique. The height allows for full blade submersion.
-
Paper Towels: Absolutely critical for thoroughly drying the knife between each and every cut, preventing water from affecting your chocolate.
Building Blocks of Bliss: Ingredients for Your Chocolate Peanut Butter Crunch Bars
Each ingredient plays a specific role in the texture and flavor profile of these delectable Chocolate Peanut Butter Crunch Bars. Selecting the right quality and type is key to success.
For the Firm, Crunchy Base
-
1½ cups Crushed Chocolate Cookie Crumbs: Opt for chocolate wafers or thin Oreos (without the cream filling for a less sweet base). These provide a deep chocolate flavor and a stable, firm foundation.
-
½ cup Finely Chopped Roasted Peanuts: The peanuts add a wonderful textural crunch and amplify the nutty flavor, making the base even more interesting than just cookie crumbs alone.
-
¼ cup Unsalted Butter, Melted: The melted butter binds the crumbs and peanuts together, creating a compact base that won’t crumble when sliced. Unsalted butter allows you to control the overall salinity.
Crafting the Creamy Peanut Butter Core
-
1 cup Creamy Peanut Butter: Processed creamy peanut butter (like Jif or Skippy) is crucial here. Its consistent texture ensures the layer sets firmly and smoothly. Natural peanut butter can be too oily and might not set correctly.
-
½ cup Unsalted Butter, Softened: Softened butter creams beautifully with the peanut butter and powdered sugar, creating a rich, pliable, and stable layer. Ensure it’s truly softened, not melted.
-
2 cups Powdered Sugar: This provides the necessary sweetness and, more importantly, structure to the peanut butter layer, allowing it to firm up properly when chilled.
-
¼ teaspoon Vanilla Extract: A touch of vanilla enhances the overall flavor profile, adding a warm, aromatic note that complements both chocolate and peanut butter.
-
1 to 2 tablespoons Milk (Optional): Only add if your peanut butter mixture is too stiff to spread. It helps achieve a perfectly smooth, manageable consistency without diluting the flavor too much.
The Decadent Chocolate Topping
-
1½ cups Semi-Sweet Chocolate Chips: Good quality semi-sweet chocolate chips melt smoothly and provide the classic, rich chocolate flavor expected in these bars. They offer a balanced sweetness against the peanut butter.
-
2 tablespoons Coconut Oil or Unsalted Butter: Coconut oil is highly recommended as it helps the chocolate melt into a silky, glossy ganache-like topping that sets beautifully and is less prone to cracking. Unsalted butter is a good alternative, also adding richness and aiding in smoothness.
Your Path to Perfect Chocolate Peanut Butter Crunch Bars: A Step-by-Step Guide
Follow these detailed steps closely to achieve your perfectly layered and flawlessly sliced Chocolate Peanut Butter Crunch Bars. Each instruction includes critical tips for success.
- Prepare Your Pan:
Line an 8×8 inch baking pan with parchment paper, ensuring an overhang on two sides.
This creates crucial “handles” for easy lifting, which directly contributes to cleaner slicing and removal later.
- Make the Crunchy Base:
In a medium bowl, combine crushed chocolate cookie crumbs, finely chopped roasted peanuts, and melted butter until well combined and crumbly.
Press this mixture firmly and evenly into the bottom of the prepared pan, compacting it tightly with the back of a spoon or a flat-bottomed glass.
Place the pan in the refrigerator to chill while you prepare the next layer, allowing the base to firm up.
- Craft the Creamy Peanut Butter Layer:
In a large bowl, use an electric mixer to beat softened creamy peanut butter and softened unsalted butter together until smooth and well combined.
Gradually add powdered sugar, beating until fully incorporated into a thick mixture.
Stir in vanilla extract. If the mixture appears too stiff, add milk one tablespoon at a time until it reaches a smooth, easily spreadable consistency.
- Layer and Chill for Stability:
Retrieve the chilled base from the refrigerator.
Evenly spread the peanut butter mixture over the chocolate cookie base, smoothing the top with an offset spatula or the back of a spoon.
Return the pan to the refrigerator for at least 30 minutes to an hour; this crucial chilling step allows the peanut butter layer to firm up, ensuring stable, distinct layers.
- Prepare the Decadent Chocolate Topping:
In a microwave-safe bowl, combine semi-sweet chocolate chips and coconut oil (or unsalted butter).
Microwave in short 30-second intervals, stirring thoroughly after each, until the mixture is completely smooth and melted. Be careful not to overheat the chocolate, as this can make it seize or become grainy.
- Top and Chill Again: The First Slice Secret (Part 1)
Pour the warm, melted chocolate mixture evenly over the chilled peanut butter layer, gently spreading it to cover the entire surface.
Return the pan to the refrigerator for a minimum of 2 hours, or preferably overnight, until the chocolate topping is completely firm and set.
Thorough chilling at this stage is absolutely the most important factor for achieving clean, crisp cuts later, so do not rush this step.
- The Guaranteed Clean Slices Method (Part 2):
When ready to cut, remove the pan from the refrigerator. Allow it to sit at room temperature for just 5-10 minutes if it’s extremely cold; this slight warming prevents the chocolate from cracking excessively on the initial cut, but do not let it soften.
Using the parchment paper overhangs, carefully lift the entire chilled block of bars out of the pan and place it onto a sturdy cutting board.
To achieve those perfect, clean slices, fill a tall glass with very hot tap water. Dip a sharp, thin-bladed knife into the hot water for about 10-15 seconds, then wipe it completely dry with a paper towel. Make your first cut firmly and straight down.
Re-dip the knife into the hot water and wipe it completely dry before every single subsequent cut. This ensures a warm, clean blade that glides effortlessly through all the layers without dragging, cracking, or smearing.
Cut into your desired square or rectangular sizes, admiring your flawless results!
Elevate Your Crunch Bar Game: Expert Tips & Tricks
These professional insights will help you master your Chocolate Peanut Butter Crunch Bars, ensuring every batch is exceptional.
Mastering the Chill: Why Cold is Your Best Friend
Don’t Rush the Chill: The chilling steps are not optional; they are paramount for setting the layers and achieving the clean, distinct lines of these bars. Longer chilling (especially overnight for the final set) yields superior results, allowing all components to firm up completely.
The Hot Knife Technique: Flawless Slices Demystified
Consistency is Key: Always re-warm and thoroughly wipe your knife clean between every single cut. Even a tiny amount of residue or a cooling blade will compromise the neatness of your next slice, causing dragging or cracking. This small step makes a huge difference.
Achieving Smooth, Even Layers
Press Firmly on the Base: A well-compacted base prevents crumbling. Use a flat-bottomed glass or the back of a spoon to press it down very tightly and evenly across the pan.
Spread with Care: Use an offset spatula or the back of a spoon to gently and evenly spread the peanut butter and chocolate layers. A smooth, even surface at each stage contributes to overall perfection and a beautiful final appearance.
Ingredient Quality Matters
Good Quality Chocolate: Using a good quality semi-sweet chocolate will improve the flavor and texture of your topping. Avoid overly waxy chocolate, which can be difficult to slice cleanly and may not melt as smoothly. Brands like Ghirardelli or Guittard are excellent choices.
Creamy Peanut Butter Only: Natural peanut butter that separates can lead to an oily peanut butter layer that doesn’t set properly. Stick to creamy, processed peanut butter for this recipe to ensure a firm, cohesive layer that holds its shape when chilled.
Common Challenges Solved: Troubleshooting Your Crunch Bars
Even with a great recipe, small issues can arise. Here’s how to quickly fix common problems when making your no-bake bars.
My Chocolate Topping Cracked When Slicing!
This usually happens if the chocolate layer is too cold, making it brittle. Try letting the bars sit at room temperature for 5-10 minutes before initiating the hot knife technique. Don’t let them soften too much, just enough to reduce the brittleness.
Alternatively, your knife might not have been hot enough, or you might have skipped re-warming it between cuts. Ensure the blade is consistently warm and perfectly dry for each slice to glide through the chocolate smoothly.
The Peanut Butter Layer Is Too Stiff/Too Soft.
If your peanut butter mixture is too stiff to spread, add milk one tablespoon at a time, mixing well after each addition, until it reaches a smooth, spreadable consistency. Conversely, if it’s too soft, you might need to add a touch more powdered sugar to firm it up slightly, though chilling usually resolves minor softness.
Ensure your butter is truly softened, not melted, for the correct consistency when blending with the peanut butter and sugar; melted butter will make the mixture too loose.
My Base Isn’t Holding Together.
A crumbly base often indicates it wasn’t pressed firmly enough into the pan, or there wasn’t enough melted butter to bind the crumbs. Ensure you compact it tightly using a flat-bottomed glass or the back of a spoon to create a dense, stable foundation.
You can also add another tablespoon of melted butter to the crumb mixture if it feels too dry and doesn’t hold together when squeezed before pressing it into the pan.
Keeping Them Fresh: Storage, Make-Ahead, and Serving Ideas
Learn how to store your Chocolate Peanut Butter Crunch Bars to maintain their perfect texture and flavor, plus tips for making them in advance and creative serving suggestions.
Storing Your Chocolate Peanut Butter Crunch Bars
Store these bars in an airtight container at room temperature for up to 3-4 days for optimal freshness, especially for the crispiest chocolate topping. For longer storage, keep them refrigerated for up to a week.
If refrigerated, allow them to sit at room temperature for 10-15 minutes before serving for the best texture and flavor, as the peanut butter layer will soften slightly.
Can I Make These Ahead?
Absolutely! These Chocolate Peanut Butter Crunch Bars are an excellent make-ahead dessert. They actually benefit from an overnight chill, ensuring all layers are perfectly set and easy to slice.
You can prepare the entire batch up to 2-3 days in advance and store them in the refrigerator, uncut, until ready to slice and serve for an event or gathering.
Creative Serving Suggestions
Serve these bars as a delightful treat on their own, perhaps with a tall glass of cold milk for a classic combination.
They also make a fantastic addition to dessert platters for parties or as a sweet ending to any meal, impressing guests with their neat layers.
More Sweet Treats to Consider
If you enjoyed these chocolate peanut butter bars, here are more chocolatey delights with complementary textures.
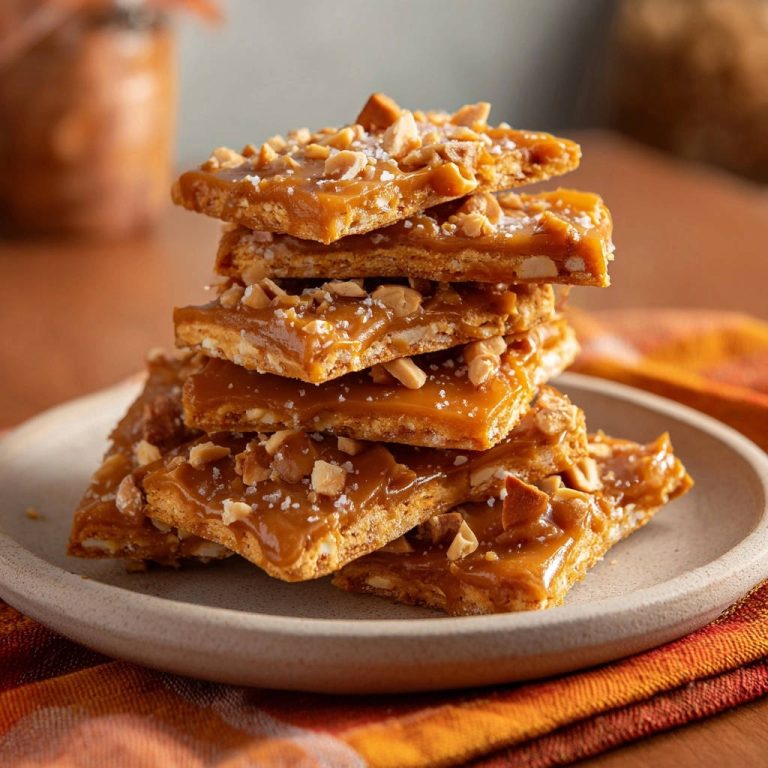
- For a different kind of crunch and chew, try these No-Bake Caramel Nut Clusters, which are simple to make and always turn out right.
- If you’re in the mood for something light and fruity with chocolate, these Chocolate Banana Crepe Roll-Ups offer a fun twist.
For an extra indulgent experience, a small scoop of vanilla ice cream or a drizzle of caramel sauce pairs wonderfully with a bar, creating a mini sundae effect.
Your Top Questions Answered: Chocolate Peanut Butter Crunch Bar FAQ
Here are answers to some frequently asked questions about making these popular peanut butter crunch bars.
Can I Use Different Kinds of Cookies for the Base?
Yes! While chocolate cookies (like wafers or Oreos) provide a classic flavor, you can certainly experiment. Graham crackers, digestive biscuits, or even vanilla wafers would work well, though the overall flavor profile will change slightly, offering new variations to explore.
Is Coconut Oil Necessary for the Topping?
Coconut oil is highly recommended as it helps create a smooth, glossy chocolate topping that sets beautifully and is easier to slice without cracking. If you don’t have it, unsalted butter is the next best alternative, but it might not yield quite the same crispness or sheen.
Can I Make These Gluten-Free or Vegan?
To make these bars gluten-free, simply substitute the chocolate cookie crumbs with your favorite gluten-free chocolate cookies or gluten-free graham crackers. Ensure all other ingredients, such as chocolate chips, are naturally gluten-free.
For a vegan version, you would need to use vegan chocolate cookies, a plant-based butter substitute for both layers, and vegan chocolate chips. Ensure your powdered sugar is also vegan, as some brands are processed with bone char.
What Kind of Peanut Butter is Best?
For this recipe, creamy, processed peanut butter (like Jif or Skippy) works best. Its stable consistency is crucial for the peanut butter layer to set properly and hold its shape, contributing to clean slices. Natural peanut butter, which tends to separate, can result in an oily or inconsistently textured layer that is less stable.
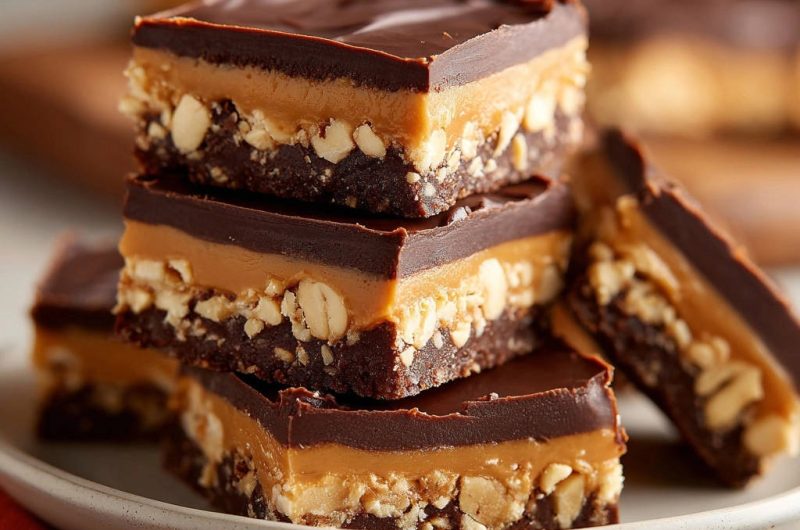
Ready to Indulge? Share Your Chocolate Peanut Butter Crunch Bars Masterpiece!
With this recipe, you’re not just making Chocolate Peanut Butter Crunch Bars; you’re crafting a dessert that promises both irresistible flavor and visual perfection. Say goodbye to crumbly bases and cracked toppings, and hello to flawlessly neat, delicious squares every single time.
If you’re seeking more ways to enjoy this chocolate and peanut butter combination, consider these decadent chocolate peanut butter swirl cups for their wonderfully firm texture.
We encourage you to try this recipe and experience the satisfaction of slicing into your own beautifully layered masterpiece. Don’t forget to share your creations and tag us on social media-we can’t wait to see your perfect crunch bars!
Chocolate Peanut Butter Crunch Bars
Course: DessertCuisine: American CuisineDifficulty: easy4
12-16 bars30
minutes180
minutesAmerican Cuisine
Ingredients
For the Base:
1 and 1/2 cups crushed chocolate cookie crumbs (like chocolate wafers or thin Oreos)
1/2 cup finely chopped roasted peanuts
1/4 cup unsalted butter, melted
For the Peanut Butter Layer:
1 cup creamy peanut butter
1/2 cup unsalted butter, softened
2 cups powdered sugar
1/4 teaspoon vanilla extract
1 to 2 tablespoons milk (optional, for consistency)
For the Chocolate Topping:
1 and 1/2 cups semi-sweet chocolate chips
2 tablespoons coconut oil or unsalted butter
Directions
- Prepare Your Pan: Line an 8×8 inch baking pan with parchment paper, leaving an overhang on two sides. This creates “handles” to easily lift the bars out later, aiding in cleaner slicing and removal.
- Make the Base: In a medium bowl, combine the crushed chocolate cookie crumbs, chopped peanuts, and melted butter. Mix until well combined and crumbly. Press this mixture firmly and evenly into the bottom of the prepared pan. Use the back of a spoon or a flat-bottomed glass to compact it tightly. Place the pan in the refrigerator while you prepare the next layer.
- Craft the Peanut Butter Layer: In a large bowl, using an electric mixer, beat the softened peanut butter and butter together until smooth. Gradually add the powdered sugar, beating until fully incorporated. Stir in the vanilla extract. If the mixture seems too stiff, add milk one tablespoon at a time until it’s a smooth, spreadable consistency.
- Layer and Chill: Retrieve the pan from the refrigerator. Evenly spread the peanut butter mixture over the chocolate cookie base. Use an offset spatula or the back of a spoon to smooth the top. Return the pan to the refrigerator for at least 30 minutes to an hour, allowing this layer to firm up. This chilling step is crucial for stable layers.
- Prepare the Chocolate Topping: In a microwave-safe bowl, combine the chocolate chips and coconut oil (or butter). Microwave in 30-second intervals, stirring well after each, until the mixture is completely smooth and melted. Be careful not to overheat.
- Top and Chill Again (The Slice Secret Part 1): Pour the melted chocolate mixture over the chilled peanut butter layer. Gently spread it evenly to cover the entire surface. Return the pan to the refrigerator for a minimum of 2 hours, or preferably overnight, until the chocolate topping is completely firm and set. Thorough chilling is the most important step for clean cuts.
- The Guaranteed Clean Slices Method (The Slice Secret Part 2): When ready to cut, remove the pan from the refrigerator. Let it sit at room temperature for just 5-10 minutes if it’s super cold, to prevent the chocolate from cracking too much on the initial cut, but don’t let it soften. Using the parchment paper overhangs, lift the entire block of bars out of the pan and place it on a cutting board. To get those perfect, clean slices, fill a tall glass with very hot water. Dip a sharp, thin-bladed knife into the hot water for about 10-15 seconds, then wipe it completely dry with a paper towel. Make your first cut firmly and straight down. Re-dip and re-wipe the knife before every single cut. This ensures the warm, clean blade glides through all the layers without dragging, cracking, or smearing. Cut into desired square or rectangular sizes.
Notes
- Thorough chilling is crucial for stable layers and achieving truly clean slices. The hot knife technique is key for perfect cuts.