Creamy Dream Cheesecake Bars: The No-Crack Secret!
For years, the dream of a perfectly smooth, unblemished cheesecake felt just out of reach, often marred by that dreaded crack right down the middle. My journey to flawless dessert perfection led me to refine this recipe for Creamy Dream Cheesecake Bars, which consistently delivers bakery-quality results with a silky-smooth top every single time.
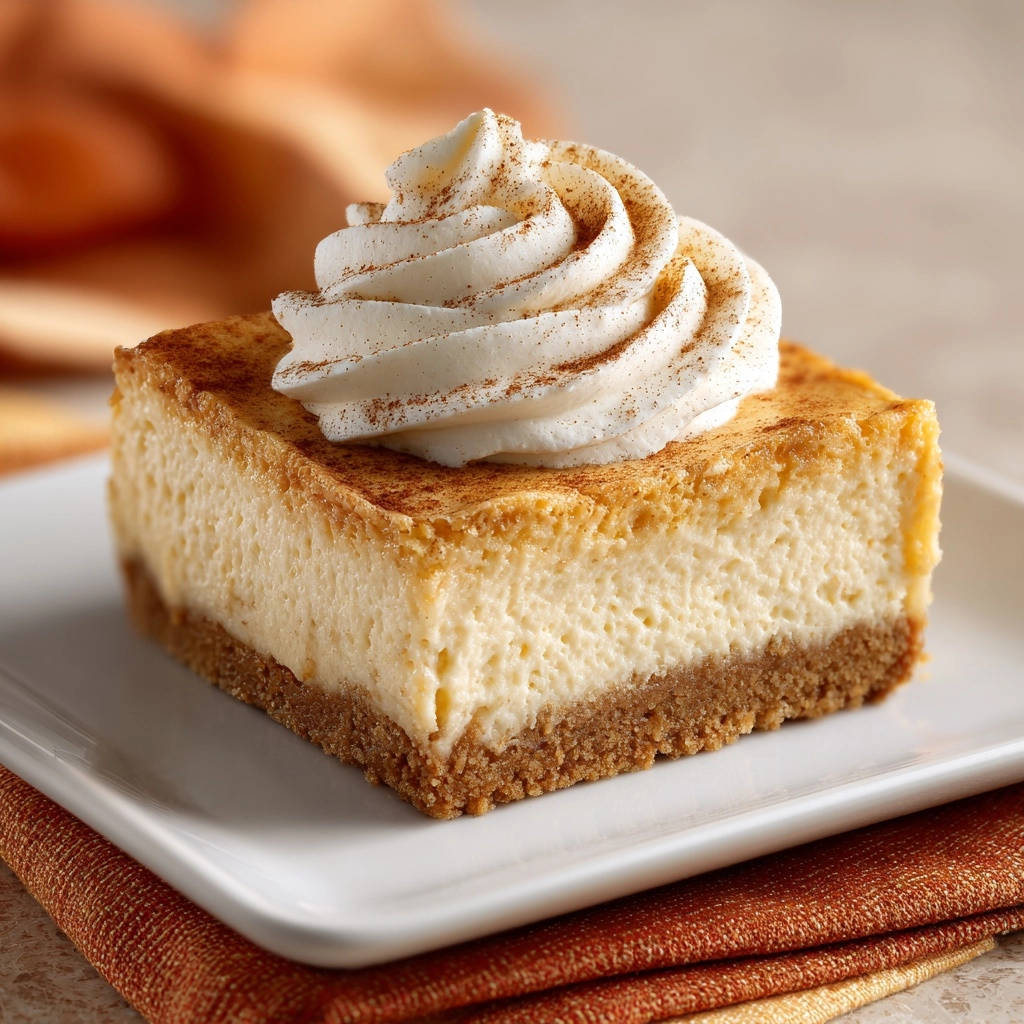
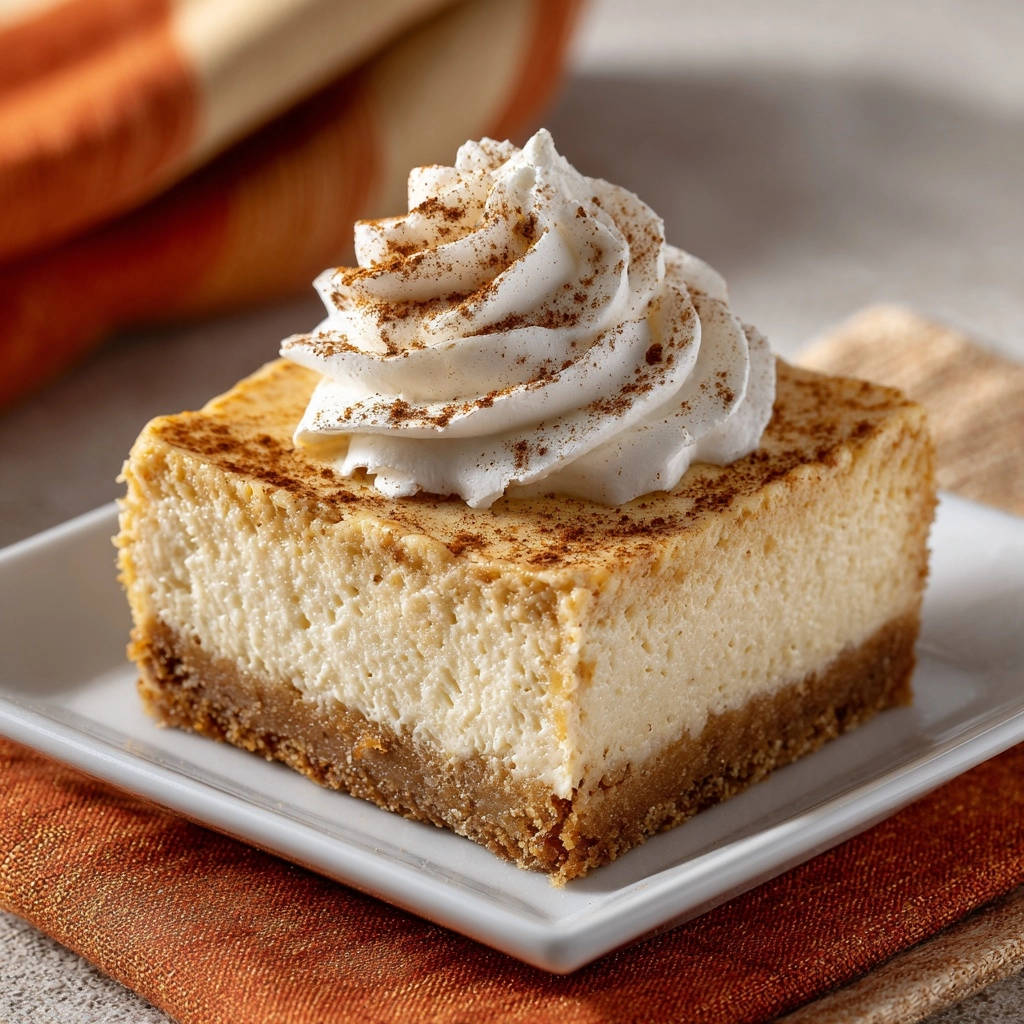
These bars aren’t just delicious; they are a testament to simple techniques that promise an impressive, crack-free outcome. Get ready to master the art of cheesecake with confidence and impress everyone with these truly foolproof treats, crowned with fluffy whipped cream and a hint of cinnamon.
Why These Creamy Dream Cheesecake Bars Are Your New Favorite
The “No More Cracks” Promise
This recipe for Creamy Dream Cheesecake Bars is meticulously designed to eliminate the common frustration of cheesecake cracking. By focusing on precise ingredient temperatures, gentle mixing, and a revolutionary cooling method, we ensure a pristine surface every time.
Get Our Best Recipes Weekly!
Join thousands of food lovers and get delicious recipes delivered to your inbox.
For a taste of autumn, explore these delightful pumpkin cheesecake bars.
It’s a foolproof approach that makes achieving bakery-perfect results accessible to every home baker.
Effortless Elegance: Bakery-Quality Results at Home
Despite their sophisticated appearance, these cheesecake bars require surprisingly simple steps to achieve a professional finish. Each stage is carefully explained to guide you towards an impressive dessert that looks and tastes like it came from a gourmet patisserie.
The minimal fuss involved makes them ideal for any occasion, from casual gatherings to elegant dinner parties.
Pure Creamy Bliss in Every Bite
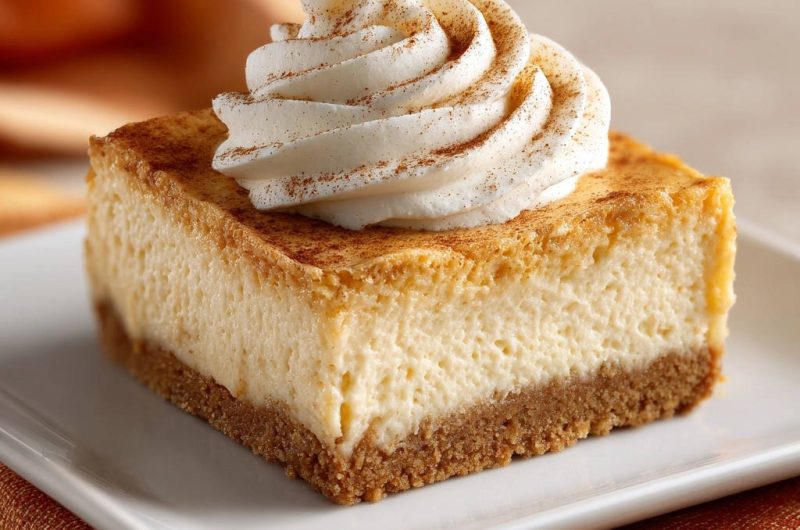
Prepare for an unparalleled sensory experience with these delightful treats. Each bite offers a luscious, rich texture that melts in your mouth, perfectly balanced with a sweet graham cracker crust and a light, airy topping.
These are the ultimate homemade cheesecake bars, providing pure satisfaction and a moment of blissful indulgence.
Assembling Your Ingredients: The Foundation of Flavor
Crust: The Golden, Buttery Base
The foundation of any great cheesecake bar begins with a perfectly balanced crust. Using fine graham cracker crumbs ensures a uniform texture that holds together beautifully.
A touch of granulated sugar adds a subtle sweetness, while melted unsalted butter acts as the crucial binder, infusing richness and crispness into the base.
Cheesecake Filling: The Silky-Smooth Core
The heart of our Creamy Dream Cheesecake Bars lies in the filling, which demands specific attention to detail. Full-fat cream cheese, softened to room temperature, is essential for a smooth, lump-free batter.
Granulated sugar provides sweetness, while large, room temperature eggs contribute to the filling’s structure and creamy texture. Pure vanilla extract elevates the flavor profile, and a tablespoon of all-purpose flour, though optional, acts as a stabilizer to further prevent cracks.
Topping: The Fluffy Cloud Finish
The final touch is a light and airy topping that beautifully complements the rich cheesecake. Heavy whipping cream, when properly chilled and beaten, transforms into a delicate, fluffy cloud.
Powdered sugar adds a subtle sweetness and helps stabilize the whipped cream, while a hint of vanilla extract enhances its flavor. A dusting of ground cinnamon provides a warm, aromatic finish.
Ingredient Spotlight: Why Room Temperature Matters
Achieving a silky-smooth, crack-free cheesecake filling hinges on one critical factor: room temperature ingredients. When cream cheese is softened, it beats to a perfectly smooth consistency without lumps.
Cold cream cheese can clump, leading to an overmixed batter when trying to smooth it out, which incorporates too much air. Similarly, room temperature eggs emulsify seamlessly into the batter.
Using cold eggs can cause the mixture to curdle or become uneven, impacting the final texture and increasing the risk of cracks during baking and cooling. This small detail truly makes a monumental difference.
Essential Tools for Cheesecake Bar Perfection
8×8 Inch Baking Pan: This size ensures your cheesecake bars are perfectly portioned and cook evenly. A light-colored metal pan is recommended for consistent heat distribution.
Parchment Paper: Lining your pan with parchment paper, especially with an overhang, is critical for easily lifting the entire cheesecake out after chilling. This prevents sticking and ensures clean removal.
Electric Mixer (Handheld or Stand): An electric mixer is indispensable for achieving the velvety smooth consistency of the cream cheese filling without overmixing. It ensures proper aeration and uniform blending.
Mixing Bowls: You’ll need various sizes – a medium bowl for the crust and a large bowl for the cheesecake filling. Using separate bowls keeps the process organized and efficient.
Wire Rack: Essential for cooling the baked cheesecake bars completely at room temperature. Air circulation underneath prevents condensation and ensures even cooling.
Wooden Spoon/Oven Mitt: These simple items are vital for propping open your oven door during the crucial slow-cooling phase. This controlled temperature drop is a key element of the no-crack method.
Your Path to Perfectly Set Creamy Dream Cheesecake Bars
Step 1: Preparing Your Pan & Oven
Preheat your oven to 325°F (160°C) to ensure a stable baking temperature from the start. Line an 8×8 inch baking pan with parchment paper, leaving a generous overhang on two sides; this thoughtful detail will act as “handles” to effortlessly lift your set cheesecake from the pan later.
Step 2: Crafting the Crunchy Crust
In a medium bowl, combine the graham cracker crumbs, ¼ cup granulated sugar, and melted unsalted butter. Mix these ingredients thoroughly until the crumbs are uniformly moistened, resembling wet sand.
Press this mixture firmly and evenly into the bottom of the prepared pan, creating a compact base. Bake for 10 minutes to lightly toast and set the crust, then remove and allow it to cool slightly while you prepare the filling.
Step 3: Mastering the Cream Cheese Mix (No Lumps, No Cracks!)
In a large bowl, using an electric mixer on medium-low speed, beat the softened, room temperature cream cheese alone for 2-3 minutes until it’s completely smooth and creamy.
This initial beating is absolutely crucial; it breaks down any lumps before other ingredients are added, preventing the need for overmixing later, which introduces excess air and can lead to cracks.
Step 4: Incorporating Sugar and Flour Gently
Add the ¾ cup granulated sugar to the cream cheese, beating on low speed just until combined, scraping down the sides of the bowl as needed. Incorporate the optional all-purpose flour and vanilla extract next, mixing on low speed only until they disappear into the batter.
The goal here is minimal mixing to avoid incorporating too much air, which expands during baking and contracts during cooling, contributing to those dreaded cracks.
Step 5: The Gentle Egg Integration (Key for Smoothness)
With your mixer still on low speed, add the room temperature eggs one at a time. Beat each egg just until the yolk disappears into the batter before adding the next one.
This gentle, minimal incorporation of the eggs is paramount; overbeating introduces excessive air, which is a primary culprit for cheesecake cracking. Stop mixing as soon as the last egg is fully integrated.
Step 6: Baking to that Perfect Jiggle
Carefully pour the smooth cheesecake batter over your slightly cooled, pre-baked graham cracker crust. Bake for 35-40 minutes, or until the edges appear set and very lightly golden.
The center should still have a slight, delicate jiggle when you gently shake the pan; this is the perfect doneness. It indicates the cheesecake is cooked through but not overbaked, which is another common cause of cracks.
Step 7: The Breakthrough No-Crack Cooling Method
Once baking is complete and you’ve observed the perfect jiggle, turn off the oven completely. Prop the oven door open about an inch or two using a wooden spoon or an oven mitt.
Allow the Creamy Dream Cheesecake Bars to cool slowly within the gradually decreasing heat of the oven for 1 hour. This gradual cooling prevents a rapid temperature shock, which causes the cheesecake to shrink too quickly and form cracks.
Step 8: The Chilling Truth: Patience for Perfection
After the hour of slow oven cooling, remove the cheesecake from the oven and transfer it to a wire rack to cool completely at room temperature. Once entirely cool, cover the pan with plastic wrap and refrigerate for at least 4 hours, or ideally overnight.
This extended chilling time is essential for the cheesecake to fully set, firm up, and allow its flavors to meld beautifully, ensuring a truly decadent texture.
Step 9: Whipping Up the Dreamy Topping
Just before serving, prepare the topping. In a clean, well-chilled bowl (chilling the bowl and beaters helps achieve stiffer peaks), combine the heavy whipping cream, powdered sugar, and ½ teaspoon vanilla extract.
Beat with an electric mixer on high speed until stiff peaks form, indicating a light and airy whipped cream that holds its shape perfectly.
Step 10: Cutting & Garnish for Showstopping Bars
Once the cheesecake is thoroughly chilled and set, use the parchment paper overhang to gently lift the entire cheesecake from the pan onto a cutting board. Slice into your desired bar sizes.
Pipe or dollop a generous swirl of the freshly whipped cream on top of each bar. Finish with a delicate dusting of ground cinnamon for an inviting aroma and elegant presentation before serving these irresistible homemade cheesecake bars.
Expert Tips for Elevating Your Cheesecake Bar Game
Don’t Overmix! (Seriously, It’s Crucial): This golden rule cannot be stressed enough throughout the entire cheesecake process, especially after adding eggs. Overmixing incorporates too much air into the batter.
This excess air expands rapidly during baking, causing the cheesecake to puff up, then contracts just as quickly upon cooling, inevitably leading to cracks. Mix just until combined for a perfectly dense and creamy texture.
Perfecting the Water Bath (Optional but Recommended): For an even more tender crumb and insurance against cracks, consider a water bath. Wrap the bottom of your baking pan securely with heavy-duty foil.
Place the foil-wrapped pan into a larger roasting pan, then fill the roasting pan with hot water about halfway up the sides of the cheesecake pan. This creates a moist, consistent heat environment, preventing the cheesecake from drying out and cracking.
Flavor Variations: Endless Possibilities: These Creamy Dream Cheesecake Bars are a fantastic canvas for creativity. Experiment with an Oreo or Biscoff cookie crust for a different twist.
For more ideas on creamy desserts, check out this Pistachio Dream Cheesecake.
Infuse the filling with lemon zest, espresso powder, or a swirl of caramel. For toppings, consider fresh berries, a tangy fruit compote, or a decadent chocolate ganache for added flair.
Achieving Clean Cuts Every Time: For picture-perfect slices, ensure your cheesecake is thoroughly chilled, preferably overnight. To achieve clean, sharp edges, dip a sharp knife into hot water, wipe it clean, and then make each cut.
Repeat this process for every slice. This method helps the knife glide through the dense, creamy texture without dragging or sticking, creating beautiful, professional-looking cheesecake bars.
Troubleshooting Your Creamy Dream Cheesecake Bars
Why Did My Cheesecake Crack? (And How to Fix It)
Cheesecake cracks often stem from three main culprits: overmixing, overbaking, or sudden temperature changes during cooling. Overmixing introduces too much air, which causes the cheesecake to rise rapidly and then fall dramatically.
Overbaking dries out the edges, making them pull away and crack. To prevent this, ensure your cream cheese and eggs are at room temperature, mix minimally, bake only until the center has a slight jiggle, and always use the slow oven-cooling method.
My Crust is Too Hard/Soft
A crust that’s too hard often means too much butter or over-baking. Reduce the butter slightly next time, or bake the crust for a shorter duration.
If your crust is too soft or crumbly, it might not have enough melted butter to bind it effectively. Ensure you press the mixture firmly into the pan to create a compact, stable base.
The Topping Isn’t Stiffening
If your whipped cream isn’t reaching stiff peaks, the cream might not be cold enough, or your bowl and beaters weren’t chilled. Always use very cold heavy whipping cream (straight from the fridge) and chill your mixing bowl and beaters for at least 15-20 minutes beforehand.
Ensure you are using heavy whipping cream, not light cream or half-and-half, as the fat content is crucial for stable peaks.
Storing and Serving Your Divine Dessert
Best Practices for Freshness
To maintain the optimal freshness and creamy texture of your Creamy Dream Cheesecake Bars, store them in an airtight container in the refrigerator. This protects them from absorbing other odors and prevents drying out.
Proper storage ensures each bar remains as delicious as the day it was made, preserving its delicate flavor and consistency for future enjoyment.
Make-Ahead Masterpiece
These homemade cheesecake bars are an ideal make-ahead dessert, perfect for entertaining or meal prep. You can bake and chill the cheesecake (without the whipped cream topping) up to 2-3 days in advance.
Simply prepare the whipped cream and garnish just before serving, allowing you to enjoy a stress-free experience when hosting.
Creative Serving Suggestions
While whipped cream and cinnamon are classic, don’t hesitate to get creative with serving your Creamy Dream Cheesecake Bars. Drizzle them with a homemade raspberry sauce or a rich caramel for an extra layer of sweetness.
Garnish with fresh seasonal berries like strawberries or blueberries, or sprinkle with delicate chocolate shavings or toasted nuts for added texture and visual appeal.
FAQs About Creamy Dream Cheesecake Bars
Can I use low-fat cream cheese?
While you technically can, using low-fat cream cheese will significantly alter the texture and flavor of these Creamy Dream Cheesecake Bars. Full-fat cream cheese is essential for achieving the signature rich, dense, and ultra-creamy consistency.
Low-fat versions contain more water, which can lead to a less stable and often grainier final product.
How long do these bars last?
When stored properly in an airtight container in the refrigerator, these Creamy Dream Cheesecake Bars will stay fresh and delicious for 4-5 days. For best flavor and texture, aim to consume them within the first 2-3 days.
Can I freeze cheesecake bars?
Yes, cheesecake bars freeze exceptionally well! To freeze, ensure they are completely cooled and chilled. Wrap individual bars tightly in plastic wrap, then again in aluminum foil, and place them in a freezer-safe container.
They can be frozen for up to 1-2 months. Thaw overnight in the refrigerator before serving, and add fresh whipped cream and cinnamon.
What’s the best way to serve them?
For the optimal experience, serve your Creamy Dream Cheesecake Bars chilled, straight from the refrigerator. This ensures they are perfectly set with a firm yet creamy texture.
Always add the whipped cream and cinnamon just before serving to maintain the topping’s freshness and visual appeal.
Your Cheesecake Bar Journey Begins Now!
You now possess the secrets to creating truly exceptional Creamy Dream Cheesecake Bars-no more cracks, just pure, unadulterated creamy bliss. This recipe is designed to empower you, transforming any baking apprehension into confident culinary success.
What to Try Next
Since you enjoyed these cheesecake bars, you might like other baked treats or satisfying breakfast dishes.
- For a filling morning meal, consider this Hearty Sausage & Cheese Breakfast Bake, known for its fluffy texture.
- If you’re in the mood for a comforting baked meal, this Cheesy Chicken & Rice Bake offers creamy, satisfying results.
Take the leap and bake these incredible homemade cheesecake bars. I guarantee they will become a cherished favorite in your kitchen. Share your creations, enjoy every decadent bite, and savor the satisfaction of perfect results!
Creamy Dream Cheesecake Bars
Course: DessertCuisine: American CuisineDifficulty: easy16
bars30
minutes50
minutes420
minutesAmerican Cuisine
Ingredients
For the Crust:
1 ½ cups graham cracker crumbs
¼ cup granulated sugar
6 tablespoons unsalted butter, melted
For the Cheesecake Filling:
2 packages (8 ounces each) cream cheese, softened to room temperature
¾ cup granulated sugar
2 large eggs, at room temperature
1 teaspoon vanilla extract
1 tablespoon all-purpose flour (optional, helps prevent cracking)
For the Topping:
1 cup heavy whipping cream
2 tablespoons powdered sugar
½ teaspoon vanilla extract
Ground cinnamon, for dusting
Directions
- Preheat your oven to 325°F (160°C). Line an 8×8 inch baking pan with parchment paper, leaving an overhang on two sides to easily lift the bars later.
- Prepare the crust: In a medium bowl, combine the graham cracker crumbs, ¼ cup granulated sugar, and melted butter. Mix until well combined and the crumbs are moistened. Press the mixture firmly and evenly into the bottom of the prepared pan. Bake for 10 minutes, then remove from oven and let cool slightly while you prepare the filling.
- Prepare the cheesecake filling: In a large bowl, using an electric mixer on medium-low speed, beat the room temperature cream cheese alone until it’s completely smooth and creamy, about 2-3 minutes. This step is key to avoiding lumps and overmixing later.
- Add ¾ cup granulated sugar to the cream cheese and beat on low speed just until combined, scraping down the sides of the bowl as needed. Do not overmix, as incorporating too much air can lead to cracks.
- Add the all-purpose flour (if using) and vanilla extract, mixing on low speed just until incorporated.
- Add the room temperature eggs one at a time, beating on low speed just until the yolk disappears after each addition. Avoid overmixing the eggs; stop as soon as they are no longer visible in the batter. Overbeating the eggs introduces air that expands during baking and contracts during cooling, causing cracks.
- Pour the smooth cheesecake batter over the pre-baked crust in the pan.
- Bake for 35-40 minutes, or until the edges are set and lightly golden, but the center still has a slight jiggle when gently shaken. This slight jiggle is perfect; it means it’s cooked but not overcooked, which can also cause cracks.
- The no-crack cooling trick: Once baking is complete, turn off the oven. Prop the oven door open about an inch or two using a wooden spoon or oven mitt. Allow the cheesecake to cool slowly in the oven for 1 hour. This gradual temperature change prevents the cheesecake from shrinking too rapidly and developing cracks.
- After 1 hour, remove the cheesecake from the oven and transfer it to a wire rack to cool completely at room temperature. Once cool, cover and refrigerate for at least 4 hours, or preferably overnight, to allow it to fully set.
- Prepare the topping: In a clean, chilled bowl, beat the heavy whipping cream, powdered sugar, and ½ teaspoon vanilla extract with an electric mixer on high speed until stiff peaks form.
- Once the cheesecake is chilled and set, use the parchment paper overhang to lift it from the pan. Cut into desired bar sizes. Pipe or dollop a generous swirl of whipped cream on top of each bar and dust with ground cinnamon before serving.
Notes
- Ensure all dairy ingredients are at room temperature for a smooth, lump-free batter.