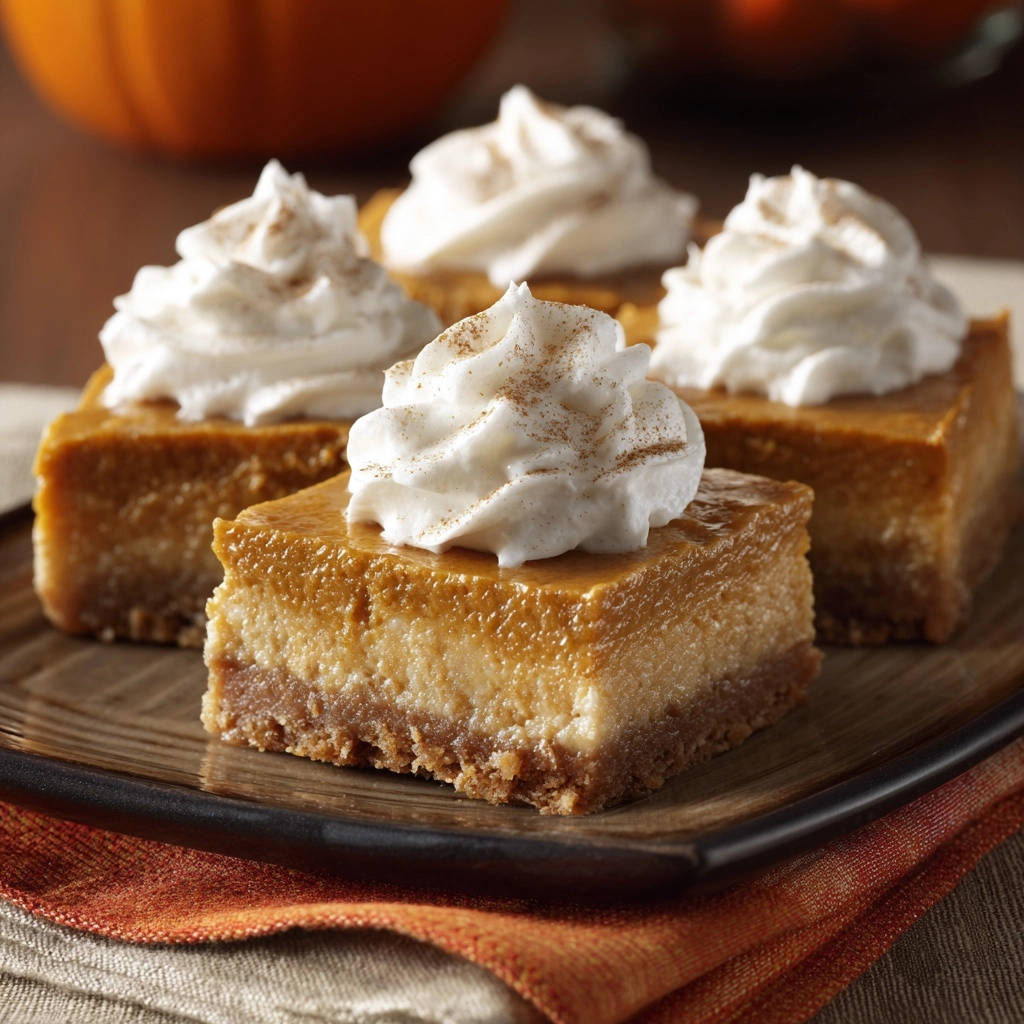
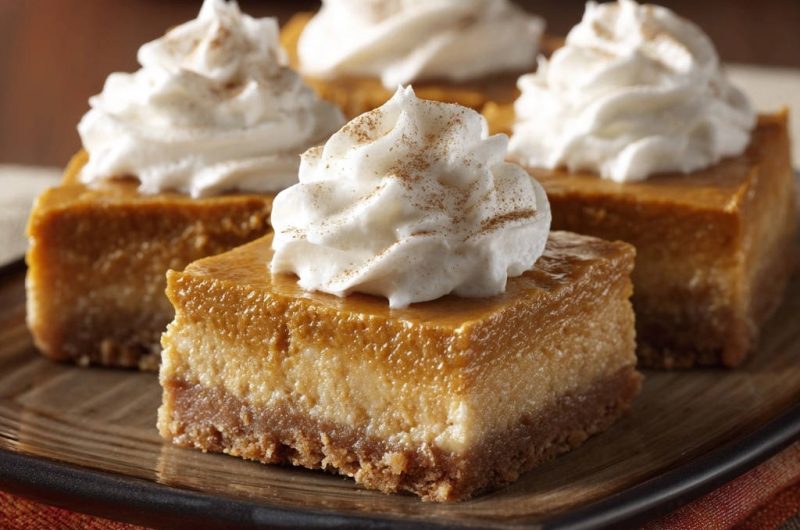
Pumpkin Cheesecake Bars: No-Soggy-Bottom Perfection!
Nothing quite dims the anticipation of a luscious fall treat like biting into a soggy crust. I’ve spent years perfecting the ultimate Pumpkin Cheesecake Bars recipe, one that finally conquers that common culinary frustration.
My unique pre-baking technique guarantees a perfectly crisp, golden foundation every single time, harmonizing beautifully with the velvety pumpkin cheesecake layer for true seasonal delight.
Finally, Pumpkin Cheesecake Bars with a Perfectly Crisp Crust!
The “No Soggy Bottom” Guarantee
A soggy crust is the nemesis of any bar recipe, often turning a promising dessert into a textural disappointment. This recipe’s innovative pre-baking step creates an impermeable barrier, locking out moisture from the creamy filling.
Get Our Best Recipes Weekly!
Join thousands of food lovers and get delicious recipes delivered to your inbox.
This foundational technique ensures your Pumpkin Cheesecake Bars consistently boast a delightfully crisp and sturdy graham cracker base, offering a reliable solution you can trust every time.
A Symphony of Fall Flavors in Every Bite
Beyond the texture, these bars deliver an exquisite blend of autumn’s finest flavors. Creamy pumpkin puree meets a warm embrace of cinnamon, nutmeg, and ginger, creating a quintessential taste of the season.
Each bite offers a balanced harmony, where the rich, spiced pumpkin cheesecake layer is perfectly complemented by the buttery crunch of the crust.

Effortless Elegance for Any Occasion
Despite their sophisticated appearance, these Pumpkin Cheesecake Bars are surprisingly simple to prepare, making them accessible for bakers of all skill levels. The clear instructions guide you to a stunning finish.
Their elegant presentation, whether for a holiday gathering or a cozy evening, makes them a versatile and impressive dessert that requires minimal fuss.
Gather Your Essentials: Ingredients for Stellar Pumpkin Cheesecake Bars
For that Golden, Crisp Crust
The foundation of your Pumpkin Cheesecake Bars relies on a perfectly crunchy, buttery crust. Graham cracker crumbs provide classic flavor, while melted butter binds it all together.
- 1 1/2 cups graham cracker crumbs
- 1/4 cup granulated sugar
- 1/2 cup unsalted butter, melted
The Velvety Pumpkin Cheesecake Layer
This is where the magic happens! Softened cream cheese ensures a smooth texture, while pure pumpkin puree and a blend of warm spices deliver the quintessential fall flavor. Ensure you’re using plain pumpkin puree, not pie filling.
- 1 (8 ounce) package cream cheese, softened
- 1/2 cup granulated sugar
- 1 teaspoon vanilla extract
- 1 large egg
- 1 cup pumpkin puree (not pie filling)
- 1/2 teaspoon ground cinnamon
- 1/4 teaspoon ground nutmeg
- Pinch of ground ginger (optional but good for pumpkin spice)
Optional Topping for a Festive Finish
A simple yet elegant topping elevates your Pumpkin Cheesecake Bars, adding another layer of flavor and visual appeal. Whipped cream and a dusting of spice are classic choices.
- Whipped cream
- A dusting of ground cinnamon or pumpkin pie spice
Baking Brilliance: Your Step-by-Step Guide to Pumpkin Cheesecake Bars
-
Preheat and Pan Prep for Success
Preheat your oven to 350F (175C).
Line an 8×8 inch baking pan with parchment paper, ensuring an overhang on two sides. This overhang is your secret weapon for easy lifting and clean removal later, preventing sticking and making slicing a breeze.
-
The “No Soggy Bottom” Crust: Press and Pre-Bake
In a medium bowl, combine the graham cracker crumbs, 1/4 cup granulated sugar, and melted butter. Mix until the crumbs are well moistened and evenly coated, resembling wet sand.
Press this mixture firmly and evenly into the bottom of your prepared pan. A truly firm press is paramount for a sturdy base that won’t crumble. Use the bottom of a glass or your knuckles for best results.
Bake the crust for 8 to 10 minutes until it’s lightly golden and wonderfully fragrant. Remove from oven and let it cool slightly while you prepare the filling. This crucial pre-baking step creates a robust barrier, toasting the crumbs and preventing them from absorbing moisture from the cheesecake layer – goodbye, soggy bottoms!
For a truly flawless finish on your pumpkin creations, discover how to achieve perfect pumpkin cheesecake bars every time.
-
Whip Up the Creamy Cheesecake Base
In a large bowl, using an electric mixer, beat the softened cream cheese and 1/2 cup granulated sugar until the mixture is smooth and delightfully creamy, with absolutely no lumps. Scrape down the sides of the bowl often.
For similar smooth results, consider our Pistachio Dream Cheesecake.
Beat in the vanilla extract, then carefully add the egg, mixing just until combined. Avoid overmixing after the egg is added, as this can introduce too much air, which may lead to cracks in your finished cheesecake.
-
Infuse with Pumpkin and Fall Spices
Gently fold in the pumpkin puree, ground cinnamon, ground nutmeg, and the optional pinch of ground ginger into the cream cheese mixture.
Mix only until just combined and uniformly colored. Overmixing here can also affect the final texture and density of your pumpkin cheesecake layer.
-
Assemble Your Layers with Care
Carefully pour the rich pumpkin cheesecake filling over the slightly cooled, pre-baked crust in your pan.
Spread the filling evenly with a spatula to ensure consistent thickness across the bars, promoting even baking.
-
Bake to Creamy Perfection
Bake for 30 to 35 minutes. You’ll know it’s ready when the edges are set and the center is almost set but still has a slight, delicate jiggle. This subtle jiggle indicates a perfectly creamy texture once cooled; it will firm up further during chilling.
-
Cool Completely for Clean Slices
Remove the pan from the oven and let it cool completely on a wire rack for at least 1 hour at room temperature. This gradual cooling prevents cracking.
Then, transfer the pan to the refrigerator and chill for a minimum of 2 to 3 hours, or ideally, overnight. This extended chilling time is absolutely crucial for the bars to fully set, ensuring clean, beautiful, and distinct slices.
-
Slice, Top, and Serve Your Fall Delights
Once thoroughly chilled, use the parchment paper overhang to gently lift the entire slab of bars out of the pan and onto a cutting board.
Cut into uniform squares using a sharp, clean knife. For the neatest slices, wipe the knife clean with a warm, damp cloth between each cut.
Just before serving, dollop each bar with a generous swirl of whipped cream and a delicate dusting of ground cinnamon or pumpkin pie spice for an elegant and delicious finish.
Beyond the Bars
If you enjoyed these pumpkin cheesecake bars, you might like other baked goods or breakfast ideas.
- For a warm, spiced treat, consider making these Pumpkin Walnut Rolls, known for their soft texture.
- If you’re looking for a hearty start to your day, try this Sausage & Cheese Breakfast Bake, which promises a fluffy outcome.
Elevate Your Bake: Expert Tips for Flawless Pumpkin Cheesecake Bars
Precision for the Perfect Crust
Don’t Skimp on the Press: Really lean into pressing those graham cracker crumbs. A dense, compact crust is your best defense against sogginess and provides a sturdy base for the rich filling. Use a flat-bottomed measuring cup or glass.
Cooling is Key: Allow your pre-baked crust to cool slightly before adding the filling. This prevents the filling from melting into the warm crust, ensuring distinct, beautiful layers and a better set.
Cheesecake Filling Finesse
Room Temperature Cream Cheese & Egg: Ensure your cream cheese and egg are at room temperature. This is crucial for a smooth, lump-free batter that incorporates air evenly, leading to a wonderfully creamy texture without overmixing.
Avoid Overmixing the Egg: Once the egg is added, mix just until it’s incorporated. Overmixing can introduce too much air, which can cause the cheesecake to puff up excessively, then crack during baking or cooling.
Pumpkin Puree, Not Pie Filling: Always use pure pumpkin puree for this recipe. Pumpkin pie filling contains added sugars and spices that will throw off the carefully balanced flavor profile of these bars.
Cooling and Chilling for Success
Patience in Cooling: Resist the urge to cut into the bars early. Cooling on the wire rack and then thoroughly chilling in the refrigerator is absolutely vital for the bars to set properly, resulting in firm, clean, and beautiful slices.
Creative Topping Ideas
Beyond Whipped Cream: While classic, consider a drizzle of warm caramel sauce, a sprinkle of crunchy toasted pecans or walnuts, or even a dollop of homemade cream cheese frosting for an extra special touch to your Pumpkin Cheesecake Bars.
Troubleshooting Your Pumpkin Cheesecake Bars: Solutions for Common Woes
My Crust is Still Soggy!
This is likely due to insufficient pressing or under-baking. Ensure you pressed the graham cracker mixture very firmly into the pan, creating a dense layer. Also, confirm you pre-baked the crust for the full 8-10 minutes until it was visibly golden and fragrant. An under-baked or loosely packed crust won’t create the necessary moisture barrier.
The Cheesecake Layer Cracked During Baking/Cooling.
Cracking often happens from overmixing the batter (especially after adding the egg), which incorporates too much air. Another common culprit is baking at too high a temperature or cooling too rapidly. Ensure your oven temperature is accurate and let the bars cool gradually on a wire rack before transferring to the refrigerator.
My Bars Are Crumbly and Hard to Cut.
Insufficient chilling is almost always the cause here. These bars need ample time (2-3 hours minimum, preferably overnight) in the refrigerator to fully set and firm up. Trying to slice them too soon will result in a messy, crumbly outcome with ill-defined layers.
The Flavor is Lacking or Off.
Ensure you’re using fresh, quality spices (cinnamon, nutmeg, ginger). Older spices lose their potency quickly. Also, double-check that you’re using pure pumpkin puree, not pumpkin pie filling, which often has less intense pumpkin flavor and pre-mixed, sometimes bland, spices.
Your Pumpkin Cheesecake Bars Questions Answered
Can I use a different size baking pan for this recipe?
Yes, you can. For a 9×13 inch pan, you would likely need to increase the ingredient quantities by about 1.5 times to achieve a similar thickness for both the crust and filling layers. Adjust baking time accordingly, as thinner layers will bake faster. Always watch for the visual cues of doneness.
How far in advance can I make these Pumpkin Cheesecake Bars?
These bars are fantastic for make-ahead! You can prepare them completely (up to the chilling step) 2-3 days in advance. Store them, unsliced, in an airtight container in the refrigerator. Slice and top just before serving for the freshest presentation.
Can I freeze Pumpkin Cheesecake Bars?
Absolutely! Once completely cooled and thoroughly chilled, you can freeze unsliced bars (without the whipped cream topping) for up to 1 month. Wrap them tightly first in plastic wrap, then in a layer of aluminum foil to prevent freezer burn. Thaw overnight in the refrigerator before slicing and serving.
What if I don’t have graham crackers for the crust?
You can substitute other crisp cookies for the crust, such as digestive biscuits, shortbread cookies, or even vanilla wafers. Aim for about 1 1/2 cups of finely crushed crumbs. You may need to slightly adjust the amount of sugar or butter depending on the sweetness and fat content of your chosen cookie.
Can I make these Pumpkin Cheesecake Bars gluten-free?
Yes! This recipe is easily adaptable to be gluten-free. Simply use gluten-free graham cracker crumbs for the crust. The filling ingredients are naturally gluten-free. Always ensure all other ingredients you use are certified gluten-free if cross-contamination is a concern.
Serving, Storing, & Making Ahead: Maximize Your Pumpkin Cheesecake Bar Enjoyment
The Perfect Presentation
While whipped cream and a dusting of cinnamon are classic, consider garnishing your Pumpkin Cheesecake Bars with candied pecans, a delicate drizzle of salted caramel sauce, or even a tiny pumpkin-shaped shortbread cookie for an extra festive and charming touch.
Storing Leftovers for Lasting Freshness
Store any leftover Pumpkin Cheesecake Bars in an airtight container in the refrigerator for up to 3-4 days. For optimal freshness and texture, it’s best to add whipped cream topping just before serving each individual bar, as it can deflate over time in the fridge.
Make-Ahead Marvel: Prep for Easy Entertaining
These bars are an excellent make-ahead dessert, perfect for holiday gatherings or dinner parties. Prepare them completely (up to the chilling step) 1-2 days in advance. Keep them whole and chilled in the pan, covered tightly, until you’re ready to slice and serve. This allows you to focus on other tasks when entertaining.
Ready to Bake? Share Your Pumpkin Cheesecake Bars Masterpiece!
With this recipe and its foolproof “no soggy bottom” secret, you’re more than ready to create Pumpkin Cheesecake Bars that will impress everyone this fall. They’re creamy, perfectly spiced, wonderfully textured, and truly embody the comforting spirit of the season in every delightful square.
Don’t just take our word for it – whip up a batch today and experience the unparalleled joy of perfectly crisp crusts and velvety pumpkin filling. We’d absolutely love to see your creations! Share your beautiful baking masterpieces and tag us on social media.
Pumpkin Cheesecake Bars
Course: DessertCuisine: American CuisineDifficulty: easy4
12-16 bars25
minutes45
minutes240
minutesAmerican Cuisine
Ingredients
For the Crust:
1 1/2 cups graham cracker crumbs
1/4 cup granulated sugar
1/2 cup unsalted butter, melted
For the Pumpkin Cheesecake Layer:
1 (8 ounce) package cream cheese, softened
1/2 cup granulated sugar
1 teaspoon vanilla extract
1 large egg
1 cup pumpkin puree (not pie filling)
1/2 teaspoon ground cinnamon
1/4 teaspoon ground nutmeg
Pinch of ground ginger (optional but good for pumpkin spice)
For Topping:
Whipped cream
A dusting of ground cinnamon or pumpkin pie spice
Directions
- Preheat and Prep: Preheat your oven to 350F (175C). Line an 8×8 inch baking pan with parchment paper, leaving an overhang on two sides to easily lift the bars out later. This also helps with sticking.
- The NO SOGGY BOTTOM Crust Secret: In a medium bowl, combine the graham cracker crumbs, 1/4 cup granulated sugar, and melted butter. Mix until well combined and the crumbs are moistened. Press this mixture firmly and evenly into the bottom of your prepared pan. This firm press is KEY. Bake the crust for 8 to 10 minutes until lightly golden and fragrant. Remove from oven and let cool slightly while you prepare the filling. This pre-baking step creates a barrier and toasts the crust, preventing it from absorbing moisture from the filling later!
- Whip the Cheesecake Base: In a large bowl, using an electric mixer, beat the softened cream cheese and 1/2 cup granulated sugar until smooth and creamy. Beat in the vanilla extract, then the egg until just combined. Do not overmix after adding the egg.
- Add Pumpkin and Spices: Gently fold in the pumpkin puree, cinnamon, nutmeg, and ginger (if using) into the cream cheese mixture until just combined.
- Assemble and Bake: Pour the pumpkin cheesecake filling over the slightly cooled, pre-baked crust. Spread evenly.
- Bake to Perfection: Bake for 30 to 35 minutes, or until the center is almost set but still slightly jiggly. A slight jiggle is good; it means it will be perfectly creamy when cooled.
- Cool Completely: Remove from oven and let cool on a wire rack for at least 1 hour, then refrigerate for at least 2 to 3 hours (or overnight) to allow the bars to fully set. This is crucial for clean slices.
- Slice and Serve: Once thoroughly chilled, use the parchment paper overhang to lift the entire slab out of the pan. Cut into squares. Top each bar with a dollop of whipped cream and a dusting of cinnamon before serving.
Notes
- Cool completely and refrigerate for clean slices.