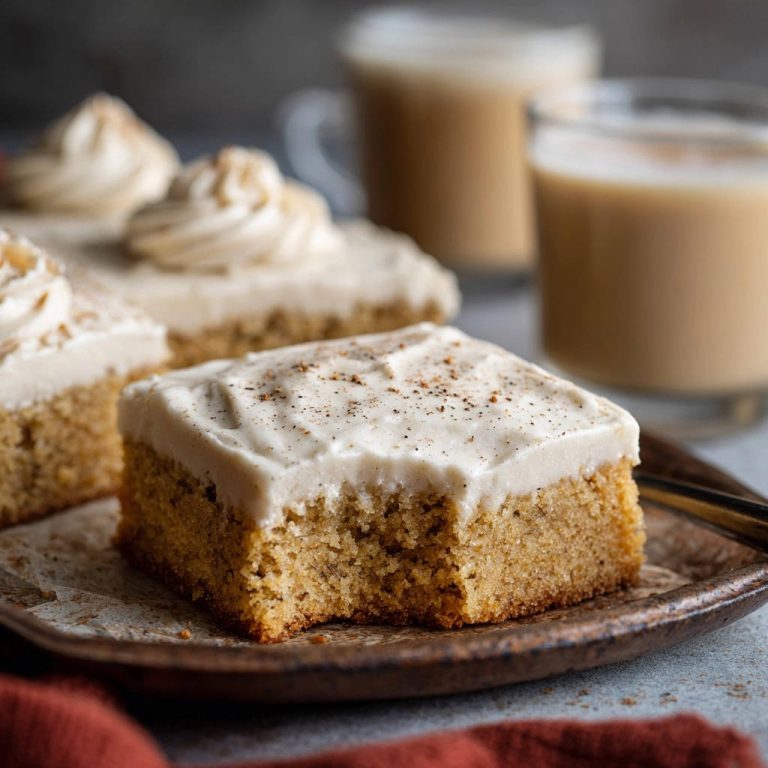
Pumpkin Walnut Rolls: Secret to Super Soft & Fluffy Bites
Why These Pumpkin Walnut Rolls Will Be Your New Fall Favorite
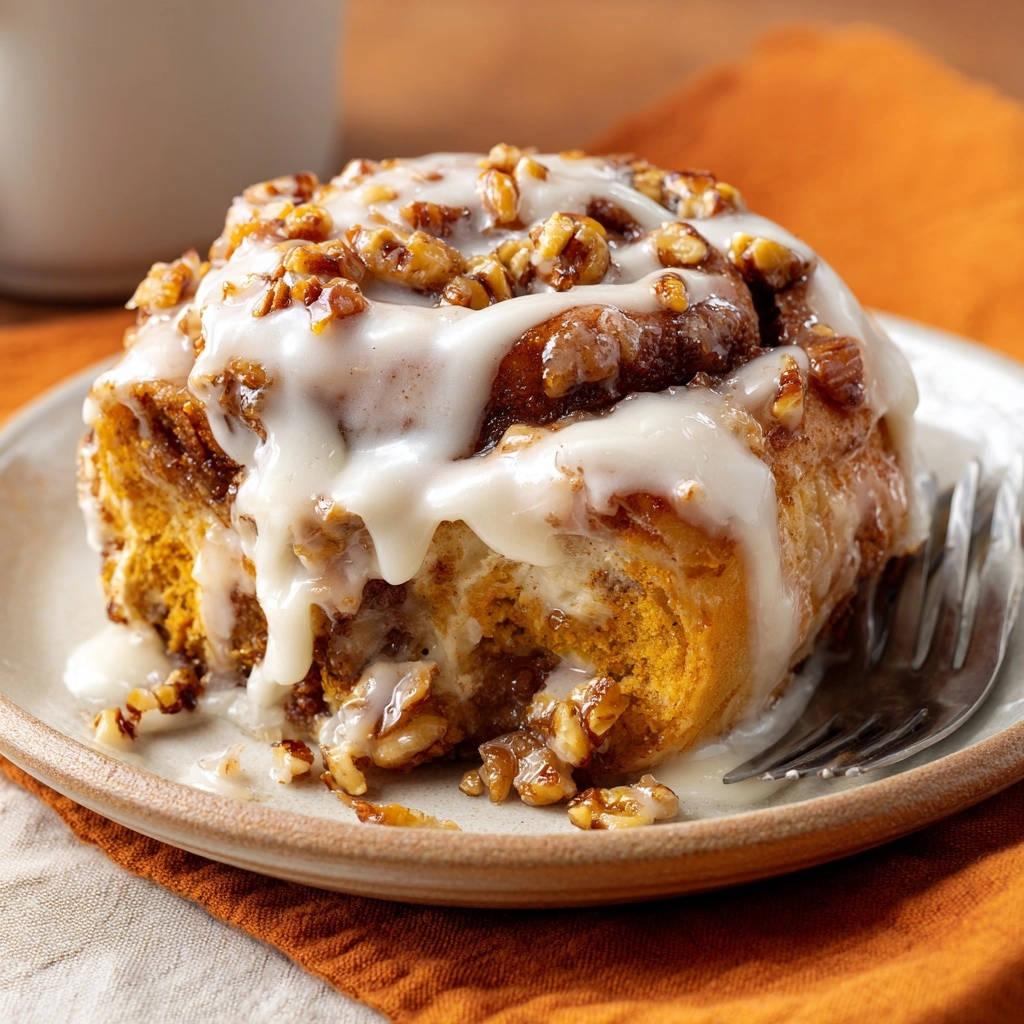
Forget dry, dense rolls; our recipe guarantees an unbelievably soft, melt-in-your-mouth texture thanks to specific, easy-to-follow techniques. The subtle addition of pumpkin puree doesn’t just impart beautiful color, but also adds incredible moisture and a characteristic fall flavor profile. These Pumpkin Walnut Rolls offer a perfect balance of warming spices, tender crumb, and a luscious cream cheese frosting. You’ll achieve impressive, bakery-quality results every single time, making you feel like a true baking expert.Gather Your Essentials: Ingredients for Perfect Pumpkin Walnut Rolls
-
For the Dough:
- 1 cup warm milk (around 105-115F)
- 2 1/4 teaspoons active dry yeast (one packet)
- 1/2 cup granulated sugar, divided
- 1/2 cup pumpkin puree
- 1/2 cup unsalted butter, melted and cooled slightly
- 1 teaspoon salt
- 4 1/2 to 5 cups all-purpose flour
-
For the Filling:
- 1/2 cup unsalted butter, softened
- 1/2 cup packed light brown sugar
- 2 tablespoons ground cinnamon
- 1 cup chopped walnuts
-
For the Cream Cheese Frosting:
- 4 ounces cream cheese, softened
- 1/4 cup unsalted butter, softened
- 2 cups powdered sugar
- 1 teaspoon vanilla extract
- 1 to 2 tablespoons milk
Dough Foundation: Milk, Yeast, and Flour Secrets
Warm milk, precisely between 105-115°F, is essential to gently awaken your active dry yeast without killing it. The yeast then works its magic, producing gases that give the dough its signature airy lift and texture.
All-purpose flour provides the necessary structure, allowing the dough to stretch and capture those gases, which is crucial for fluffy rolls. Gradually adding the flour prevents overworking the dough, ensuring a tender crumb.
Sweetness, Spice, and Autumn Flavor: Pumpkin & Sugars
Pumpkin puree infuses the dough with natural moisture, a beautiful golden hue, and that unmistakable, comforting autumn flavor. It’s a game-changer for soft, flavorful homemade rolls.
Get Our Best Recipes Weekly!
Join thousands of food lovers and get delicious recipes delivered to your inbox.
Granulated sugar feeds the yeast, encouraging vigorous activity for a great rise, and contributes to the overall sweetness of the dough. Packed light brown sugar in the filling adds a deeper, molasses-rich sweetness and helps create a gooey texture.
Richness & Texture: Butter, Salt, and Walnuts
Unsalted butter, both in the dough and filling, lends incredible richness and tenderness to these Pumpkin Walnut Rolls. Its fat content helps create a truly luxurious mouthfeel.
Salt is not just for seasoning; it balances the sweetness and strengthens the gluten structure in the dough, improving its elasticity. Chopped walnuts introduce a delightful textural contrast and nutty flavor, perfectly complementing the pumpkin and spice.
The Irresistible Topping: Cream Cheese Frosting Components
Softened cream cheese and butter form the decadent, tangy base of our signature frosting. This blend ensures a rich, smooth consistency that beautifully melts onto warm rolls.
Powdered sugar provides the essential sweetness and a silky-smooth finish, while vanilla extract enhances all the flavors. A touch of milk adjusts the frosting to your preferred drizzle or spreadable consistency.
Your Journey to Heavenly Pumpkin Walnut Rolls: Step-by-Step Directions
-
Activate the Yeast: The Foamy Start
In a large mixing bowl, combine the warm milk and 1 tablespoon of granulated sugar. Sprinkle the active dry yeast over the top and let it sit undisturbed for 5-10 minutes.
This period is crucial: the yeast should become visibly foamy, indicating it’s alive and ready to make your Pumpkin Walnut Rolls rise beautifully.
-
Combine Wet and Dry: Forming the Shaggy Dough
Add the remaining granulated sugar, pumpkin puree, slightly cooled melted butter, and salt to the activated yeast mixture. Stir everything together until well combined.
Gradually incorporate 4 cups of the all-purpose flour, mixing until a rough, shaggy dough forms. This rustic texture is exactly what you want before kneading.
-
Knead Your Way to Softness: Developing Gluten
Turn the shaggy dough out onto a lightly floured surface and begin kneading for 8-10 minutes. Gradually add more flour, one tablespoon at a time, only if the dough feels excessively sticky.
The goal is to achieve a soft, elastic dough that gently springs back when poked. This thorough kneading develops the gluten, which is vital for that incredibly light, airy structure in your final rolls.
-
The First Rise: Unlocking Pillowy Texture
Lightly grease a large clean bowl. Place your kneaded dough inside, turning it once to ensure it’s coated, then cover the bowl securely with plastic wrap or a clean kitchen towel.
Allow the dough to rise in a warm, draft-free spot for 1 to 1 1/2 hours, or until it has doubled in size. This slow, proper first rise is the secret ingredient for ultimately soft and fluffy Pumpkin Walnut Rolls-do not rush this step!
-
Prepare the Aromatic Filling: A Simple Blend
While your dough is happily rising, prepare the rich filling. In a small bowl, cream together the softened unsalted butter, packed light brown sugar, and ground cinnamon until smooth and well combined.
This simple blend will create the irresistible, spiced layer inside your rolls.
For a similar treat with a slightly different texture, check out this super moist pumpkin walnut bread.
-
Roll Out the Dough: Creating Your Canvas
Once the dough has doubled in size, gently punch it down to release the trapped air. Turn the dough out onto a lightly floured surface.
Roll the dough into a large rectangle, aiming for approximately 12×18 inches and about 1/4 inch thick. An even thickness ensures consistent rolls.
-
Spread the Flavor: Adding Filling and Walnuts
Evenly spread the prepared cinnamon sugar filling over the entire surface of the rolled dough, leaving a small, clean border along one of the longer edges.
Generously sprinkle the chopped walnuts over the spiced filling, distributing them evenly for a delightful crunch in every bite.
-
Roll and Seal: Crafting a Tight Log
Starting from the long edge opposite the clean border, carefully and tightly roll the dough into a snug log. A tight roll helps prevent gaps and ensures beautiful swirls.
Once rolled, firmly pinch the seam closed to seal the log, ensuring the filling stays securely inside during baking.
-
Slice into Perfect Rounds: The Dental Floss Trick
Using a sharp knife or, for best results, unflavored dental floss, slice the log into 12 equal rolls, each about 1 1/2 inches thick. Dental floss provides incredibly clean, un-smashed cuts.
To use floss, slide a piece under the log, cross the ends over the top, and pull firmly to slice through.
-
The Second Rise: Ensuring Maximum Tenderness
Arrange the sliced Pumpkin Walnut Rolls in a lightly greased 9×13 inch baking dish. Cover the dish with plastic wrap or a clean kitchen towel.
Let the rolls rise again in a warm spot for another 30-45 minutes, or until they are noticeably puffy and appear larger. This second proofing is crucial for achieving maximum tenderness and preventing dense rolls.
-
Bake to Golden Perfection: Avoiding Dryness
Preheat your oven to 375°F (190°C). Bake the rolls for 20-25 minutes, or until they turn a beautiful golden brown and are cooked through.
The key to keeping these Pumpkin Walnut Rolls super soft and moist is to avoid overbaking. If they start to brown too quickly on top, loosely tent the baking dish with aluminum foil.
-
Whip Up the Dreamy Cream Cheese Frosting: Smooth and Fluffy
While the rolls are baking, prepare the irresistible cream cheese frosting. In a medium bowl, beat the softened cream cheese and butter together with an electric mixer until completely smooth and creamy.
Gradually beat in the powdered sugar, vanilla extract, and 1 tablespoon of milk. Add more milk, a teaspoon at a time, until the frosting reaches your desired light and fluffy consistency.
-
Frost and Enjoy: The Irresistible Finish
Remove the golden Pumpkin Walnut Rolls from the oven and allow them to cool for just 5-10 minutes. This brief cooling period is important before frosting.
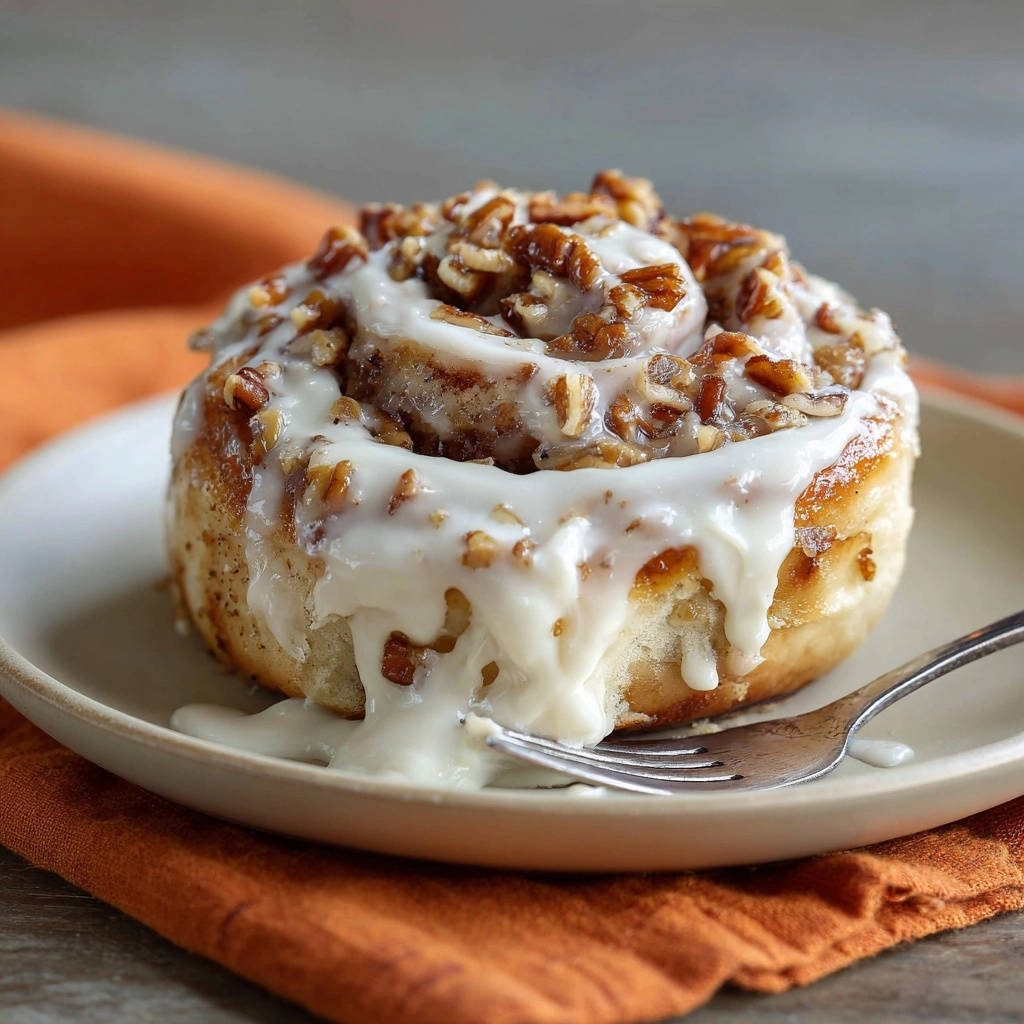
Generously spread or drizzle the homemade cream cheese frosting over the warm rolls. The slight warmth helps the frosting melt just a little, creating that coveted, irresistible gooeyness. Serve warm and savor every bite!
More Pumpkin Delights
If you enjoyed these pumpkin rolls, explore more ways to savor this seasonal favorite.
- For a creamy, sweet finish, consider these Pumpkin Cheesecake Bars, offering a smooth texture and rich flavor.
- Another take on a classic treat, discover these Perfect Pumpkin Cheesecake Bars, designed for a flawless presentation.
Chef’s Secrets: Elevating Your Pumpkin Walnut Rolls from Great to Unforgettable
-
Perfecting Yeast Activation: Always confirm your yeast is active. Milk temperature is critical (105-115°F). If it doesn’t foam, your yeast might be expired or the liquid too hot/cold, and it’s best to restart for a reliable rise.
-
The Art of a Gentle Punch Down: After the first rise, gently punch down the dough to release gases without deflating it too much. This makes it easier to handle and ensures a tender crumb.
-
Use Dental Floss for Clean Slices: For perfectly uniform and un-smashed rolls, slide a piece of unflavored dental floss under the log, cross the ends over the top, and pull firmly to slice. It’s much cleaner than a knife!
-
Preventing Overbaking is Key: Keep a close eye on your rolls. They should be golden brown, not deep brown. An internal temperature of 190-200°F is ideal. Overbaking leads to dry, tough rolls.
-
Frosting Warm (Not Hot!) Rolls: Apply the cream cheese frosting when the rolls are warm, but not piping hot. This allows the frosting to slightly melt and seep into the nooks, creating a luscious, gooey layer without completely disappearing.
Common Questions & Smart Solutions for Your Pumpkin Walnut Rolls
Why Are My Pumpkin Walnut Rolls Dense and Dry?
Dense or dry Pumpkin Walnut Rolls often stem from overmixing the dough, which can develop too much gluten and make it tough. Insufficient rise time during either the first or second proofing also contributes to density.
Most commonly, overbaking is the culprit for dryness. Keep a close eye on your oven and remove them as soon as they’re golden brown.
My Dough Isn’t Rising – What Could Be the Problem?
The most likely issue is inactive or “dead” yeast, which can happen if it’s expired or stored improperly. Ensure your milk temperature is precisely between 105-115°F; temperatures too hot or too cold can kill or hinder the yeast.
Lastly, a cold or drafty rising environment will significantly slow down or prevent your dough from proofing adequately.
How Do I Prevent the Filling from Leaking Out?
To keep that delicious filling tucked inside, make sure the butter in your filling isn’t overly soft; it should be softened but not melted. Rolling the dough log very tightly helps encapsulate the filling.
Crucially, pinch the seam of the rolled log closed securely along its entire length. This creates a strong barrier against leaks.
My Rolls Browned Too Quickly on Top!
If you notice your Pumpkin Walnut Rolls browning rapidly on top before they appear fully cooked through, simply tent the baking dish loosely with aluminum foil. This will protect the tops from further browning while the insides finish baking.
Pumpkin Walnut Rolls: Make Ahead, Storage, and Serving Suggestions
Make Ahead Magic: Preparing Your Rolls in Advance
For convenience, prepare the dough through the first rise, then punch it down, wrap tightly, and refrigerate overnight. Let it come to room temperature for about 30-60 minutes before rolling.
Alternatively, assemble the rolls and place them in the baking dish after the second rise. Cover tightly and refrigerate overnight, then let them sit at room temperature for 1-2 hours before baking as directed.
Storing Your Delicious Leftovers: Keeping Rolls Fresh
Frosted Pumpkin Walnut Rolls are best stored in an airtight container at room temperature for up to 2-3 days, or refrigerated for up to 5 days. Reheat gently in the microwave for a few seconds to regain softness.
Unfrosted rolls can be frozen for up to one month. Thaw, warm, and then frost for fresh enjoyment. Frosted rolls can also be frozen, then thawed and gently reheated.
Creative Ways to Serve Your Pumpkin Walnut Rolls
These fluffy Pumpkin Walnut Rolls are a showstopping addition to any fall brunch spread, paired perfectly with coffee or tea. They make an unforgettable dessert, especially when served slightly warm with an extra drizzle of frosting.
Consider them as a cozy breakfast treat on a crisp autumn morning, or as a comforting snack for an afternoon pick-me-up. They are truly versatile for any occasion.
Frequently Asked Questions About Baking Pumpkin Walnut Rolls
Can I Substitute the Walnuts for Another Nut or Omit Them Entirely?
Absolutely! Pecans or chopped almonds make excellent substitutes for walnuts, offering a similar crunch and complementary flavor. If you prefer a nut-free option, simply omit them or add extra ground cinnamon to the filling for intensified spice.
What if I Don’t Have Pumpkin Puree? Are There Substitutions?
While pumpkin puree is key for flavor and moisture, you can try substituting an equal amount of unsweetened applesauce or mashed cooked sweet potato. Be aware that this will slightly alter the overall flavor and color of your Pumpkin Walnut Rolls.
Can These Pumpkin Walnut Rolls Be Made Gluten-Free?
Yeast baking with gluten-free flour can be challenging due to the lack of gluten structure. While some specialized gluten-free flour blends may work, for optimal results, it’s often best to seek out a recipe specifically developed for gluten-free Pumpkin Walnut Rolls.
How Long Do Pumpkin Walnut Rolls Stay Fresh?
For the freshest experience, enjoy your homemade Pumpkin Walnut Rolls within 2-3 days when stored in an airtight container at room temperature. When refrigerated, they will remain delicious for up to 5 days. Always ensure they are covered to prevent drying out.
Ready to Impress? Share Your Pumpkin Walnut Rolls Masterpiece!
Now that you have the ultimate guide to creating unbelievably soft and fluffy Pumpkin Walnut Rolls, it’s time to gather your ingredients and get baking! You’re just steps away from experiencing the most delicious fall treat that will impress everyone. We’d absolutely love to see your beautiful creations! Share your homemade Pumpkin Walnut Rolls on social media using #SuperSoftRolls and #PumpkinWalnutMagic, and tell us your favorite part of baking them. Happy baking, and enjoy every delightful bite!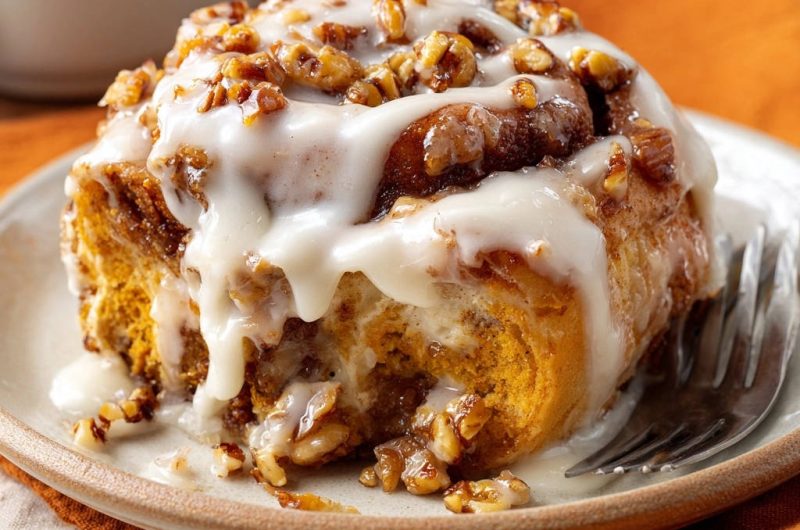
Pumpkin Walnut Rolls
Course: BakingCuisine: American CuisineDifficulty: easy4
12 rolls45
minutes25
minutes180
minutesAmerican Cuisine
Ingredients
For the Dough:
1 cup warm milk (around 105-115F)
2 1/4 teaspoons active dry yeast (one packet)
1/2 cup granulated sugar, divided
1/2 cup pumpkin puree
1/2 cup unsalted butter, melted and cooled slightly
1 teaspoon salt
4 1/2 to 5 cups all-purpose flour
For the Filling:
1/2 cup unsalted butter, softened
1/2 cup packed light brown sugar
2 tablespoons ground cinnamon
1 cup chopped walnuts
For the Cream Cheese Frosting:
4 ounces cream cheese, softened
1/4 cup unsalted butter, softened
2 cups powdered sugar
1 teaspoon vanilla extract
1 to 2 tablespoons milk
Directions
- In a large mixing bowl, combine the warm milk and 1 tablespoon of the granulated sugar. Sprinkle the yeast over the top and let it sit for 5-10 minutes until foamy. This step is crucial for activating your yeast and ensures your dough will rise beautifully.
- Add the remaining granulated sugar, pumpkin puree, melted butter, and salt to the yeast mixture. Mix well. Gradually add 4 cups of the flour, mixing until a shaggy dough forms.
- Turn the dough out onto a lightly floured surface. Knead for 8-10 minutes, gradually adding more flour, a tablespoon at a time, if the dough is too sticky. You’re looking for a soft, elastic dough that springs back when poked. This thorough kneading develops the gluten, which is essential for that light, airy structure.
- Lightly grease a large bowl. Place the dough in the bowl, turning once to coat. Cover the bowl with plastic wrap or a clean kitchen towel and let it rise in a warm, draft-free place for 1 to 1 1/2 hours, or until doubled in size. This slow, proper rise is the secret sauce for incredibly soft and fluffy rolls. Do not rush this step!
- While the dough rises, prepare the filling: In a small bowl, cream together the softened butter, brown sugar, and cinnamon.
- Once the dough has doubled, gently punch it down to release the air. Turn it out onto a lightly floured surface and roll it into a large rectangle, approximately 12×18 inches. The dough should be about 1/4 inch thick.
- Spread the cinnamon sugar filling evenly over the dough, leaving a small border on one of the longer edges. Sprinkle the chopped walnuts over the filling.
- Starting from the long edge opposite the clean border, carefully roll the dough into a tight log. Pinch the seam closed to seal it.
- Using a sharp knife or dental floss, slice the log into 12 equal rolls, about 1 1/2 inches thick.
- Arrange the rolls in a lightly greased 9×13 inch baking dish. Cover the dish with plastic wrap or a clean towel and let the rolls rise again in a warm spot for another 30-45 minutes, or until noticeably puffy. This second proofing ensures maximum tenderness and prevents dense rolls.
- Preheat your oven to 375F (190C).
- Bake the rolls for 20-25 minutes, or until they are golden brown and cooked through. The key to keeping them super soft and moist is to avoid overbaking. If they start to brown too quickly, you can loosely tent them with foil.
- While the rolls are baking, prepare the frosting: In a medium bowl, beat the softened cream cheese and butter together until smooth. Gradually beat in the powdered sugar, vanilla extract, and milk (start with 1 tablespoon and add more if needed for desired consistency) until light and fluffy.
- Remove the rolls from the oven and let them cool for just 5-10 minutes. Generously spread or drizzle the cream cheese frosting over the warm rolls. The slight warmth helps the frosting melt just a little, creating that irresistible gooeyness. Serve warm and enjoy your perfectly soft and luscious pumpkin walnut rolls!
Notes
- The crucial slow rising times are essential for achieving the incredibly soft and fluffy texture. Avoid overbaking to maintain moisture and tenderness.