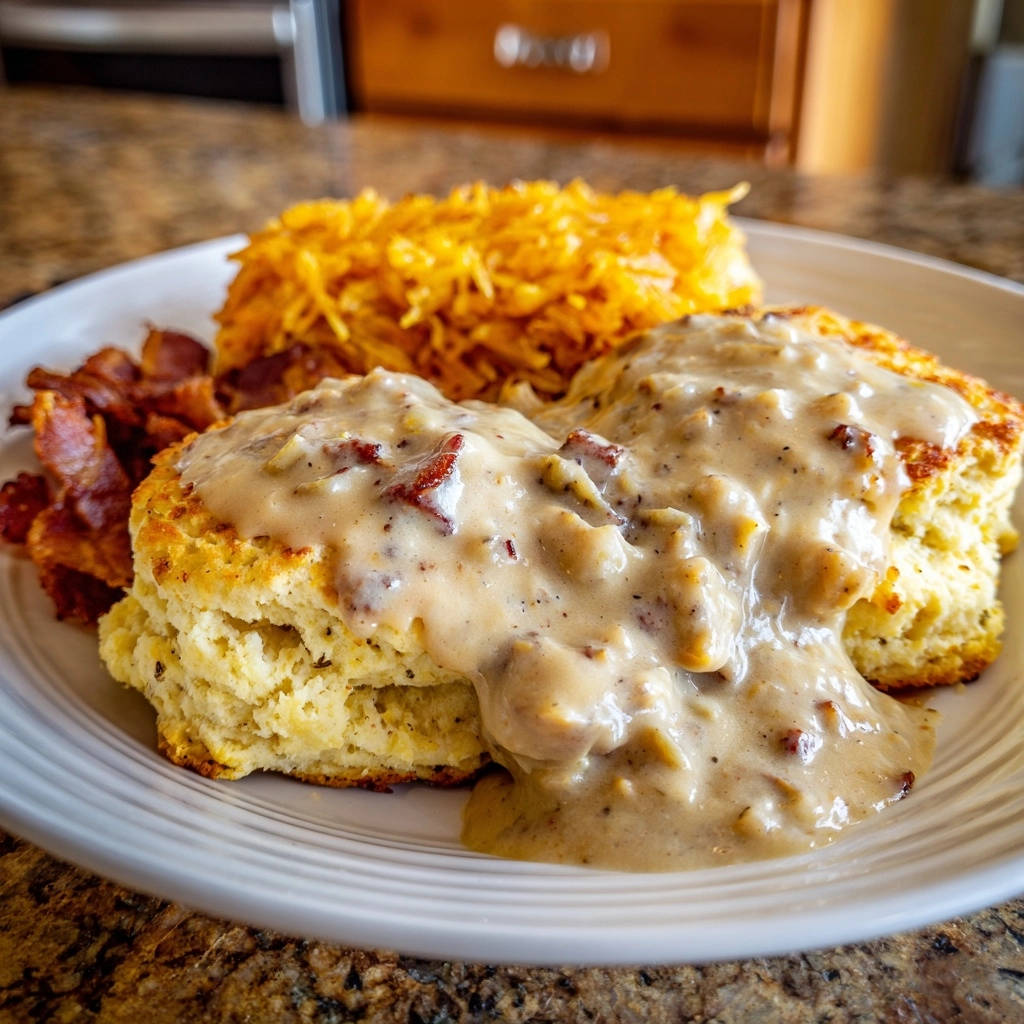
Classic Biscuits & Gravy: Your Guide to Fluffy & Velvety Perfection
There’s nothing quite like the comforting embrace of a warm plate of Classic Biscuits & Gravy, yet achieving that elusive perfectly smooth gravy and tender biscuit can feel like a culinary challenge. For years, I’ve refined this recipe to banish lumpy gravy forever and guarantee biscuits that are impossibly fluffy. This isn’t just breakfast; it’s a complete, heartwarming meal designed for ultimate satisfaction.
Why This Classic Biscuits & Gravy Recipe Stands Out
Say Goodbye to Lumpy Gravy: Our Secret Method Revealed
The secret to our velvety, lump-free gravy lies in a specific technique: gradually whisking cold milk into a warm roux. This temperature contrast prevents the flour from clumping, ensuring a smooth, luxurious consistency every single time. You’ll be amazed at how simple it is to achieve perfection.
Achieving Perfectly Fluffy Biscuits, Every Time
Our method prioritizes key elements like using exceptionally cold butter and minimal handling of the dough. These steps create pockets of steam during baking, resulting in incredibly light, airy, and flaky biscuits that practically melt in your mouth. Get ready for biscuit bliss!
Get Our Best Recipes Weekly!
Join thousands of food lovers and get delicious recipes delivered to your inbox.
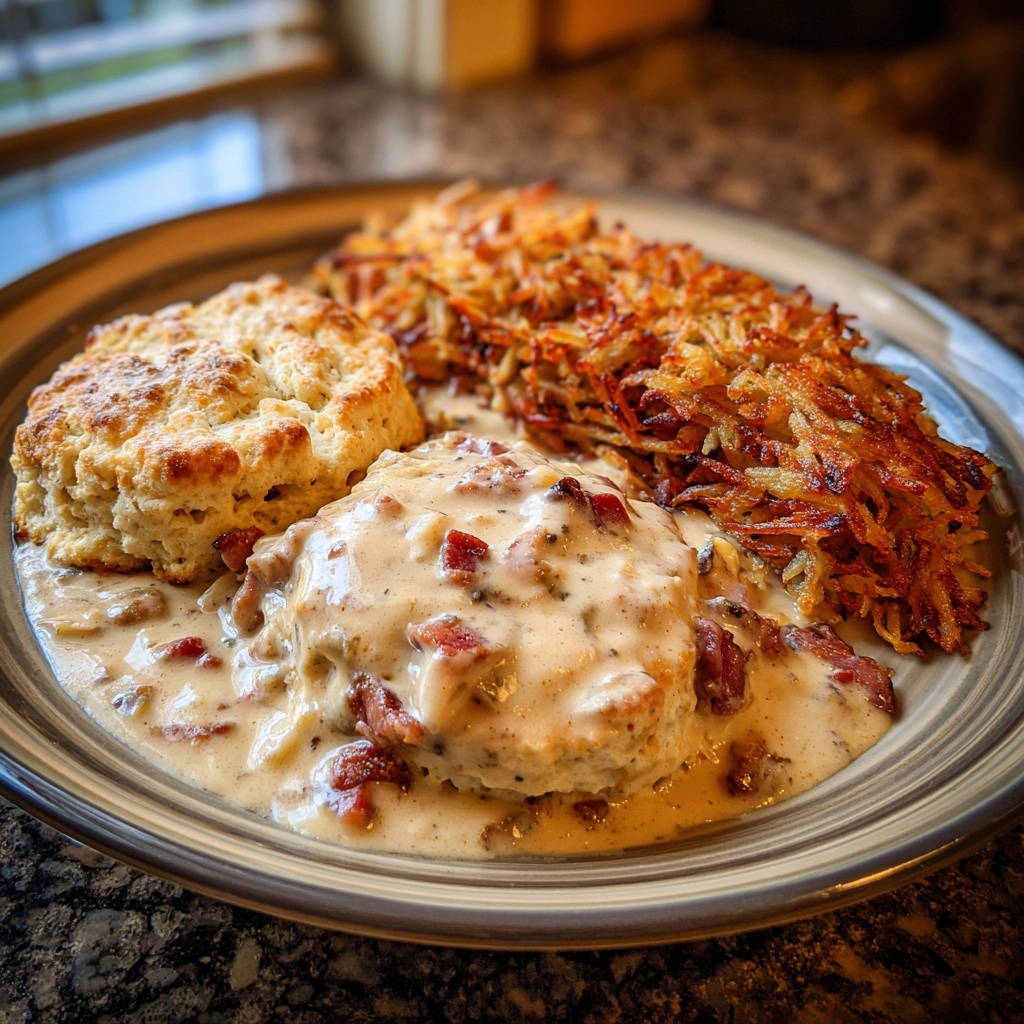
More Than Just Breakfast: A Complete Comfort Meal with Crispy Hash Browns
Beyond the stellar biscuits and gravy, this recipe elevates your breakfast into a full-fledged comfort feast with the addition of perfectly crispy hash browns. This trio creates a harmonious balance of textures and flavors, making it an unforgettable meal that satisfies every craving.
The Essential Ingredients for Your Ultimate Breakfast Feast
For the Best Biscuits: A Focus on Cold & Quality
Cold ingredients are paramount for flaky biscuits. They prevent the butter from melting too early, creating essential pockets for steam to lift the dough. Quality flour and fresh baking powder ensure a perfect rise and tender crumb.
2 cups all-purpose flour
1 tablespoon baking powder
1/2 teaspoon salt
1/2 cup cold butter, cut into small pieces
3/4 cup cold milk
Crafting the Velvety, Never-Lumpy Gravy Base
These ingredients form the backbone of your savory, smooth gravy. The bacon fat provides unparalleled depth of flavor, while the specific ratio of flour and cold milk ensures a creamy, consistent texture without any lumps.
6 slices bacon, chopped
1/4 cup reserved bacon fat (or butter)
1/4 cup all-purpose flour
2 cups cold milk
1/2 teaspoon black pepper (or to taste)
Salt to taste
Crispy Hash Browns: The Perfect Sidekick
Achieving truly crispy hash browns relies on just a few simple, high-quality ingredients. Russet potatoes are ideal for their starch content, which helps create that desirable golden crust. Proper seasoning enhances their natural flavor.
2 large Russet potatoes, grated
1 tablespoon oil (vegetable or canola)
Salt and black pepper to taste
Essential Kitchen Tools for Classic Biscuits & Gravy Success
Large Mixing Bowls: Essential for combining biscuit ingredients and conveniently holding your grated potatoes.
Pastry Blender or Forks: Crucial for cutting cold butter into the flour without overworking the dough, which maintains biscuit flakiness.
Large Skillet: The workhorse for this recipe, perfect for rendering bacon and building the flavorful gravy base.
Whisk: Your absolute best friend for creating a lump-free roux and consistently smooth, velvety gravy.
Slotted Spoon: Handy for removing crispy bacon bits while leaving behind the precious rendered fat for your gravy.
Rolling Pin or Hands: For gently shaping the biscuit dough to the perfect thickness without making it tough.
Round Biscuit Cutter: Ensures uniformly shaped, beautifully risen biscuits. A floured glass rim works too!
Baking Sheet: Provides the surface area needed to bake your fluffy biscuits to golden-brown perfection.
Non-Stick Skillet: Ideal for achieving perfectly crispy, non-stick hash browns that release easily from the pan.
Your Step-by-Step Journey to Classic Biscuits & Gravy Perfection
Grate and Season Potatoes: Grate the Russet potatoes into a bowl. Season them generously with salt and black pepper, then set aside. This initial salting helps draw out some excess moisture, which is key for truly crispy hash browns.
Combine Dry Biscuit Ingredients: In a large mixing bowl, whisk together the all-purpose flour, baking powder, and salt. Whisking ensures these dry ingredients, especially the leavening, are evenly distributed throughout the mixture for a consistent rise.
Cut in Cold Butter: Add the small pieces of cold butter to your dry biscuit ingredients. Using a pastry blender or your fingertips, quickly cut in the butter until the mixture resembles coarse crumbs with some pea-sized pieces remaining. These small pockets of butter will create incredible flakiness as they steam in the oven.
Preheat Oven & Cook Bacon: Preheat your oven to 425°F (220°C). In a large skillet, cook the chopped bacon over medium heat until it’s wonderfully crispy. This crucial step renders the fat, which is the flavorful foundation for our smooth gravy.
Reserve Bacon & Fat: Remove the crispy bacon bits with a slotted spoon and set them aside; these will be stirred into the gravy at the very end for texture and flavor. Leave the rendered bacon fat in the skillet. Ensure you have about 1/4 cup of fat; if not, add butter to reach this precise amount.
Create the Roux: Reduce the heat under the skillet to medium-low. Add the 1/4 cup of flour to the bacon fat (or butter). Whisk constantly for 1-2 minutes until a light golden paste, known as a roux, forms. This essential step cooks out the raw flour taste and builds the stable base for your velvety gravy.
Slowly Incorporate Cold Milk: This is the most critical step for achieving truly lump-free gravy. Gradually and slowly pour the 2 cups of COLD milk into the warm roux while continuously whisking. The contrast of cold liquid hitting warm roux is a masterful trick to prevent flour particles from clumping together.
Whisk Until Smooth: Continue whisking until all the milk is fully incorporated and the mixture is perfectly smooth. Don’t worry if it initially seems thin; it will thicken beautifully as it heats and simmers.
Form Biscuit Dough: To the prepared biscuit mixture from Step 1, gradually add the 3/4 cup of cold milk, mixing just until a shaggy dough forms. It’s imperative not to overmix, as excessive handling develops gluten, which can lead to tough, rather than fluffy, biscuits.
Shape and Cut Biscuits: Turn the dough onto a lightly floured surface. Gently pat or roll the dough to about 1-inch thickness. Use a round biscuit cutter (or a floured glass rim) to cut out biscuits and place them on a baking sheet. Avoid twisting the cutter, as this can seal the edges and inhibit a proper rise.
Bake Biscuits: Place the biscuits in the preheated oven and bake for 12-15 minutes, or until they are beautifully golden brown and well-risen. Keep a close eye on them towards the end of the baking time to prevent overbrowning.
Simmer and Thicken Gravy: While the biscuits are baking, increase the heat under the gravy to medium. Bring it to a gentle simmer, continuing to whisk occasionally. The gravy will visibly thicken as it cooks, typically taking about 5-7 minutes. Once thickened to your desired consistency, season generously with black pepper and salt to taste.
Cook Hash Browns: While the biscuits are in the oven, heat 1 tablespoon of oil in a non-stick skillet over medium-high heat. Add the grated potatoes in an even layer, pressing down lightly to ensure maximum contact with the hot pan. Cook undisturbed for 5-7 minutes until the bottom is deeply golden brown and wonderfully crispy. Resisting the urge to move them is crucial for forming that perfect crust.
Flip and Finish Hash Browns: Carefully flip the hash browns and cook for another 5-7 minutes until the other side is equally golden and crispy, and the potatoes are tender throughout. They should release easily from the pan when they are perfectly cooked.
Final Gravy Prep: Once biscuits are golden and removed from the oven, stir the reserved crispy bacon bits into the lump-free gravy. This adds a fantastic burst of savory flavor and delightful textural contrast.
Serve Immediately: Split the warm biscuits in half and generously spoon the creamy, bacon-studded gravy over them. Serve immediately with the perfectly crispy hash browns on the side. Enjoy your perfectly smooth and delicious breakfast feast!
Preparing Your Mise en Place: Potatoes & Biscuit Dry Mix
Building the Gravy’s Foundation: Crispy Bacon & Roux Mastery
The Lumps-Begone Technique: Achieving Smooth Gravy
Baking Fluffy Biscuits & Thickening the Gravy
Perfectly Crispy Hash Browns: The Final Touch
Assembling Your Ultimate Classic Biscuits & Gravy Plate
Chef’s Secrets: Elevating Your Classic Biscuits & Gravy Game
Biscuit Brilliance: Insider Tips for Fluffiness
Keep Ingredients COLD: This is a non-negotiable rule for tender, flaky biscuits. Cold butter creates steam pockets when it melts, while cold milk prevents the butter from melting prematurely during dough preparation.
Don’t Overmix the Dough: Mix only until the ingredients are just combined and a shaggy dough forms. Overmixing develops gluten, which results in tough, dense biscuits instead of light and airy ones.
Pat, Don’t Roll Aggressively: When shaping the dough, use gentle patting motions with your hands rather than aggressively rolling with a pin. This minimizes gluten development and helps maintain the dough’s tender texture.
Gravy Guru: Ensuring Velvety Smoothness Every Time
Whisk Constantly for the Roux: When adding flour to the bacon fat, continuous whisking for 1-2 minutes ensures the flour cooks evenly and thoroughly. This prevents burning and creates a perfectly smooth, flavorful base.
Cold Milk is Your Best Friend: The dramatic temperature difference between cold milk and a warm roux is the ultimate trick to prevent lumps. Add the milk slowly and maintain vigorous whisking throughout the process.
Taste and Adjust Seasoning: Always taste your gravy after it thickens and before serving. Bacon provides some inherent saltiness, so add additional salt and pepper cautiously until the flavors are perfectly balanced.
Hash Brown Hacks: Maximizing Crispness
Squeeze Out Moisture: After grating potatoes, give them a good squeeze in a clean kitchen towel or paper towels to remove as much excess moisture as possible. This is the single most important step for achieving truly crispy hash browns.
Don’t Overcrowd the Pan: Cook hash browns in a single, even layer. Overcrowding lowers the pan temperature, causing the potatoes to steam instead of brown and crisp up effectively.
Cook Undisturbed: Allow the hash browns to form a deep golden crust on one side before attempting to flip them. Resist the urge to peek or stir too early, as this breaks the crucial browning process.
Common Pitfalls & Quick Fixes for Your Biscuits & Gravy
My Gravy is Lumpy!
If your gravy turns out lumpy, it’s most likely due to adding the milk too quickly to the roux or using warm milk instead of cold. To fix it, whisk the gravy vigorously off the heat to break up small lumps. For more persistent lumps, carefully strain the gravy through a fine-mesh sieve into another saucepan, then reheat gently.
My Biscuits Are Hard or Dense!
Dense biscuits are almost always a symptom of overmixing the dough. The key is to mix only until the ingredients are just combined and the dough is shaggy. Ensure your butter and milk are exceptionally cold, and handle the dough minimally to prevent gluten development.
My Hash Browns Aren’t Crispy!
Lack of crispiness usually stems from too much moisture in the potatoes or overcrowding the pan. Always squeeze grated potatoes thoroughly before cooking. Additionally, ensure you cook them in a single layer with sufficient oil and adequate space to brown, not steam.
My Gravy is Too Thin or Too Thick!
If your gravy is too thin, allow it to simmer gently for a few more minutes, whisking occasionally, to reduce and thicken. If it becomes too thick, simply whisk in a tablespoon or two of warm milk at a time until it reaches your desired, velvety consistency.
Serving Suggestions, Make-Ahead Tips, and Storage Solutions
Perfect Pairings: What to Serve with Your Classic Biscuits & Gravy
While our Classic Biscuits & Gravy recipe is a complete and satisfying meal on its own, it also pairs wonderfully with simple additions. Consider serving it alongside perfectly scrambled eggs, sunny-side-up fried eggs, or a fresh fruit salad for a bright contrast. A dash of your favorite hot sauce can also add a delightful, spicy kick!
Looking for Something Sweet?
Round out your meal with these sweet dishes that complement the richness of biscuits and gravy.
- For a fruity finish, consider this No-Bake Cherry Dream Pie, offering layers of creamy goodness.
- If you prefer a classic sweet treat, this Classic Banana Cream Pie is a satisfying choice.
Make-Ahead Magic: Preparing Components in Advance
To streamline your breakfast prep, you can chop your bacon and grate your potatoes the night before. Store these separately in airtight containers in the refrigerator. The dry biscuit mix (flour, baking powder, salt) can also be whisked together and stored in an airtight container until you’re ready to add the cold butter and milk.
Storing Leftovers: Keeping Your Comfort Food Fresh
Store leftover gravy in an airtight container in the refrigerator for up to 3-4 days. Reheat it gently on the stovetop over low heat, whisking constantly, and adding a splash of milk or water if it has thickened too much. Biscuits can be stored at room temperature in an airtight container for 1-2 days, or frozen for up to a month for longer storage. For best results, reheat biscuits in the oven or toaster oven to restore their crispness.
Your Top Questions About Classic Biscuits & Gravy, Answered
Can I use a different type of milk for the gravy?
For the creamiest, most decadent results, whole milk is highly recommended as it provides the richest flavor and texture. You can use 2% milk, but be aware the gravy may be slightly less velvety. Skim milk is generally not advised, as it won’t yield the same luxurious consistency.
What if I don’t have a pastry blender for the biscuits?
No pastry blender? No problem! You can easily cut the cold butter into the flour using two knives, cutting in opposite directions, or simply use your fingertips. When using your hands, work quickly to prevent the butter from melting too much. A food processor can also work for a few short pulses, but be careful not to overmix.
Can I make this recipe gluten-free?
Yes, this recipe can be adapted to be gluten-free. Simply substitute the all-purpose flour for a high-quality 1:1 gluten-free all-purpose flour blend. Ensure your chosen blend contains xanthan gum for optimal texture. The overall method for both the fluffy biscuits and velvety gravy remains the same.
How do I reheat leftover biscuits and gravy?
To reheat gravy, warm it gently in a saucepan over low heat, whisking constantly. Add a splash of milk or water if it has become too thick. For biscuits, arrange them on a baking sheet and reheat in a 350°F (175°C) oven for 5-7 minutes, or until warmed through and slightly crisp again. This prevents them from becoming soggy.
Ready to Indulge? Share Your Classic Biscuits & Gravy Masterpiece!
Now that you’re armed with the secrets to perfectly fluffy biscuits and velvety, lump-free gravy, there’s no stopping you from creating the ultimate Classic Biscuits & Gravy experience right in your own kitchen. This comforting dish isn’t just a meal; it’s a heartwarming tradition waiting to be made. Gather your ingredients, follow our detailed guide, and prepare to delight your family and friends with this timeless breakfast feast.
We’d love to see your breakfast creations! Share your photos and tag us on social media, or leave a comment below with your experience. Happy cooking, and get ready to enjoy the best Classic Biscuits & Gravy you’ve ever made!

Classic Biscuits & Gravy
Course: BreakfastCuisine: AmericanDifficulty: medium4
servings20
minutes40
minutes750
kcal60
minutesBanish lumpy gravy forever with our secret method for Classic Biscuits & Gravy. Enjoy warm, fluffy biscuits smothered in rich, creamy bacon gravy, perfectly complemented by crispy hash browns for the best breakfast ever!
Ingredients
For the Biscuits:
2 cups all-purpose flour
1 tablespoon baking powder
1/2 teaspoon salt
1/2 cup cold butter, cut into small pieces
3/4 cup cold milk
For the Gravy:
6 slices bacon, chopped
1/4 cup reserved bacon fat (or butter)
1/4 cup all-purpose flour
2 cups cold milk
1/2 teaspoon black pepper (or to taste)
Salt to taste
For the Crispy Hash Browns:
2 large Russet potatoes, grated
1 tablespoon oil (vegetable or canola)
Salt and black pepper to taste
Directions
- Prepare the Components for Assembly: Grate the 2 large Russet potatoes into a bowl. Season with salt and black pepper to taste and set aside. In a large bowl, whisk together flour, baking powder, and salt for the biscuits. Cut in the cold butter using a pastry blender or your fingertips until the mixture resembles coarse crumbs. Set aside.
- Start with the Bacon and Gravy Base: Preheat oven to 425F (220C). In a large skillet, cook chopped bacon over medium heat until crispy. Remove the cooked bacon with a slotted spoon and set aside, leaving the rendered fat in the pan. If you don’t have enough fat (about 1/4 cup), add butter to make up the difference.
- Master the Lump-Free Roux: Reduce heat under the skillet to medium-low. Add the 1/4 cup flour to the bacon fat (or butter). Whisk constantly for 1-2 minutes until a light golden paste (roux) forms. This cooks out the raw flour taste.
- The Lumps Begone Technique: Gradually, and this is the key, SLOWLY pour the 2 cups of COLD milk into the roux while continuously whisking. Pouring cold milk into a warm roux helps prevent lumps from forming. Keep whisking until all the milk is incorporated and the mixture is smooth.
- Finish Biscuits & Simmer Gravy: To the biscuit dough from Step 1, gradually add cold milk, mixing just until a shaggy dough forms. Turn onto a lightly floured surface and gently pat or roll to about 1-inch thickness. Cut out biscuits with a round cutter and place on a baking sheet. Place biscuits in the preheated oven and bake for 12-15 minutes, or until golden brown and risen. Meanwhile, increase heat under the gravy to medium and bring to a gentle simmer, still whisking occasionally. It will thicken as it cooks, about 5-7 minutes. Season with black pepper and salt to taste.
- Crisp Up the Hash Browns: While biscuits are baking, heat 1 tablespoon oil in a non-stick skillet over medium-high heat. Add the grated potatoes in an even layer, pressing down lightly. Cook undisturbed for 5-7 minutes until deeply golden and crispy on the bottom. Flip carefully and cook for another 5-7 minutes until the other side is golden and potatoes are tender.
- Assemble Your Plate: Once biscuits are golden, remove them from the oven. Stir the reserved crispy bacon bits into the gravy. Split warm biscuits and generously spoon the lump-free, creamy bacon gravy over them. Serve immediately with crispy hash browns. Enjoy your perfectly smooth and delicious breakfast!
Notes
- Our secret method ensures a perfectly smooth, lump-free gravy every time, turning a kitchen mystery into a delightful success.