Cheesy Enchiladas: Never Soggy, Always Perfect!
Every home cook dreams of a plate of vibrant, flavorful enchiladas, but the reality often brings the disappointment of soggy tortillas. I’ve been there, pulling a beautiful pan from the oven only to find a delicious mess that lacked that satisfying texture. This recipe for Cheesy Enchiladas, however, promises a revolutionary approach, ensuring your tortillas remain tender yet firm, perfectly absorbing the rich red sauce without ever becoming mushy.
Why This Cheesy Enchiladas Recipe is a Game-Changer
The Secret Weapon: Perfectly Pliable, Never Soggy Tortillas
The common frustration of soggy tortillas often ruins an otherwise delicious enchilada experience. Our unique preparation method directly addresses this, creating a protective barrier on the tortillas.
To avoid a similar problem with corn tortillas, consider trying ultimate loaded nachos for a reliably crisp bite.
Get Our Best Recipes Weekly!
Join thousands of food lovers and get delicious recipes delivered to your inbox.
This ensures they maintain their integrity and absorb the sauce beautifully, resulting in an ideal, satisfying texture in every bite.
Effortless Enjoyment: Satisfying & Simple to Master
Despite its impressive results, this recipe for homemade enchiladas is surprisingly easy to follow. It uses simple, accessible ingredients and straightforward steps.
Home cooks of all skill levels can achieve a restaurant-quality meal, promising a deeply satisfying and consistently delicious outcome with minimal fuss.
Crowd-Pleasing Comfort: A Family Favorite for Any Occasion
These hearty Cheesy Enchiladas are the epitome of Mexican comfort food, perfect for family dinners, festive gatherings, or a comforting weeknight meal.
Their rich flavors and satisfying cheesiness make them a universally loved dish, guaranteeing smiles around the table.
Your Essential Kitchen Toolkit for Cheesy Enchiladas
Setting Up for Success: Tools You’ll Need
Having the right tools ready makes the enchilada-making process smooth and enjoyable. Here’s what you’ll need:
-
9×13 Inch Baking Dish: Essential for baking the enchiladas evenly and accommodating a full batch.
-
Large Skillet: Crucial for the quick-fry tortilla prep, ensuring even heat distribution.
-
Tongs: Absolutely vital for safely handling hot tortillas in oil and sauce, preventing burns and maintaining control.
-
Shallow Dish: Ideal for warming and dipping the tortillas in sauce, allowing for efficient and even coating.
-
Measuring Cups & Spoons: For accurate ingredient proportions, ensuring balanced flavors.
Gathering Your Delicious Ingredients
The Heart of the Dish: Tortillas & Cheese
For the best Cheesy Enchiladas, selecting quality components is key. We recommend standard size corn tortillas as they hold up well to the frying and dipping process, achieving that perfect pliability.
A shredded cheese blend, such as Monterey Jack and mild cheddar, offers a fantastic balance of creamy melt and savory flavor. Feel free to experiment with your favorite melting cheeses, like a sharp cheddar or pepper jack for a kick.
The Flavor Foundation: Red Enchilada Sauce
The red enchilada sauce is the soul of this dish, infusing every bite with rich, savory depth. A 28-ounce can of good quality store-bought red enchilada sauce is convenient and delicious.
For those seeking a deeper flavor profile, consider making an enchilada sauce recipe from scratch with dried chiles for an authentic taste, though the canned option is perfectly acceptable for a quick weeknight meal.
Subtle Enhancers: Oil & Finishing Touches
A tablespoon of vegetable oil is essential for the quick-fry technique, creating that protective barrier on the tortillas. It helps prevent them from becoming waterlogged.
Fresh cilantro, finely chopped, and a generous dollop of sour cream are not just garnishes; they are crucial finishing touches. They add a refreshing coolness and brightness that beautifully contrasts the rich, savory enchiladas.
Crafting Your Cheesy Enchiladas: A Detailed Guide
- Prepare Your Baking Dish and Oven:
Preheat your oven to 375°F (190°C) to ensure it reaches the correct temperature before baking. Lightly grease a 9×13 inch baking dish; this crucial step prevents sticking and aids in easy serving.
- The Secret Sauce Prep:
Pour 1 cup of the red enchilada sauce into a shallow dish. Gently warm it in the microwave for 30 seconds, or on low heat in a small saucepan. This slightly warms the sauce, helping the tortillas absorb just the right amount of moisture for perfect pliability without becoming waterlogged.
- Mastering the Fry-and-Dip Technique:
Heat 1 tablespoon of vegetable oil in a large skillet over medium-high heat. Using tongs, carefully place a dry corn tortilla into the hot oil. Fry for about 5-10 seconds per side, just until it softens, becomes pliable, and is lightly toasted but not crispy or brittle. This quick fry seals the tortilla’s surface, creating a barrier that prevents it from absorbing too much moisture and becoming mushy during baking.
Immediately after frying, transfer the lightly fried tortilla to a clean plate, then dip it into the warm enchilada sauce from Step 2. Ensure it’s just enough to fully coat it without soaking. Remove and shake off any excess sauce. This sequence is the key to perfectly textured enchiladas.
- Assembling Your Enchiladas:
Lay a softened, sauced tortilla flat on a clean surface. Sprinkle about 2 tablespoons of the shredded cheese down the center. Roll the tortilla tightly and place it seam-side down in your prepared baking dish. Repeat this process with the remaining tortillas and cheese, arranging them snugly side-by-side in the dish.
- Bathing in Flavor: The Remaining Sauce:
Pour the remaining red enchilada sauce evenly over the rolled enchiladas. Ensure they are well covered, as this sauce will continue to infuse flavor and moisture into the enchiladas during baking.
- The Final Cheesy Blanket:
Generously sprinkle the remaining shredded cheese over the top of the sauced enchiladas. This layer will melt into a golden, bubbly crust, adding irresistible texture and flavor.
- Bake to Golden Perfection:
Bake for 20-25 minutes, or until the sauce is bubbly around the edges and the cheese is beautifully melted and lightly golden. Keep a close eye on it during the last few minutes to prevent over-browning, ensuring a perfect finish.
- The Art of Resting:
Carefully remove the dish from the oven. Let the enchiladas rest for 5 minutes before serving. This crucial resting period allows the flavors to meld and the enchiladas to set, preventing a watery consistency when cut.
- Garnish and Serve:
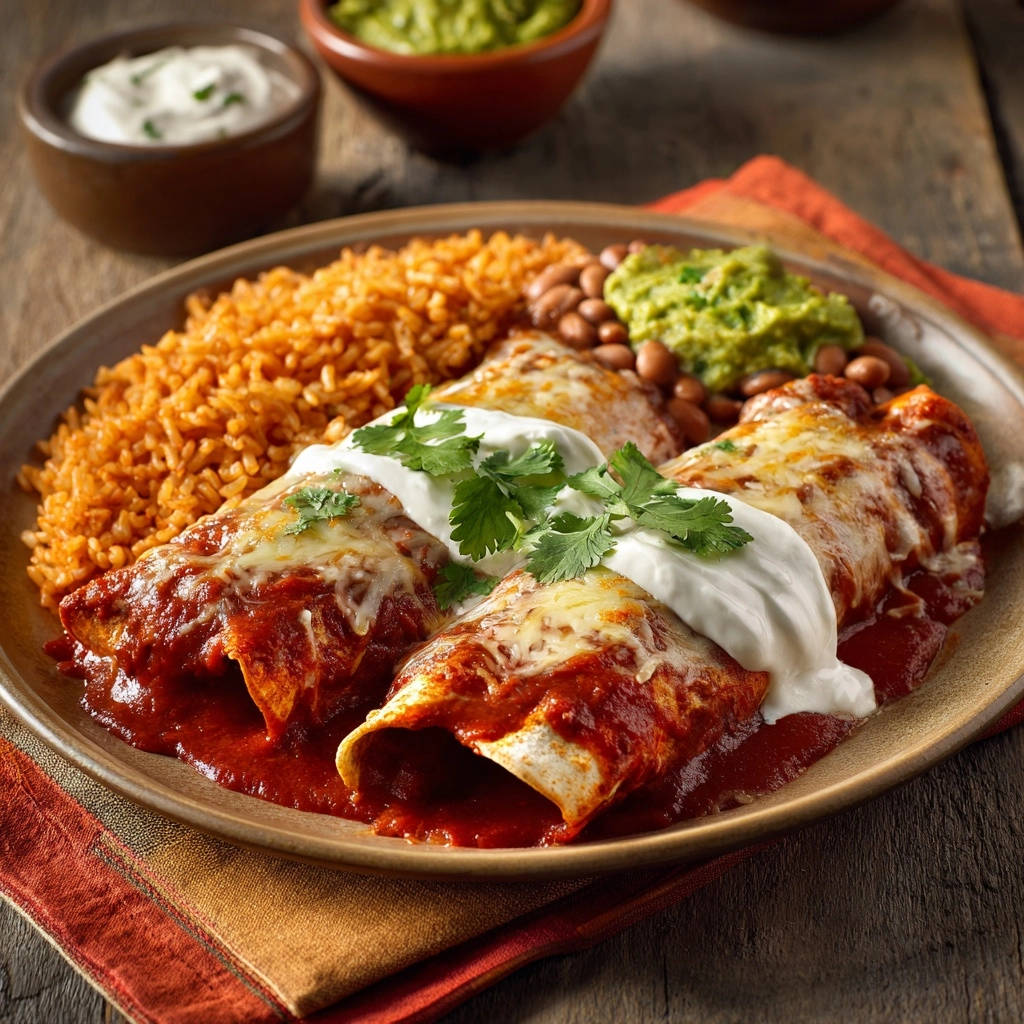
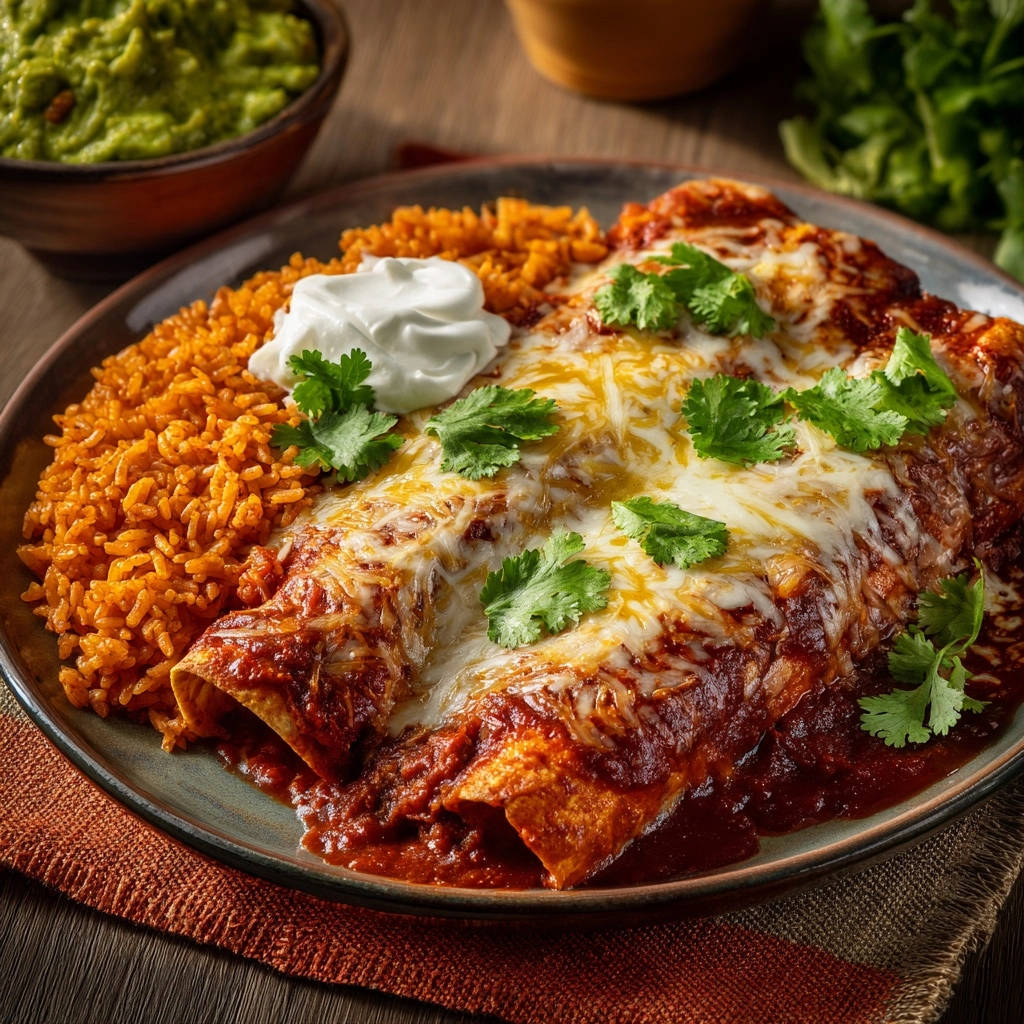
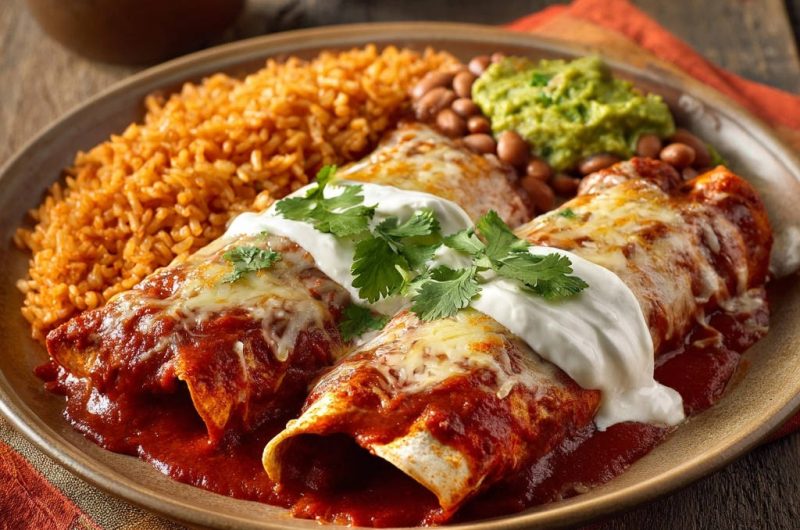
Serve your Cheesy Enchiladas hot, topped with generous dollops of cooling sour cream and a sprinkle of fresh chopped cilantro. These garnishes add essential brightness and a fresh counterpoint to the rich, savory flavors of the dish.
Chef’s Secrets: Elevating Your Cheesy Enchiladas Game
Understanding the Fry-and-Dip Tortilla Technique
The quick-fry in oil seals the corn tortilla’s surface, creating a protective barrier. This prevents it from instantly absorbing too much liquid from the sauce, which is the primary cause of sogginess.
Dipping the warm, fried tortilla into warm sauce immediately after frying allows it to become pliable and flavorful without over-saturating. The warmth helps the sauce adhere and penetrate just enough, ensuring perfect texture. This thoughtful tortilla preparation is paramount for stellar Cheesy Enchiladas.
Achieving the Ultimate Cheese Pull and Flavor
For the best melt and flavor, use a blend of cheeses. Monterey Jack provides incredible meltiness, while mild cheddar adds a familiar, rich taste. For a deeper flavor, consider adding a touch of Oaxaca cheese.
To achieve that desirable golden, bubbly top without drying out the cheese, sprinkle it on evenly, covering all the rolled enchiladas. Bake until just golden; over-baking can make the cheese tough. A quick broiler finish for 1-2 minutes can enhance browning if desired.
Smart Substitutions for Every Taste and Diet
For a gluten-free option, ensure you are using certified gluten-free corn tortillas, as the method works well with them. Dairy-free cheese blends can be substituted, though their melt and texture may vary.
To add protein, cooked shredded chicken or seasoned black beans and corn can be added inside the tortillas alongside the cheese, making it a hearty weeknight meal. Experiment with different types of enchilada sauce, like green chile, for varied flavor profiles.
Make-Ahead Magic: Prep Now, Enjoy Later
You can prepare the rolled enchiladas and arrange them in the baking dish without the final sauce and cheese. Cover and refrigerate for up to 24 hours.
When ready to bake, pour over the sauce, sprinkle with cheese, and bake as directed, potentially adding 5-10 minutes to the baking time if starting from cold. This allows for convenient preparation for future gatherings.
Common Questions & Quick Answers About Enchiladas
Can I use flour tortillas instead of corn for this recipe?
While corn tortillas are traditional and recommended for their authentic texture and structural integrity, you can use flour tortillas. However, they may become softer or slightly chewier and won’t develop the same firm, non-soggy texture as corn tortillas prepared with this method.
What are the best side dishes to serve with Cheesy Enchiladas?
For a complete Mexican comfort food experience, pair your enchiladas with classic sides. Mexican rice, creamy refried beans, and fresh guacamole are excellent choices.
For another satisfying meal with similar toppings, check out these Southwestern stuffed baked potatoes.
A simple side salad with a vibrant vinaigrette also offers a refreshing contrast to the richness of the enchiladas.
How do I store leftover enchiladas and reheat them?
Store leftover enchiladas in an airtight container in the refrigerator for up to 3-4 days. This keeps them fresh and prevents flavor loss.
For reheating, the oven is best to maintain texture. Cover the dish with foil and bake at 350°F (175°C) for 15-20 minutes, or until heated through.
Can I freeze Cheesy Enchiladas?
Yes, Cheesy Enchiladas freeze well. For best results, freeze them before baking. Assemble the enchiladas in a freezer-safe dish, cover tightly with foil, and freeze for up to 2-3 months.
To bake from frozen, remove the foil, add an extra layer of sauce and cheese if needed, and bake at 375°F (190°C) for 45-60 minutes, or until bubbly and hot, covering with foil if the cheese starts to brown too quickly.
Troubleshooting Your Enchilada Adventures
My tortillas are still a bit soggy! What went wrong?
If your tortillas are still soggy, you might have skipped the quick-fry step or fried them for too short a time, preventing the seal. Ensure the oil is hot enough and fry each side for the full 5-10 seconds until pliable but not crispy.
Also, ensure you are dipping them briefly into the warm sauce and shaking off any excess. Over-soaking is a common culprit.
The cheese on top didn’t melt perfectly or got too hard.
This often happens if the oven temperature is too high, causing the cheese to brown before it fully melts underneath. Ensure your oven is accurately calibrated at 375°F (190°C).
Using a good melting cheese blend and not over-baking beyond a light golden hue will ensure a perfect, bubbly, and gooey topping. If it browns too fast, cover lightly with foil.
My enchiladas taste a little bland. How can I boost the flavor?
To boost flavor, consider enhancing your red enchilada sauce. Sautéing a little onion and garlic before adding the sauce can deepen its base flavors. A pinch of cumin, chili powder, or oregano can also be stirred into the sauce.
Ensure your cheese blend is robust enough, or add a sprinkle of a more aged cheese for extra punch. Don’t forget the fresh cilantro and sour cream for essential brightness and tang.
Serving Suggestions & Storage Tips
Creative Pairings for a Complete Meal
Beyond the traditional, consider serving your Cheesy Enchiladas with a vibrant corn and black bean salsa for added texture and freshness. A simple green salad with avocado can provide a light, crisp counterpoint.
Round Out Your Meal
Consider these dishes to complement your cheesy enchiladas.
- For a warm and hearty start, try our Loaded Potato Soup, offering a creamy texture that pairs well with the richness of enchiladas.
- Another satisfying option is our Creamy Southwest Chicken Chili, featuring complementary Southwestern spices and a tender chicken preparation.
For a refreshing beverage, offer horchata or a sparkling limeade. A light dessert like churros or sopapillas would round out the meal beautifully, creating a memorable dining experience.
Keeping Your Cheesy Enchiladas Fresh
After cooling to room temperature, transfer any leftover enchiladas to an airtight container. This prevents them from drying out and absorbing refrigerator odors.
Properly stored in the refrigerator, they will remain delicious for up to 3-4 days, making them perfect for planned leftovers or packed lunches.
Reheating for Optimal Enjoyment
For the best results, reheat individual portions of enchiladas in the microwave on medium power for 2-3 minutes, until warmed through. This maintains moisture.
If reheating a larger portion, place it in an oven-safe dish, cover with foil, and warm in a 350°F (175°C) oven for 15-20 minutes. This method helps maintain a better texture than direct microwaving for multiple servings.
Your Turn: Create and Share Your Perfect Cheesy Enchiladas!
This recipe transforms the humble enchilada into a truly extraordinary dish, banishing soggy tortillas forever. You’ll discover the immense satisfaction of serving perfectly textured, flavor-packed Cheesy Enchiladas that taste as good as they look.
It’s incredibly easy to master, making it your new go-to for a comforting and crowd-pleasing meal. Don’t just take my word for it-try this recipe tonight, and be sure to share your delicious creations and experiences in the comments below!
Cheesy Enchiladas
Course: Main CourseCuisine: Mexican cuisineDifficulty: easy4
servings20
minutes25
minutes50
minutesMexican cuisine
Ingredients
12 corn tortillas (standard size)
2 cups shredded cheese blend (like Monterey Jack and mild cheddar)
1 28 ounce can red enchilada sauce
1 tablespoon vegetable oil
Sour cream, for serving
Fresh cilantro, chopped, for serving
Directions
- Preheat your oven to 375F (190C). Lightly grease a 9×13 inch baking dish.
- This is the secret for no more soggy tortillas! Pour about 1 cup of the red enchilada sauce into a shallow dish and warm it gently in the microwave for 30 seconds, or in a small saucepan over low heat. Set aside. This slightly warms the sauce, helping the tortillas absorb just the right amount of moisture.
- Heat the vegetable oil in a large skillet over medium-high heat. You will work with one tortilla at a time. Using tongs, carefully place a dry corn tortilla into the hot oil. Fry for about 5-10 seconds per side, just until it softens, becomes pliable, and is lightly toasted but not crispy or brittle. This quick fry seals the tortilla’s surface, creating a barrier that prevents it from absorbing too much moisture and becoming mushy during baking. Transfer the lightly fried tortilla to a clean plate, then immediately dip it into the warm enchilada sauce (from Step 2), just enough to fully coat it. Do not let it soak. Remove and shake off any excess sauce.
- Lay a softened tortilla flat on a clean surface. Sprinkle about 2 tablespoons of the shredded cheese down the center. Roll the tortilla tightly and place it seam-side down in your prepared baking dish. Repeat with the remaining tortillas and cheese, arranging them snugly in the dish.
- Pour the remaining red enchilada sauce evenly over the rolled enchiladas. Ensure they are well covered.
- Sprinkle the remaining shredded cheese over the top of the enchiladas.
- Bake for 20-25 minutes, or until the sauce is bubbly and the cheese is melted and lightly golden.
- Carefully remove from the oven. Let the enchiladas rest for 5 minutes before serving. This helps the flavors meld and the enchiladas set without being too watery.
- Serve hot, topped with generous dollops of sour cream and a sprinkle of fresh cilantro. Perfect alongside Mexican rice, refried beans, and guacamole for a complete meal!
Notes
- Serve with Mexican rice, refried beans, and guacamole for a complete meal!