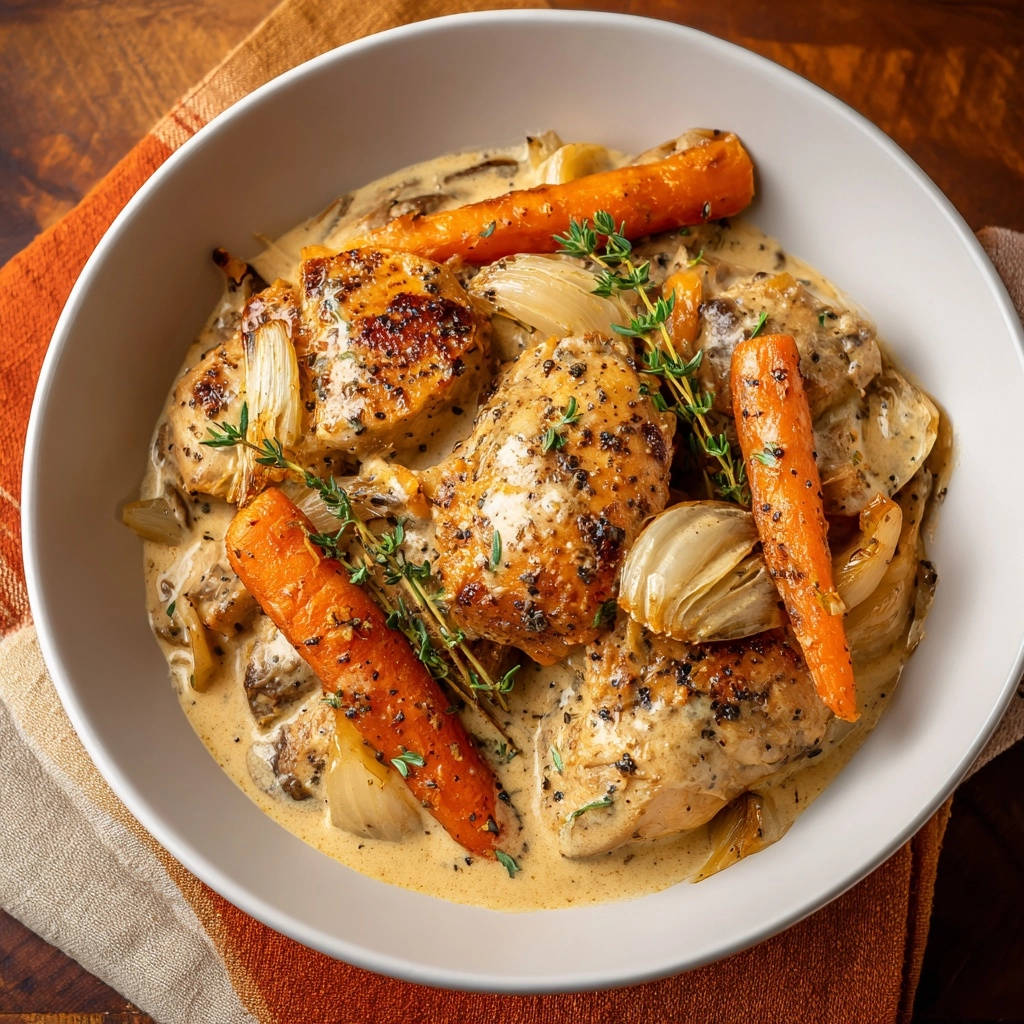
Creamy Garlic Herb Chicken & Carrots: Never Dry, Always Juicy!
As a seasoned recipe developer, I understand the frustration of dry chicken and bland dinners. That’s why I’m thrilled to share my perfected recipe for Creamy Garlic Herb Chicken & Carrots, designed to deliver incredibly juicy chicken and tender, flavorful vegetables every single time.
This dish isn’t just a meal; it’s a testament to how simple techniques can transform everyday ingredients into a truly special, one-pan weeknight triumph, winning over even the pickiest eaters with its rich, aromatic sauce.
Beyond the Chicken
If you’re enjoying this creamy garlic herb chicken, you might want to explore other comforting chicken dishes.
Get Our Best Recipes Weekly!
Join thousands of food lovers and get delicious recipes delivered to your inbox.
- For a hearty and satisfying meal, consider making homestyle chicken and dumplings, known for its tender chicken and fluffy dumplings.
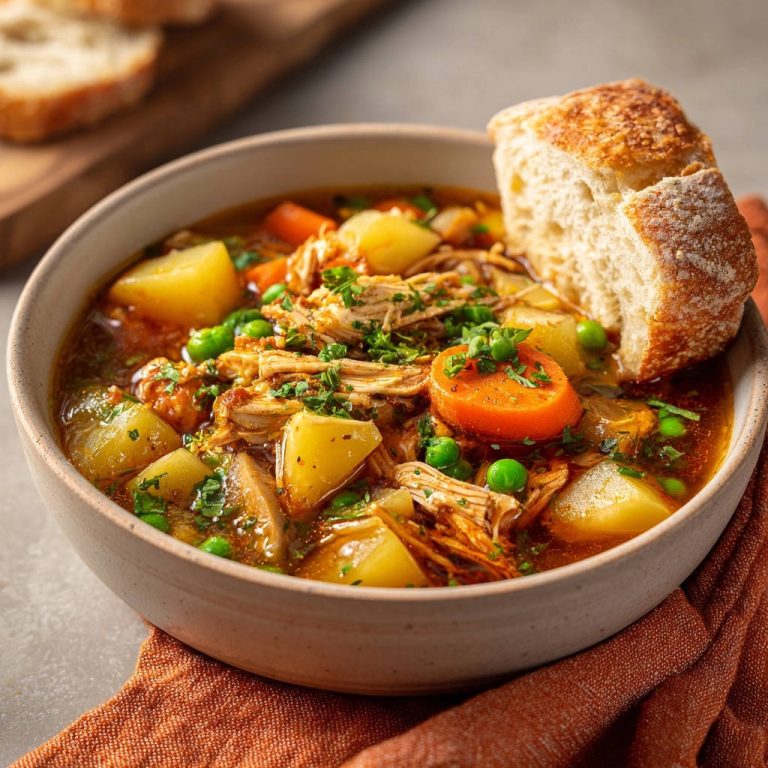
- If you prefer a stew with rich, savory flavors, try this creamy chicken stew, which offers a different take on tender chicken in a comforting sauce.
Beyond Basic: Why This Creamy Garlic Herb Chicken & Carrots Recipe Works Wonders
The End of Dry Chicken: A Promise Delivered
This recipe specifically combats dryness by employing a strategic two-step cooking process. A high-heat sear locks in moisture and develops a golden crust, while finishing in a creamy sauce within the oven ensures the chicken remains incredibly tender.
The gentle baking environment prevents moisture loss, guaranteeing perfectly juicy chicken thighs infused with rich flavors.
Effortless Elegance: Your One-Pan Weeknight Solution
Imagine a gourmet meal with minimal cleanup; this one-pan approach makes it a reality. All the magic happens in a single oven-safe skillet or Dutch oven, from searing to simmering to baking.
This streamlined method makes the Creamy Garlic Herb Chicken & Carrots perfect for busy weeknights, offering sophisticated flavors without the fuss.
Rich, Layered Flavors That Win Over Picky Eaters
The depth of flavor in this dish is extraordinary, built upon a foundation of browned chicken fond, sweet caramelized onions, pungent garlic, and earthy fresh thyme.
These elements meld beautifully with a luxurious creamy sauce, creating a harmonious taste that satisfies a wide range of palates, making it a reliable family favorite.
Building Blocks of Flavor: Key Ingredients for Success
The Star Protein: Bone-In, Skin-On Chicken Thighs
Bone-in, skin-on chicken thighs are my top choice for this dish due to their inherent juiciness and rich flavor. The bone contributes to a deeper taste, while the skin crisps beautifully and protects the meat from drying out.
They are incredibly forgiving and ideal for slow cooking methods that ensure tender results.
Sweet Earthiness: Carrots and Onions
Carrots, whether baby or chopped large ones, provide a natural sweetness that balances the savory elements of the dish. They soften beautifully, absorbing the sauce’s rich flavors.
Quartered yellow onions caramelize slightly as they sauté, adding another layer of sweet, aromatic depth to the creamy sauce base.
Aromatic Foundation: Garlic and Fresh Thyme
Minced garlic is crucial for the signature “Garlic Herb” profile, infusing the entire dish with its warm, pungent aroma. It’s the backbone of the savory flavor.
For another way to use garlic and chicken, try our honey garlic chicken thighs.
Fresh thyme sprigs contribute an earthy, slightly peppery note, elevating the overall fragrance and adding a touch of sophisticated freshness to the finished meal.
The Creamy Base: Chicken Broth, Heavy Cream, and Optional Flour
Chicken broth forms the initial liquid base, deglazing the pan and capturing all the flavorful fond. It’s essential for building a rich sauce.
Heavy cream is what gives the sauce its luxurious, velvety texture and rich mouthfeel, making it truly decadent. The optional all-purpose flour helps thicken the sauce, creating a more substantial coating for the chicken and vegetables.
Seasoning Essentials: Olive Oil, Salt, and Black Pepper
Olive oil is used for searing the chicken, crucial for developing that irresistible golden-brown crust and building the foundational flavors in the pan.
Generous seasoning with salt and black pepper throughout the cooking process is vital. These staples enhance all the other ingredients, bringing out their best flavors.
Gear Up: Essential Tools for This Delicious Dish
The Right Vessel: Oven-Safe Skillet or Dutch Oven
An oven-safe skillet or Dutch oven is absolutely crucial for this recipe. It allows you to seamlessly transition from stovetop searing to oven baking in the same pan.
A large pan ensures enough surface area for searing the chicken properly and provides ample space for all the vegetables and sauce.
Beyond the Basics: Prep Tools That Make a Difference
Sharp Knife and Cutting Board: Essential for efficiently preparing your carrots, onions, and garlic.
Paper Towels: Critical for thoroughly drying the chicken, which is a key step for achieving a perfect sear.
Meat Thermometer: Your best friend for ensuring the chicken is cooked to juicy perfection without being overcooked.
From Prep to Plate: Crafting Your Creamy Garlic Herb Chicken & Carrots
- Prepare the Chicken:
Pat the chicken thighs thoroughly dry with paper towels. This crucial step is key to getting a beautiful sear and locking in those natural juices.
Season generously all over with salt and black pepper, ensuring even coverage for maximum flavor.
- Sear for Golden Perfection:
Heat the olive oil in a large oven-safe skillet or Dutch oven over medium-high heat until shimmering. A hot pan is essential for a good sear.
Place chicken thighs skin-side down in the hot skillet, ensuring not to overcrowd the pan. Sear for 6-8 minutes until the skin is deeply golden brown and crispy. This initial sear creates a flavorful crust and helps keep the chicken moist.
Flip the chicken and sear for another 2-3 minutes to lightly brown the other side. Remove chicken from the skillet and set aside on a clean plate.
- Build the Aromatic Base:
Add the quartered onions and carrot chunks to the same skillet, reducing heat slightly if necessary. Sauté for 5-7 minutes, scraping up any browned bits (fond) from the bottom of the pan as you stir. These flavorful bits will enrich the sauce.
Add the minced garlic and cook for another minute until fragrant, being careful not to burn it.
- Create the Sauce Foundation (Optional Thickening):
If using flour for a thicker sauce, sprinkle it over the vegetables and stir for 1 minute to cook out the raw flour taste.
Slowly pour in the chicken broth, stirring constantly to combine and scrape up all remaining fond from the bottom of the pan. Bring the mixture to a gentle simmer, allowing the flavors to meld.
- Achieve Creamy Richness:
Stir in the heavy cream and let the sauce gently simmer for 2-3 minutes until it thickens slightly. The cream adds a luscious texture.
Taste the sauce and adjust seasoning with salt and pepper as needed. This is your chance to perfect the flavor balance.
- Return Chicken to the Skillet:
Carefully return the seared chicken thighs to the skillet, nestling them into the sauce and vegetables. Ensure the chicken is mostly submerged in the liquid to prevent drying out during baking.
- Bake to Juicy Perfection:
Transfer the skillet to a preheated oven at 375 degrees Fahrenheit (190°C). Bake for 20-25 minutes, or until the chicken reaches an internal temperature of 170-175 degrees Fahrenheit (77-79°C). This gentle baking ensures the chicken stays incredibly tender and juicy.
- Rest and Garnish:
Remove from oven, let the dish rest for a few minutes before serving. Resting allows the juices to redistribute, resulting in more tender meat.
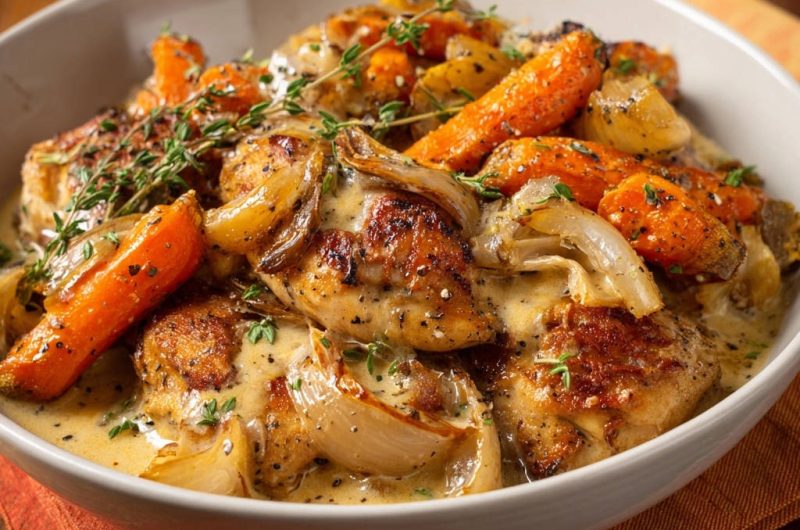
Garnish with fresh thyme sprigs just before serving for a burst of fresh flavor and visual appeal.
Unlock Flavor Secrets: Pro Tips for Your Best Dish Yet
The Power of a Perfect Sear: Crispy Skin, Juicy Meat
Don’t rush the searing process! A proper, deep golden-brown sear on the chicken skin is critical for both flavor and creating a barrier that locks in moisture during baking. Ensure your pan is hot enough and avoid overcrowding.
Don’t Forget the Fond: Building Deep Flavor
Those browned bits stuck to the bottom of your pan after searing the chicken and sautéing the vegetables are pure flavor gold. Deglaze the pan with broth, scraping up every last bit, to infuse your sauce with incredible depth.
Temperature Matters: Ensuring Optimal Juiciness
Using a meat thermometer is your best friend to prevent overcooking. Aim for an internal temperature of 170-175°F (77-79°C) in the thickest part of the chicken thigh. Thighs are forgiving, but overcooking still leads to dryness.
The Art of Resting: A Crucial Step
Once removed from the oven, allow the chicken to rest for 5-10 minutes. This allows the juices to redistribute throughout the meat, guaranteeing a more tender and juicy bite. Don’t skip this easy step!
Taste and Adjust: Seasoning for Perfection
Always taste your sauce before returning the chicken to the pan and again just before serving. Salt and pepper levels are subjective, so adjust to your personal preference. A pinch more salt can brighten all the flavors.
Navigating Challenges: Common Issues & Quick Fixes
My Chicken is Still Dry!
Ensure you thoroughly pat the chicken dry before searing to achieve a good crust, and make sure it’s mostly submerged in the sauce during baking. Also, verify your oven temperature and use a meat thermometer to avoid overcooking beyond 175°F.
The Sauce Isn’t Right: Too Thin or Too Thick?
If your sauce is too thin, let it simmer uncovered for a few extra minutes to reduce. If it’s too thick, you can thin it out with a splash of extra chicken broth or water until it reaches your desired consistency. Remember the flour is optional for thickening.
Flavor Falls Flat: Boosting the Taste
Generous seasoning is key! Ensure you salt and pepper the chicken well, and taste the sauce before serving to adjust. Don’t forget to scrape up all the fond from the bottom of the pan, as it adds immense depth of flavor.
Serving Your Masterpiece: Perfect Sides & Pairings
Classic Comfort: Rice or Mashed Potatoes
Fluffy white rice or creamy mashed potatoes are perfect for soaking up every drop of the luscious sauce from your Creamy Garlic Herb Chicken & Carrots.
Fresh & Vibrant: Steamed Greens or Salad
Balance the richness with a side of steamed green beans, asparagus, or a simple green salad with a light vinaigrette for a refreshing contrast.
Crusty Bread for Dipping
Don’t let any sauce go to waste! Serve this one-pan meal with crusty bread or warm garlic bread for dipping into the flavorful creamy sauce.
Smart Planning: Prep, Storage, and Reheating Tips
Can You Make This Dish Ahead?
While best served fresh, you can sear the chicken and sauté the vegetables ahead of time, then finish baking just before serving. Store seared chicken and sautéed veggies separately in the refrigerator.
Storing Leftovers for Best Taste
Store any leftover Creamy Garlic Herb Chicken & Carrots in an airtight container in the refrigerator for up to 3-4 days. Ensure it cools completely before refrigerating to maintain freshness.
Reheating Without Losing Flavor or Texture
Gently reheat leftovers on the stovetop over medium-low heat, adding a splash of chicken broth or cream if the sauce seems too thick. You can also reheat in the oven at 300°F (150°C) until warmed through, covered, to prevent drying out.
Your Burning Questions, Answered
Can I Substitute Different Chicken Cuts?
Yes, you can use boneless, skinless chicken thighs or breasts, but cooking times will vary significantly. Boneless breasts may dry out more easily and will need less baking time. Adjust accordingly and rely on a meat thermometer for accurate doneness.
What About Other Vegetables?
Absolutely! Feel free to experiment with other sturdy vegetables like mushrooms, bell peppers, or even potatoes. Add them with the carrots and onions, ensuring they are cut into similar-sized pieces for even cooking and optimal flavor absorption.
Is There a Dairy-Free Option?
For a dairy-free version, you can substitute the heavy cream with full-fat coconut milk (ensure it’s unsweetened) or a dairy-free cream alternative. The flavor profile will be slightly different but still delicious, offering a creamy texture.
Can I Skip the Flour for a Thinner Sauce?
Yes, the flour is entirely optional. If you prefer a thinner, lighter sauce, simply omit it. The sauce will still have body from the cream and broth reduction, but it won’t be as thick, appealing to those who prefer a less viscous consistency.
Your Next Culinary Triumph Starts Here!
You now have all the tools and knowledge to create a truly spectacular Creamy Garlic Herb Chicken & Carrots dish that promises juicy, flavorful chicken every time. This recipe is more than just a meal; it’s a guaranteed crowd-pleaser that will elevate your weeknight dining and impress your guests with its rich sauce and tender components.
So, grab your skillet, gather your ingredients, and get ready to transform your dinner table with this incredible one-pan meal. Don’t forget to share your culinary masterpiece and tell us how much you loved it!
Creamy Garlic Herb Chicken & Carrots
Course: Main CourseCuisine: American CuisineDifficulty: easy4
servings20
minutes40
minutes60
minutesAmerican Cuisine
Ingredients
4 bone in skin on chicken thighs
1 pound baby carrots or 4 large carrots peeled and cut into chunks
1 large yellow onion quartered and separated
4 cloves garlic minced
1.5 cups chicken broth
0.5 cup heavy cream
2 tablespoons all purpose flour (optional, for thicker sauce)
2 tablespoons olive oil
Fresh thyme sprigs for garnish
Salt and black pepper to taste
Directions
- Pat the chicken thighs thoroughly dry with paper towels. This crucial step is key to getting a beautiful sear and locking in those natural juices. Season generously all over with salt and black pepper.
- Heat the olive oil in a large oven safe skillet or Dutch oven over medium high heat until shimmering. Place chicken thighs skin side down in the hot skillet, ensuring not to overcrowd the pan. Sear for 6-8 minutes until the skin is deeply golden brown and crispy. This initial sear creates a flavorful crust and acts as a barrier to keep the chicken moist during the rest of the cooking process. Flip the chicken and sear for another 2-3 minutes. Remove chicken from the skillet and set aside.
- Add the quartered onions and carrot chunks to the same skillet. Sauté for 5-7 minutes, scraping up any browned bits from the bottom of the pan as you stir. These browned bits (fond) are packed with flavor and will contribute to a rich sauce. Add the minced garlic and cook for another minute until fragrant.
- If using flour for a thicker sauce, sprinkle the flour over the vegetables and stir for 1 minute to cook out the raw flour taste. Slowly pour in the chicken broth, stirring constantly to combine and scrape up all remaining fond from the bottom of the pan. Bring the mixture to a simmer.
- Stir in the heavy cream and let the sauce gently simmer for 2-3 minutes until it thickens slightly. Taste and adjust seasoning with salt and pepper as needed.
- Carefully return the seared chicken thighs to the skillet, nestling them into the sauce and vegetables. Ensure the chicken is mostly submerged in the liquid to prevent drying out.
- Transfer the skillet to a preheated oven at 375 degrees Fahrenheit. Bake for 20-25 minutes, or until the chicken reaches an internal temperature of 170-175 degrees Fahrenheit. The gentle baking in the creamy sauce ensures the chicken stays incredibly tender and juicy, guaranteeing no more dry meat.
- Remove from oven, let rest for a few minutes, then garnish with fresh thyme sprigs before serving. Enjoy your perfectly juicy chicken and flavorful veggies!