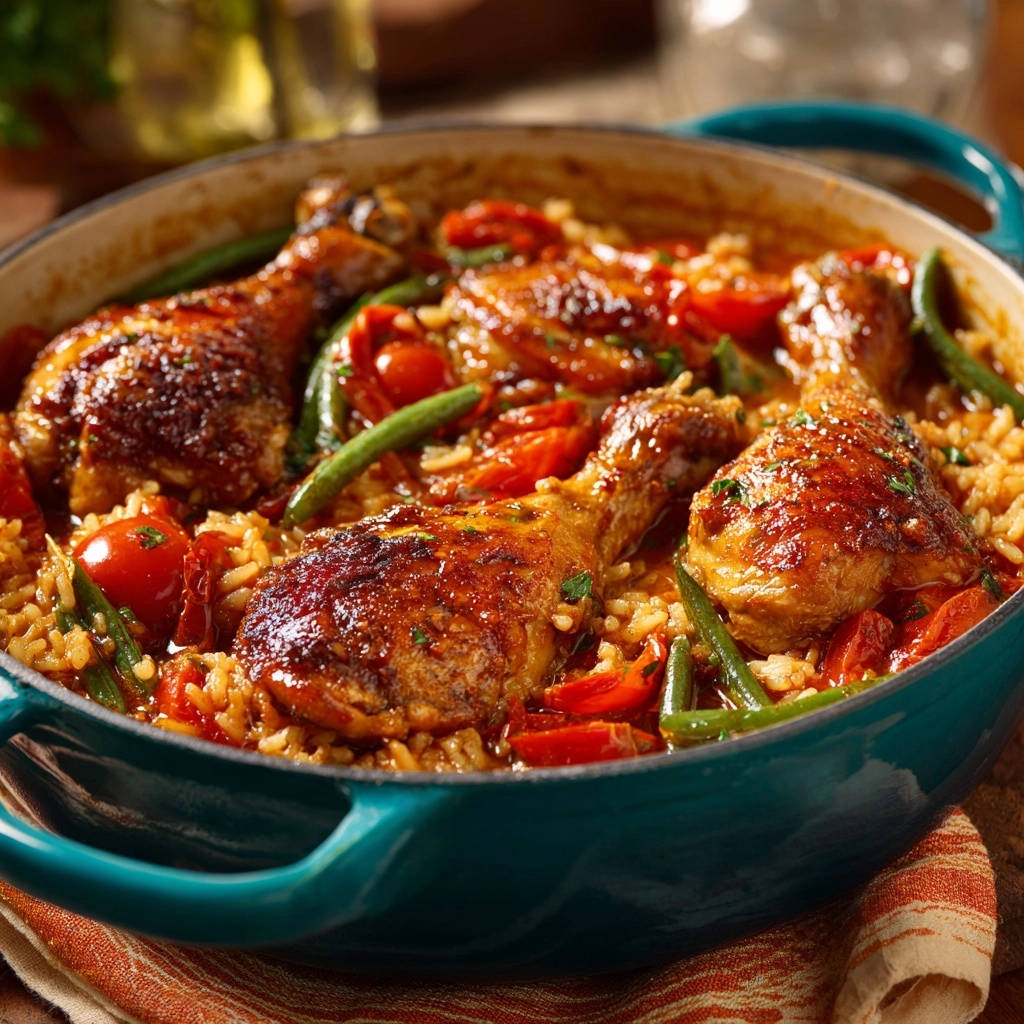
Skillet Chicken & Rice: The Secret to Juicy, Tender Bites
I remember countless attempts at one-pot chicken and rice, often resulting in dry, uninspired chicken and sticky or undercooked grains. This `Skillet Chicken & Rice` recipe is my definitive answer to that frustration, transforming simple ingredients into a deeply flavorful, impossibly juicy meal that truly delivers every single time.
You’re about to discover a method that locks in moisture and infuses every bite with robust flavor, making this skillet dinner a confident weeknight win.
Why This Skillet Chicken & Rice Belongs in Your Weeknight Rotation
Say Goodbye to Dry Chicken: Our Moisture-Locking Method
The secret to unbelievably juicy chicken lies in two critical steps: a high-heat sear and a perfectly sealed, low-simmer cook. We create a beautiful, crispy skin while locking in the natural juices, ensuring every drumstick remains tender and moist.
Get Our Best Recipes Weekly!
Join thousands of food lovers and get delicious recipes delivered to your inbox.
Flavor Infusion: From Sear to Simmer
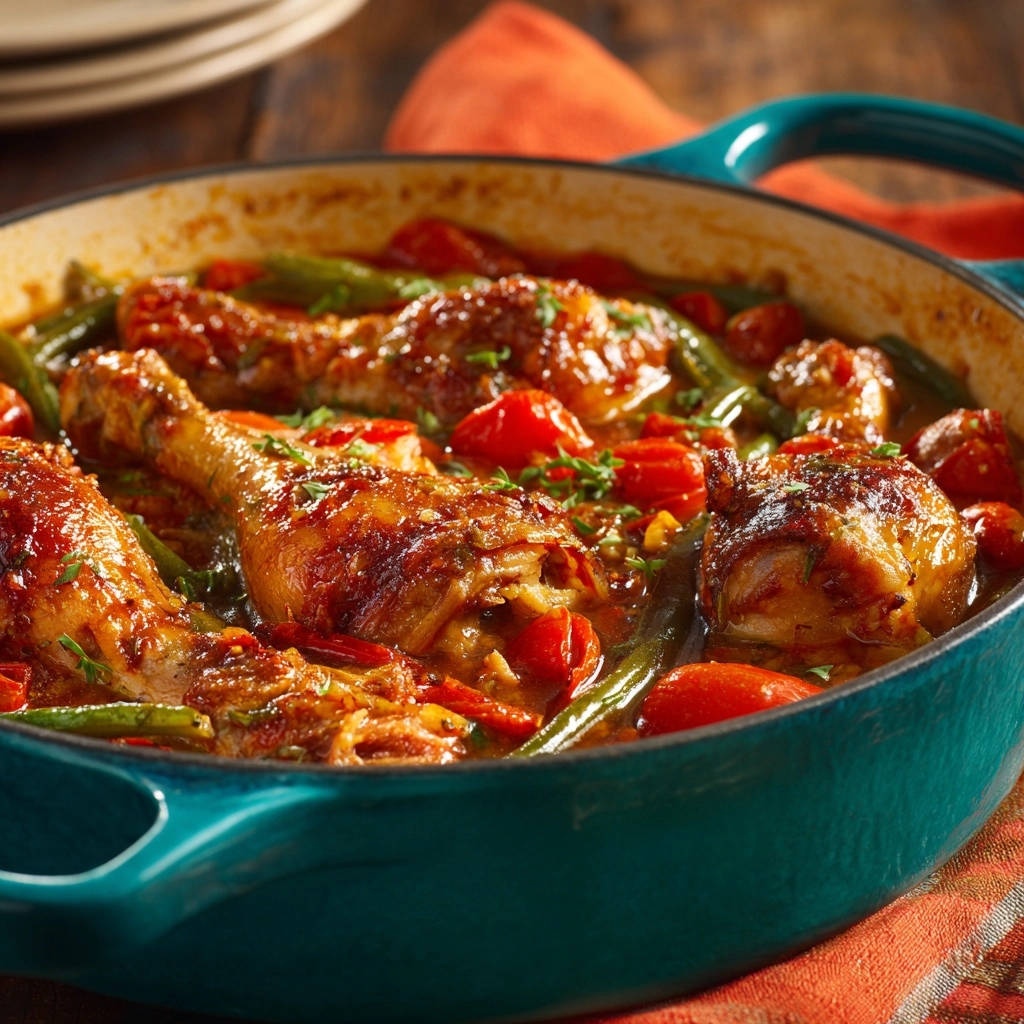
This `Skillet Chicken & Rice` isn’t just about cooking; it’s about building layers of flavor from the very start. From the rich browned bits (fond) in the pan to the aromatic sautéed vegetables and vibrant tomatoes, every ingredient contributes to a complex, satisfying taste profile.
One-Pot Wonder: Effortless Cleanup, Maximum Taste
Imagine a complete, wholesome meal with minimal dishes to wash. This recipe utilizes a single skillet from start to finish, making it an ideal solution for busy weeknights when you crave homemade goodness without the extensive cleanup.
Gather Your Gear: Essential Tools for Skillet Chicken & Rice Success
The Star of the Show: Choosing Your Skillet
A large, heavy-bottomed, oven-safe skillet or Dutch oven is essential. Its ability to retain and distribute heat evenly is crucial for both effective searing and consistent simmering, leading to perfectly cooked rice and chicken.
Beyond the Pan: Supporting Utensils
You’ll need a good pair of tongs for handling the chicken, a sharp knife and cutting board for prep, and accurate measuring cups. Most importantly, a tight-fitting lid for your skillet is non-negotiable for creating that vital steamy environment.
The Flavor Foundation: Key Ingredients for Perfect Skillet Chicken & Rice
Chicken Drumsticks: The Heart of the Meal
We opt for chicken drumsticks for their inherent flavor and ability to stay tender through the cooking process. Look for drumsticks of similar size to ensure even cooking and juicy results.
Aromatics & Spice: Building Depth
Onion provides a sweet, savory base as it caramelizes. Minced garlic adds a pungent depth, while smoked paprika introduces a warm, earthy, and subtly smoky note that defines the dish’s character. Dried oregano contributes an herbaceous complexity.
Tomato Trio: Freshness & Acidity
Canned diced tomatoes form a foundational, saucy liquid for the rice, contributing essential moisture and a tangy base. Fresh cherry tomatoes burst with sweet acidity as they cook, adding pockets of vibrant flavor and texture throughout the `Skillet Chicken & Rice`.
Rice and Broth: The Perfect Pair for Fluffy Grains
Long-grain white rice is chosen for its ability to absorb flavor while remaining distinct and fluffy. Rinsing the rice thoroughly removes excess starch, preventing a gummy texture. Chicken broth infuses the rice with savory depth, crucial for a truly flavorful dish.
Fresh Greens & Garnish: A Pop of Color and Flavor
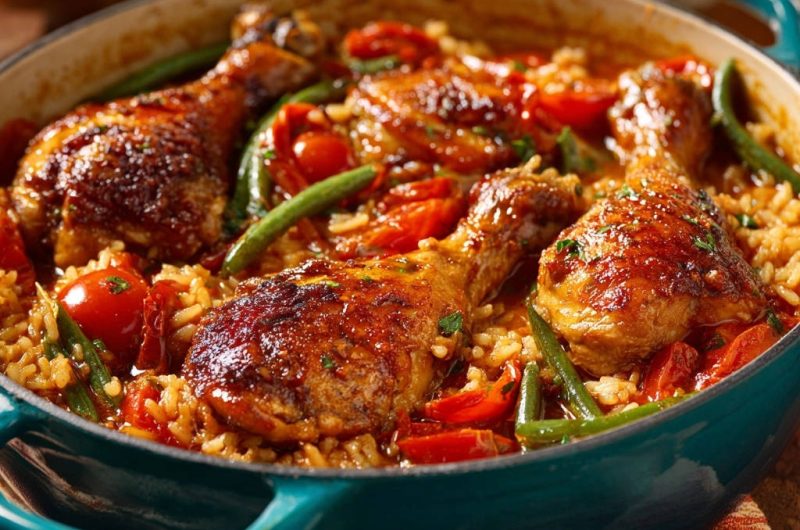
Fresh green beans are stirred in towards the end, providing a delightful tender-crisp texture and a touch of vibrant green. A generous garnish of fresh parsley adds a burst of freshness and brightness, elevating the dish’s aroma and visual appeal.
Mastering the Skillet: Your Step-by-Step Skillet Chicken & Rice Guide
Step 1: Sear for Golden Glory (and Juicy Chicken!)
Begin by patting your chicken drumsticks very dry with paper towels. This crucial step ensures a superior sear, not a steam, resulting in incredibly crispy skin.
Season generously with salt and pepper. Heat olive oil in your skillet over medium-high heat until shimmering, then sear the drumsticks for 5-7 minutes per side until they are deeply golden brown and the skin is crisp. This essential browning creates flavor depth and locks in juices, guaranteeing tender chicken.
For more cheesy goodness, try this Cheesy Chicken & Rice Bake.
Once beautifully seared, remove the chicken from the skillet and set it aside to rest.
Step 2: Crafting the Aromatic Base
Reduce the heat to medium. Add the chopped onion to the skillet and cook for 5-7 minutes, stirring occasionally, until it softens and becomes translucent.
As you cook, gently scrape up any browned bits (the “fond”) from the bottom of the pan; these are packed with flavor. Add the minced garlic, smoked paprika, and oregano, cooking for just 1 minute more until their fragrant aromas fill your kitchen.
Step 3: Integrating Rice and Tomatoes
Stir in the undrained diced tomatoes and the halved cherry tomatoes into the skillet. Bring this mixture to a gentle simmer for 2-3 minutes, allowing the flavors to meld.
For another rice dish with similar ease, explore this skillet jambalaya-style rice.
Next, add the thoroughly rinsed long-grain rice to the skillet, stirring gently to ensure every grain is evenly coated with the rich tomato and aromatic mixture. This even coating promotes consistent cooking.
Step 4: The Gentle Simmer & Chicken Return
Carefully pour the chicken broth into the skillet. Bring the entire mixture to a boil over medium-high heat, then immediately reduce the heat to its lowest setting to maintain just a bare simmer.
Gently nest the seared chicken drumsticks back into the rice mixture, ensuring they are partially submerged. Cover the skillet tightly with its lid.
Step 5: The Unbroken Cook: Why Patience Pays Off
Allow the `Skillet Chicken & Rice` to simmer undisturbed on low heat for 20-25 minutes. During this critical period, resist the urge to lift the lid, no matter how curious you are!
Keeping the lid on traps steam, creating a perfect, consistent environment that gently cooks the chicken through without drying it out, resulting in incredibly juicy drumsticks and perfectly tender, fluffy rice.
Step 6: Fresh Greens & Final Rest
After the 20-25 minutes of simmering, remove the lid. Quickly stir in the fresh green beans, distributing them evenly over the rice.
Re-cover the skillet and continue to cook on low heat for another 3-5 minutes, allowing the green beans to steam to a perfect tender-crisp. Remove the skillet from the heat and let it rest, still covered, for 5-10 minutes. This resting period finishes cooking the green beans and allows the rice to absorb any remaining liquid, achieving optimal texture.
Step 7: Garnish and Serve with Pride
Uncover the skillet. Gently fluff the perfectly cooked rice with a fork, incorporating all the delicious flavors.
Garnish generously with fresh chopped parsley, adding a vibrant pop of color and herbaceous freshness. Serve your impressive, juicy `Skillet Chicken & Rice` immediately and enjoy!
More Chicken Dinner Ideas
If you enjoyed this chicken and rice dish, you might like these other chicken recipes.
- For a different take on comforting chicken, try our homestyle chicken and dumplings, featuring soft, fluffy dumplings.
- If you’re in the mood for a hearty, warming meal, check out this creamy chicken stew, a satisfying dish perfect for cooler evenings.
Chef’s Secrets: Elevating Your Skillet Chicken & Rice to New Heights
The Power of a Proper Sear
Patting the chicken completely dry before searing is paramount. This allows the chicken to achieve a deep, golden-brown crust through the Maillard reaction, which is crucial for building complex flavors and locking in moisture.
Unlocking the Fond: Flavor Gold
Those browned bits that stick to the bottom of the pan after searing the chicken are pure flavor gold, known as “fond.” When you add the onions and later the tomatoes, these liquids deglaze the pan, incorporating all that rich, concentrated flavor back into your `Skillet Chicken & Rice`.
The Lid’s Magic: Why You Must Resist Peeking
The tight-fitting lid during simmering acts like a miniature oven, creating a steamy, self-contained environment. Lifting the lid releases this precious steam, interrupting the cooking process and potentially leading to unevenly cooked rice or dry chicken. Trust the process!
Perfecting Your Rice Texture
Rinsing long-grain rice under cold water until it runs clear removes excess surface starch, which is key to achieving fluffy, distinct grains rather than a gummy or sticky texture. After adding the rice, avoid excessive stirring; just enough to coat it evenly.
Vegetable Timing for Optimum Crunch
Adding the green beans towards the end of the cooking process, just for a brief steam, ensures they emerge tender-crisp. This prevents them from becoming overcooked and mushy, maintaining their vibrant color and texture in the `Skillet Chicken & Rice`.
Solving Common Skillet Chicken & Rice Conundrums
Why is My Chicken Dry?
Dry chicken often results from insufficient searing, which fails to lock in juices effectively. Lifting the lid too frequently during the simmering phase can also release crucial moisture.
Ensure your heat is truly on low during the covered simmer; too high a heat will cook the chicken too aggressively, drying it out.
My Rice is Mushy (or Undercooked)!
Mushy rice can be due to adding too much liquid, simmering for too long, or not rinsing the rice sufficiently to remove excess starch. Conversely, undercooked rice might mean insufficient broth, not simmering long enough, or maintaining too low a heat.
Always measure accurately and trust the stated simmering times, adjusted slightly for your stove.
The Flavor Isn’t Popping
If your `Skillet Chicken & Rice` tastes a bit flat, double-check your initial seasoning of the chicken and the aromatics. Ensuring the onions are properly softened and the garlic and spices are fragrant before adding liquids is key.
A final squeeze of fresh lemon juice or an extra handful of fresh herbs like parsley or dill can brighten flavors significantly.
Rice Sticking to the Bottom
Rice sticking is usually a sign that your heat is too high, or there isn’t enough oil in the pan to begin with. Ensure you have a good amount of olive oil for searing and that your simmering heat is truly on low.
A heavy-bottomed skillet helps, and a gentle stir from the bottom before serving can usually free any stubborn grains.
Beyond the Skillet: Serving, Storing, and Enjoying Your Creation
Perfect Pairings & Serving Inspiration
Your `Skillet Chicken & Rice` is a complete meal on its own, but a simple side salad with a light vinaigrette makes for a refreshing contrast. Crusty bread is excellent for soaking up any remaining savory juices.
Consider a lemon wedge for each plate, or a dollop of sour cream or plain Greek yogurt for a creamy, tangy finish.
Storing Leftovers: Keeping it Fresh
Leftover `Skillet Chicken & Rice` keeps beautifully. Allow it to cool completely before transferring it to an airtight container.
Refrigerate for up to 3-4 days. To reheat, gently warm in the microwave or on the stovetop with a splash of chicken broth or water to restore moisture.
Make-Ahead Magic: Tips for Easier Meal Prep
To streamline your cooking process on a busy weeknight, you can prep some elements in advance. Chop your onion and mince your garlic the day before.
You can also measure out your spices and have them ready to go. Rinsing the rice ahead of time and letting it air dry briefly can also shave off a few minutes.
Your Skillet Chicken & Rice Questions Answered
Can I Substitute Other Cuts of Chicken?
Yes, chicken thighs (bone-in, skin-on) work exceptionally well and have a similar cooking time and fat content to drumsticks, ensuring juiciness. Boneless, skinless chicken breasts can be used, but reduce the simmering time by about 5-10 minutes to prevent them from drying out.
Always ensure chicken reaches an internal temperature of 165°F (74°C).
What Kind of Rice Works Best?
While long-grain white rice is recommended for its texture, you can experiment. Basmati rice offers a similar light, fluffy texture. Brown rice will require significantly more liquid (about 1/2 to 1 cup extra) and a longer simmering time, typically 40-50 minutes, so adjust accordingly.
Can I Freeze Leftovers?
Yes, `Skillet Chicken & Rice` freezes well. Allow the dish to cool completely, then transfer portions to freezer-safe containers or bags. It can be frozen for up to 3 months.
Thaw overnight in the refrigerator before reheating gently on the stovetop or in the microwave, adding a little broth or water if needed.
What if I Don’t Have an Oven-Safe Skillet?
No problem! After searing the chicken and building your flavor base in a regular skillet, transfer the contents (rice, tomatoes, broth, and chicken) to a large, oven-safe baking dish or casserole. Cover it tightly with foil and proceed with the simmering step in your oven at 350°F (175°C) for the same duration.
Ready to Create Your Own Skillet Chicken & Rice Masterpiece?
You now have all the expert knowledge and detailed guidance to create a truly exceptional `Skillet Chicken & Rice` that will impress everyone at your table.
Embrace the simple techniques, trust the process, and prepare to enjoy a profoundly satisfying and juicy meal. Don’t forget to share your culinary triumph with us!
Skillet Chicken & Rice
Course: Main CourseCuisine: American CuisineDifficulty: easy6
servings15
minutes55
minutes60
minutesAmerican Cuisine
Ingredients
6 chicken drumsticks
1 tablespoon olive oil
1 large onion, chopped
2 cloves garlic, minced
1 teaspoon smoked paprika
1/2 teaspoon dried oregano
Salt and black pepper to taste
1 (14.5 ounce) can diced tomatoes, undrained
1 cup cherry tomatoes, halved
2 cups long grain white rice, rinsed
3 cups chicken broth
1 cup fresh green beans, trimmed and halved
Fresh parsley, chopped, for garnish
Directions
- Sear for Success: Pat chicken drumsticks very dry with paper towels. Season generously all over with salt and pepper. Heat olive oil in a large oven safe skillet or Dutch oven over medium-high heat. Once hot, add drumsticks and sear for 5-7 minutes per side until deeply golden brown and skin is crisp. This critical step locks in juices and builds incredible flavor, preventing dry chicken later. Remove chicken from skillet and set aside.
- Build Flavor Base: Reduce heat to medium. Add chopped onion to the skillet and cook for 5-7 minutes until softened and translucent, scraping up any browned bits from the bottom of the pan. Add minced garlic, smoked paprika, and oregano. Cook for 1 minute more until fragrant.
- Rice and Tomatoes: Stir in the undrained diced tomatoes and halved cherry tomatoes. Bring to a gentle simmer for 2-3 minutes. Add the rinsed long grain rice to the skillet, stirring to combine everything evenly with the tomato mixture.
- Simmer for Tenderness: Pour in the chicken broth. Bring the mixture to a boil, then immediately reduce heat to low, ensuring it is just barely simmering. Nest the seared chicken drumsticks back into the rice mixture. Cover the skillet tightly with a lid.
- Cook to Perfection: Simmer on low heat for 20-25 minutes, or until the liquid is mostly absorbed and the rice is tender. Crucially, resist the urge to lift the lid during this time! This creates a steamy environment that gently cooks the chicken through without drying it out, ensuring every drumstick is incredibly juicy.
- Add Veggies & Finish: Once the 20-25 minutes of simmering are complete, remove the lid. Quickly stir in the green beans. Re-cover the skillet and continue to cook on low heat for 3-5 minutes, allowing the green beans to steam. Then, remove from heat and let sit, covered, for 5-10 minutes. The residual heat will finish the green beans to perfect tenderness and allow the rice to finish absorbing any remaining liquid.
- Serve Hot: Uncover, fluff the rice gently with a fork, and garnish generously with fresh chopped parsley before serving. Enjoy your perfectly juicy chicken and flavorful rice!
Notes
- Resist lifting the lid during simmering to ensure juicy chicken and perfectly cooked rice.