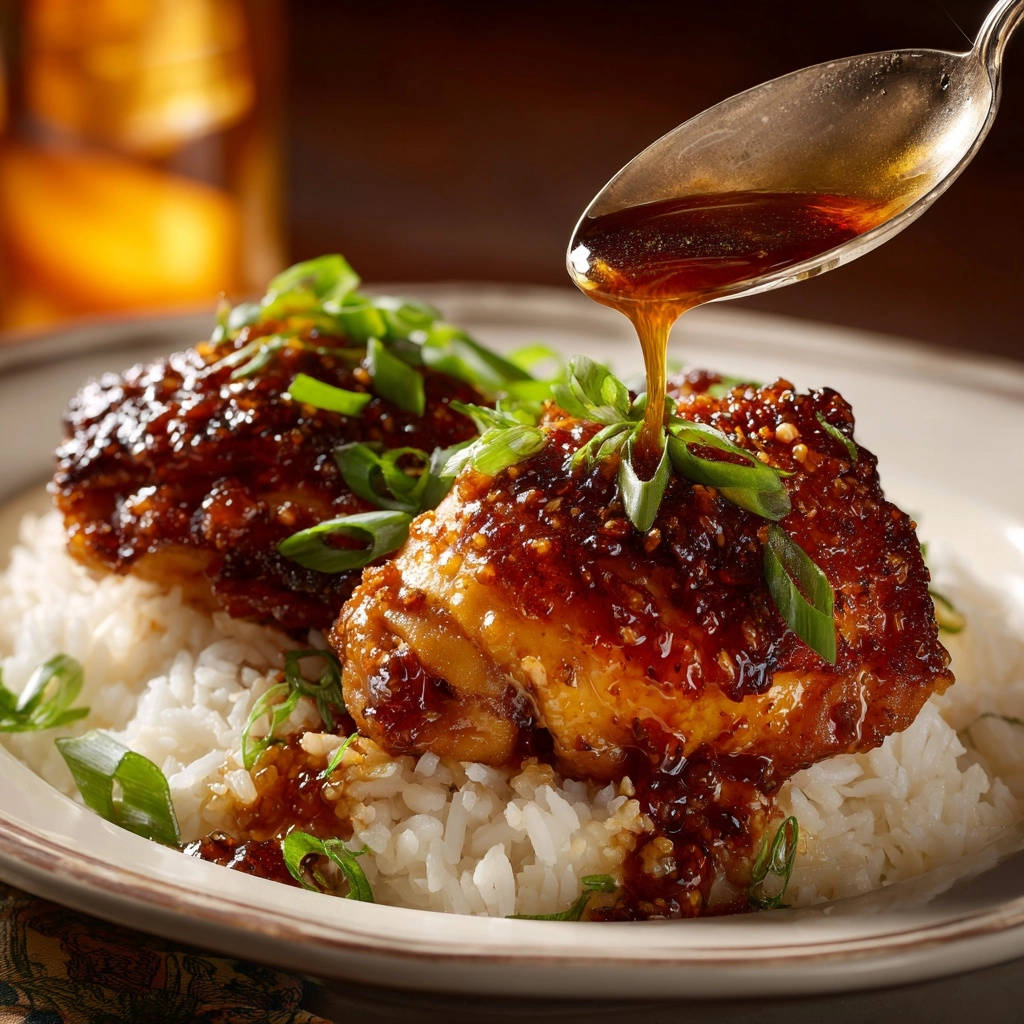
Honey Garlic Glazed Chicken Thighs: The Perfect Sticky Glaze
Ever struggled to achieve that elusive, restaurant-quality sticky glaze at home, only to end up with a watery sauce or chicken that lacks flavor? You’re not alone! This recipe for Honey Garlic Glazed Chicken Thighs is your ultimate guide to mastering a gloriously thick, glossy, and adhesive glaze that clings to every succulent bite.
Get ready to transform simple ingredients into an extraordinary weeknight meal, proving that an incredibly delicious and juicy chicken dish with a perfect sticky glaze is entirely achievable in your own kitchen.
For another simple yet flavorful chicken option, check out this creamy garlic herb chicken.
Get Our Best Recipes Weekly!
Join thousands of food lovers and get delicious recipes delivered to your inbox.
Beyond Bland: Why This Honey Garlic Glazed Chicken Thighs Recipe Shines
This recipe isn’t just about cooking chicken; it’s about elevating a classic to its ultimate potential. We’re unlocking secrets to a truly exceptional meal that stands out.
Mastering the “Glow and Stick”: Your Sticky Glaze Secret Revealed
The hallmark of this recipe is its unparalleled sticky glaze. We achieve that coveted “glow and stick” by precisely balancing flavors and utilizing a cornstarch slurry correctly, ensuring a thick, glossy coating that adheres beautifully to the chicken, rather than slipping off.
This technique creates a restaurant-quality sauce, elevating the entire dish beyond a simple pan sauce.
Weeknight Wonder: Fast Flavor, Restaurant Quality Without the Fuss
Despite its sophisticated taste, this dish is remarkably straightforward and quick to prepare. It’s designed for busy evenings when you crave something special but lack endless time.
You can enjoy gourmet flavors without spending hours in the kitchen, making it a perfect weeknight solution.
Juicy Perfection: Boneless, Skinless Thighs Every Time
Boneless, skinless chicken thighs are the star here for a reason. Their inherent fat content keeps them incredibly moist and flavorful, even when cooked quickly.
They are forgiving, ensuring tender and juicy results every time, perfectly absorbing the rich honey garlic sauce.
A Crowd-Pleaser: Loved by Families and Guests Alike
The sweet and savory balance of these honey garlic glazed chicken thighs has universal appeal. It’s a dish that satisfies diverse palates, making it ideal for family dinners or entertaining friends.
Prepare to receive rave reviews and requests for this recipe again and again.
The Flavor Foundation: Essential Ingredients for Your Glazed Chicken
Every exceptional dish begins with quality ingredients. Understanding their role is key to mastering this recipe.
For the Star: Boneless, Skinless Chicken Thighs
Chicken thighs are chosen for their incredible tenderness and rich flavor, which outperforms breast meat in this application. Boneless and skinless varieties cook quickly and provide a smooth surface for the glaze to adhere perfectly.
The Aromatic Core: Fresh Garlic and Ginger
Freshly minced garlic and grated ginger are non-negotiable for this recipe. They provide a vibrant, pungent, and warm aromatic base that cannot be replicated by powdered versions.
These aromatics are crucial for building the complex, irresistible flavor profile of the honey garlic glaze.
Sweet & Savory Balance: Honey and Low-Sodium Soy Sauce
Honey contributes natural sweetness and helps create that beautiful sticky texture. Low-sodium soy sauce provides the essential savory, umami depth without making the dish overly salty.
Their interplay creates the quintessential sweet and savory foundation for this honey garlic chicken.
Acidity & Depth: Rice Vinegar
Rice vinegar is a secret weapon. Its mild acidity cuts through the richness and sweetness of the honey and soy, balancing the flavors and adding a bright, tangy lift to the glaze.
The Thickening Magic: Cornstarch Slurry
Cornstarch is the hero behind the signature sticky and glossy texture. When mixed with cold water, it forms a slurry that thickens the sauce beautifully as it heats, creating a perfect coating consistency.
Optional Kick: Red Pepper Flakes
A pinch of red pepper flakes offers a gentle warmth and subtle heat, adding another layer of complexity. It’s fully customizable to your spice preference.
Serving Companions: Rice and Green Onions
Cooked white rice provides a neutral canvas to soak up all the incredible glaze. Freshly sliced green onions add a welcome pop of color, a hint of freshness, and a mild oniony bite that complements the rich sauce.
Your Culinary Arsenal: Essential Tools for Honey Garlic Glazed Chicken Thighs
Having the right tools makes all the difference in achieving perfect results with your pan-fried chicken.
Large Non-Stick Skillet: Essential for even cooking and preventing sticking. This allows you to achieve a beautiful sear on the chicken and build the glaze efficiently in one pan.
Whisk: Crucial for smooth glaze thickening. A good whisk ensures your cornstarch slurry incorporates evenly, preventing lumps and creating a perfectly glossy sauce.
Meat Thermometer: For ensuring perfectly cooked chicken every time. This tool guarantees juiciness by preventing overcooking and confirms the chicken is safe to eat.
Paper Towels: A simple tool vital for patting chicken dry to achieve a good sear. Removing surface moisture is a key step for crisp, golden-brown results.
Grater (for ginger): For fresh, potent ginger flavor. A microplane grater works wonders for finely grating ginger, releasing its maximum aromatic punch into the glaze.
Your Path to Perfect Honey Garlic Glazed Chicken Thighs: A Detailed Walkthrough
Follow these steps closely to create your ultimate honey garlic glazed chicken thighs, ensuring every component is perfect.
- Step 1: Prepare the Chicken for Optimal Searing
Pat the chicken thighs completely dry with paper towels. This step is crucial for achieving a beautiful golden-brown sear, as moisture creates steam and prevents browning. A dry surface allows the chicken to caramelize beautifully.
Season the chicken lightly with salt and pepper on both sides. Remember, the glaze will also add significant seasoning, so a light hand here is best.
- Step 2: Cook Chicken to Golden Perfection
Heat the cooking oil in a large non-stick skillet over medium-high heat until shimmering. Ensure the pan is hot enough to create an immediate sizzle when the chicken is added, promoting a good crust.
Add the chicken thighs in a single layer, making sure not to overcrowd the pan. Cook for 5-7 minutes per side, until they are beautifully golden brown and cooked through.
An internal temperature of 165°F (74°C) indicates doneness. Remove the cooked chicken from the pan and set it aside on a plate; residual heat will continue to cook it slightly, ensuring maximum juiciness.
- Step 3: Build the Glaze Base (The Sticky Secret Begins!)
Reduce the heat to medium. If there’s excess oil in the pan from cooking the chicken, carefully pour out all but about 1 teaspoon. This prevents the glaze from becoming greasy and ensures a clean flavor.
Add the minced garlic, grated ginger, and optional red pepper flakes to the pan. Sauté for just 30 seconds until they are fragrant. Be vigilant here; garlic burns quickly and can turn bitter, so watch it closely.
- Step 4: Simmer and Infuse Flavor for Depth
Pour in the soy sauce, honey, 1/4 cup water or broth, and rice vinegar. Bring the mixture to a gentle simmer, stirring well to combine all the aromatic and liquid ingredients.
Allow the glaze base to simmer for 2-3 minutes. This brief period is essential for the flavors to meld and deepen, creating a harmonious and robust base for the final glaze.
- Step 5: Thicken to Signature Stickiness with Cornstarch Slurry
This is the moment the magic happens! Give your cornstarch slurry a quick stir to ensure the cornstarch is fully suspended and hasn’t settled at the bottom.
Slowly pour the cornstarch slurry into the simmering sauce, whisking constantly. Continue to whisk for 1-2 minutes until the sauce visibly thickens, becoming beautifully glossy and sticky. It should easily coat the back of a spoon.
If you desire an even thicker glaze, you can add a tiny bit more slurry, but usually the recommended amount creates that ideal cling and delicious stickiness.
- Step 6: Glaze and Coat Every Irresistible Bite
Return the cooked chicken thighs to the skillet. Turn them gently to ensure they are completely coated in the thick, sticky glaze.
Let them simmer in the glaze for another 1-2 minutes, continuously spooning the glaze over the chicken. This allows the incredible flavor to truly adhere and absorb into the chicken, intensifying every bite.
- Step 7: Plate and Garnish Your Masterpiece
Divide the cooked white rice among serving plates. The rice serves as a perfect bed for the flavorful chicken and absorbs extra glaze, ensuring no drop of deliciousness is wasted.
Top each portion of rice with a glazed chicken thigh. Spoon any remaining sticky glaze from the pan generously over the chicken and rice, enhancing the visual appeal and taste.
Garnish with thinly sliced green onions for a pop of color and fresh, mild onion flavor. Serve immediately and savor every perfectly sticky, sweet, and savory bite!
Unlock Extra Flavor: Pro Tips for Your Honey Garlic Glazed Thighs
Elevate your dish from great to extraordinary with these expert insights for your juicy chicken thighs.
Round Out Your Meal
These chicken dishes pair well with your Honey Garlic Glazed Chicken Thighs.
- For a different take on comforting chicken, consider our Homestyle Chicken & Dumplings, perfect for a hearty meal.
- If you’re in the mood for a rich, warming chicken preparation, try this Creamy Chicken Stew.
The Dry-Chicken Advantage: Don’t skip patting the chicken dry! Excess moisture prevents the Maillard reaction, which is crucial for a golden, flavorful crust. A truly dry surface ensures a better sear and improved glaze adherence.
Prevent Overcrowding: Cook chicken in batches if necessary. An overcrowded pan lowers the temperature, steaming the chicken instead of searing it, leading to less browning and a tougher texture.
Whisking the Slurry is Key: Always stir your cornstarch slurry right before adding it to the pan, as cornstarch settles quickly. Pour it in slowly while constantly whisking to prevent lumps and ensure a smooth, even thickening.
Customizing Your Kick: Adjust the red pepper flakes to your heat preference. For more spice, add a pinch extra; for less, omit them entirely. You can also add a touch of sriracha at the end for fresh heat.
Don’t Overcook the Chicken: While thighs are forgiving, overcooking can still lead to dryness. Use a meat thermometer to ensure chicken reaches 165°F (74°C) and remove it promptly. The brief simmer in the glaze will finish cooking perfectly.
Fresh is Best for Aromatics: While ground ginger and garlic powder can be used in a pinch, fresh minced garlic and grated ginger deliver a far superior, more vibrant flavor profile that truly elevates the glaze.
Common Glaze Challenges Solved: Troubleshooting Your Honey Garlic Chicken
Even seasoned cooks encounter issues. Here’s how to tackle common problems and ensure perfect honey garlic glazed chicken thighs every time.
“My Glaze is Too Thin!”
If your glaze isn’t thickening, ensure your cornstarch slurry was fully mixed and added slowly while whisking. You can create an additional small slurry (1 teaspoon cornstarch with 1 tablespoon cold water) and slowly whisk it into the simmering glaze until the desired consistency is reached.
Patience is key; allow a minute or two for the cornstarch to fully activate and thicken the sauce.
“My Glaze is Too Thick or Gummy!”
If the glaze becomes too thick or sticky, simply whisk in a tablespoon or two of water or low-sodium chicken broth until it reaches your preferred consistency. Do this gradually to avoid over-thinning, adding liquid spoon by spoon.
“The Chicken Isn’t Golden Brown Enough”
This usually happens if the pan wasn’t hot enough, or if the chicken wasn’t properly patted dry. Ensure your skillet is sizzling before adding the chicken, and cook in batches to avoid overcrowding, which drops the pan temperature significantly.
“My Garlic Burned While Sautéing!”
Burnt garlic turns bitter and can ruin the glaze flavor. Reduce the heat slightly, sauté for a very short duration (30 seconds MAX), and be ready to add liquids immediately.
If it does burn, it’s best to clean the pan and start the glaze step again for optimal flavor, as burnt garlic cannot be salvaged.
Beyond the Plate: Perfect Pairings and Smart Storage
Make the most of your honey garlic glazed chicken thighs with these serving and storage ideas.
Ideal Companions: What to Serve with Your Honey Garlic Glazed Thighs
While white rice is a classic, this versatile dish pairs wonderfully with brown rice, quinoa, or even a simple side of steamed broccoli, green beans, or roasted asparagus. A light, fresh cucumber salad or Asian-inspired slaw would also complement the richness of the glaze beautifully.
Make-Ahead Magic: Prepping for Busy Weeknights
You can prepare the glaze mixture (without the cornstarch slurry) up to 2 days in advance and store it in the refrigerator. The chicken can also be seasoned and kept covered in the fridge for up to 24 hours.
This streamlines your cooking process significantly, making this an even easier weeknight chicken dinner.
Storing Leftovers: Keeping the Flavor Fresh
Store any leftover Honey Garlic Glazed Chicken Thighs and rice in an airtight container in the refrigerator for up to 3-4 days. The glaze often thickens further upon cooling, enhancing the stickiness and flavor.
Creative Leftover Ideas: Reinventing Your Meal
Leftovers are fantastic! Shred the chicken and use it in wraps, sandwiches, or toss it with stir-fried noodles. You can also chop it and add to fried rice for an extra flavor boost, creating a whole new meal.
Customize Your Creation: Adaptations for Every Palate
This honey garlic chicken recipe is wonderfully adaptable. Here’s how to tailor it to your taste or dietary needs.
Spicy Twist: Amping Up the Heat
To make it spicier, increase the red pepper flakes to 1 teaspoon or more. You can also add a dash of sriracha or a few drops of chili oil when simmering the glaze, or simply serve with extra chili flakes on the side.
Gluten-Free Options
Ensure you use a certified gluten-free soy sauce (such as tamari) and confirm your cornstarch is gluten-free. This simple swap makes the entire dish suitable for those avoiding gluten, without compromising flavor.
Alternative Proteins: Beyond Chicken Thighs
This glaze works beautifully with other proteins! Try it with boneless chicken breasts (adjust cooking time to prevent drying), pork tenderloin medallions, or even firm tofu for a vegetarian option.
Shrimp could also work, but cook very quickly at the end, tossing in the warm glaze immediately after cooking.
Sugar Alternatives for the Glaze
For those looking for an alternative to honey, pure maple syrup or agave nectar can be substituted in equal amounts. This will slightly alter the flavor profile but still provide the necessary sweetness and stickiness to your glaze.
Your Questions Answered: FAQs About Honey Garlic Glazed Chicken Thighs
We’ve gathered common questions about making Honey Garlic Glazed Chicken Thighs to ensure your cooking success.
Can I use chicken breast instead of thighs?
Yes, you can! Boneless, skinless chicken breasts will work, but they tend to dry out more easily. Reduce the cooking time to about 4-6 minutes per side, ensuring they reach 165°F (74°C) internal temperature.
Thighs are generally more forgiving and stay juicier, offering a richer flavor and texture to the dish.
How do I make the glaze less sweet or more savory?
To reduce sweetness, you can slightly decrease the amount of honey by a tablespoon or two. For a more savory profile, increase the soy sauce by a tablespoon and consider adding a splash of Worcestershire sauce or a pinch of mushroom powder to the glaze.
Can I bake this chicken instead of pan-frying?
While this recipe focuses on pan-frying for that quick sear and immediate glaze integration, you can certainly bake the chicken. Bake seasoned chicken thighs at 400°F (200°C) for 20-25 minutes, or until an internal temperature of 165°F is reached.
Prepare the glaze separately on the stovetop and then toss the baked chicken in the hot glaze. You can then briefly broil the glazed chicken for 1-2 minutes to get extra stickiness and caramelization.
Is this recipe freezer-friendly?
Yes, cooked Honey Garlic Glazed Chicken Thighs freeze well. Place individual portions in freezer-safe containers for up to 2-3 months.
Thaw overnight in the refrigerator and reheat gently on the stovetop or in the microwave, adding a splash of water or broth if the glaze has become too thick upon reheating.
Your New Go-To: Savoring Every Sticky, Sweet, and Savory Bite!
You’ve now mastered the art of creating truly irresistible Honey Garlic Glazed Chicken Thighs, complete with that coveted sticky, glossy glaze. Say goodbye to bland chicken and hello to a dish that delivers restaurant-quality flavor with surprising ease.
This recipe is more than just a meal; it’s an experience that promises to impress and satisfy, solidifying its place as a new favorite in your repertoire. Don’t just take our word for it – whip up a batch tonight and witness the magic firsthand.
We’d love to see your culinary creations! Share your beautiful Honey Garlic Glazed Chicken Thighs on social media and tag us, or drop a comment below with your favorite serving suggestions. Happy cooking!
Honey Garlic Glazed Chicken Thighs
Course: Main CourseCuisine: Asian cuisineDifficulty: easy3
servings10
minutes20
minutes30
minutesAsian cuisine
Ingredients
1.5 lbs boneless, skinless chicken thighs
1 tablespoon cooking oil (like vegetable or canola)
For the Sticky Glaze:
1/2 cup low-sodium soy sauce
1/4 cup honey
2 tablespoons water or low-sodium chicken broth
1 tablespoon rice vinegar (or apple cider vinegar)
3 cloves garlic, minced
1 teaspoon fresh ginger, grated (or 1/2 teaspoon ground ginger)
1 tablespoon cornstarch mixed with 2 tablespoons cold water (cornstarch slurry)
Optional: 1/2 teaspoon red pepper flakes (for a little kick)
For Serving:
2 cups cooked white rice
2 green onions, thinly sliced
Directions
- Prepare the Chicken: Pat the chicken thighs completely dry with paper towels. Season lightly with salt and pepper.
- Cook the Chicken: Heat the cooking oil in a large non-stick skillet over medium-high heat. Once hot, add the chicken thighs in a single layer without overcrowding the pan. Cook for 5-7 minutes per side, until golden brown and cooked through (internal temperature reaches 165F). Remove chicken from the pan and set aside on a plate.
- Build the Glaze (The Sticky Secret!): Reduce the heat to medium. If there’s excess oil in the pan, carefully pour out all but about 1 teaspoon. Add the minced garlic, grated ginger, and optional red pepper flakes to the pan. Sauté for 30 seconds until fragrant, being careful not to burn the garlic.
- Simmer and Flavor: Pour in the soy sauce, honey, 1/4 cup water/broth, and rice vinegar. Bring the mixture to a gentle simmer, stirring to combine all ingredients. Let it simmer for 2-3 minutes to allow the flavors to meld.
- Thicken to Perfection: This is where the magic happens! Give your cornstarch slurry a quick stir to recombine if it’s settled. Slowly pour the cornstarch slurry into the simmering sauce, whisking constantly. Continue to whisk for 1-2 minutes until the sauce visibly thickens and becomes glossy and sticky, easily coating the back of a spoon. If you want it even thicker, you can add a tiny bit more slurry, but usually this amount is perfect for that ideal cling.
- Glaze the Chicken: Return the cooked chicken thighs to the skillet, turning them to coat completely in the thick, sticky glaze. Let them simmer in the glaze for another 1-2 minutes, spooning the glaze over the chicken constantly, allowing it to truly adhere and absorb that incredible flavor.
- Serve: Divide the cooked white rice among serving plates. Top each with a glazed chicken thigh. Spoon extra sticky glaze from the pan over the chicken and rice. Garnish generously with sliced green onions. Serve immediately and enjoy that perfectly sticky, flavorful bite!
Notes
- The key to a perfect sticky glaze is ensuring the cornstarch slurry is fully incorporated and whisked until glossy.