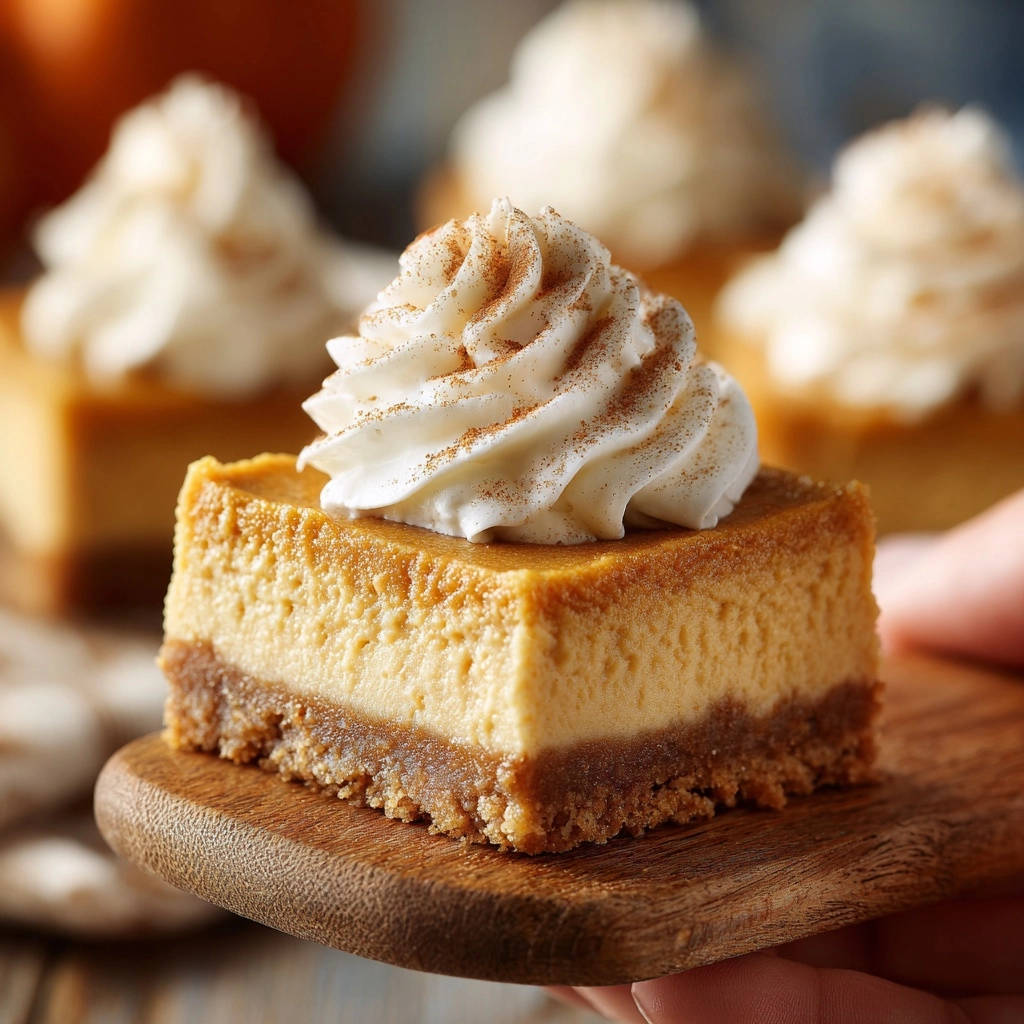
Perfect Pumpkin Cheesecake Bars: No More Cracks!
There’s nothing quite as satisfying as a silky, smooth cheesecake, yet often, the dream of elegant, crack-free Perfect Pumpkin Cheesecake Bars ends in a fractured reality. I’ve been there, staring at those tell-tale lines that betray the hours of effort. But with this recipe, those days are over.
I’ve honed this method to guarantee a flawless finish every single time, transforming a challenging bake into a joyous, foolproof process. Get ready to impress with these irresistibly creamy, perfectly spiced Perfect Pumpkin Cheesecake Bars, engineered for success and pure autumnal delight.
For even more foolproof tips on achieving that ideal texture, check out these pumpkin cheesecake bars.
Get Our Best Recipes Weekly!
Join thousands of food lovers and get delicious recipes delivered to your inbox.
Why This Perfect Pumpkin Cheesecake Bars Recipe Stands Out
The Secret to a Flawless, Crack-Free Top
This recipe employs specific, time-tested techniques to banish cracks permanently. The gentle incorporation of eggs and the essential water bath create a uniform baking environment.
Furthermore, the crucial slow cool-down prevents sudden temperature shifts that commonly lead to surface fractures. You’ll achieve a perfectly smooth, unblemished top every time.
Irresistibly Smooth & Creamy Texture
Achieving a velvety, melt-in-your-mouth texture is paramount for any cheesecake. Our method focuses on thorough initial beating of softened cream cheese, ensuring a lump-free foundation.
This careful preparation, combined with the moist heat from the water bath, results in an incredibly smooth and luscious filling that truly melts on your tongue.
A Symphony of Autumnal Flavors
Beyond texture, this recipe strikes a beautiful balance between rich cream cheese and warm, earthy pumpkin. A carefully measured blend of granulated and brown sugars enhances the sweetness.
The pumpkin pie spice delivers that classic, comforting fall aroma without overpowering the delicate cheesecake notes. It’s the quintessential flavor of the season in every bite.
Easy to Make, Impressive to Serve
While the results are undeniably elegant, this recipe for Perfect Pumpkin Cheesecake Bars is surprisingly approachable. Each step is clearly defined, with “why” explanations to build your confidence.
For another flawless dessert that’s sure to delight, check out this Pistachio Dream Cheesecake.
Whether you’re a novice baker or a seasoned pro, you can achieve professional-looking and tasting cheesecake bars. They are perfect for holiday gatherings or a special treat.
Essential Tools for Your Cheesecake Bar Success
Key Baking Equipment You’ll Need
-
9×13 Inch Baking Pan: This standard size is perfect for creating evenly portioned bars. Choose a light-colored metal pan for best baking results.
-
Electric Mixer: Essential for achieving a smooth, lump-free cream cheese filling and for whipping the cream to stiff peaks.
-
Large Roasting Pan: This will house your baking pan to create the crucial water bath, providing even, moist heat.
-
Mixing Bowls: You’ll need several – one for the crust, one large one for the filling, and a cold one for the whipped topping.
-
Wire Rack: Necessary for cooling the cheesecake bars completely and evenly after their slow oven cool-down.
Preparing Your Pan for Easy Removal
The secret to effortlessly lifting your Perfect Pumpkin Cheesecake Bars from the pan lies in parchment paper. Always line your 9×13 inch baking pan with parchment.
Ensure you leave a generous overhang on the sides. This creates convenient handles that allow you to lift the entire chilled slab of cheesecake out with ease for clean cutting.
The Building Blocks: Ingredients for Divine Pumpkin Cheesecake Bars
For the Golden Graham Cracker Crust
-
1 1/2 cups Graham Cracker Crumbs: Use fine crumbs for a cohesive base. You can buy them pre-crushed or crush your own in a food processor.
-
1/4 cup Granulated Sugar: Adds a touch of sweetness to balance the buttery richness of the crust.
-
1/2 cup Unsalted Butter, melted: Unsalted butter allows you to control the overall saltiness. Ensure it’s fully melted to bind the crumbs perfectly.
Crafting the Rich Pumpkin Cheesecake Filling
-
24 ounces Cream Cheese, softened: Use full-fat block cream cheese, not spreadable tubs. Crucially, it must be at room temperature to ensure a smooth, lump-free filling.
-
1 cup Granulated Sugar: Provides sweetness and helps create a tender texture in the cheesecake.
-
1/2 cup Brown Sugar, packed: Adds a deeper, molasses-rich sweetness that complements the pumpkin beautifully, contributing to moisture.
-
1 teaspoon Vanilla Extract: Enhances all the other flavors, adding a warm, aromatic note. Use a good quality pure vanilla extract.
-
1 1/2 cups Pumpkin Puree: Use 100% pure pumpkin puree, not pumpkin pie filling. This is the heart of the pumpkin flavor.
-
2 teaspoons Pumpkin Pie Spice: A blend of cinnamon, ginger, nutmeg, and cloves, delivering the quintessential autumnal flavor profile.
-
3 Large Eggs: Eggs act as the binder and provide structure to the cheesecake. Ensure they are also at room temperature for better emulsion.
Whipped Topping: The Cloud-Like Garnish
-
1 1/2 cups Heavy Cream, very cold: The colder the cream, the faster and more stable it will whip. This is a non-negotiable for stiff peaks.
-
1/4 cup Powdered Sugar: Adds sweetness and helps stabilize the whipped cream. Sift if clumpy for a smoother texture.
-
1/2 teaspoon Vanilla Extract: A touch of vanilla brightens the whipped topping and ties into the cheesecake’s flavors.
-
Ground Cinnamon, for dusting: An optional but recommended final touch for aroma and visual appeal.
Your Path to Perfection: Step-by-Step Guide to Pumpkin Cheesecake Bars
Step 1: Prep the Crust & Preheat Oven
Preheat your oven to 350°F (175°C). Line a 9×13 inch baking pan with parchment paper, allowing a generous overhang on the sides.
In a medium bowl, combine the graham cracker crumbs, 1/4 cup granulated sugar, and melted butter. Mix until the crumbs are evenly moistened.
Press this mixture firmly and evenly into the bottom of the prepared pan using the back of a spoon or a flat-bottomed glass. Bake for 10 minutes to set the crust, then remove and reduce the oven temperature to 325°F (160°C).
Step 2: Create the Silky Cheesecake Filling Base
In a large bowl, using an electric mixer, beat the softened cream cheese on medium speed for 2-3 minutes. This step is crucial for achieving a lump-free, super smooth filling, so ensure it’s completely velvety.
Gradually add the granulated sugar and brown sugar, continuing to beat until well combined and fluffy. Remember to scrape down the sides of the bowl frequently to ensure everything is fully incorporated.
Beat in the vanilla extract, pumpkin puree, and pumpkin pie spice until the mixture is smooth and evenly colored. Avoid overmixing at this stage to prevent excess air.
Step 3: Carefully Incorporate the Eggs
Add the large eggs one at a time to the pumpkin cheesecake mixture. Beat on low speed after each addition, just until the egg is fully combined.
This gentle approach is critical. Overmixing the eggs introduces too much air into the batter, which can cause the cheesecake to puff up excessively and then crack as it cools.
Step 4: The Crucial Water Bath Setup
Pour the prepared pumpkin cheesecake filling evenly over the pre-baked graham cracker crust in the 9×13 inch pan.
Place this baking pan inside a larger roasting pan. Carefully pour hot water into the larger roasting pan, ensuring the water comes about halfway up the sides of your cheesecake pan.
This water bath creates a consistently moist and even heat environment during baking. This prevents the edges from setting too quickly and prevents unsightly cracks from forming on the surface.
Step 5: Baking to Ideal Consistency
Carefully transfer the roasting pan, containing the cheesecake and water bath, to your preheated 325°F (160°C) oven.
Bake for 50-60 minutes. The cheesecake is done when the edges appear set, but the center still exhibits a slight jiggle when gently shaken. It should not look wet or liquid.
Step 6: The Slow Cool Down (Don’t Skip This!)
Once baked, turn off the oven completely. Prop the oven door slightly ajar using a wooden spoon or oven mitt.
Leave the cheesecake inside the cooling oven for at least 1 hour. This gradual cooling prevents a sudden drop in temperature, which is a major culprit for cracks, allowing the cheesecake to gently set.
Step 7: Thorough Chilling for Optimal Set
After the slow oven cool-down, carefully remove the cheesecake from the water bath and the oven. Let it cool completely on a wire rack at room temperature.
Once fully cooled, cover the pan tightly with plastic wrap and refrigerate for at least 4 hours, or preferably overnight. This chilling time is essential for the Perfect Pumpkin Cheesecake Bars to fully set and firm up, making them easy to slice.
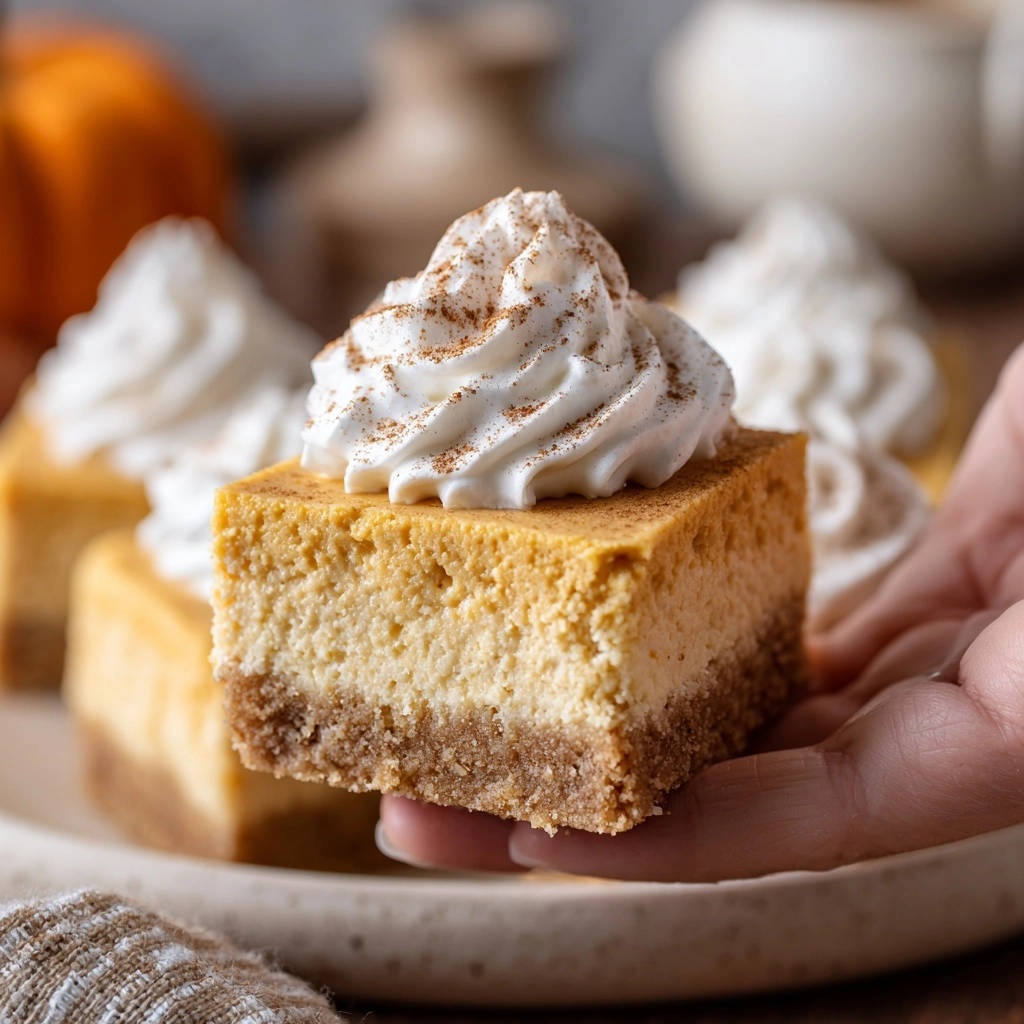
Step 8: Whipped Topping & Serving Presentation
Once thoroughly chilled, use the parchment paper overhang to gently lift the entire cheesecake slab out of the pan and onto a cutting board.
In a separate, very cold bowl, beat the very cold heavy cream, powdered sugar, and vanilla extract on high speed until stiff peaks form. This requires cold ingredients and patience.
Cut the cheesecake into desired bar sizes. Pipe or dollop a generous amount of whipped topping onto each bar and lightly dust with ground cinnamon for a final flourish before serving.
Chef’s Secrets: Elevate Your Pumpkin Cheesecake Bar Game
Mastering the Cream Cheese Smoothness
Softened cream cheese is the bedrock of a smooth cheesecake. Cold cream cheese will inevitably lead to lumps, no matter how long you beat it.
Ensure your cream cheese sits at room temperature for at least an hour before you begin. Beat it on its own until it’s completely velvety and airy before adding other ingredients.
The Gentle Touch with Eggs
Eggs introduce air and moisture. Overmixing them in cheesecake batter is the leading cause of cracks because too much air creates a soufflé-like structure that collapses upon cooling.
Add eggs one at a time, beating on the lowest speed possible, just until the yolk disappears. Stop immediately to preserve that dense, creamy texture.
Why the Water Bath is Your Best Friend
A water bath isn’t just about preventing cracks; it’s about creating the perfect baking environment. The steam from the hot water gently cooks the cheesecake, preventing the edges from over-baking and drying out.
This moist, even heat ensures the entire cheesecake sets uniformly, resulting in that dreamy, silken texture we all crave in Perfect Pumpkin Cheesecake Bars.
Patience Pays Off: Don’t Rush the Cool Down
The slow cool-down in the oven is as vital as the water bath. A sudden temperature drop shocks the delicate cheesecake structure, causing it to contract rapidly and crack.
Allowing it to cool gradually in the residual warmth of the oven prevents this thermal shock, letting the cheesecake settle into its smooth, beautiful form.
Cold Cream for Stiff Peaks
For perfectly stable whipped cream, every element needs to be cold. Place your heavy cream, mixing bowl, and even the whisk attachment in the freezer for 10-15 minutes before whipping.
The colder the environment, the quicker the fat molecules in the cream will stabilize, leading to beautiful, stiff peaks that hold their shape on your Perfect Pumpkin Cheesecake Bars.
Troubleshooting Common Cheesecake Bar Challenges
My Cheesecake Bars Cracked!
Cracks are usually due to overmixing eggs, skipping the water bath, or sudden temperature changes. Ensure eggs are gently incorporated on low speed.
Always use the water bath and follow the slow cool-down method religiously. These steps prevent the rapid expansion and contraction that cause fissures.
The Crust is Too Hard/Soft.
A hard crust might indicate too much butter or over-baking. If it’s too soft, you might need a bit more butter or more firm pressing.
Always press the mixture firmly and evenly. A proper balance of butter and crumbs is key for a perfectly crisp, yet tender, crust for your Perfect Pumpkin Cheesecake Bars.
Cheesecake Bars Are Soggy or Undercooked.
If your bars are soggy, it could be from water seeping into the pan (ensure your pan is sealed if using a springform, or the parchment creates a barrier).
Undercooked bars often jiggle too much in the center; ensure they bake until the edges are set and only the very center has a slight wobble.
Whipped Topping Won’t Hold its Shape.
This is almost always due to warm ingredients or over-whipping. Ensure your heavy cream, bowl, and whisk are extremely cold.
Beat until stiff peaks form, but watch carefully. Whipping beyond stiff peaks will quickly turn your cream into butter, causing it to lose its airy texture.
Serving, Storing, and Enjoying Your Perfect Pumpkin Cheesecake Bars
Creative Serving Suggestions
While classic whipped cream and cinnamon are divine, elevate your Perfect Pumpkin Cheesecake Bars further. Drizzle with warm caramel sauce or sprinkle with toasted pecans or candied ginger.
A light dusting of flaky sea salt can also beautifully enhance the pumpkin and caramel notes. Offer a variety for a dessert bar!
Storing Leftovers for Lasting Freshness
Store any leftover Perfect Pumpkin Cheesecake Bars in an airtight container in the refrigerator. They will maintain their quality and flavor for up to 3-4 days.
If serving with whipped topping, it’s best to top individual bars just before serving to prevent the cream from weeping.
Make-Ahead Tips for Stress-Free Entertaining
These Perfect Pumpkin Cheesecake Bars are an excellent make-ahead dessert. You can bake and chill the cheesecake (without the topping) up to 2-3 days in advance.
The overnight chilling is actually beneficial for flavor and texture development. Simply prepare the whipped topping and cut the bars just before serving.
Can You Freeze Pumpkin Cheesecake Bars?
Yes, these bars freeze beautifully! Once completely chilled, cut them into individual portions. Freeze them on a baking sheet until firm, then wrap each bar tightly in plastic wrap and foil.
Store in an airtight freezer bag for up to 2-3 months. Thaw individual bars in the refrigerator overnight before topping and serving.
Frequently Asked Questions About Perfect Pumpkin Cheesecake Bars
What kind of pumpkin puree is best for this recipe?
Always use 100% pure pumpkin puree, not pumpkin pie filling. Pumpkin pie filling contains added spices and sweeteners, which will alter the flavor profile of your cheesecake.
Look for brands like Libby’s or similar pure pumpkin products in the baking aisle.
Can I substitute ingredients for the graham cracker crust?
Absolutely! For a different flavor, you can substitute gingersnap crumbs, digestive biscuits, or even shortbread cookies for the graham crackers.
Ensure the total quantity of crumbs remains the same. You might need to slightly adjust the amount of melted butter depending on the dryness of your chosen crumb.
Is it possible to make this recipe gluten-free?
Yes, making these Perfect Pumpkin Cheesecake Bars gluten-free is straightforward. Simply use certified gluten-free graham cracker crumbs for the crust.
Always double-check that all other ingredients, particularly vanilla extract, are also certified gluten-free to avoid cross-contamination.
How do I know when the cheesecake is perfectly baked?
The key indicators are visually observing the edges and gently shaking the pan. The edges should appear set and slightly puffed, while the very center should still have a slight, delicate jiggle.
It will continue to set as it cools. An instant-read thermometer inserted into the center should read 150°F (65°C) to 155°F (68°C) if you want to be extra precise.
Can I skip the water bath for these bars?
While technically possible, I strongly advise against skipping the water bath for this recipe, especially if you want truly crack-free Perfect Pumpkin Cheesecake Bars with a silky texture.
The water bath is critical for even, gentle baking and preventing cracks. Without it, your cheesecake is much more prone to drying out and fracturing.
There’s immense satisfaction in presenting a beautiful, crack-free dessert, and now you have all the knowledge to achieve just that. Take the plunge and create these stunning Perfect Pumpkin Cheesecake Bars.
They are a testament to careful technique and a guaranteed crowd-pleaser. Enjoy the process, savor the flavors, and don’t forget to share your flawless creations!
What Else To Try
Since you’re enjoying this pumpkin cheesecake, consider these other baked treats and breakfast ideas.
- For more fall flavors, try these Pumpkin Walnut Rolls, which are known for being super soft.
- If you’re looking for a satisfying morning meal, our Hearty Sausage & Cheese Breakfast Bake is a great choice for a fluffy texture.

Perfect Pumpkin Cheesecake Bars
Course: DessertCuisine: AmericanDifficulty: medium12
bars30
minutes1
hour450
kcal360
minutesCraving creamy pumpkin cheesecake bars without the dreaded cracks? This recipe guarantees perfectly smooth, rich pumpkin cheesecake bars every single time. Get ready to impress with their flawless finish and incredible flavor, ditching frustration for pure pumpkin bliss!
Ingredients
For the Crust:
1 1/2 cups graham cracker crumbs
1/4 cup granulated sugar
1/2 cup unsalted butter, melted
For the Pumpkin Cheesecake Filling:
24 ounces cream cheese, softened
1 cup granulated sugar
1/2 cup brown sugar, packed
1 teaspoon vanilla extract
1 1/2 cups pumpkin puree
2 teaspoons pumpkin pie spice
3 large eggs
For the Whipped Topping:
1 1/2 cups heavy cream, very cold
1/4 cup powdered sugar
1/2 teaspoon vanilla extract
Ground cinnamon, for dusting
Directions
- Prep the Crust: Preheat your oven to 350°F (175°C). Line a 9×13 inch baking pan with parchment paper, leaving an overhang on the sides to easily lift the bars out later. In a medium bowl, combine the graham cracker crumbs, 1/4 cup granulated sugar, and melted butter. Press this mixture firmly and evenly into the bottom of the prepared pan. Bake for 10 minutes, then remove from oven and reduce oven temperature to 325°F (160°C).
- Make the Filling: In a large bowl, using an electric mixer, beat the softened cream cheese on medium speed until completely smooth, about 2-3 minutes. This is key for a lump-free filling. Gradually add the granulated sugar and brown sugar, continuing to beat until well combined and fluffy, scraping down the sides of the bowl as needed. Beat in the vanilla extract, pumpkin puree, and pumpkin pie spice until smooth.
- Incorporate Eggs Carefully: Add the eggs one at a time, beating on low speed just until combined after each addition. Do not overmix at this stage; overmixing eggs introduces too much air, which can cause cracks during baking.
- The Crack-Free Baking Method: Pour the pumpkin cheesecake filling over the baked crust in the prepared pan. Place the 9×13 inch baking pan inside a larger roasting pan. Carefully pour hot water into the larger roasting pan, so it comes about halfway up the sides of the cheesecake pan. This water bath creates a moist, even heat environment, preventing the edges from baking faster than the center and eliminating cracks.
- Bake Slowly: Carefully transfer the roasting pan with the cheesecake to the preheated 325°F (160°C) oven. Bake for 50-60 minutes, or until the edges are set but the center still jiggles slightly when gently shaken.
- The Slow Cool Down (Crucial for No Cracks!): Once baked, turn off the oven but leave the cheesecake in the oven with the door slightly ajar for at least 1 hour. This slow, gradual cooling prevents the sudden temperature change that causes cracks.
- Chill Thoroughly: After slow cooling, carefully remove the cheesecake from the water bath and the oven. Let it cool completely on a wire rack at room temperature. Once cool, cover and refrigerate for at least 4 hours, or preferably overnight, to allow it to fully set.
- Prepare Whipped Topping & Serve: Once chilled, lift the cheesecake out of the pan using the parchment paper overhang. In a separate cold bowl, beat the very cold heavy cream, powdered sugar, and vanilla extract on high speed until stiff peaks form. Cut the cheesecake into bars. Pipe or dollop a generous amount of whipped topping onto each bar and dust lightly with ground cinnamon before serving.
Notes
- The water bath and slow cooling steps are crucial for preventing cracks and achieving a smooth top.