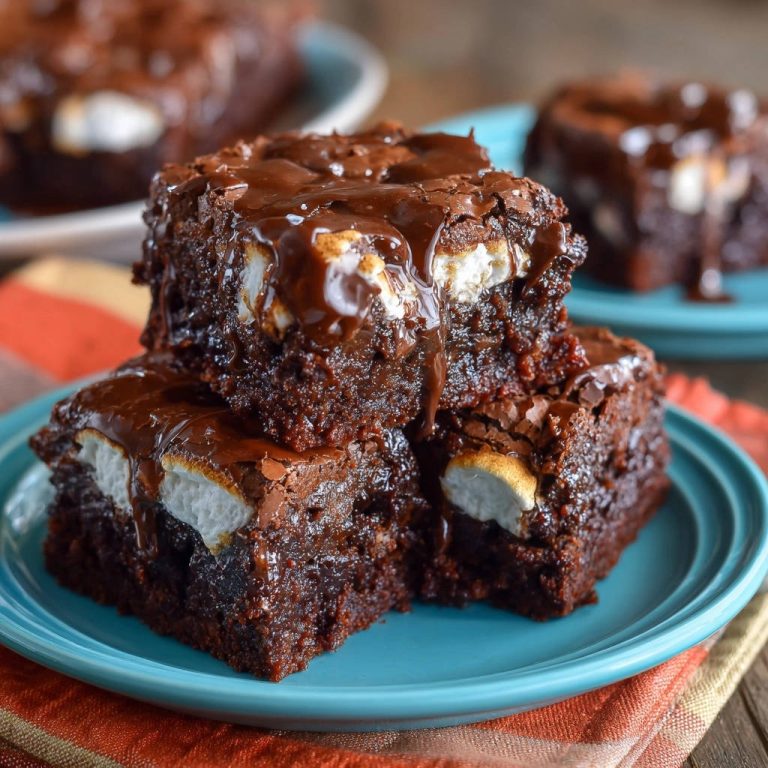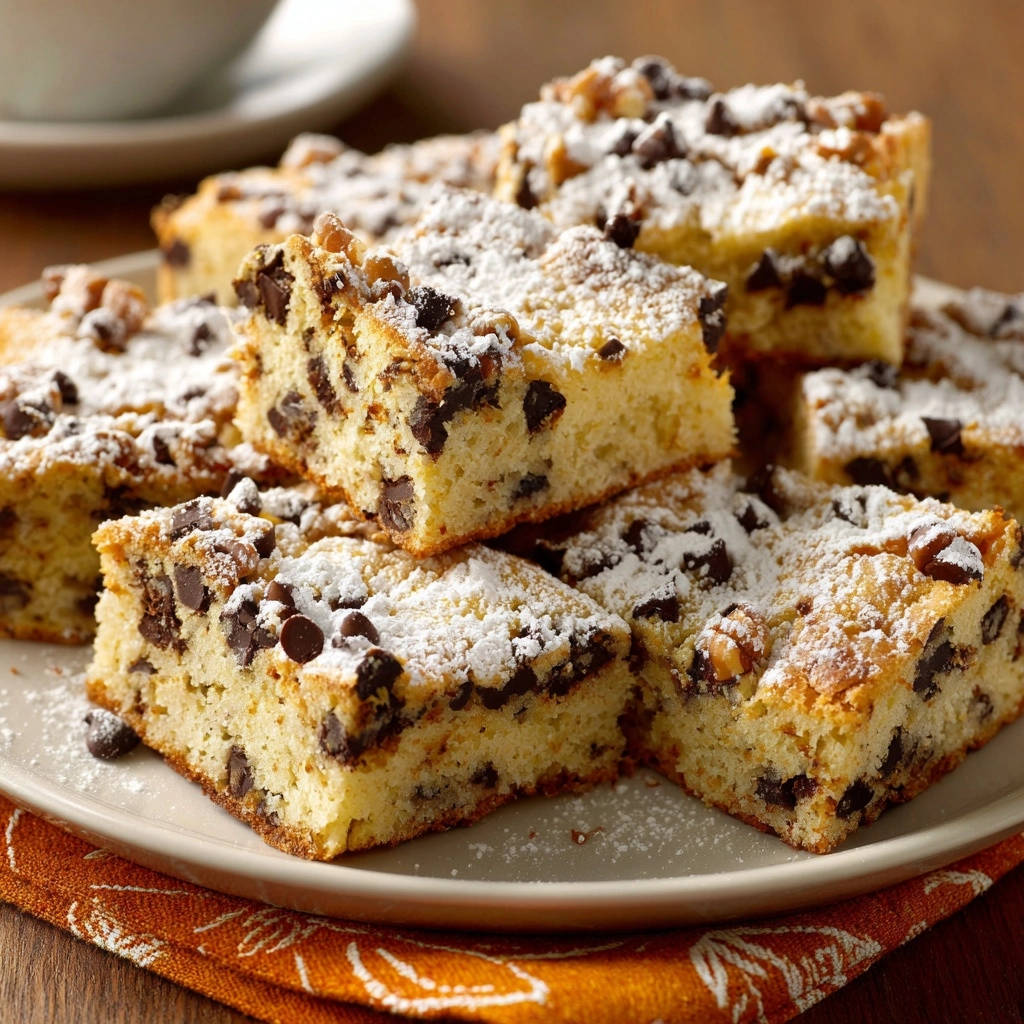
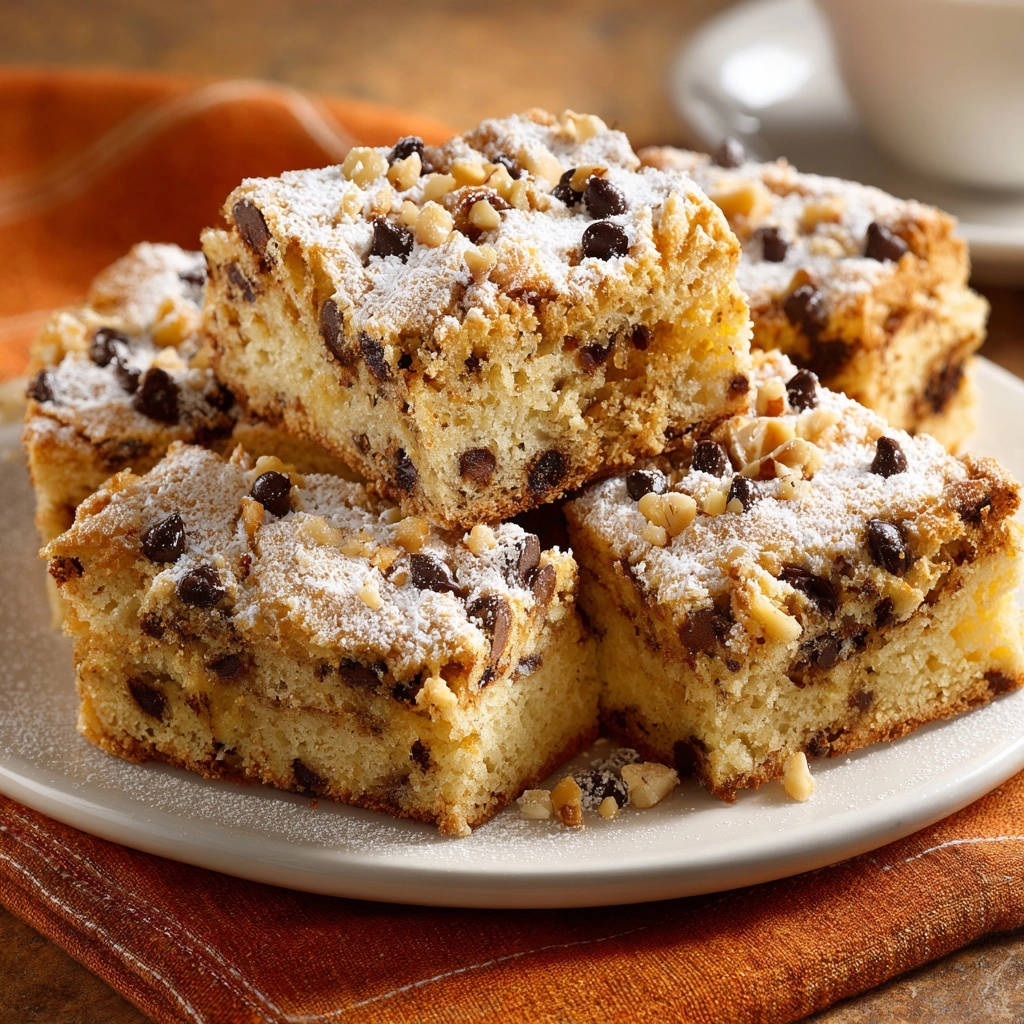
Irresistible Chocolate Chip Walnut Blondies: No More Sinking Chips!
Ever sliced into a warm batch of blondies, only to discover all the delicious chocolate chips and walnuts had settled at the bottom? It’s a common baking disappointment we’ve all faced. This recipe for Irresistible Chocolate Chip Walnut Blondies not only guarantees perfectly suspended mix-ins in every bite but also delivers an unbelievably chewy, moist, and utterly delightful dessert.
As an expert recipe developer, I’m thrilled to share the game-changing secret that ensures your blondies are beautifully studded throughout, making them truly irresistible.
Why These Blondies Will Become Your Go-To Recipe
The Game-Changing Trick for Perfectly Suspended Mix-Ins
The core innovation in this recipe is a simple yet incredibly effective technique: coating your chocolate chips and walnuts in a small amount of flour before adding them to the batter. This thin flour layer creates friction.
Get Our Best Recipes Weekly!
Join thousands of food lovers and get delicious recipes delivered to your inbox.
It prevents the heavier mix-ins from sinking to the bottom during baking, ensuring every single square is packed with chocolate and walnuts, just as it should be.
Fluffy, Chewy Perfection in Every Bite
These blondies strike the ideal balance between a wonderfully chewy texture and a light, fluffy crumb. The precise ratio of brown to granulated sugar, combined with careful creaming of butter, results in a rich, buttery flavor profile.
You’ll enjoy that signature blondie chewiness without them ever feeling dense or dry, offering a truly satisfying experience.
Quick & Easy: Blondie Bliss Made Simple
Despite their sophisticated results, these Irresistible Chocolate Chip Walnut Blondies are surprisingly straightforward to prepare. With clear, step-by-step instructions and readily available ingredients, even novice bakers can achieve spectacular results.
The relatively short baking time means you’ll be enjoying these delicious treats in no time, making them perfect for last-minute cravings or entertaining.
Your Essential Tools for Blondie Success
Baking Pan: A 9×13 inch baking pan is ideal for this recipe, ensuring the correct thickness and baking time. Metal pans generally conduct heat more evenly than glass, promoting uniform baking and browning.
Mixing Bowls: You’ll need at least two – a medium bowl for whisking dry ingredients and a large one for creaming the wet ingredients. This separation helps ensure proper incorporation.
Electric Mixer: Whether a handheld or stand mixer, an electric mixer is essential for thoroughly creaming the butter and sugars. This step incorporates air, vital for the blondies’ light and fluffy texture.
Whisk: A simple whisk is perfect for combining your dry ingredients evenly. It ensures the baking powder and salt are well-distributed throughout the flour.
Spatula or Wooden Spoon: These are indispensable for scraping down bowl sides, gently folding in your floured mix-ins, and spreading the batter smoothly into the pan.
Parchment Paper: Using parchment paper, especially with an overhang, is a game-changer. It simplifies removing the blondies from the pan, making slicing much easier and cleaner.
Wire Rack: A wire rack is crucial for cooling your baked blondies. It allows air to circulate around all sides, preventing condensation and ensuring an even cool-down without a soggy bottom.
The Core Ingredients for Irresistible Chocolate Chip Walnut Blondies
The Dry Foundation: Flour, Baking Powder & Salt
All-purpose flour provides the primary structure for our blondies. Its gluten content gives them their satisfying chew.
Baking powder acts as a leavening agent, ensuring a slight rise and contributing to that desirable fluffy texture. Salt is crucial for balancing the sweetness and enhancing all the other flavors within the blondies.
Sweetness & Structure: Butter & Sugars
Unsalted butter is the heart of these blondies, providing richness and a beautiful golden color. Using it softened is non-negotiable for proper creaming.
Granulated sugar contributes to crispier edges and sweetness, while light brown sugar is key for the blondies’ characteristic chewiness and deep, caramel-like flavor.
Binding & Richness: Eggs, Vanilla & Milk
Large eggs serve as a binder, holding the batter together and adding richness and structure. They also contribute to the blondies’ moist texture.
Vanilla extract is essential for its warm, aromatic notes, complementing the butterscotch-like flavor profile. Milk adds additional moisture and helps achieve a tender crumb.
The Star Mix-Ins: Chocolate Chips & Walnuts (and the Flour Coating Secret)
Semi-sweet chocolate chips are a classic choice, offering a balanced sweetness that pairs perfectly with the blondie base. Their melty pockets are pure bliss.
Chopped walnuts provide a delightful crunch and a hint of nutty earthiness, beautifully offsetting the sweetness of the chocolate. The innovative step here is to lightly coat both the chocolate chips and walnuts with a small amount of the recipe’s flour.
For a similarly rich chocolate experience, consider this decadent chocolate walnut cake.
This creates a barrier that prevents them from sinking to the bottom of the pan during baking, ensuring even distribution throughout your Irresistible Chocolate Chip Walnut Blondies.
The Finishing Touch: Powdered Sugar
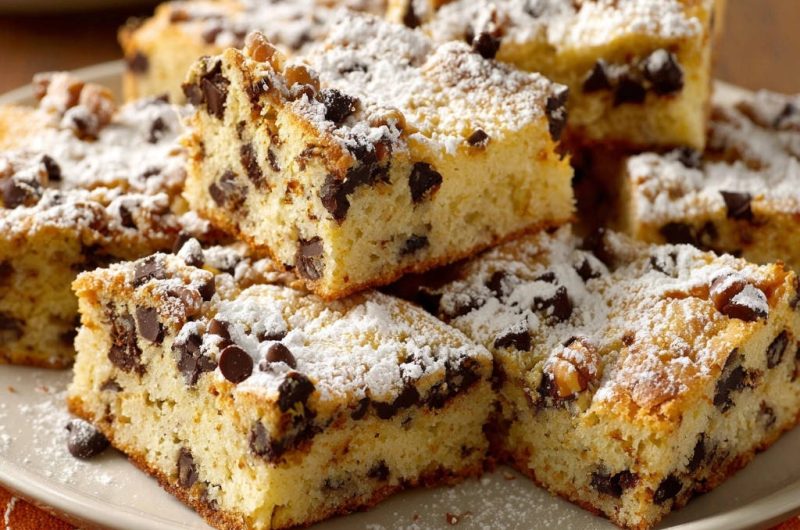
A light dusting of powdered sugar adds an elegant visual finish to your baked blondies. It also provides a subtle, delicate sweetness that melts delightfully in the mouth.
Crafting Your Perfect Blondies: A Step-by-Step Guide
- Prepare Your Pan for Easy Release:
Preheat your oven to 350°F (175°C).
Lightly grease and flour a 9×13 inch baking pan, or line it with parchment paper, ensuring an overhang on the sides. This overhang is your secret weapon for easy lifting later, preventing sticking and making clean cuts simpler!
- Whisk Your Dry Ingredients:
In a medium bowl, combine 1 and 1/2 cups of all-purpose flour, baking powder, and salt. Whisk them together thoroughly until uniformly mixed.
Proper distribution of these dry ingredients ensures an even rise and consistent, tender texture in your blondies, preventing pockets of leavening.
- The Secret to Suspended Chips: Coating Your Mix-Ins:
In a separate small bowl, add your semi-sweet chocolate chips and chopped walnuts.
Sprinkle the remaining 1/4 cup of all-purpose flour over them and toss gently until every chip and nut is lightly coated. This thin flour layer creates friction and a slightly dryer surface, effectively preventing them from sinking during baking.
- Cream Butter and Sugars to Fluffy Perfection:
In a large bowl, using an electric mixer, cream together the softened unsalted butter, granulated sugar, and light brown sugar. Beat for about 2-3 minutes until the mixture is light, fluffy, and pale in color.
This creaming process incorporates essential air into the butter and sugar, contributing significantly to the blondies’ desired chewy yet fluffy texture.
- Incorporate Eggs and Vanilla:
Beat in the large eggs one at a time, mixing well after each addition to ensure full incorporation into the creamy butter mixture.
Stir in the vanilla extract, making sure it’s evenly distributed for that warm, inviting flavor that defines classic blondies.
- Gradually Combine Wet and Dry Mixtures:
Slowly add the dry flour mixture to the wet ingredients in the large bowl, alternating with the milk.
Begin and end with the flour mixture, mixing on low speed until just combined. Be extremely careful not to overmix at this stage, as over-developing gluten can lead to tough, dense blondies.
- Gently Fold in the Floured Chips and Walnuts:
With a spatula, gently fold your specially floured chocolate chips and walnuts into the batter.
Mix only until they are evenly distributed throughout the blondie batter, again, being careful not to overmix and compress the batter.
- Spread Batter and Prepare for Baking:
Spread the prepared blondie batter evenly into your greased and floured (or parchment-lined) baking pan.
Use the back of a spoon or a spatula to ensure an even layer for uniform baking and consistent thickness across all your squares.
- Bake to Golden Perfection:
Bake for 25-30 minutes, or until a wooden skewer inserted into the center comes out with moist crumbs, but no wet batter.
The edges should be lightly golden and just set. Avoid overbaking, as blondies continue to cook slightly and firm up as they cool, which prevents them from drying out.
- Cool Completely Before Slicing:
Remove the pan from the oven and let the blondies cool completely in the pan on a wire rack.
This critical step allows the blondies to set properly, ensuring they are firm enough to lift out and cut into clean, perfect squares without falling apart.
- The Finishing Touch: Dusting with Powdered Sugar:
Once completely cool, use the parchment paper overhang to carefully lift the blondies out of the pan. Place them on a cutting board.
Dust generously with powdered sugar before cutting into squares and serving. Enjoy your perfectly chip-filled Irresistible Chocolate Chip Walnut Blondies!
Expert Tips & Tricks for Blondie Brilliance
Don’t Overmix the Batter (Crucial for Fluffiness!)
Once you introduce flour into the wet ingredients, mix only until the last streaks of flour disappear. Overmixing at this stage over-develops the gluten in the flour.
This leads to a tough, dense blondie rather than the desired soft, chewy, and tender texture we’re aiming for.
The Importance of Softened Butter
Ensure your unsalted butter is genuinely softened to room temperature, not melted. Softened butter creams beautifully with sugars.
This process incorporates tiny air pockets, which are crucial for creating a light and airy texture in your Irresistible Chocolate Chip Walnut Blondies.
How to Know When Your Blondies Are Done (and Not Overbaked)
Look for edges that are lightly golden brown and a center that appears set but still slightly soft. A wooden skewer inserted into the middle should come out with moist crumbs, not wet batter.
Remember, blondies continue to cook and firm up as they cool in the pan, so a slightly underbaked center is often preferable to an overbaked, dry blondie.
Perfect Pan Preparation for Clean Slices
Using parchment paper with an overhang is invaluable. This simple trick allows you to lift the entire slab of cooled blondies out of the pan in one piece.
This makes cutting into neat, precise squares incredibly easy and minimizes mess, leading to beautiful presentation.
Customize Your Mix-Ins
While chocolate chips and walnuts are a classic and delicious combination, feel free to get creative! You could try white chocolate chips, butterscotch chips, or even chopped pecans or macadamia nuts.
More Chocolatey Options
If you enjoyed these blondies, you might like these other chocolate-focused treats.
- For more rolled chocolate goodness, try the chocolate banana crepe roll-ups, perfect for a sweet finish.
- If you prefer a bar format with plenty of chew, consider the chewy chocolate chip oatmeal bars.
Just remember to still coat any new mix-ins lightly in flour to ensure they remain perfectly suspended throughout the batter, thanks to our proven trick!
Troubleshooting Common Blondie Blunders
Why are my blondies dense or tough?
This common issue is almost always a result of overmixing the batter, especially after adding the flour. Excessive mixing develops the gluten, making the blondies tough.
Ensure your butter was only softened, not melted, as melted butter can also contribute to a dense texture. Mix only until the ingredients are just combined.
My blondies are too crumbly.
Crumbly blondies often indicate overbaking, which dries out the moisture in the batter. Double-check your baking time and rely on the skewer test for doneness.
Inaccurate ingredient measurements can also affect moisture balance. Ensure you’re measuring your flour correctly (spoon and level method) and consider using an oven thermometer to verify your oven’s actual temperature.
The edges burned, but the middle is raw.
This suggests your oven might be running hotter than its set temperature, or your baking pan (especially dark metal ones) could be contributing to faster edge browning. Try reducing your oven temperature by 25°F (about 15°C) next time, or check your oven with a thermometer.
Lining the pan with parchment paper can also offer a bit of insulation, protecting the edges while the center cooks through.
What if I don’t have parchment paper?
If parchment paper isn’t available, thoroughly grease and flour your baking pan. Ensure every corner and side is coated to prevent sticking.
While removal won’t be as effortless, a well-prepared pan will still allow you to get the blondies out. Crucially, ensure the blondies are completely cool before attempting to remove and cut them, as they are most fragile when warm.
Beyond the Bake: Serving, Storing, and Enjoying
Creative Serving Suggestions
These Irresistible Chocolate Chip Walnut Blondies are fantastic on their own, especially with a simple dusting of powdered sugar. Their rich flavor and chewy texture stand proudly.
For an extra indulgent treat, serve them warm with a scoop of premium vanilla bean ice cream, a generous drizzle of warm caramel sauce, or a dollop of freshly whipped cream. They also pair wonderfully with a hot cup of coffee or a cold glass of milk.
Storing Your Delicious Blondies
To keep your blondies fresh and chewy, store them in an airtight container at room temperature for up to 3-4 days. Placing a slice of bread in the container can help keep them soft, if desired.
For longer storage, individual blondie squares can be frozen in an airtight container for up to 2-3 months. Thaw them at room temperature for an hour or two before enjoying.
Can I Make These Blondies Ahead of Time?
Absolutely! Blondies actually tend to develop a deeper, more complex flavor and an even chewier texture on the second day, making them an excellent make-ahead dessert.
You can easily bake a batch a day in advance and store them as directed. If freezing, bake, cool completely, slice, and then freeze, thawing them only when you’re ready to serve.
Frequently Asked Questions About Irresistible Chocolate Chip Walnut Blondies
What’s the difference between a blondie and a brownie?
The primary difference lies in the chocolate content. Brownies typically incorporate cocoa powder or melted chocolate directly into the batter, giving them their rich, dark color and intense chocolate flavor.
Blondies, on the other hand, derive their characteristic golden hue and flavor profile from brown sugar and vanilla, resulting in a buttery, caramel-like taste, entirely free of cocoa.
Can I use different types of chocolate chips or nuts?
Yes, absolutely! This recipe is wonderfully versatile. Feel free to experiment with other mix-ins like white chocolate chips, butterscotch chips, or a combination.
For nuts, pecans, slivered almonds, or even macadamia nuts would be delicious substitutions or additions. Just remember to lightly flour any mix-ins to prevent them from sinking, regardless of their type.
Is it possible to make these gluten-free?
You can certainly adapt this recipe to be gluten-free. Substitute the all-purpose flour with a high-quality 1:1 gluten-free baking flour blend, ensuring it contains xanthan gum for structure.
Follow the rest of the recipe as directed. While the texture might vary slightly from the original, you should still achieve delicious Irresistible Chocolate Chip Walnut Blondies.
Why do I need to cool them completely before cutting?
Cooling is a critical, often overlooked step for blondies and most bar cookies. As they cool, the internal structure of the blondies continues to set and firm up.
If you attempt to cut them while warm, they will likely be too gooey and crumbly, making it difficult to achieve clean, well-defined squares. Patience ensures perfect presentation!
Your Next Sweet Adventure Awaits!
Now that you’re armed with the ultimate secret to perfectly suspended mix-ins and a foolproof recipe, there’s nothing stopping you from baking the most incredible Irresistible Chocolate Chip Walnut Blondies. Say goodbye to sunken chips and hello to fluffy, flavorful squares loaded with goodness in every single bite.
Get ready to impress your friends, delight your family, and maybe even keep a batch all to yourself – we won’t tell! We’d love to see your creations; share your blondie masterpieces in the comments below or tag us on social media. Happy baking!
Irresistible Chocolate Chip Walnut Blondies
Course: DessertCuisine: American CuisineDifficulty: easy12
squares (from 9×13 pan)20
minutes25
minutesAmerican Cuisine
Ingredients
1 and 3/4 cups all-purpose flour
1 teaspoon baking powder
1/2 teaspoon salt
1/2 cup (1 stick) unsalted butter, softened
1 cup granulated sugar
1/2 cup packed light brown sugar
2 large eggs
1 teaspoon vanilla extract
1/4 cup milk
1 and 1/2 cups semi-sweet chocolate chips
1/2 cup chopped walnuts
Powdered sugar, for dusting
Directions
- Preheat your oven to 350°F (175°C). Lightly grease and flour a 9×13 inch baking pan, or line it with parchment paper leaving an overhang on the sides for easy lifting.
- In a medium bowl, whisk together 1 and 1/2 cups of the all-purpose flour, baking powder, and salt. Set aside.
- This is the secret for perfectly distributed chips! In a separate small bowl, combine the chocolate chips and walnuts with the remaining 1/4 cup of all-purpose flour. Toss gently until the chips and nuts are lightly coated. This thin layer of flour creates friction, preventing them from sinking to the bottom during baking.
- In a large bowl, using an electric mixer, cream together the softened butter, granulated sugar, and light brown sugar until light and fluffy, about 2-3 minutes.
- Beat in the eggs one at a time, mixing well after each addition. Stir in the vanilla extract.
- Gradually add the dry flour mixture to the wet ingredients, alternating with the milk, beginning and ending with the flour mixture. Mix on low speed until just combined. Be careful not to overmix.
- Gently fold in your floured chocolate chips and walnuts until they are evenly distributed throughout the batter.
- Spread the batter evenly into your prepared baking pan.
- Bake for 25-30 minutes, or until a wooden skewer inserted into the center comes out with moist crumbs, but not wet batter. The edges should be lightly golden.
- Let the blondies cool completely in the pan on a wire rack before lifting them out and cutting into squares. Dust with powdered sugar before serving. Enjoy your perfectly chip-filled blondies!
Notes
- Features a unique trick to prevent chocolate chips and walnuts from sinking during baking.