Lemon Thumbprint Cookies: The Melt-in-Your-Mouth Secret
Are your thumbprint cookies always coming out hard, crumbly, or just… underwhelming? You’re not alone! So many home bakers struggle to get that perfect tender, buttery texture.
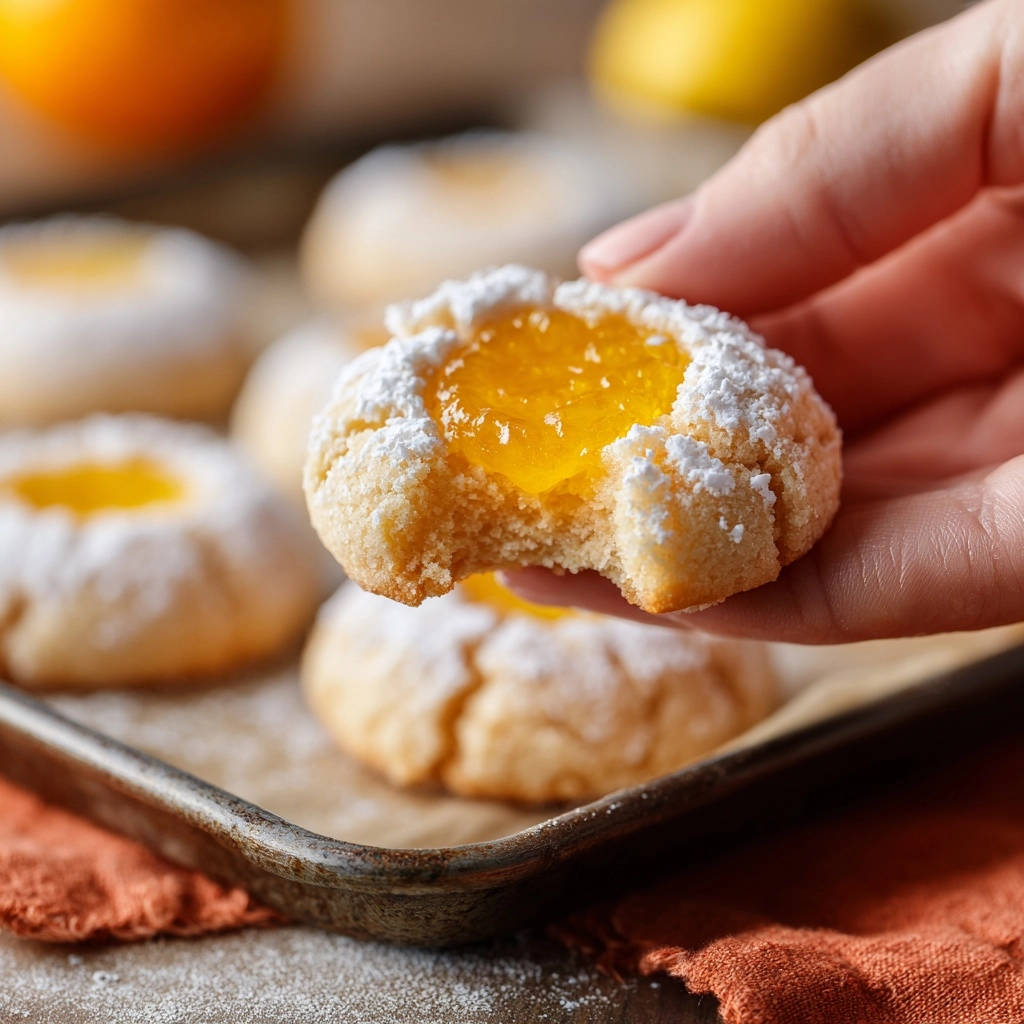
But I’ve cracked the code! This recipe unlocks the secret to Lemon Thumbprint Cookies that are impossibly soft, rich, and literally melt in your mouth, all crowned with a vibrant burst of citrus. Forget dry, tough cookies forever.
Beyond Basic: Why This Lemon Thumbprint Cookie Recipe Shines
Say Goodbye to Dry, Crumbly Cookies Forever
Achieving a truly tender cookie is a common challenge, but this recipe is designed to eliminate the dryness. We focus on precise mixing and baking techniques that lock in moisture and prevent the dreaded crumbly texture.
Get Our Best Recipes Weekly!
Join thousands of food lovers and get delicious recipes delivered to your inbox.
Each bite of these buttery cookies delivers a soft, almost cake-like texture that melts beautifully, making them far superior to many store-bought or less refined versions.
The Secret to Impossibly Soft, Tender Texture
Our method emphasizes proper creaming of butter and sugar, which incorporates essential air into the dough. This foundational step, combined with the enriching power of an egg yolk and careful flour integration, is critical.
Crucially, we guide you through precise baking cues, ensuring you pull the cookies from the oven at the exact moment they achieve peak tenderness, avoiding any overbaking that can lead to toughness.
A Burst of Bright, Zesty Flavor in Every Bite
The star of these homemade thumbprints is undeniably the vibrant lemon flavor. Fresh lemon zest infused into the dough creates a fragrant, aromatic base that perfectly complements the rich, buttery cookie.
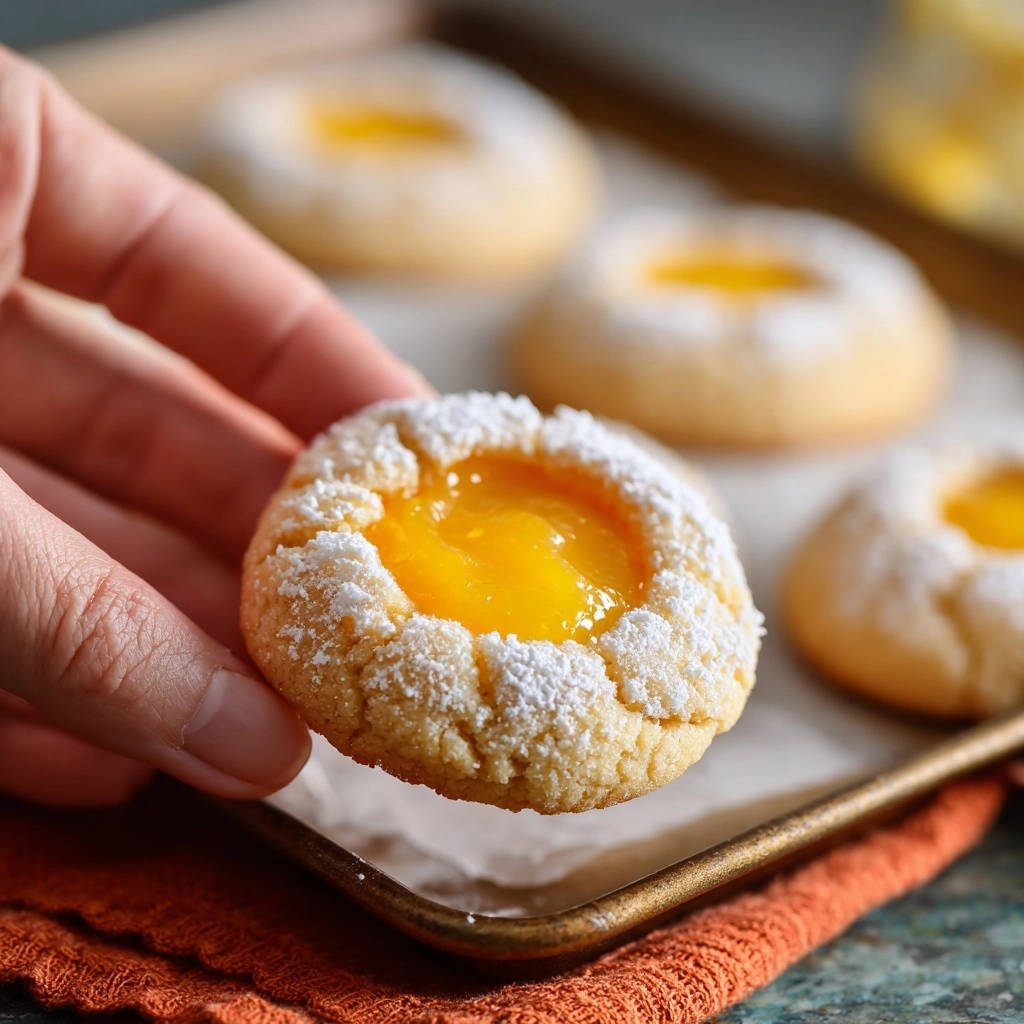
A generous dollop of quality lemon curd in the center provides a tangy, sweet counterpoint, making these zesty treats an irresistible blend of textures and tastes.
Gather Your Essentials: Ingredients for Luminous Lemon Thumbprints
The Creamy Foundation: Butter and Sugar
Unsalted butter, softened to room temperature, is paramount for a tender crumb. Using unsalted butter allows you to control the overall saltiness of the cookie.
Granulated sugar contributes to the cookie’s sweetness and texture. When creamed with butter, it helps create tiny air pockets, crucial for a light and airy dough.
Flavor Boosters: Egg Yolk, Vanilla, and Zest
A single large egg yolk adds richness and acts as a binder, contributing to the cookie’s melt-in-your-mouth texture without making it tough.
Vanilla extract introduces a warm, comforting note that balances the bright lemon. Freshly grated lemon zest delivers concentrated citrus oils, infusing the dough with intense, natural lemon flavor.
The Structural Core: All-Purpose Flour and Salt
All-purpose flour provides the necessary structure for these delightful Lemon Thumbprint Cookies. Its protein content, when managed correctly, ensures a tender crumb.
A touch of salt is essential to enhance and balance all the other flavors, preventing the cookies from tasting flat or overly sweet.
The Zesty Heart: Lemon Curd and Powdered Sugar
High-quality lemon curd or preserves forms the bright, tangy filling that makes these cookies shine. Its luscious texture and intense citrus flavor are non-negotiable for authentic thumbprints.
A dusting of delicate powdered sugar after cooling adds a professional finish and a final subtle touch of sweetness, making these a truly beautiful citrus dessert.
Tools of the Trade: Equipping Your Kitchen for Thumbprint Success
Electric Mixer: Whether a hand mixer or a stand mixer, this tool is crucial for properly creaming butter and sugar. It ensures your butter mixture becomes light and fluffy, incorporating the air needed for a tender cookie texture.
Baking Sheets and Parchment Paper: Two baking sheets are ideal for efficiency. Lining them with parchment paper prevents sticking, ensures even browning, and makes cleanup incredibly easy.
Measuring Spoons and Cups: Accuracy in baking is key to consistent results. Use proper measuring tools to ensure the right ratios of ingredients for a perfect dough.
Wire Rack: Essential for cooling the cookies completely after they come out of the oven. A wire rack allows air to circulate around all sides, preventing condensation and sogginess.
Small Scoop or Teaspoon: A small cookie scoop helps you portion out uniform dough balls, leading to evenly sized and baked cookies. A teaspoon or the back of a rounded measuring spoon is also perfect for creating the indentations.
Crafting Your Perfect Lemon Thumbprint Cookies: A Detailed Guide
- Prepare Your Workspace: Oven and Baking Sheets
Preheat your oven to 350F (175C) and line baking sheets with parchment paper. This ensures a non-stick surface and even heat distribution, crucial for consistent baking results.
- The Secret to Softness: Creaming Butter and Sugar
In a large bowl, cream softened unsalted butter and granulated sugar with an electric mixer until light, fluffy, and pale. This crucial step incorporates air, vital for a tender cookie texture, so don’t rush it (about 2-3 minutes).
- Integrate Wet Ingredients for Flavor Depth
Beat in the egg yolk, vanilla extract, and lemon zest until just combined. Overmixing here isn’t necessary; simply ensure they are fully incorporated into the creamy butter mixture.
- The Flour Factor: Gentle Mixing for Tender Results
Whisk together all-purpose flour and salt in a separate bowl. Gradually add the dry ingredients to the wet, mixing on low speed just until the flour disappears. This is key to preventing tough cookies; avoid overmixing as it develops gluten.
- Shape, Indent, and Prepare for Filling
Roll the dough into 1-inch balls and space them about 2 inches apart on your prepared baking sheet. Gently press an indentation into the center of each cookie using your thumb or a measuring spoon, being careful not to press all the way through.
- Fill with Zesty Lemon Curd
Spoon approximately 1/2 teaspoon of lemon curd or preserves into each indentation. Ensure the curd stays within the well for the best presentation and to prevent it from baking onto the sheet.
- Baking to Perfection: The “Melt-in-Your-Mouth” Moment
Bake for 10-12 minutes, or until the edges are just barely set and very lightly golden. The centers should still look slightly soft. Pulling them out at this precise moment is critical for that signature melt-in-your-mouth texture; overbaking is the enemy of a soft cookie!
- Cooling for Structure and Consistency
Allow the cookies to cool on the baking sheet for 5 minutes before carefully transferring them to a wire rack. This initial cooling period helps them firm up before handling, preventing breakage.
- The Finishing Flourish: Powdered Sugar Dusting
Once completely cooled, generously dust the lemon thumbprint cookies with powdered sugar for an elegant finish and a touch of extra sweetness. Dusting while warm will cause the sugar to melt.
Unlock the Secrets: Expert Tips for Impossibly Soft Lemon Thumbprint Cookies
Butter Temperature Matters: Ensure your butter is truly softened, but not melted. It should give slightly when pressed, but still hold its shape. This is essential for proper creaming and achieving the correct dough consistency.
Precision in Zesting: Use only the yellow part of the lemon peel. The white pith is bitter and can detract from the bright, fresh lemon flavor you’re aiming for.
The Golden Rule: Don’t Overmix the Dough: This is a recurring theme for a reason! Mixing flour for too long develops gluten, leading to tough, chewy cookies instead of tender ones. Stop as soon as the flour is visibly incorporated.
Consistent Cookie Size: Use a small cookie scoop or weigh your dough balls to ensure they are uniform. This promotes even baking, so all cookies are perfectly done at the same time and look professionally made.
The “Barely Set” Baking Cue: Trust your eyes, not just the timer! Pull the cookies when the edges are just starting to turn light gold and the centers still look slightly underbaked. They will continue to cook slightly on the hot baking sheet as they cool.
Cool Completely Before Dusting: Dusting with powdered sugar while the cookies are warm will cause it to melt and disappear into the cookie. Wait until they are fully cooled for the best visual appeal and a pristine white finish.
Lemon Thumbprint Cookies Troubleshooting: Solving Common Challenges
My Cookies Are Spreading Too Much!
Excessive spreading can be caused by butter that’s too soft (or even slightly melted), or by inaccurate flour measurements leading to a too-wet dough. Try chilling your dough for at least 30-60 minutes before baking to firm up the butter.
Always ensure your butter is softened but not greasy, and measure flour precisely using the scoop and level method for best results with these homemade thumbprints.
Why Are My Lemon Thumbprint Cookies Dry and Hard?
The most common culprits for dry, hard cookies are overmixing the dough and overbaking. Mix the flour only until just combined, as overworking develops gluten, which toughens the dough.
For baking, remove cookies from the oven when their edges are barely golden and centers still look slightly soft – they will set more as they cool, achieving that desired tender cookie texture.
The Lemon Curd Baked Out or Burned!
Ensure your indentations are deep enough to hold the curd securely, but not so deep they pierce the bottom of the cookie. If using a very thin preserve, consider slightly reducing the amount, or spooning in a bit more halfway through baking.
For a vibrant, uncooked filling, you can also bake the cookies empty and fill the cooled wells with lemon curd just before serving, guaranteeing a fresh, zesty flavor.
Beyond the Bake: Serving, Storing, and Creative Twists
Delightful Serving Suggestions
These lemon thumbprint cookies are perfect on their own, offering a bright burst of flavor with every bite. They also make a beautiful and elegant addition to any dessert platter, ideal for tea parties, brunches, or holiday gatherings.
Pair them with a warm cup of herbal tea or a light coffee for a truly comforting experience, or serve alongside fresh berries for a refreshing contrast, elevating these buttery cookies.
Round Out Your Meal
These lemon thumbprint cookies pair well with bright, fresh dishes. Consider serving them alongside these complementary recipes.
- For a light and zesty main course, try the Lemon-Dill Fish & Quinoa Bowls, featuring tender fish and vibrant flavors.
- Another excellent option is the Lemon Garlic Breadcrumb Spaghetti, which offers a satisfying pasta experience with a bright citrus note.
Storage & Make-Ahead Tips for Convenience
Store your cooled lemon thumbprint cookies in an airtight container at room temperature for up to 5-7 days, maintaining their tender texture. For longer freshness, they can be frozen for up to 3 months; simply thaw at room temperature before serving.
The dough can also be prepared ahead of time! Complete the dough up to step 4, then wrap it tightly in plastic wrap and refrigerate for up to 2-3 days. Allow it to come to room temperature slightly before rolling, indenting, and baking as directed.
Creative Flavor Variations to Explore
While lemon is a beloved classic, feel free to get creative with your fillings for these tender cookies! Other fruit preserves like raspberry, apricot, or strawberry make delightful alternatives, offering different flavor profiles.
For a decadent twist, consider a dollop of chocolate ganache or a salted caramel sauce. You can also experiment with different citrus zests in the dough – orange or lime zest would provide a similar bright, aromatic note with a unique twist.
Frequently Asked Questions About Lemon Thumbprint Cookies
Can I use bottled lemon juice instead of fresh zest?
For the lemon zest specifically, fresh is always best. Bottled lemon juice will not provide the same aromatic intensity or the essential oils that fresh lemon zest contributes to the cookie dough’s flavor.
For the brightest, most authentic lemon taste in your Lemon Thumbprint Cookies, don’t skip the fresh zest. Lemon juice’s primary role is for acidity, not the same aromatic oils.
Can I freeze Lemon Thumbprint Cookies?
Absolutely! You can freeze both the baked cookies and the unbaked dough. For baked cookies, ensure they are completely cooled, then freeze in a single layer on a baking sheet before transferring to an airtight container or freezer bag for up to 3 months.
For unbaked dough, roll into balls, indent, and freeze on a baking sheet. Once solid, transfer to a freezer bag and bake from frozen, adding a few extra minutes to the baking time for these delicious zesty treats.
What if I don’t have lemon curd?
If lemon curd isn’t available, you can easily substitute it with any fruit preserve or jam you enjoy; raspberry or apricot jams are classic and delicious alternatives, offering a different flavor profile to your homemade thumbprints.
Alternatively, for a lemon flavor without curd, you could fill the cooled indentations with a simple lemon glaze made from powdered sugar and fresh lemon juice.
Can I make these Lemon Thumbprint Cookies gluten-free?
While this specific recipe was developed with all-purpose flour, you can often substitute a high-quality 1:1 gluten-free baking flour blend (one that contains xanthan gum) for the all-purpose flour.
Be aware that the texture might vary slightly, so consider testing a small batch first to ensure satisfaction with your gluten-free soft lemon cookies.
Your Next Baking Adventure Awaits: Share Your Lemon Thumbprint Cookies!
There you have it – the definitive guide to crafting lemon thumbprint cookies that will impress everyone who takes a bite. With the secrets to achieving impossibly soft texture and a vibrant burst of lemon flavor, these aren’t just cookies; they’re a testament to joyful baking and irresistible treats.
Now it’s your turn to experience the delight of these tender, melt-in-your-mouth cookies. Bake a batch, share the love with family and friends, and don’t hesitate to share your baking successes and any creative twists you discover!

Lemon Thumbprint Cookies
Course: DessertCuisine: American CuisineDifficulty: easy4
24-30 cookies25
minutes12
minutes45
minutesAmerican Cuisine
Ingredients
1 cup (2 sticks) unsalted butter, softened
1/2 cup granulated sugar
1 large egg yolk
1 teaspoon vanilla extract
1 teaspoon lemon zest (from about 1 lemon)
1/4 teaspoon salt
2 cups all-purpose flour
1/2 cup lemon curd or lemon preserves
Powdered sugar, for dusting
Directions
- Preheat your oven to 350F (175C). Line a baking sheet with parchment paper.
- The Secret to Softness Starts Here: In a large bowl, using an electric mixer, cream together the softened butter and granulated sugar until it’s light, fluffy, and pale in color. This takes about 2-3 minutes. Don’t rush this step, as it incorporates air crucial for a tender cookie.
- Beat in the egg yolk, vanilla extract, and lemon zest until just combined.
- In a separate bowl, whisk together the all-purpose flour and salt. Gradually add the dry ingredients to the wet ingredients, mixing on low speed just until the flour disappears. This is another key step to avoiding tough cookies. Do not overmix! Overworking the dough develops gluten, leading to a harder texture.
- Roll the dough into 1-inch balls. Place them about 2 inches apart on your prepared baking sheet. Using your thumb or the back of a measuring spoon, gently press an indentation into the center of each cookie. Be careful not to press all the way through.
- Spoon about 1/2 teaspoon of lemon curd into each indentation.
- Bake for 10-12 minutes, or until the edges are just barely set and very lightly golden. The centers should still look slightly soft. The Pain-Point Solver for Dryness: Pulling them out at this precise moment is critical for that melt-in-your-mouth texture. Overbaking is the enemy of a soft cookie!
- Let the cookies cool on the baking sheet for 5 minutes before carefully transferring them to a wire rack to cool completely.
- Once fully cooled, dust generously with powdered sugar. Enjoy your perfectly tender, flavorful lemon thumbprints!