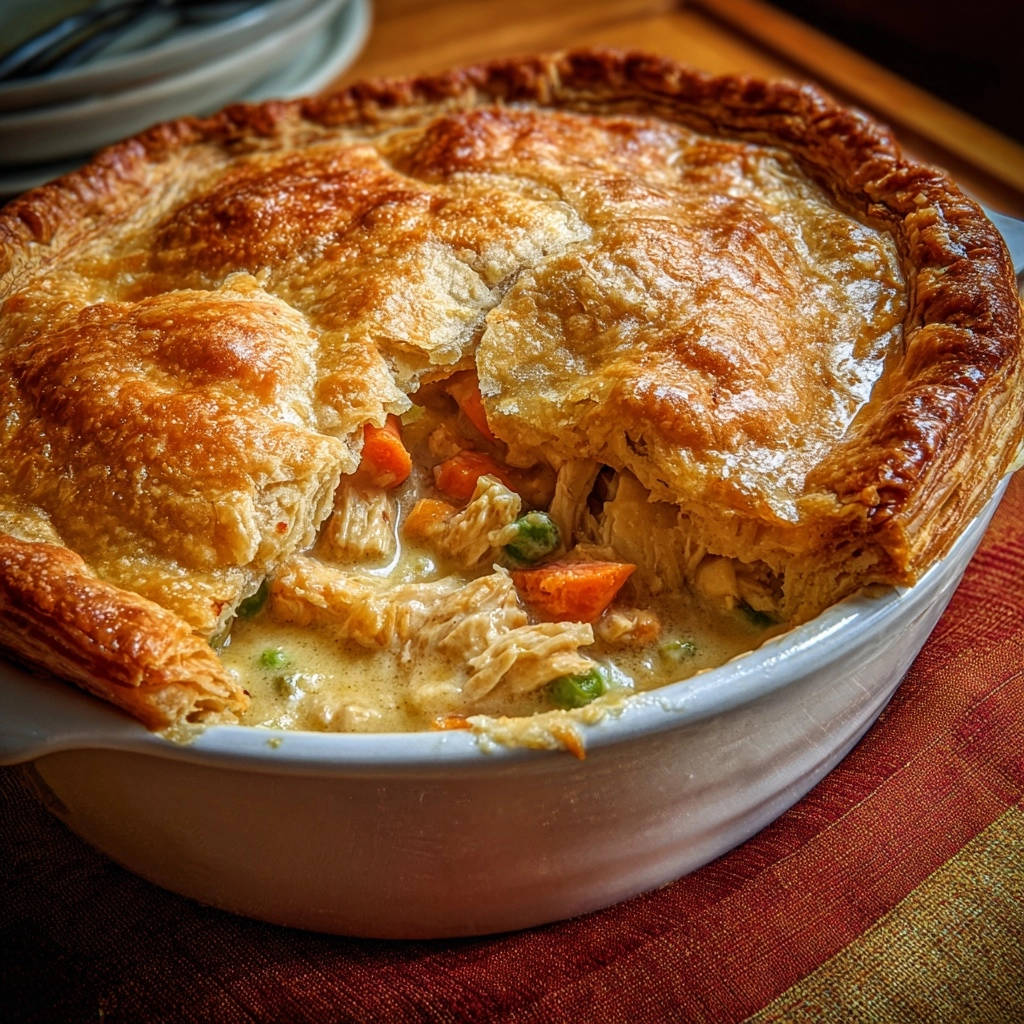
Classic Chicken Pot Pie: The Flaky Golden Crust Secret
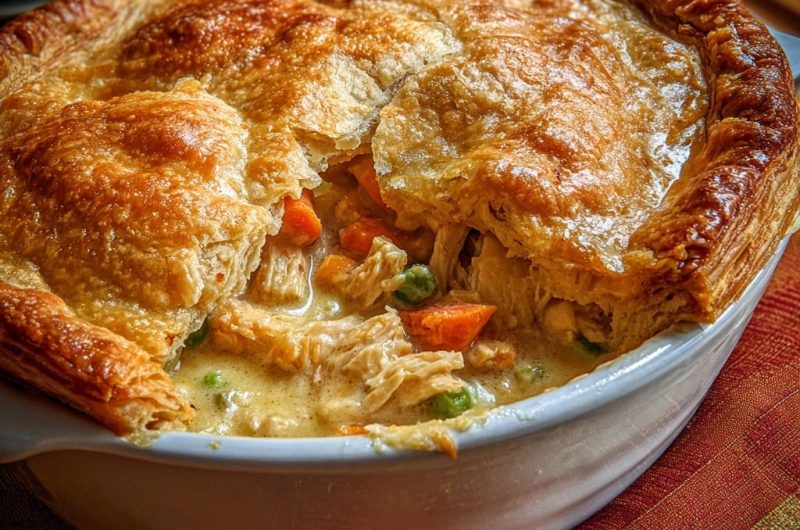
For years, crafting the perfect Classic Chicken Pot Pie felt like chasing a culinary myth, especially achieving that gloriously golden, shatteringly flaky crust. We’ve all been there with a sad, pale topping or a soggy bottom, right? My refined recipe finally solves this challenge, guaranteeing an unbelievably crisp puff pastry top that transforms a comforting meal into a true showstopper.
Why This Classic Chicken Pot Pie Will Be Your New Favorite
The Secret to a Consistently Flaky, Golden Top
Many struggle with pie crusts that fall flat, becoming tough or soggy. This Classic Chicken Pot Pie recipe champions the use of store-bought puff pastry, making a consistently flaky, golden top not just possible, but guaranteed.
The inherent layers of puff pastry, combined with a strategic egg wash, eliminate the guesswork. This ensures every bite delivers that satisfying crunch and beautiful golden hue you crave.
Get Our Best Recipes Weekly!
Join thousands of food lovers and get delicious recipes delivered to your inbox.
Effortless Elegance: Comfort Without the Fuss
Despite its impressive appearance and rich flavor, this Classic Chicken Pot Pie is remarkably straightforward to prepare. Leveraging pre-cooked chicken and readily available puff pastry significantly streamlines the process.
You get all the deep, savory satisfaction of a homemade meal with significantly less time and effort in the kitchen. It’s comfort food at its most convenient and delicious.
A Timeless Dish for Gathering and Comfort
There’s something uniquely heartwarming about a Classic Chicken Pot Pie bubbling hot from the oven. It’s the ultimate comfort food, perfect for a cozy family dinner or an impressive dish for guests.
This recipe brings people together, evoking a sense of nostalgia and contentment with every spoonful. It’s a dish that truly nourishes both body and soul.
Gather Your Comfort: Essential Ingredients for Pot Pie Perfection
Crafting this incredible Classic Chicken Pot Pie starts with selecting the right ingredients. Each component plays a vital role in building the dish’s signature flavor and texture.
The Creamy Heart: Filling Fundamentals
Proteins & Veggies for a Hearty Base
-
Cooked, Shredded Chicken Breast: Forms the protein-rich core of our pot pie. Using pre-cooked chicken drastically cuts down prep time, making this a weeknight-friendly option.
-
Carrots & Green Peas: Classic additions that provide natural sweetness, vibrant color, and essential nutrients. Carrots add a foundational savory note, while peas offer bursts of freshness and texture.
Creating the Velvety Sauce
-
All-Purpose Flour: The essential thickening agent for our rich, creamy sauce. It’s crucial for achieving that perfect, comforting consistency without lumps.
-
Chicken Broth & Milk/Half-and-Half: These liquids combine to form the luscious base of the filling. Chicken broth provides savory depth, while milk or half-and-half adds creaminess and body.
-
Olive Oil: Used for sautéing the vegetables, laying the groundwork for rich flavor development in the filling.
The Golden Crown: Our Flaky Pastry Hero
-
Frozen Puff Pastry Sheet, Thawed: This is our secret weapon for an unbelievably flaky, golden crust with minimal effort. Its pre-layered structure is designed for dramatic puff and crispness.
-
Large Egg & Water (for Egg Wash): The simple yet powerful egg wash is what gives the pastry its signature deep golden color. It also contributes significantly to the irresistibly crisp and professional-looking texture.
Aromatic Enhancers: Seasoning Your Pot Pie
-
Dried Thyme: Adds a classic, earthy, and aromatic depth that beautifully complements chicken and vegetables in a pot pie. It’s a hallmark flavor.
-
Salt & Black Pepper: Fundamental seasonings to enhance and balance all the flavors in the filling. Proper seasoning ensures every bite is perfectly harmonious and delicious.
Your Kitchen Arsenal: Tools for Classic Chicken Pot Pie Success
Having the right kitchen tools on hand makes the process of creating your Classic Chicken Pot Pie smooth and enjoyable. These essentials ensure precision and ease.
Essential Cookware for a Seamless Experience
Large Oven-Safe Skillet or Saucepan: Ideal for preparing the creamy filling, especially if it can go directly into the oven, minimizing dishes and maximizing efficiency.
Oven-Safe Pie Dish or Casserole Dish (9-10 inch): If not using an oven-safe skillet, this is crucial for baking your chicken pot pie to perfection and achieving an even cook.
Whisk: Indispensable for creating a smooth, lump-free creamy sauce for the pot pie filling. A good whisk is your best friend here.
Pastry Brush: Essential for applying the egg wash evenly over the puff pastry. This ensures a consistent golden finish and contributes to overall crispness.
Crafting Culinary Comfort: Step-by-Step Classic Chicken Pot Pie
Follow these detailed steps to create a show-stopping Classic Chicken Pot Pie with that irresistible flaky, golden crust.
-
Step 1: Building Your Flavorful Base
Prepare the Filling Base: In a large oven-safe skillet or saucepan, heat olive oil over medium heat. Add chopped carrots and cook for 5-7 minutes until they are slightly tender, beginning to soften.
Once the carrots have softened slightly, add the cooked, shredded chicken and cook for 2-3 minutes, stirring, just to heat it through. This step ensures all components are warm and ready for the sauce, integrating flavors early on.
-
Step 2: Mastering the Creamy Pot Pie Sauce
Make the Creamy Sauce: Sprinkle flour evenly over the chicken and carrot mixture, stirring constantly for 1 minute to cook out the raw flour taste. This brief cooking prevents a starchy, unpleasant flavor in your finished sauce.
Stir in the dried thyme. Gradually whisk in the chicken broth, then the milk or half-and-half, ensuring no lumps form. The gradual addition and continuous whisking are key to achieving a silky-smooth, perfectly emulsified sauce.
Bring the mixture to a gentle simmer, stirring frequently, until the sauce thickens to your desired consistency. Finally, stir in the frozen green peas and cook for 1-2 minutes until just heated through. Season generously with salt and black pepper to taste, ensuring a balanced flavor.
-
Step 3: Assembling Your Pie & Preheating
Assemble the Pie (and Preheat Oven): While the filling is simmering and thickening, preheat your oven to a robust 400°F (200°C). A hot oven is crucial for successful puff pastry expansion and achieving maximum flakiness.
Once the filling is ready, pour it into an oven-safe pie dish or casserole dish (if you’re not using the skillet directly). Let the filling cool slightly for 10-15 minutes while the oven finishes preheating. This cooling step helps prevent the bottom crust from becoming soggy by avoiding direct contact with extremely hot filling.
-
Step 4: The Game-Changing Flaky Puff Pastry Top
The Flaky Crust Secret: Carefully unroll the thawed puff pastry sheet. Place it over the cooled filling, trimming any excess or crimping the edges to seal if desired. Ensure it completely covers the filling, creating a protective barrier.
Brush the entire surface of the puff pastry generously with the egg wash (1 large egg whisked with 1 tablespoon water). This egg wash creates that incredible golden color and contributes significantly to the crisp, flaky texture, making your pot pie visually stunning.
Cut a few small slits in the center of the pastry to allow steam to escape during baking. This prevents the pastry from becoming too soggy underneath and helps it puff dramatically and evenly.
-
Step 5: Baking to Golden Perfection
Bake to Perfection: Bake for 25-30 minutes, or until the puff pastry is dramatically puffed, deeply golden brown, and absolutely flaky. The visual cues of deep color and significant rise are key indicators of perfect doneness.
If the crust starts browning too quickly, you can loosely tent it with aluminum foil to prevent burning while the rest of the pie cooks through. This allows the filling to heat thoroughly without over-browning the pastry.
-
Step 6: Serving Your Masterpiece
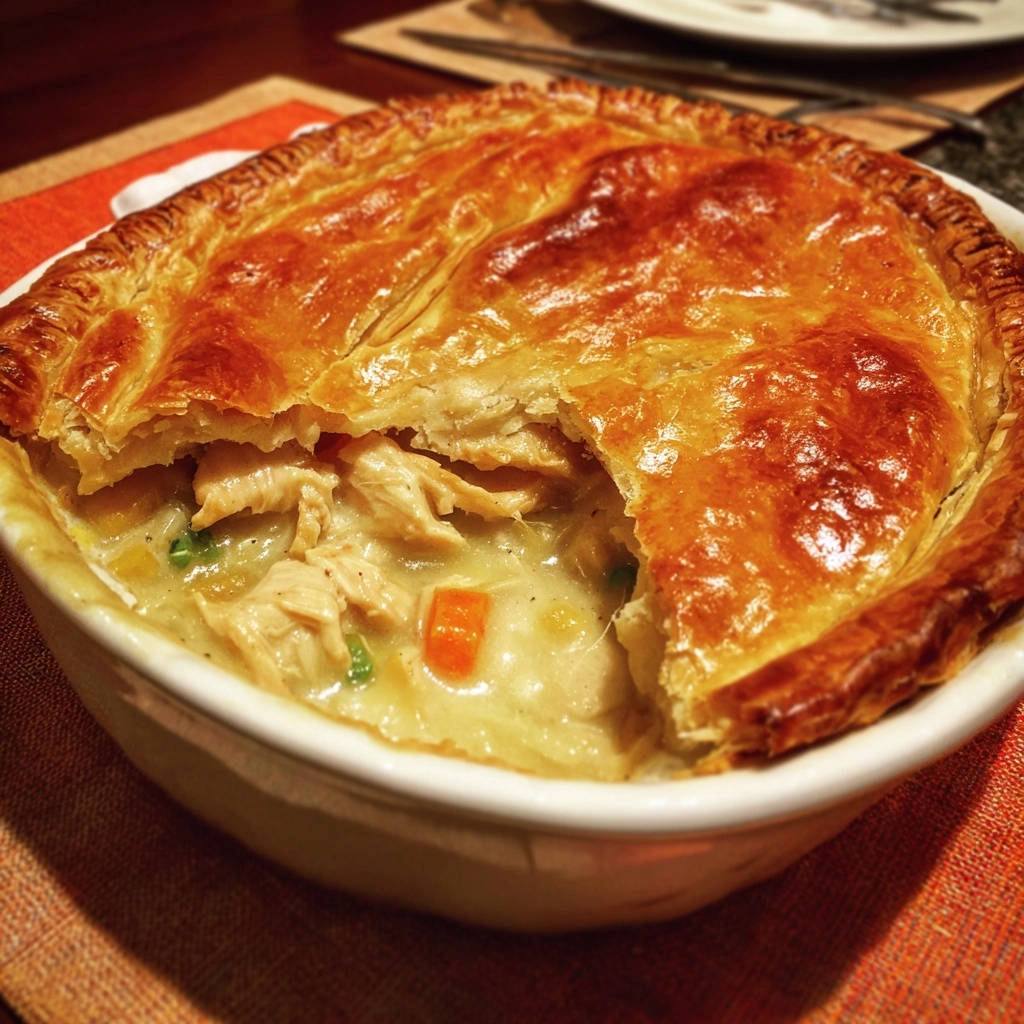
Serve Hot and Enjoy: Remove your Classic Chicken Pot Pie from the oven and let it rest for a few minutes before serving. This allows the filling to set slightly and prevents burns, making it easier to serve.
Then, cut into generous portions and enjoy that incredible, show-stopping crust! Savor the rich, creamy filling encased by the most satisfyingly flaky topping.
More Comforting Chicken Dishes
If you loved this chicken pot pie, here are a couple more chicken recipes that bring warmth and satisfaction.
- For a different kind of hearty chicken meal, check out this Homestyle Chicken & Dumplings, perfect for a cozy evening.
- If you’re looking for another creamy chicken option, try this Creamy Chicken Stew for a satisfying and flavorful bowl.
Chef’s Wisdom: Elevating Your Classic Chicken Pot Pie
These expert tips will ensure your Classic Chicken Pot Pie is not just good, but truly exceptional, delivering maximum flavor and perfect texture every time.
Achieving the Perfect Sauce Consistency
Don’t Rush the Roux: Ensure you cook the flour for at least 1 minute before adding liquids. This crucial step eliminates the raw flour taste and creates a more stable, lump-free roux for superior thickening.
Whisk Gradually: When adding broth and milk, do so slowly while continuously whisking. This prevents lumps from forming and ensures a smooth, luxurious, and creamy sauce every time.
Puff Pastry Pointers for Maximum Flakiness
Thaw Properly: Ensure your puff pastry is thawed just enough to unroll without cracking, but still cold to the touch. Over-thawed pastry can be sticky and difficult to handle, while frozen pastry will tear.
Generous Egg Wash: Don’t skimp on the egg wash! A good, even coating is key to achieving that deep golden color and incredibly crisp texture that makes this pot pie so special. Cover the entire visible surface.
Cool the Filling: Allowing the filling to cool slightly before adding the pastry is crucial. Hot filling can create steam that makes the bottom of the pastry soggy before it even bakes, hindering its dramatic puffiness.
Flavor Variations: Personalize Your Pot Pie
Herb Power: Experiment with other herbs like fresh rosemary or sage, or stir in fresh parsley or chives at the very end for a bright, herbaceous finish.
Veggie Boost: Add diced celery, sautéed mushrooms, or sweet corn to the filling for extra texture and nutrients. Sauté these additions with the carrots for optimal flavor.
Cheese Please: Stir in a handful of shredded sharp cheddar or Gruyere cheese into the filling just before adding the pastry for an extra layer of savory richness and gooey delight.
Solving Common Pot Pie Predicaments
Even expert cooks encounter challenges. Here are solutions to common Classic Chicken Pot Pie issues, ensuring your culinary journey remains smooth.
“Why isn’t my sauce thick enough?”
This often happens if the flour wasn’t cooked long enough to activate its thickening properties, or if the mixture wasn’t simmered adequately to allow the flour to fully hydrate. To fix, remove some liquid, whisk in a little more flour (mixed with an equal amount of cold water to avoid lumps), and stir it back into the pot, continuing to simmer gently until the desired thickness is achieved.
“My crust is browning too fast!”
If your puff pastry is getting too dark before the baking time is up or the filling is thoroughly heated, simply loosely tent the entire pie with aluminum foil. This will protect the crust from direct heat, allowing the rest of the pie to cook without further browning or burning.
“How do I prevent a soggy bottom?”
Several factors help prevent a soggy bottom. First, ensure your filling isn’t too hot when you top it with pastry, as excessive steam can create sogginess. Second, always preheat your oven to the specified temperature (400°F) to ensure a quick crust set from the bottom. Lastly, allow the pie to rest for 5-10 minutes after baking; this lets the steam redistribute and prevents a soggy base.
Enjoying & Preserving Your Classic Chicken Pot Pie
Maximize your enjoyment and minimize waste with these practical tips for serving, making ahead, and storing your delicious Classic Chicken Pot Pie.
Perfect Pairings: What to Serve Alongside
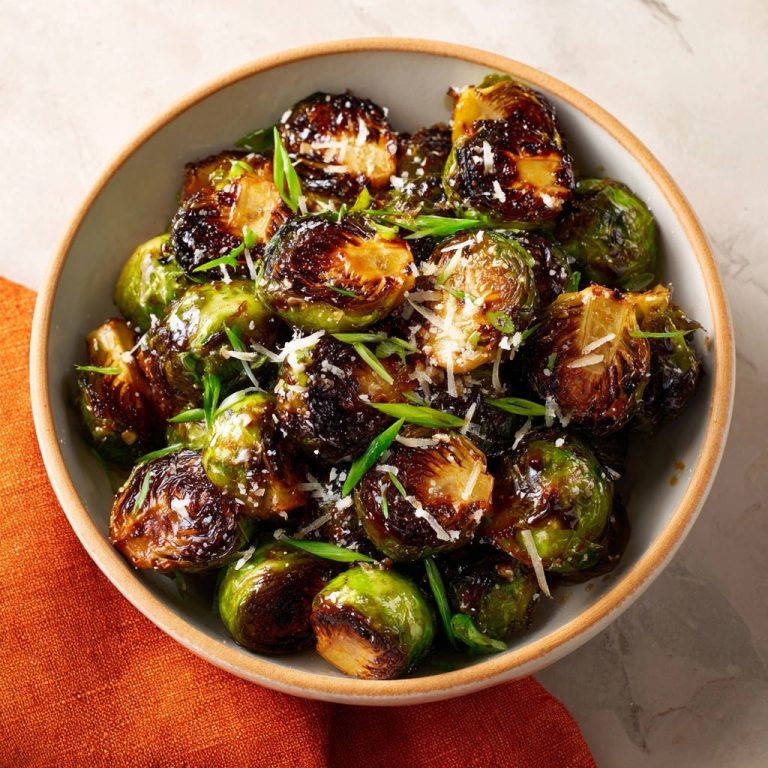
This hearty Classic Chicken Pot Pie is a meal in itself, rich and satisfying. However, it pairs beautifully with a simple, crisp green salad dressed with a light vinaigrette to cut through the richness. A side of roasted asparagus or steamed green beans also makes an excellent, complementary accompaniment, adding freshness and balance.
Make-Ahead Magic: Prep for Busy Days
You can prepare the entire creamy filling a day or two in advance and store it in an airtight container in the refrigerator. When ready to bake, transfer the cold filling to your pie dish, top with fresh, thawed puff pastry, and proceed with baking as directed. If starting with a cold filling, you may need to add an extra 5-10 minutes to the bake time to ensure it heats through.
Storing Leftovers for Future Indulgence
Leftover Classic Chicken Pot Pie can be stored in an airtight container in the refrigerator for up to 3-4 days. To reheat, warm individual slices in the microwave, or for a crispier crust that mimics freshly baked, reheat in an oven or toaster oven at 350°F (175°C) until thoroughly heated through and the crust is revitalized.
Your Classic Chicken Pot Pie Questions Answered
Here are answers to some of the most frequently asked questions about making this comforting Classic Chicken Pot Pie, offering even more flexibility and confidence.
Can I use pre-cooked rotisserie chicken?
Absolutely! Using pre-cooked rotisserie chicken is a fantastic time-saver and adds wonderful, savory flavor to your pot pie, often with extra herbs. Simply shred approximately 2 cups of the meat and incorporate it as directed in the recipe, ensuring it’s heated through.
What if I don’t have puff pastry?
While puff pastry is the secret to this recipe’s incredible flakiness and dramatic puff, you can substitute it with a traditional pie crust (store-bought or homemade) for a different but still delicious result. You can also use canned biscuits for a charming biscuit-topped pot pie, though baking times will vary.
Can this recipe be made gluten-free?
Yes, with a few thoughtful substitutions! Use a gluten-free all-purpose flour blend (ensure it’s specifically formulated for thickening sauces) and a readily available gluten-free puff pastry sheet (check specialty or freezer sections of your grocery store). Proceed with the recipe as normal, adjusting cooking times if necessary for the gluten-free flour to thicken appropriately.
Can I freeze leftover Classic Chicken Pot Pie?
Yes, you can freeze individual slices or the entire baked pie. Wrap it tightly first in plastic wrap and then in aluminum foil to prevent freezer burn, then freeze for up to 2-3 months for best quality. Thaw in the refrigerator overnight before reheating as described in the “Storing Leftovers” section.
Ready to Create Your Own Classic Chicken Pot Pie Masterpiece?
With this foolproof recipe and its secret to a gloriously flaky, golden puff pastry crust, you’re now equipped to create the ultimate Classic Chicken Pot Pie that will impress everyone at your table. Say goodbye to crust frustrations and hello to pure comfort food perfection, elevated to an art.
Don’t wait any longer to experience the joy of this heartwarming dish. Gather your ingredients, follow our simple, expert-guided steps, and prepare to delight in every savory, creamy, and irresistibly flaky bite. Share your creations with us – we can’t wait to see your pot pie masterpieces and hear about your success!
Classic Chicken Pot Pie
Course: Main CourseCuisine: AmericanDifficulty: medium4
servings20
minutes45
minutes300
kcal60
minutesWho doesn’t love a comforting pot pie? This recipe shares a foolproof method for achieving the most gorgeous, shatteringly crisp puff pastry top, transforming a classic comfort food into ultimate perfection. Say goodbye to crust frustrations and hello to a truly impressive dish!
Ingredients
1 tablespoon olive oil
1 cup chopped carrots
1/2 cup frozen green peas
2 cups cooked, shredded chicken breast
1/4 cup all-purpose flour
2 cups chicken broth
1/2 cup milk or half-and-half
Salt and black pepper to taste
1 teaspoon dried thyme
1 sheet frozen puff pastry, thawed
1 large egg, whisked with 1 tablespoon water (for egg wash)
Directions
- Prepare the Filling Base: In a large oven-safe skillet or saucepan, heat olive oil over medium heat. Add chopped carrots and cook for 5-7 minutes until slightly tender. Add the cooked, shredded chicken and cook for 2-3 minutes, stirring, just to heat through.
- Make the Creamy Sauce: Sprinkle flour over the chicken and carrot mixture, stirring constantly for 1 minute to cook out the raw flour taste. Stir in the dried thyme. Gradually whisk in the chicken broth, then the milk, ensuring no lumps. Bring the mixture to a gentle simmer, stirring frequently, until the sauce thickens to your desired consistency. Stir in the frozen green peas and cook for 1-2 minutes until just heated through. Season with salt and black pepper.
- Assemble the Pie (and Preheat Oven): While the filling is simmering and thickening, preheat your oven to a robust 400°F (200°C). Once the filling is ready, pour it into an oven-safe pie dish or casserole dish (if not using the skillet directly). Let the filling cool slightly for 10-15 minutes while the oven finishes preheating.
- The Flaky Crust Secret: Carefully unroll the thawed puff pastry sheet. Place it over the cooled filling, trimming any excess or crimping the edges to seal if desired. Brush the entire surface of the puff pastry generously with the egg wash. This egg wash creates that incredible golden color and contributes to the crisp, flaky texture. Cut a few small slits in the center of the pastry to allow steam to escape.
- Bake to Perfection: Bake for 25-30 minutes, or until the puff pastry is dramatically puffed, deeply golden brown, and absolutely flaky. If the crust starts browning too quickly, you can loosely tent it with foil.
- Serve hot and enjoy that incredible, show-stopping crust!
Notes
- Ensure puff pastry is properly thawed. Let the filling cool slightly before adding pastry to prevent a soggy crust.