Chocolate Chip Sea Salt Cookies: Guaranteed Gooey Centers
There’s nothing quite like the quest for the perfect Chocolate Chip Sea Salt Cookies. I’ve spent countless hours in my kitchen, refining techniques and tweaking ingredients, often encountering the disappointment of dry, crumbly results.
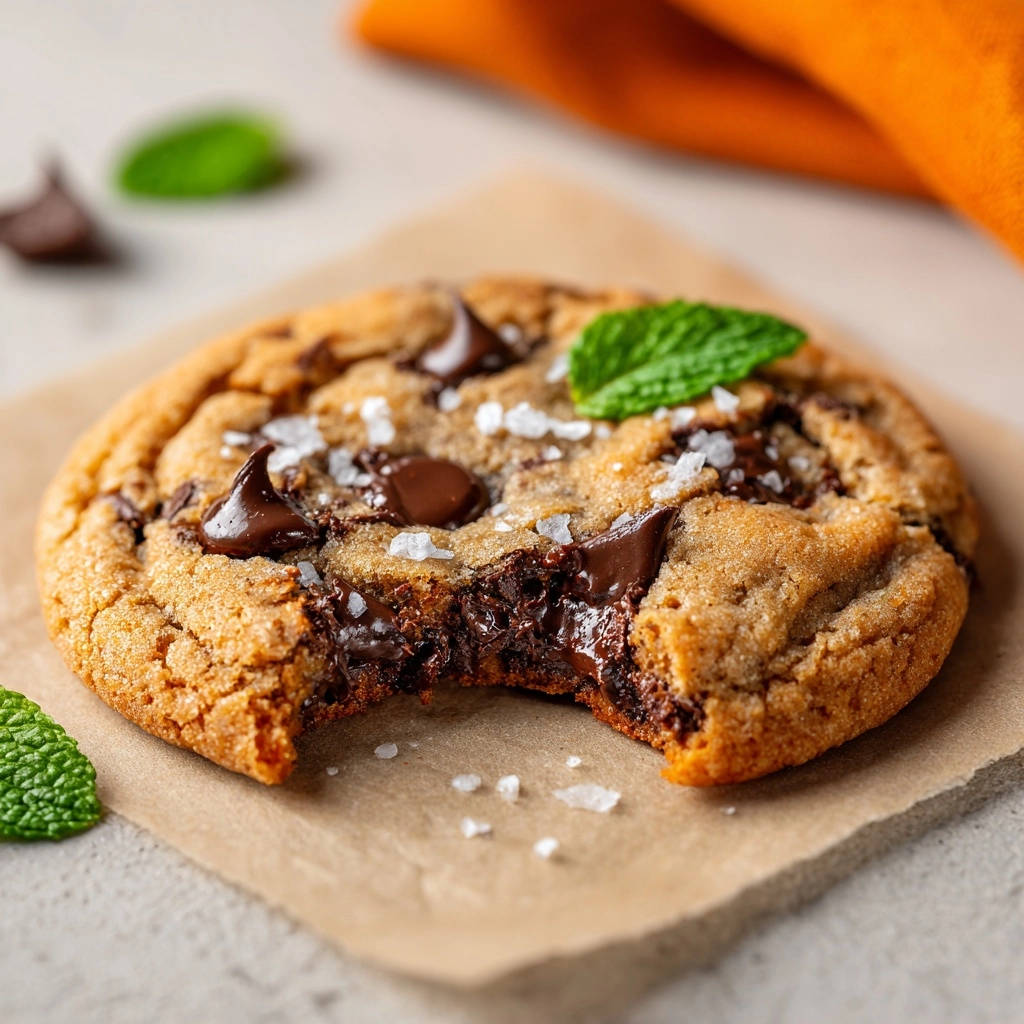
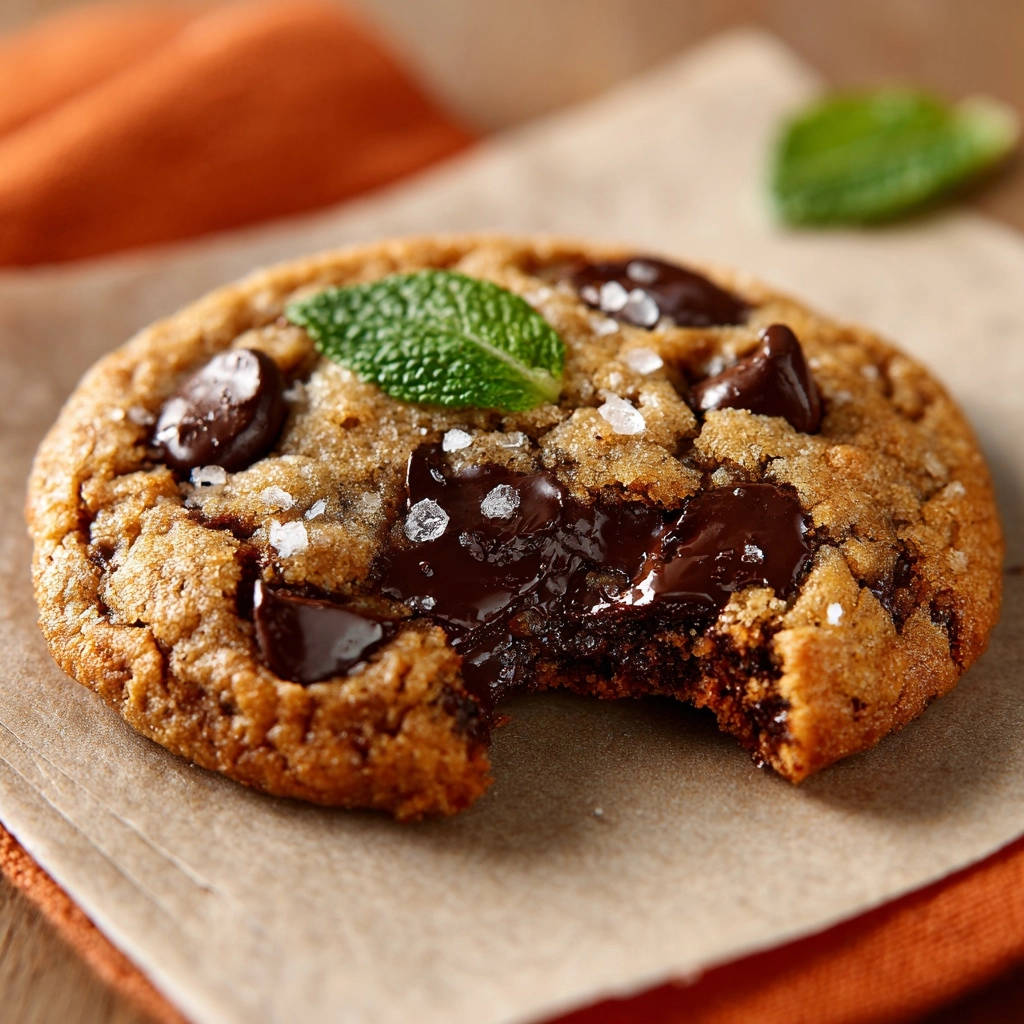
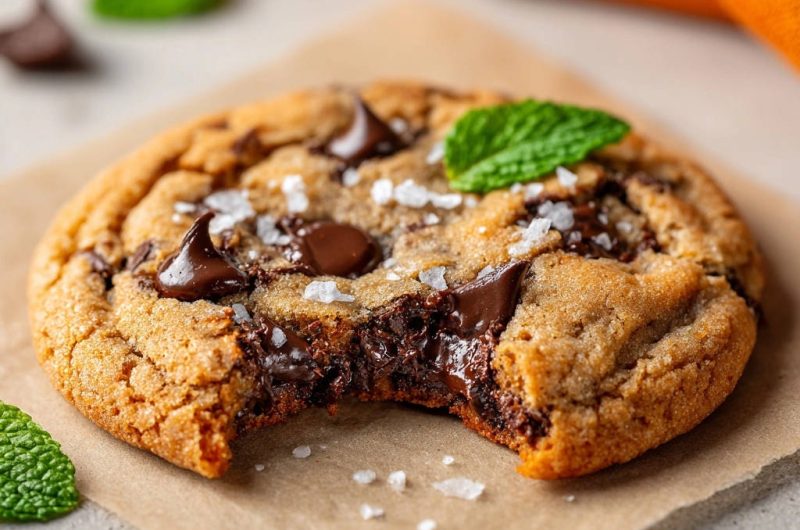
This recipe for Chocolate Chip Sea Salt Cookies is the culmination of that journey, specifically engineered to deliver that elusive, guaranteed gooey, molten chocolate center with perfectly chewy edges and a delightful hint of flaky sea salt.
It’s the ultimate cookie for bakers seeking reliable perfection, ensuring every bite is a blissful escape into rich, balanced sweetness.
Get Our Best Recipes Weekly!
Join thousands of food lovers and get delicious recipes delivered to your inbox.
Why This Recipe is Your New Favorite (and How it Guarantees Gooey Centers)
Cracking the Code: The Secret to Irresistible Molten Chocolate
The magic of truly gooey centers in your Chocolate Chip Sea Salt Cookies hinges on strategic underbaking. We pull them from the oven when the edges are just set and golden, but the middle still appears tantalizingly soft.
The residual heat on the baking sheet continues to cook the cookies gently without overbaking, ensuring the chocolate remains wonderfully molten.
Adding extra chocolate chips immediately after baking is another crucial step, creating those picture-perfect pools of melted chocolate on top.
Beyond Basic: What Makes Our Cookies Stand Out
Beyond the gooey core, this recipe elevates the classic by meticulously balancing textures and flavors. We achieve ideal chewy edges that beautifully complement the soft, tender interiors.
The subtle hint of sea salt doesn’t just add flavor; it brilliantly cuts through the sweetness, making each bite more complex and satisfying.
This method ensures a consistent, bakery-quality result that is simple enough for any home baker to master.
The Perfect Balance: Chewy Edges, Soft Centers, and a Hint of Salt
Achieving this textural harmony is a testament to the precise ratio of sugars and the careful baking method. Brown sugar contributes moisture and chewiness, while granulated sugar ensures those slightly crisp edges.
The specific baking soda quantity promotes a gentle spread and rise, preventing a cakey texture.
Finally, the generous sprinkle of flaky sea salt on the warm Chocolate Chip Sea Salt Cookies is non-negotiable, offering a delightful contrast that enhances the rich chocolate and sweet dough.
Gathering Your Baking Essentials: Ingredients for Success
The Foundation: Butter & Sugars for Perfect Texture
Softened unsalted butter is critical for creaming effectively, incorporating air that yields a tender crumb. Using unsalted allows you to control the overall salt content precisely.
Granulated sugar provides sweetness and contributes to the crispness around the cookie’s edges, preventing them from being uniformly soft.
Light brown sugar adds a deep, molasses flavor and crucial moisture, ensuring a delightfully chewy texture throughout these homemade cookies.
Key Leavening & Flavor Boosters
A large egg acts as a binder, adding structure and richness, while also contributing to the dough’s emulsification and overall texture.
Vanilla extract is an indispensable flavor enhancer, deepening the aroma and warmth of the Chocolate Chip Sea Salt Cookies.
Baking soda reacts with the acidic brown sugar to produce carbon dioxide, providing lift and promoting spread for a perfectly textured cookie.
Flour Power & The All-Important Salt Balance
All-purpose flour provides the necessary structure and body for the cookies. Its moderate protein content is ideal for a tender yet sturdy cookie.
A small amount of fine salt within the dough balances the sweetness and enhances all the other flavors.
The finishing touch of flaky sea salt is paramount; it offers a beautiful visual, a delightful crunch, and a burst of savory contrast that truly elevates these chocolate chip cookies.
Choosing Your Chocolate: Chips vs. Chunks
Semi-sweet chocolate chips or chunks are preferred for their balanced sweetness and excellent melting properties, creating luscious pools of molten chocolate.
Chunks often yield a more varied melt and visual appeal compared to uniform chips.
If you’re enjoying the variation in melt that chunks provide, you’ll want to try chocolate chunk cookies for another delightful texture.
Don’t forget the extra chocolate chips for pressing onto the hot cookies; this is a non-negotiable step for that iconic, gooey top layer.
Essential Tools for Your Chocolate Chip Sea Salt Cookie Journey
Mixing Bowls & Stand Mixer (or Hand Mixer)
You’ll need a large bowl for the wet ingredients and a separate medium bowl for dry ingredients. An electric mixer, either stand or hand-held, is indispensable for thoroughly creaming the butter and sugars, ensuring an airy base.
Baking Sheets & Parchment Paper
Having at least two sturdy baking sheets allows for continuous baking. Parchment paper is a game-changer; it prevents sticking, ensures even browning, and makes cleanup incredibly easy.
Measuring Cups, Spoons & Spatulas
Accurate measurement is the cornerstone of successful baking, so reliable measuring cups and spoons are a must. A flexible rubber spatula is essential for scraping down the bowl sides, ensuring all ingredients are fully incorporated.
Wire Cooling Rack
A wire rack provides crucial air circulation, allowing your Chocolate Chip Sea Salt Cookies to cool evenly and set properly without becoming soggy on the bottom, maintaining their perfect texture.
Crafting Your Guaranteed Gooey Chocolate Chip Sea Salt Cookies: Step-by-Step
Prep for Perfection: Oven & Sheet Readiness
Begin by preheating your oven to 375°F (190°C). This ensures a consistent temperature from the moment your cookies enter the oven, preventing uneven baking.
Line your baking sheets with parchment paper. This simple step prevents sticking, promotes even heat distribution, and guarantees easy removal of your freshly baked treats.
Creaming to Cloud-Like: Building the Base
In a large bowl, combine the softened unsalted butter, granulated sugar, and light brown sugar. Beat with an electric mixer until the mixture is light, fluffy, and noticeably pale in color, typically 2-3 minutes.
This creaming process is fundamental; it incorporates air into the butter and sugar mixture, which is crucial for the cookies’ tender texture and helps them spread beautifully.
Combining the Elements: Wet & Dry
Beat in the large egg and vanilla extract until they are fully incorporated and the mixture is smooth, pausing to scrape down the sides of the bowl as needed to ensure everything is evenly mixed.
In a separate medium bowl, whisk together the all-purpose flour, baking soda, and fine salt until uniformly combined. Gradually add these dry ingredients to the wet mixture, mixing on low speed until just combined.
Overmixing at this stage can overdevelop the gluten in the flour, resulting in tougher, less tender Chocolate Chip Sea Salt Cookies.
The Chocolate Fold: Integrating the Goodness
Gently fold in 1 cup of your chosen semi-sweet chocolate chips or chunks. Use a spatula to ensure they are evenly distributed throughout the dough without crushing them or overworking the mixture.
The goal is to integrate the chocolate just enough so every cookie gets a generous share of molten goodness.
Scooping & Spacing
Using a spoon or cookie scoop, drop rounded tablespoons of cookie dough onto your prepared baking sheets. Space them approximately 2 inches apart to allow for proper spreading during baking, preventing them from merging into one giant cookie.
The Critical Bake: Achieving That Gooey Center
Bake the cookies for 8-10 minutes, or until the edges are set and lightly golden brown, but the centers still appear soft and slightly underbaked. This specific timing is paramount for achieving that coveted gooey, molten center.
Resist the urge to bake longer, even if the centers look too soft; they will continue to set as they cool, maintaining their incredible chewiness.
The Final Touch: Extra Chips & Sea Salt Magic
Immediately after removing the baking sheet from the oven, gently press a few extra chocolate chips or chunks directly onto the tops of each hot cookie. The residual heat will beautifully melt these additions, creating those inviting pools of chocolate.
Generously sprinkle each warm cookie with flaky sea salt. This final touch provides a crucial salty contrast to the sweet chocolate, elevating the flavor profile significantly.
Cooling Gracefully: Setting for Success
Allow the Chocolate Chip Sea Salt Cookies to cool on the baking sheet for 5-10 minutes before carefully transferring them to a wire rack to cool completely. This crucial resting period allows them to firm up slightly without losing their incredible gooey interior.
Cooling on the sheet prevents the warm, delicate cookies from breaking apart when moved, and helps them maintain their shape and texture.
Chef’s Secrets: Elevate Your Chocolate Chip Sea Salt Cookies Game
Mastering the Mix: Why Overmixing is Your Enemy
Overmixing cookie dough, especially after adding flour, develops gluten excessively, leading to tough, cakey Chocolate Chip Sea Salt Cookies instead of wonderfully chewy ones.
Always mix dry ingredients into wet until just combined, with a few streaks of flour still visible, then finish by hand.
Temperature Tactics: Softened Butter & Egg Wisdom
Ensure your unsalted butter is genuinely softened (indent with a finger) but not melted for optimal creaming and aeration. Cold butter won’t cream properly, and melted butter will lead to greasy, flat cookies.
Room temperature eggs emulsify better with the butter and sugar, creating a smoother, more uniform dough structure for your homemade cookies.
The Underrated Power of Parchment Paper
Parchment paper does more than prevent sticking; it promotes even heat distribution for consistent baking and makes transferring delicate, warm Chocolate Chip Sea Salt Cookies effortless.
It also simplifies cleanup, saving you time and effort after your baking session.
Chill Out: The Dough Chilling Debate (and Why it Can Help)
While this recipe is designed to deliver gooey centers without chilling, a brief 30-minute chill can slightly enhance the flavor depth and reduce spread, resulting in thicker, chewier cookies.
This extra step allows the flour to fully hydrate and the flavors to meld, creating a more complex taste profile.
Don’t Skimp on the Flaky Sea Salt
That final sprinkle of flaky sea salt is not merely a garnish; it’s a powerful flavor amplifier. It provides a crucial counterpoint to the sweetness of the chocolate and sugar, creating a sophisticated balance.
The subtle crunch and burst of salinity elevate these Chocolate Chip Sea Salt Cookies from good to absolutely extraordinary.
Troubleshooting Common Chocolate Chip Sea Salt Cookie Conundrums
My Cookies Are Spreading Too Much!
Excessive spreading often stems from butter that is too soft or melted, or an oven temperature that is too low. Ensure your butter is softened, not liquid, and always verify your oven with an oven thermometer.
Additionally, a warm dough or too little flour can contribute to spreading. If dough feels too warm, chill it briefly before scooping.
Why Are My Cookies Dry and Crumbly?
Dry and crumbly cookies are typically a result of overbaking. Pull your Chocolate Chip Sea Salt Cookies from the oven when the edges are set and golden, but the centers still look soft.
Using too much flour, or not enough butter or liquid in your dough, can also lead to a dry texture. Always measure flour accurately using the spoon and level method.
My Chocolate Chips Didn’t Melt into Gooey Pools!
This usually happens if you’re not using the right type of chocolate (e.g., specific baking chips designed to hold their shape), or if you didn’t add extra chips immediately after baking while the cookies were still piping hot.
The residual heat is crucial for melting those top-pressed chips into luscious, gooey puddles. Ensure your chocolate is fresh and of good quality.
Edges Are Burnt, Center is Raw?
This common issue can be due to oven hot spots, inconsistent cookie sizing, or baking sheets placed too close to the heating elements.
Rotate your baking sheet halfway through baking, and ensure all your Chocolate Chip Sea Salt Cookies are uniform in size for even cooking. Using parchment paper also helps prevent burnt bottoms.
Serving, Storing, and Enjoying Your Delicious Creations
Perfect Pairings & Garnish Ideas
These warm, gooey Chocolate Chip Sea Salt Cookies are utterly divine on their own, but truly shine when paired with a cold glass of milk, a robust cup of coffee, or a scoop of vanilla bean ice cream.
For an elegant touch, garnish with a fresh mint leaf; its bright, herbaceous note offers a refreshing contrast to the rich sweetness.
Storing for Freshness: Keeping Them Chewy
To maintain their exquisite chewiness and gooey texture, store your baked Chocolate Chip Sea Salt Cookies in an airtight container at room temperature for up to 3-4 days.
For longer storage, they can be frozen in a freezer-safe bag or container for up to 3 months. Thaw at room temperature or gently reheat in a microwave for that fresh-baked warmth.
Make-Ahead Magic: Dough Prep & Freezing Tips
You can easily prepare the cookie dough in advance! Scoop rounded balls of dough onto a parchment-lined tray and freeze until solid, then transfer to a freezer-safe bag.
Frozen dough balls can be baked directly from the freezer; simply add 2-3 extra minutes to the baking time. This is perfect for impromptu cravings or unexpected guests.
Frequently Asked Questions About Chocolate Chip Sea Salt Cookies
Can I use different types of chocolate in this recipe?
Absolutely! While semi-sweet is classic, feel free to experiment with dark chocolate for a richer, less sweet cookie, or milk chocolate for an extra creamy, sweeter profile.
White chocolate chips can also be a delightful addition, offering a different flavor dimension and visual contrast.
If you’re adding white chocolate, consider the festive twist of peppermint white chocolate chip cookies for a cool contrast.
What’s the best way to measure flour for accurate results?
The most accurate method for measuring flour is the “spoon and level” technique. Lightly spoon the flour into your measuring cup until it overflows, then level off the top with a straight edge like a knife.
Avoid scooping directly from the bag, as this can compact the flour, leading to using too much and resulting in dry, dense cookies.
Can I make these Chocolate Chip Sea Salt Cookies gluten-free or dairy-free?
Yes, with some careful substitutions! For gluten-free, use a 1:1 gluten-free all-purpose flour blend that contains xanthan gum. For dairy-free, substitute unsalted butter with a high-quality plant-based butter alternative and ensure your chocolate chips are dairy-free.
Always check ingredient labels to confirm suitability for specific dietary needs, especially for chocolate chips.
How long do these cookies last, and can they be reheated?
Baked Chocolate Chip Sea Salt Cookies remain fresh and delicious for 3-4 days when stored in an airtight container at room temperature.
To revive their gooey texture, gently reheat them in the microwave for 10-15 seconds, or in a warm oven (300°F/150°C) for a few minutes until the chocolate is melty again.
Is chilling the dough really necessary?
For this specific Chocolate Chip Sea Salt Cookies recipe, chilling the dough is not strictly necessary to achieve those guaranteed gooey centers and chewy edges, as the ingredient ratios and baking method are optimized.
However, chilling for 30 minutes to an hour can slightly deepen the flavor and lead to a thicker, less spread-out cookie, so it’s an optional enhancement you might explore.
Ready to Bake? Share Your Chocolate Chip Sea Salt Cookies Success!
Now that you’re armed with all the secrets, it’s time to transform your kitchen into a haven of irresistible aromas and flavors. These Chocolate Chip Sea Salt Cookies are more than just a dessert; they’re a testament to thoughtful baking.
Go forth and create these guaranteed gooey treats, and prepare to delight everyone who tastes them. Don’t forget to share your baking triumphs with us – we can’t wait to see your perfect homemade cookies!
More Sweet Ideas
If you enjoyed these chocolate chip sea salt cookies, here are a couple more chocolatey treats you might like.
- For a delicate rolled dessert, try these Chocolate Banana Crepe Roll-Ups that are made to be tear-proof.
- If you prefer a bar format with great texture, check out these Chewy Chocolate Chip Oatmeal Bars for hold-together perfection.
Chocolate Chip Sea Salt Cookies
Course: DessertCuisine: AmericanDifficulty: easy4
12-18 cookies15
minutes10
minutes270
kcal35
minutesTired of dry, crumbly cookies? This recipe guarantees perfectly gooey, molten chocolate centers with chewy edges and a touch of flaky sea salt. Bake the cookies of your dreams with this easy-to-follow guide!
Ingredients
1/2 cup (1 stick) unsalted butter, softened
1/2 cup granulated sugar
1/4 cup packed light brown sugar
1 large egg
1 teaspoon vanilla extract
1 1/4 cups all-purpose flour
1/2 teaspoon baking soda
1/4 teaspoon salt
1 cup semi-sweet chocolate chips or chunks, plus extra for topping
Flaky sea salt, for sprinkling
Fresh mint leaves, for optional garnish
Directions
- Preheat your oven to 375F (190C). Line a baking sheet with parchment paper.
- In a large bowl, cream together the softened butter, granulated sugar, and brown sugar until light and fluffy, about 2-3 minutes. This step creates air pockets essential for the cookie’s texture.
- Beat in the egg and vanilla extract until well combined, scraping down the sides of the bowl as needed.
- In a separate bowl, whisk together the all-purpose flour, baking soda, and salt.
- Gradually add the dry ingredients to the wet ingredients, mixing on low speed until just combined. Be careful not to overmix, as this can develop the gluten too much, leading to tougher cookies.
- Fold in 1 cup of chocolate chips or chunks.
- Scoop rounded tablespoons of dough onto the prepared baking sheet, leaving about 2 inches between cookies.
- To ensure those guaranteed gooey centers: Bake for 8-10 minutes, or until the edges are set and lightly golden brown, but the centers still look soft and slightly underbaked. This is the crucial step for keeping the cookies chewy and the chocolate molten!
- Immediately remove the baking sheet from the oven. While the cookies are still hot, gently press a few extra chocolate chips or chunks directly onto the tops of each cookie. The residual heat will melt them beautifully, creating those irresistible pools of gooey chocolate you see in the picture.
- Sprinkle generously with flaky sea salt.
- Let the cookies cool on the baking sheet for 5-10 minutes before transferring them to a wire rack. This allows them to set slightly while maintaining their warmth and exquisite gooey texture.
- Serve warm, garnished with a fresh mint leaf if desired.
Notes
- Serve warm, garnished with a fresh mint leaf if desired.