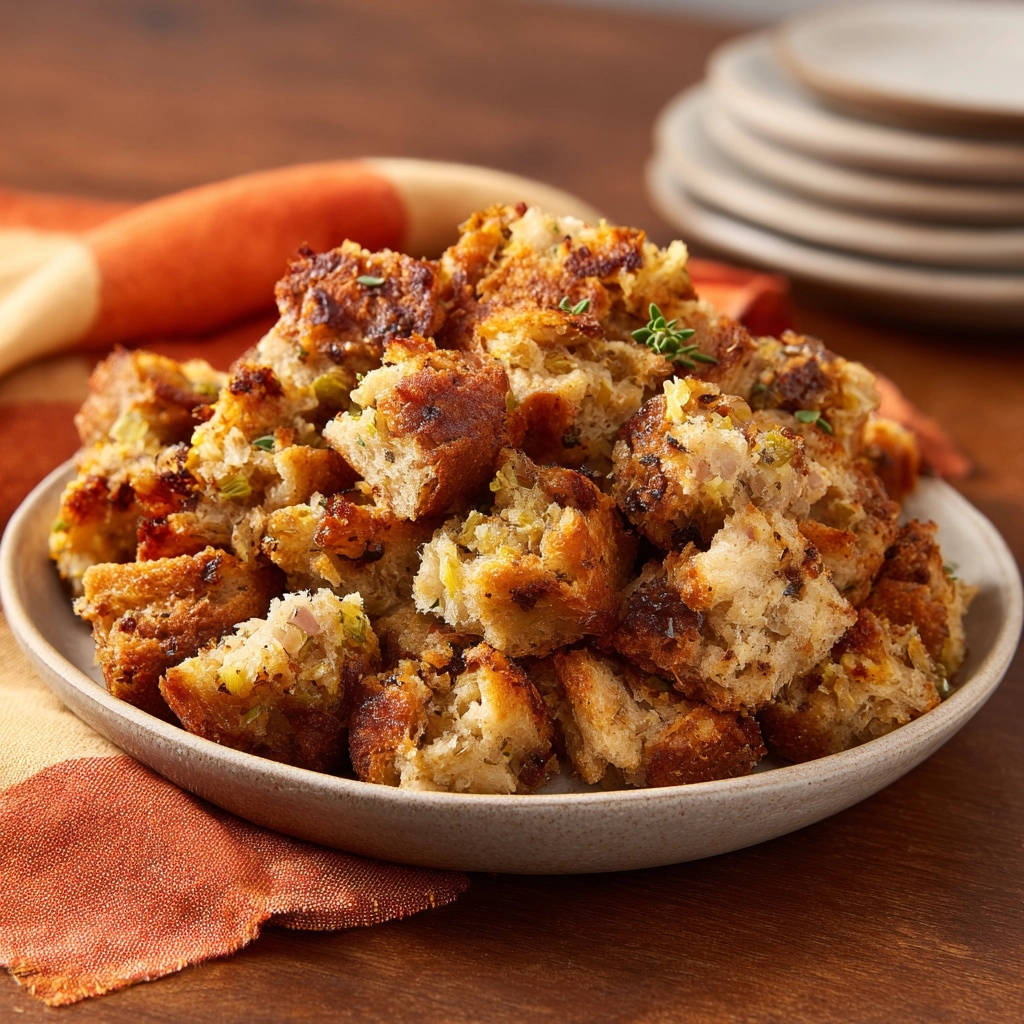
Classic Herb Stuffing: Never Dry, Always Perfect!
For years, I wrestled with stuffing that was either a dry, crumbly disappointment or an unappealing, soggy mess. Finally, I perfected this Classic Herb Stuffing recipe to banish those frustrations forever. It delivers an utterly moist, flavorful interior crowned with a beautifully golden, crispy crust every single time.
The Secret to Stuffing Success: Why This Recipe Shines
Creating truly exceptional stuffing doesn’t have to be a guessing game. This recipe focuses on precise techniques and high-quality ingredients, ensuring every bite is a triumph. We tackle the most common stuffing pitfalls head-on.
Banishing Dryness: A Masterclass in Moisture
The secret to a tender and juicy interior lies in strategic moisture management during baking. Our method incorporates a careful balance of broth and a covered baking phase. This creates a steaming environment that locks in moisture, ensuring your Classic Herb Stuffing remains wonderfully supple from the inside out.
Get Our Best Recipes Weekly!
Join thousands of food lovers and get delicious recipes delivered to your inbox.
The Crispy Top, Never Soggy Bottom Advantage
Achieving that coveted golden and crispy top, without a mushy base, is paramount. This recipe begins with properly dried bread cubes, the first line of defense against sogginess. The final uncovered baking phase then works its magic, creating an irresistible crunchy crust that perfectly complements the moist interior.
A Foundation of Flavor: Classic Herbs and Savory Vegetables
Beyond texture, the heart of any great stuffing is its flavor. Our Classic Herb Stuffing builds on a robust base of sautéed yellow onion and celery, providing a sweet and savory depth. The quintessential pairing of sage and thyme infuses the dish with that comforting, aromatic essence we all crave.
Essential Gear for Your Stuffing Adventure
Having the right tools simplifies the process and helps ensure a perfect outcome. These items are fundamental for crafting your delicious Classic Herb Stuffing.
Tools for Efficient Prep and Mixing
Chef’s Knife and Cutting Board: Essential for precisely chopping onions, celery, and preparing your bread cubes. Uniform cuts ensure even cooking.
Large Mixing Bowl: Crucial for comfortably combining all the stuffing ingredients without spillage. It allows for gentle tossing to evenly distribute moisture and flavors.
Sturdy Spatula or Wooden Spoon: Ideal for sautéing vegetables and gently folding the bread mixture. Avoids crushing the bread cubes during mixing.
Baking Essentials for the Perfect Finish
Large Baking Sheet: Imperative for drying your bread cubes evenly. It provides ample surface area for air circulation or gentle toasting in the oven.
8×8 Inch Baking Dish (or Similar): The ideal size for baking this recipe. Its dimensions promote even baking and a good ratio of crispy top to moist interior.
Aluminum Foil: A non-negotiable item for the covered baking phase. It seals in moisture, creating that crucial steaming environment for a tender stuffing.
The Heart of the Feast: Ingredients for Our Classic Herb Stuffing
Each ingredient in this Classic Herb Stuffing plays a vital role in achieving its renowned taste and texture. Understanding their purpose elevates your cooking.
The Foundation: Choosing the Right Bread
Six cups of day-old bread, cut into 1/2-inch cubes, form the base. Sturdy white or sourdough bread is highly recommended due to its ability to hold shape and absorb moisture without becoming mushy. The “day-old” aspect is key, as slightly stale bread dries out more effectively, which is critical for a perfect texture.
Aromatic Vegetables: The Flavor Powerhouses
One cup each of finely chopped yellow onion and celery creates the foundational savory notes. These vegetables soften and sweeten as they cook, providing a robust base of flavor. Chopping them to a consistent size ensures they cook evenly and integrate seamlessly into the stuffing.
Herb Magic: The Timeless Duo of Sage and Thyme
Two teaspoons of dried sage and one teaspoon of dried thyme are the quintessential herbs for Classic Herb Stuffing. Their earthy, slightly peppery, and subtly floral notes evoke traditional comfort. While this recipe uses dried herbs for convenience and intensity, fresh herbs can be used at three times the quantity, added towards the end of sautéing or as a garnish.
The Binding Liquid: Broth’s Crucial Role
One and a half cups of vegetable or chicken broth provides the necessary moisture, binding the ingredients together. The type of broth subtly influences the final flavor. The gradual addition of broth is meticulously controlled to ensure the bread cubes are perfectly moistened, never saturated, preventing a soggy outcome.
Enrichment and Seasoning: Butter, Salt, and Pepper
Half a cup of unsalted butter adds luxurious richness and helps carry the flavors of the herbs and vegetables. Unsalted butter allows you to control the overall saltiness of the dish. Half a teaspoon of salt and a quarter teaspoon of black pepper are vital for enhancing and balancing all the other savory elements, making every bite pop with flavor.
Crafting Your Perfect Classic Herb Stuffing: Step-by-Step Directions
Step 1: The Bread Foundation – Drying for Success
Spread your 6 cups of 1/2-inch bread cubes on a large baking sheet. For the best texture, allow them to air dry overnight. If time is short, bake them at 250°F (120°C) for 15-20 minutes, tossing once, until lightly toasted and dry to the touch. This step is absolutely crucial; dry bread absorbs liquid without turning mushy, preventing soggy stuffing.
Step 2: Building the Aromatic Flavor Base
In a large skillet, melt the 1/2 cup of unsalted butter over medium heat. Add the 1 cup each of chopped onion and celery. Cook, stirring occasionally, for 8-10 minutes until the vegetables are softened and translucent, releasing their aromatic sweetness. Stir in the 2 teaspoons dried sage, 1 teaspoon dried thyme, 1/2 teaspoon salt, and 1/4 teaspoon black pepper, cooking for just another minute until the herbs are wonderfully fragrant, “blooming” their flavors.
Step 3: Gentle Combination and Achieving Perfect Moisture Balance
Transfer the sautéed vegetables and fragrant herbs to a large mixing bowl. Add the dried bread cubes and gently toss them to combine. Now, gradually pour in the vegetable broth, starting with 1 cup. Toss very gently until the bread cubes are evenly moistened but not saturated. You’re looking for them to be damp and slightly springy, never wet or squishy. Add additional broth, up to the full 1 1/2 cups, if needed to achieve this ideal moisture level.
Step 4: Dual Baking for Optimal Stuffing Texture
A. Covered Bake for a Moist Interior: Lightly grease an 8×8 inch baking dish. Transfer the stuffing mixture to the prepared dish and spread it evenly. Cover the baking dish tightly with aluminum foil and bake at 375°F (190°C) for 25 minutes. This initial covered baking phase creates a steaming environment, which is key to locking in moisture and ensuring the Classic Herb Stuffing remains wonderfully tender and juicy on the inside.
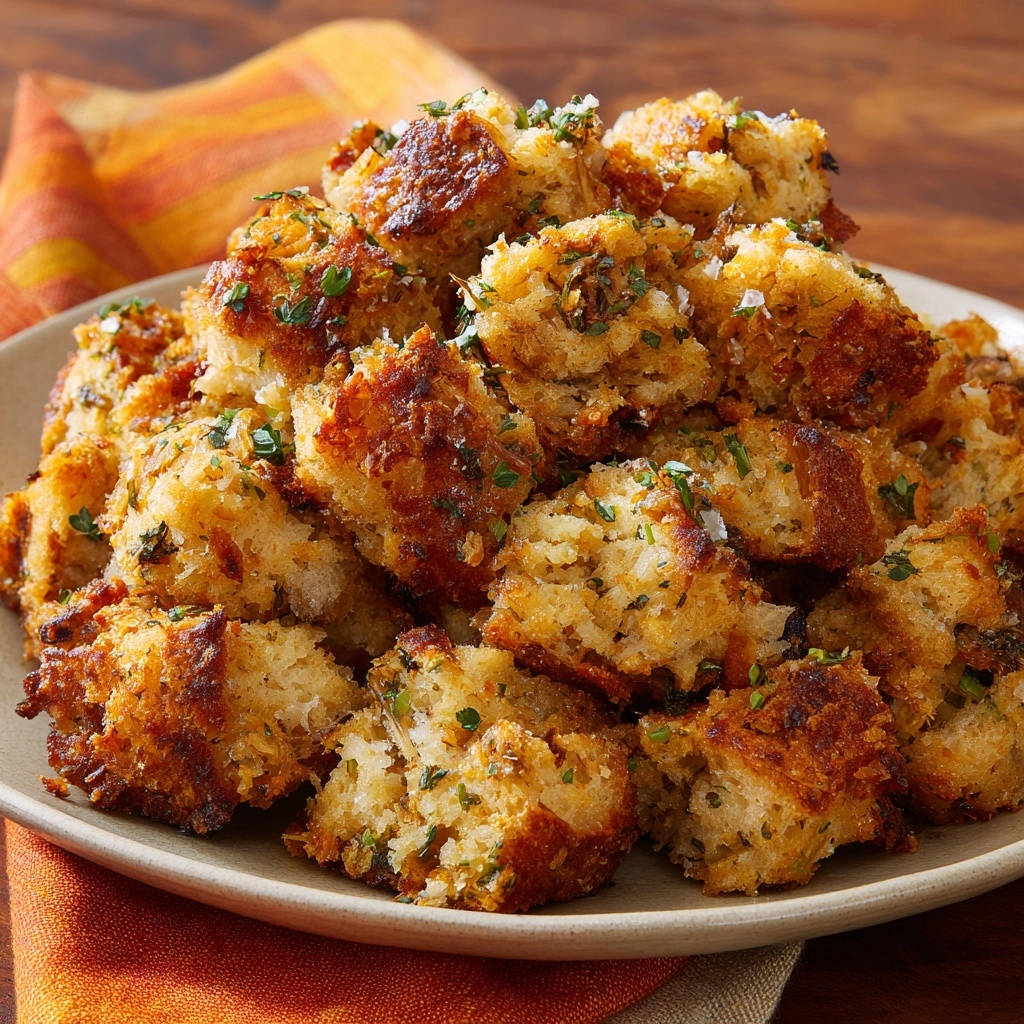
B. Uncovered Bake for a Crispy Top: After 25 minutes, carefully remove the aluminum foil. Continue baking for another 15-20 minutes, or until the top of the stuffing is beautifully golden brown and delightfully crispy. This final uncovered bake develops that irresistible crunchy crust, providing a perfect textural contrast.
Step 5: Rest and Garnish for Serving
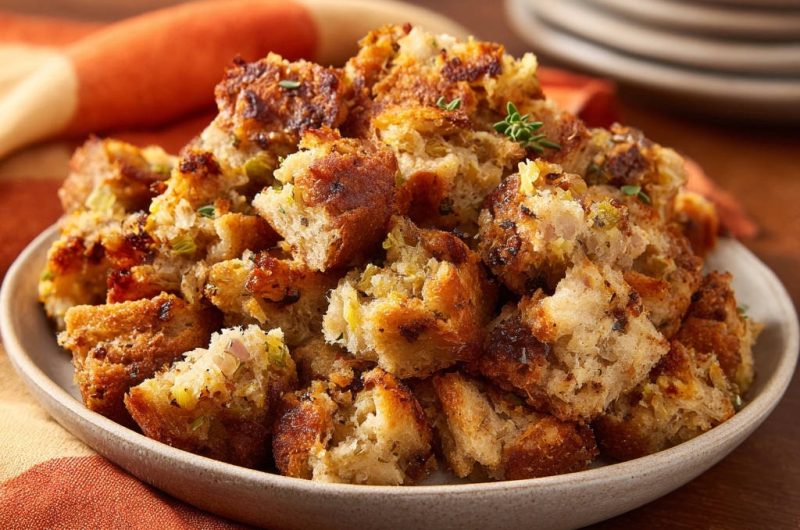
Once baked to perfection, remove the Classic Herb Stuffing from the oven. Allow it to rest for a few minutes before serving; this helps the flavors meld and the stuffing settle. Garnish with fresh thyme sprigs if desired for an extra touch of freshness and visual appeal before presenting this delicious holiday side dish.
Elevate Your Stuffing: Expert Tips for Flawless Classic Herb Results
These professional insights will help you master your Classic Herb Stuffing, ensuring it’s the star of any meal.
Choosing the Perfect Bread: While sourdough or sturdy white are excellent, consider challah for a richer, slightly sweet flavor, or a rustic French loaf for a chewier texture. Avoid very soft sandwich breads; their texture breaks down too easily, leading to mushiness.
Don’t Rush the Drying Process: This cannot be overstated. Thoroughly dried bread is your absolute best defense against soggy stuffing. If air drying isn’t an option, use the oven method, but ensure the bread is truly dry, not just warm.
Mastering Broth Control: The “gradual addition” of broth is critical. Feel the mixture; it should feel like a damp sponge, yielding slightly when squeezed but not dripping. This tactile cue ensures perfect moisture without over-saturating the bread cubes.
Seasoning Smartly: Always taste your broth-moistened stuffing mixture before baking. Adjust salt and pepper as needed. Remember that flavors will meld and deepen slightly during baking, so aim for a balanced, slightly pronounced seasoning at this stage.
Personalize Your Herbs: Feel free to experiment with other complementary herbs like a pinch of dried rosemary or marjoram for added complexity. For a brighter flavor, stir in fresh parsley or chives right before baking. When using a combination of fresh and dried, remember that dried herbs are more potent.
Flavorful Add-ins: Boost your Classic Herb Stuffing with cooked and crumbled crispy bacon, sautéed mushrooms for an umami kick, or dried cranberries and toasted pecans for a delightful sweet-savory contrast. Add these extra ingredients during Step 3, along with the dried bread cubes.
Common Stuffing Setbacks & Simple Solutions
Even seasoned cooks can encounter challenges. Here’s how to troubleshoot common issues with your Classic Herb Stuffing.
My Classic Herb Stuffing is Too Dry!
This usually happens from too little broth or over-baking. If it’s already baked, try adding a splash of warm broth or stock to individual servings before reheating. For future batches, ensure the bread mixture feels adequately damp and springy before baking, adding a bit more broth if needed.
My Classic Herb Stuffing is Soggy or Mushy!
The primary culprit is usually bread that wasn’t dry enough, or too much broth was added. To mitigate, try baking it uncovered for a longer period to allow more moisture to evaporate. If severely soggy, you can spread it thinly on a baking sheet to crisp up edges more effectively.
My Stuffing Lacks Flavor!
Ensure you’re using a high-quality broth, as it contributes significantly to the savory depth. Properly sautéing the vegetables until softened and fragrant is also key to building a robust flavor base. Don’t skip “blooming” the dried herbs in butter, and always taste and adjust seasoning before baking for the best Classic Herb Stuffing.
The Top Isn’t Crispy Enough!
This often means it needs more uncovered baking time. Check your oven temperature with an oven thermometer to ensure accuracy. Using a shallower baking dish can also increase the surface area exposed to heat, promoting a crisper crust. For a quick fix, you can finish it under the broiler for a minute or two, watching it very carefully to prevent burning.
Planning Ahead & Enjoying Your Classic Herb Stuffing
Making your Classic Herb Stuffing in advance or handling leftovers efficiently makes entertaining effortless.
Making Classic Herb Stuffing Ahead of Time
You can prepare the entire stuffing mixture, up to the point of baking, a day or two in advance. Store it tightly covered in the refrigerator. When ready to bake, add about 15-20 minutes to the covered baking time since the stuffing will be cold. This ensures it heats through evenly before crisping.
Proper Storage and Reheating Leftovers
Store leftover Classic Herb Stuffing in an airtight container in the refrigerator for up to 3-4 days. For longer storage, it can be frozen for up to 2-3 months. To reheat, warm in the oven at 350°F (175°C) until heated through, adding a splash of broth and covering with foil to prevent drying, then uncover for the last few minutes to re-crisp.
Creative Serving Suggestions Beyond the Holiday Table
This Classic Herb Stuffing is too good to save just for holidays! It makes an exceptional side for a simple roasted chicken or baked pork chops. Consider serving it alongside a hearty lentil loaf for a vegetarian main. Don’t forget that fresh thyme sprig garnish for an elegant touch, no matter the occasion.
More Savory Dishes to Try
If you enjoyed this herb stuffing, here are some other comforting main courses that complement its flavors.
- For a complete, warming meal, consider the Classic Chicken Pot Pie with its flaky, golden crust.
- If you’re looking for a deeply satisfying centerpiece, the Ultimate Pot Roast offers melt-in-your-mouth tenderness.
Your Burning Questions Answered: Classic Herb Stuffing FAQs
Can I use fresh herbs instead of dried in this Classic Herb Stuffing recipe?
Absolutely, fresh herbs can add a vibrant, aromatic dimension. As a general rule, use three times the quantity of fresh herbs compared to dried. For example, use 6 teaspoons (2 tablespoons) of fresh chopped sage and 3 teaspoons (1 tablespoon) of fresh chopped thyme. Add fresh herbs later in the sautéing process, or even stirred in just before baking, to retain their brighter flavor.
What’s truly the best type of bread for Classic Herb Stuffing?
The best bread is sturdy and has some density, allowing it to absorb moisture without disintegrating. Sourdough offers a delightful tang, while rustic white loaves provide a neutral base for the herb flavors. Challah is another excellent choice, contributing a richer, slightly sweet flavor. Avoid very soft, airy sandwich breads, as they tend to turn mushy easily.
Is it safe to bake this Classic Herb Stuffing inside a turkey?
While traditional, baking stuffing inside a turkey comes with food safety risks. The stuffing needs to reach an internal temperature of 165°F (74°C) to be safe, which can sometimes lead to overcooking the turkey. For superior texture and food safety, it’s generally recommended to bake your Classic Herb Stuffing separately. This ensures both your turkey and stuffing are perfectly cooked.
How do I know when my Classic Herb Stuffing is fully cooked and safe to eat?
Visually, your stuffing should have a beautiful golden-brown and crispy top, with edges bubbling gently. For absolute food safety, especially if using a broth containing meat products or adding other proteins, ensure the stuffing reaches an internal temperature of 165°F (74°C) when measured with a food thermometer inserted into the center. This guarantees it’s thoroughly cooked and safe to enjoy.
Ready to Impress? Share Your Classic Herb Stuffing Masterpiece!
You now possess the expertise and the perfect recipe to create a Classic Herb Stuffing that will earn rave reviews. This foolproof method guarantees a moist interior and a beautifully crisp top, transforming a once-challenging dish into a triumph. Don’t just make stuffing; make a memorable holiday side that truly shines. I encourage you to try this recipe, share your delicious results with loved ones, and savor every perfectly seasoned bite!
Classic Herb Stuffing
Course: Side DishCuisine: AmericanDifficulty: medium6
servings35
minutes55
minutes240
kcal60
minutesTired of dry or soggy stuffing? This foolproof Classic Herb Stuffing recipe guarantees a perfectly golden, crispy top and wonderfully moist, flavorful interior every time. Say goodbye to stuffing frustrations and hello to perfection!
Ingredients
6 cups day-old bread, cut into 1/2-inch cubes (sturdy white or sourdough bread recommended)
1/2 cup unsalted butter
1 cup chopped yellow onion
1 cup chopped celery
2 teaspoons dried sage
1 teaspoon dried thyme
1/2 teaspoon salt
1/4 teaspoon black pepper
1 1/2 cups vegetable broth (or chicken broth)
Fresh thyme sprigs for garnish (optional)
Directions
- Prepare Bread for Optimal Texture (Stops Sogginess): Spread the bread cubes on a large baking sheet. Allow them to air dry overnight, or for a faster method, bake at 250F (120C) for 15-20 minutes, tossing once, until they are lightly toasted and dry to the touch. This step is crucial; dry bread absorbs liquid without turning mushy.
- Flavor Base: In a large skillet, melt the butter over medium heat. Add the chopped onion and celery. Cook, stirring occasionally, until the vegetables are softened, about 8-10 minutes. Stir in the dried sage, dried thyme, salt, and pepper. Cook for another minute until fragrant.
- Combine and Moisten (Prevents Dryness and Sogginess): Transfer the sautéed vegetables and herbs to a large mixing bowl. Add the dried bread cubes and gently toss to combine. Gradually pour in the vegetable broth, starting with 1 cup. Toss gently until the bread cubes are evenly moistened but not saturated. You want them damp and slightly springy, not wet or squishy. Add additional broth if needed, up to the full 1 1/2 cups, to achieve this perfect balance.
- Bake for Dual Perfection: Lightly grease an 8×8 inch baking dish. Transfer the stuffing mixture to the prepared dish and spread evenly.
- For Moist Interior: Cover the baking dish tightly with aluminum foil. Bake at 375F (190C) for 25 minutes. This covered baking phase creates a steaming environment that locks in moisture, ensuring the stuffing remains tender and juicy on the inside.
- For Crispy Top: Remove the foil and continue baking for another 15-20 minutes, or until the top is beautifully golden brown and delightfully crispy. This final uncovered bake creates that irresistible crunchy crust.
- Serve hot, garnished with fresh thyme sprigs if desired.
Notes
- Ensure bread is properly dried for best texture. Adjust broth as needed for perfect moisture balance.