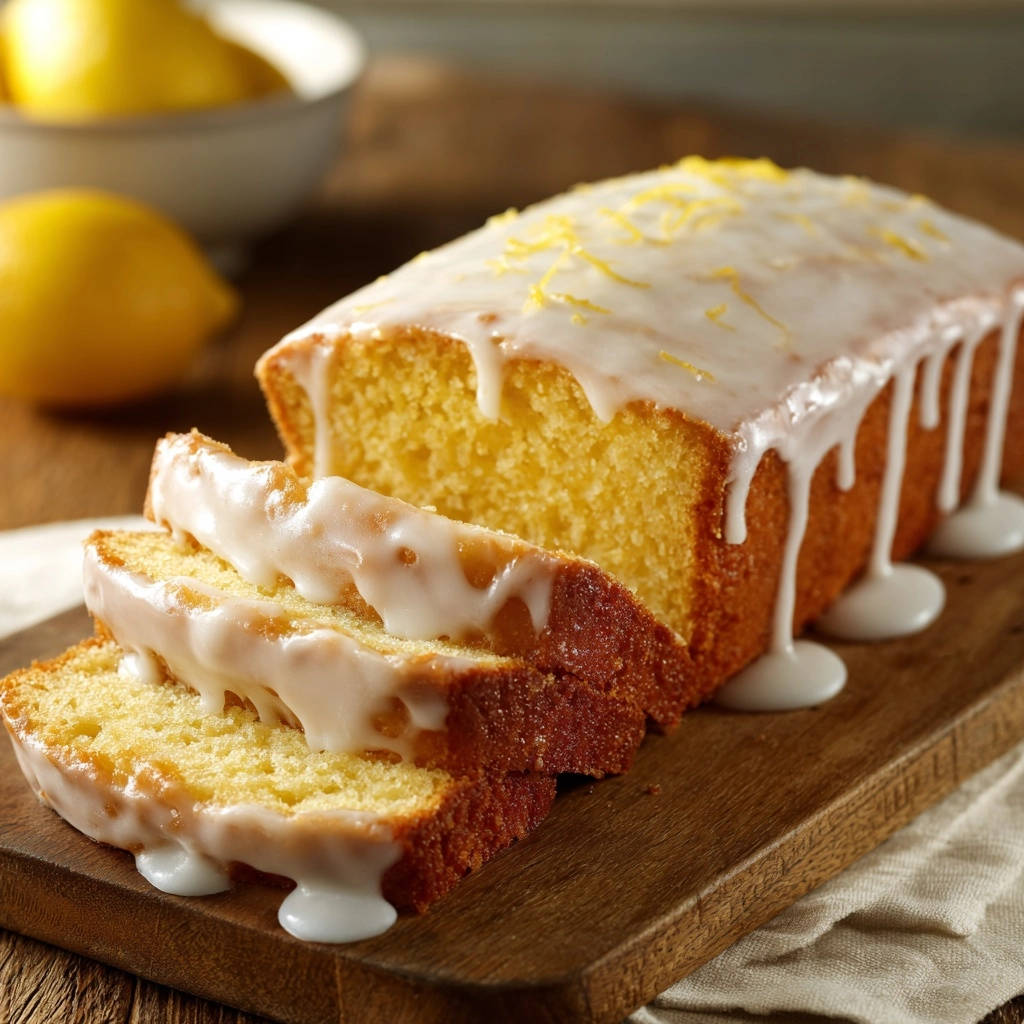
Lemon Sunshine Loaf: Perfectly Moist & Zesty Every Time
There’s nothing quite like the bright, invigorating taste of a lemon loaf, but all too often, that initial zest gives way to a disappointing dry crumb after just a day. We’ve all been there, hoping for lasting tenderness only to find a brick. This incredible Lemon Sunshine Loaf recipe changes that narrative entirely.
Our method guarantees a loaf that remains incredibly moist, boasting a tender crumb and vibrant lemon flavor from the first slice to the very last, making it the ultimate solution for any lemon lover seeking consistent perfection.
The Lemon Sunshine Loaf That Stays Perfectly Moist, Every Slice
This isn’t just another lemon loaf; it’s a meticulously crafted recipe designed to eliminate the common pitfalls of dry baked goods. We focus on techniques that lock in moisture and maximize fresh citrus notes, ensuring a superior eating experience.
Get Our Best Recipes Weekly!
Join thousands of food lovers and get delicious recipes delivered to your inbox.
The Game-Changing Syrup Infusion
The secret weapon for this Lemon Sunshine Loaf’s unparalleled moisture is a simple, yet profoundly effective, lemon syrup. Poured over the hot loaf immediately after baking, this syrup infuses deeply, preventing dryness and adding a burst of flavor.
It creates a protective moisture barrier, transforming a good lemon loaf into an exceptionally moist one that truly stands the test of time.
A Tender Crumb, Guaranteed
Achieving a supremely tender crumb is paramount in our Lemon Sunshine Loaf. This recipe utilizes a balanced blend of wet and dry ingredients, combined with precise mixing instructions, to develop just the right amount of gluten.
The addition of vegetable oil contributes to a fine, soft texture, while the eggs provide structure and richness, resulting in a delightfully yielding bite every time.
Zesty Flavor That Pops
We don’t just hint at lemon flavor; we amplify it. This Lemon Sunshine Loaf incorporates fresh lemon zest and juice directly into the batter, ensuring a deep citrus foundation.
The finishing syrup and glaze further layer on that vibrant tang, delivering a truly zesty experience that brightens any palate.
Building Blocks of Brightness: Essential Lemon Sunshine Loaf Ingredients
Every ingredient in this recipe plays a crucial role in crafting a perfectly moist and flavorful Lemon Sunshine Loaf. Understanding their purpose helps ensure your baking success.
For the Light & Tender Loaf Base
The foundation of our citrus loaf relies on a careful selection of pantry staples that work in harmony.
-
All-Purpose Flour: Provides the structure for our loaf. Using the right amount prevents a dense or crumbly texture.
-
Baking Powder: Our primary leavening agent, ensuring a light and airy lift for the cake.
-
Salt: Essential for balancing the sweetness and enhancing all the flavors in the batter, especially the bright lemon.
-
Granulated Sugar: Not only sweetens but also contributes to moisture and tenderness, creating a delightful crumb.
-
Large Eggs: Bind the ingredients, add richness, and help with the loaf’s structure and rise.
-
Milk: Adds moisture and contributes to the loaf’s tender texture and soft crumb.
-
Vegetable Oil: Guarantees a moist loaf by adding fat without incorporating air, which can sometimes dry out cakes. It also helps keep the loaf fresh longer.
-
Fresh Lemon Zest: The true powerhouse of lemon flavor! Zest contains essential oils that infuse an intense, aromatic citrus punch directly into the batter.
-
Fresh Lemon Juice (for batter): Provides tang and acidity, activating the baking powder and contributing to the overall bright flavor profile of the lemon pound cake.
The Secret to Unrivaled Moisture: Lemon Syrup
This simple combination is key to the loaf’s lasting moisture and intensified flavor.
-
Fresh Lemon Juice: Creates the vibrant, zesty base for the syrup, penetrating deep into the hot cake.
-
Granulated Sugar: Dissolves into the lemon juice, forming a sweet, tangy syrup that saturates the loaf, ensuring a consistently tender crumb.
The Perfect Finishing Touch: Zesty Glaze
The glaze not only adds visual appeal but also a final layer of tangy sweetness to your moist lemon cake.
-
Powdered Sugar: Forms the smooth, opaque base of the glaze, melting into a beautiful finish.
-
Fresh Lemon Juice: Provides the necessary liquid for the glaze’s consistency and an extra burst of vibrant lemon flavor.
Essential Gear for Your Lemon Sunshine Loaf Baking Journey
Having the right tools makes the baking process smoother and more enjoyable, contributing to a perfect Lemon Sunshine Loaf.
-
9×5 Inch Loaf Pan: The standard size for this recipe, ensuring proper baking and loaf shape.
-
Mixing Bowls (Medium and Large): Essential for separating wet and dry ingredients and then combining them.
-
Whisks: For thoroughly combining dry ingredients and emulsifying the wet mixture, crucial for a consistent batter.
-
Microplane or Zester: Best for finely grating lemon zest without including the bitter white pith.
-
Citrus Juicer: Makes extracting fresh lemon juice efficient and mess-free.
-
Small Saucepan: For gently heating and dissolving the sugar into the lemon syrup.
-
Wooden Skewer or Thin Knife: Used to test the doneness of the loaf and to prick it for syrup infusion.
-
Wire Cooling Rack: Allows air to circulate around the loaf, preventing a soggy bottom and ensuring even cooling.
Baking Brilliance: Step-by-Step Lemon Sunshine Loaf Directions
Follow these detailed steps to create your perfectly moist and flavorful Lemon Sunshine Loaf.
- Preheat Oven and Prep Pan:
Set your oven to 350F (175C) to ensure it’s at the correct temperature before the batter is ready. Prepare a 9×5 inch loaf pan by thoroughly greasing and flouring it, or for the easiest removal, line it with parchment paper leaving an overhang on the sides. This preparation prevents sticking and ensures a beautiful, intact loaf.
- Combine Dry Ingredients:
In a medium bowl, thoroughly whisk together the all-purpose flour, baking powder, and salt. Whisking ensures these leavening agents and flavor enhancers are evenly distributed throughout the dry mixture, which is crucial for a consistent rise and texture in your citrus loaf. Set this aside.
- Mix Wet Ingredients:
In a separate large bowl, whisk together the granulated sugar, eggs, milk, vegetable oil, lemon zest, and 1/4 cup fresh lemon juice until everything is well combined and homogenous. This creates a fully emulsified base, which helps prevent overmixing later and contributes to the moist texture.
- Combine Wet and Dry:
Gradually incorporate the dry ingredients into the wet ingredients. Mix until just combined, being very careful not to overmix, which can result in a tough loaf due to excessive gluten development. A few small lumps are perfectly normal and will disappear during baking, yielding a tender crumb.
- Bake the Loaf:
Pour the batter evenly into the prepared loaf pan and gently spread it to the edges. Bake for 50-60 minutes, or until a wooden skewer inserted into the center comes out clean, indicating it’s fully cooked and ready for the next crucial step in creating the ultimate moist lemon cake.
- The Game-Changing Moisture Step: Prepare Lemon Syrup:
While the loaf is baking, begin preparing the lemon syrup. In a small saucepan, combine 1/4 cup fresh lemon juice and 1/4 cup granulated sugar. Heat this mixture over medium heat, stirring continuously until all the sugar has completely dissolved and the syrup is clear. Remove from heat immediately once dissolved to prevent it from thickening too much.
- Infuse with Syrup Immediately:
Once the loaf is out of the oven, immediately prick the entire top surface of the warm cake all over with a wooden skewer or fork. While the loaf is still hot and in the pan, slowly and evenly pour or brush the prepared lemon syrup over the entire top. The heat allows the syrup to soak in deeply, infusing moisture throughout the tender crumb. Allow the loaf to sit in the pan for 10-15 minutes, giving the syrup ample time to soak in and deeply infuse moisture throughout every crevice.
- Cool Completely:
Carefully remove the loaf from its pan, using the parchment overhang if applicable, and transfer it to a wire rack. Let it cool completely to room temperature before proceeding to the next step; this is crucial for the glaze to set properly without melting or running off.
- Prepare the Glaze:
Once the loaf is completely cool, whisk together 1 and 1/2 cups of powdered sugar with 3-4 tablespoons of fresh lemon juice in a small bowl until the glaze is smooth and has a pourable consistency. Adjust the consistency as needed by adding more lemon juice (a teaspoon at a time) if it’s too thick, or more powdered sugar if it’s too thin, aiming for a thick but flowing texture.
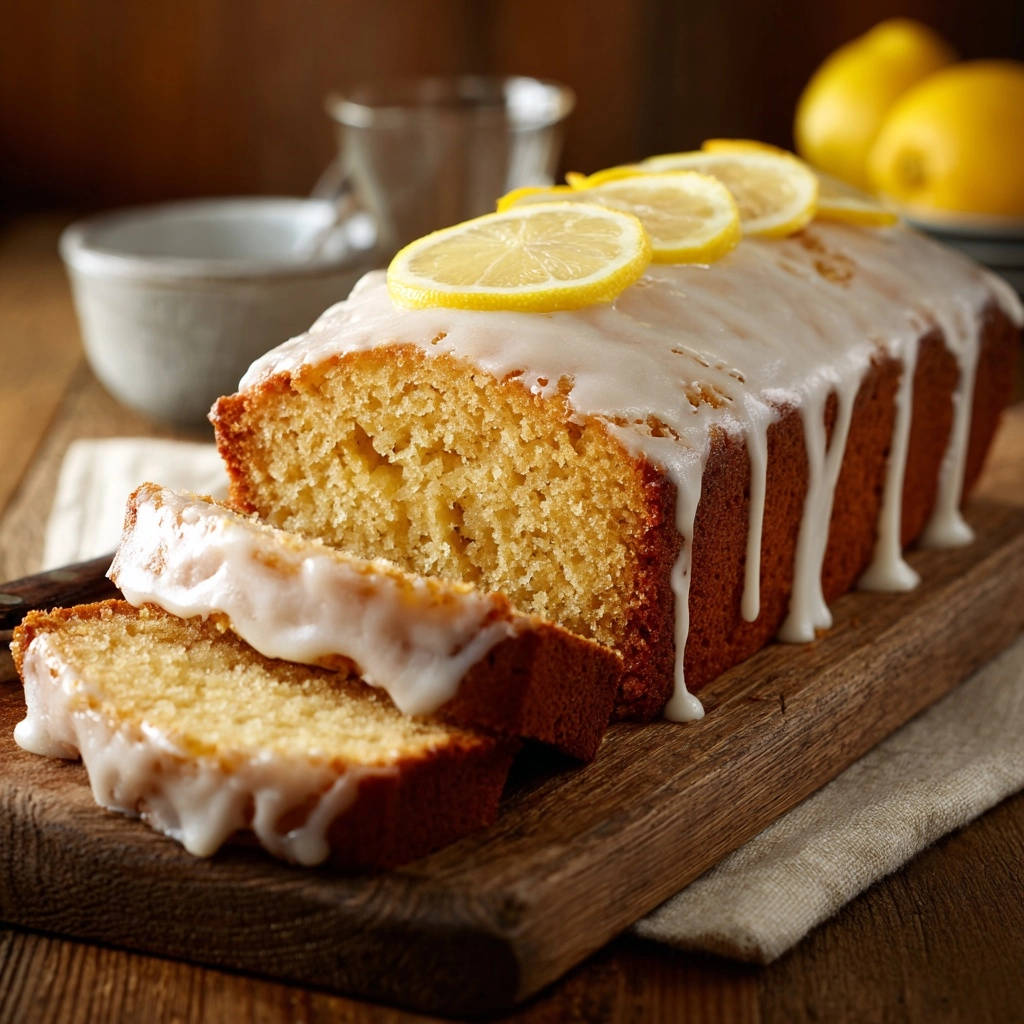
- Glaze and Garnish:
Generously drizzle the prepared glaze over the cooled lemon loaf, allowing it to drip down the sides for a beautiful finish. For an extra touch of freshness and visual appeal, garnish with additional lemon zest if desired, which also enhances the aroma. Slice and enjoy your perfectly moist and flavorful Lemon Sunshine Loaf!
Chef’s Secrets: Elevate Your Lemon Sunshine Loaf Game
Unlock the full potential of your Lemon Sunshine Loaf with these expert tips and tricks.
Mastering the Batter: Avoiding Toughness
The key to a tender crumb lies in gentle mixing. Overmixing develops too much gluten, which can result in a dense, tough loaf.
Mix until the dry and wet ingredients are just combined; a few small lumps are perfectly fine and even desirable, ensuring a delicate texture.
The Art of Syrup Infusion
Pricking the hot loaf allows the warm lemon syrup to penetrate deeply and evenly throughout the cake. Pouring it slowly ensures maximum absorption, preventing a soggy top or uneven moistness.
This immediate application while the loaf is hot is critical, as the cake acts like a sponge, drawing in the liquid as it cools, leading to an incredibly moist lemon cake.
Achieving Glaze Perfection
For a beautiful, set glaze, always ensure your Lemon Sunshine Loaf is completely cool before applying. A warm loaf will melt the glaze, causing it to run off rather than form a smooth coating.
Adjusting the glaze consistency is simple: add more powdered sugar for a thicker glaze, or a tiny bit more lemon juice for a thinner, more pourable one, aiming for a rich but flowing texture.
Pro-Tips for Zesting & Juicing
To get the most zest, use a microplane and gently glide it over the yellow part of the lemon, avoiding the bitter white pith beneath. For juicing, roll the lemon firmly on a countertop before cutting it in half; this helps release more juice.
Using fresh, ripe lemons will make an immense difference in the vibrant flavor of your lemon sunshine loaf, far superior to any bottled alternatives.
Room Temperature Ingredients: A Subtle Game Changer
Bringing eggs, milk, and even lemons to room temperature before baking significantly improves the texture and emulsification of your batter. Room temperature ingredients combine more smoothly, creating a homogeneous mixture.
This leads to a more consistent rise and a finer, more tender crumb in your finished Lemon Sunshine Loaf.
Troubleshooting Your Lemon Sunshine Loaf: Common Baking Questions Answered
Even experienced bakers can encounter minor issues. Here’s how to tackle common Lemon Sunshine Loaf challenges.
Why Is My Loaf Dry or Crumbly?
A dry or crumbly loaf is often a sign of overbaking. Ensure you’re baking only until a skewer comes out clean, not bone dry. Overmixing the batter can also lead to dryness by overdeveloping gluten.
Lastly, ensure you don’t skip the crucial lemon syrup infusion step, as this is the primary defense against dryness in this particular recipe.
My Loaf Sank in the Middle. What Happened?
A sunken loaf usually indicates it was underbaked, causing the center to collapse as it cools. Always trust the skewer test for doneness.
Oven temperature fluctuations or opening the oven door too frequently during baking can also cause the delicate structure to fall. Avoid excessive leavening agents as well.
Glaze Consistency Woes: Too Thick or Too Thin?
Easily remedied! If your glaze is too thick to pour smoothly, add a very small amount (half a teaspoon at a time) of fresh lemon juice, whisking well after each addition until the desired consistency is reached.
If it’s too thin and watery, gradually whisk in more powdered sugar until it thickens to a pourable, opaque consistency suitable for your moist lemon cake.
Is My Loaf Too Tough or Chewy?
A tough or chewy texture is almost always due to overmixing the batter. Once the wet and dry ingredients are combined, stop mixing as soon as there are no visible streaks of flour.
Overworking the gluten develops too much elasticity, resulting in a less tender crumb. Always mix gently for a perfectly soft Lemon Sunshine Loaf.
Enjoying Your Lemon Sunshine Loaf: Serving, Storage & Make-Ahead Tips
Make the most of your delicious Lemon Sunshine Loaf with these practical tips.
Perfect Pairings & Serving Suggestions
The vibrant tang of this Lemon Sunshine Loaf makes it a perfect companion for a variety of occasions. Enjoy a slice with your morning coffee or a soothing afternoon tea.
Round out your meal
If you’re enjoying this zesty loaf, consider these bright and flavorful dishes that share similar lemon notes.
- For a light and fresh main course, try these Lemon-Dill Fish & Quinoa Bowls, featuring tender fish and vibrant herbs.
- Another way to bring citrus and garlic into your meal is with Lemon Garlic Breadcrumb Spaghetti, a satisfying pasta dish with a zesty topping.
For a dessert, serve it alongside fresh berries, a dollop of whipped cream, or a scoop of vanilla ice cream to complement its zesty flavor. This simple lemon dessert is always a crowd-pleaser.
Storing for Peak Freshness: Keeping it Moist
Thanks to our unique syrup infusion, this Lemon Sunshine Loaf stays moist for days. Store it at room temperature, wrapped tightly in plastic wrap or in an airtight container.
It will maintain its peak freshness and tender crumb for up to 3-4 days, making it ideal for enjoying throughout the week. For longer storage, refrigeration can extend its life, but bring to room temperature before serving for best flavor.
Can I Make This Lemon Sunshine Loaf Ahead?
Absolutely! This Lemon Sunshine Loaf is an excellent make-ahead option. You can bake the loaf, cool it completely, and wrap it tightly in plastic wrap, then aluminum foil.
Freeze for up to 2-3 months. Thaw overnight in the refrigerator, then bring to room temperature and glaze before serving. This ensures you always have a delicious citrus loaf ready for any occasion.
Your Lemon Sunshine Loaf Questions Answered (FAQs)
Here are answers to some frequently asked questions about baking this delightful Lemon Sunshine Loaf.
Can I Substitute Bottled Lemon Juice?
While fresh lemon juice is highly recommended for its superior flavor and aromatic oils, you can substitute bottled lemon juice in a pinch. Be aware that the flavor may not be as bright or intense.
Adjusting the amount might be necessary to achieve your desired level of tanginess, as bottled juices can sometimes be more concentrated or less vibrant. However, for a truly exceptional Lemon Sunshine Loaf, fresh is always best.
How Do I Know When My Loaf is Perfectly Baked?
The most reliable test for doneness is inserting a wooden skewer or thin knife into the center of the loaf. When it comes out clean, with no wet batter attached, your loaf is ready.
Other visual cues include a golden-brown top, edges pulling slightly away from the pan, and the top springing back gently when lightly pressed. These indications are crucial for a perfectly baked lemon pound cake.
Can I Make This Recipe Gluten-Free?
Yes, you can adapt this Lemon Sunshine Loaf recipe to be gluten-free. Substitute the all-purpose flour with an equal amount of a good quality 1:1 gluten-free baking flour blend that contains xanthan gum.
No other significant adjustments should be needed, but always ensure your gluten-free blend is suitable for baking, as some can yield different textures. The moist baking techniques in this recipe will help maintain a great texture.
What’s the Best Way to Zest a Lemon?
The best way to zest a lemon is using a microplane grater. Gently rub the lemon over the grater, rotating it frequently, until you’ve removed only the bright yellow outer layer.
Avoid grating into the white pith directly underneath the zest, as this part is bitter and can impart an unpleasant taste to your Lemon Sunshine Loaf.
Ready to Bake Your Own Lemon Sunshine Loaf Masterpiece?
Now that you’re equipped with all the secrets and techniques, it’s time to bring the sunny, zesty magic of this Lemon Sunshine Loaf into your kitchen. Say goodbye to dry, crumbly cakes and hello to consistently moist, tender perfection.
This recipe isn’t just about baking; it’s about creating moments of pure joy with every slice. Go forth and bake your truly exceptional Lemon Sunshine Loaf, and don’t forget to share your delicious creations!

Lemon Sunshine Loaf
Course: DessertCuisine: AmericanDifficulty: medium1
loaf25
minutes50
minutes3500
kcal60
minutesTired of dry lemon loaves? This Lemon Sunshine Loaf recipe guarantees an incredibly moist and tender crumb from the first slice to the last, thanks to a secret syrup technique. Enjoy bright lemon flavor and a juicy texture every single time.
Ingredients
1 and 1/2 cups all purpose flour
1 teaspoon baking powder
1/4 teaspoon salt
1 cup granulated sugar
2 large eggs
1/2 cup milk
1/2 cup vegetable oil
Zest of 2 large lemons
1/4 cup fresh lemon juice (for the cake batter)
For the Lemon Syrup:
1/4 cup fresh lemon juice
1/4 cup granulated sugar
For the Glaze:
1 and 1/2 cups powdered sugar
3-4 tablespoons fresh lemon juice
Additional lemon zest for garnish
Directions
- Preheat your oven to 350F (175C). Grease and flour a 9×5 inch loaf pan, or line with parchment paper leaving an overhang on the sides for easy lifting.
- In a medium bowl, whisk together the flour, baking powder, and salt. Set aside.
- In a large bowl, whisk together the granulated sugar, eggs, milk, vegetable oil, lemon zest, and 1/4 cup fresh lemon juice until well combined.
- Gradually add the dry ingredients to the wet ingredients, mixing until just combined. Be careful not to overmix, as this can lead to a tough cake. A few small lumps are fine.
- Pour the batter into the prepared loaf pan and spread evenly. Bake for 50-60 minutes, or until a wooden skewer inserted into the center comes out clean.
- This is the game-changing step for moisture: While the cake is baking, prepare the lemon syrup. In a small saucepan, combine 1/4 cup lemon juice and 1/4 cup granulated sugar. Heat over medium heat, stirring until the sugar completely dissolves. Remove from heat.
- Once the cake is done, remove it from the oven. Immediately prick the top of the warm cake all over with the wooden skewer or a fork. While the cake is still hot in the pan, slowly and evenly pour or brush the prepared lemon syrup over the entire top surface. Let the cake sit in the pan for 10-15 minutes, allowing the syrup to soak in and infuse moisture.
- Carefully remove the cake from the pan and transfer it to a wire rack to cool completely.
- Once the cake is cool, prepare the glaze. In a small bowl, whisk together the powdered sugar and 3-4 tablespoons of fresh lemon juice until smooth and pourable. Add more lemon juice a teaspoon at a time if the glaze is too thick, or more powdered sugar if it’s too thin.
- Drizzle the glaze generously over the cooled lemon loaf. Garnish with additional lemon zest if desired. Slice and enjoy your perfectly moist lemon loaf!