Classic Key Lime Pie: Guaranteed Firm Slices Every Time
Have you ever spent precious time baking a beautiful pie, only for your Key Lime Pie slices to sadly collapse into a runny mess? It’s a common disappointment I’ve faced too, but not anymore! This recipe guarantees perfectly firm, picture-perfect slices of Classic Key Lime Pie, holding its shape beautifully every single time.
Why This Classic Key Lime Pie Recipe Stands Above the Rest
This isn’t just another pie recipe; it’s your definitive guide to a perfectly set, deliciously tangy Key lime dessert. We address the most common frustration: the dreaded runny slice, ensuring your pie is always presentation-ready.
My method focuses on specific techniques, from a crucial pre-baked graham cracker crust to precise chilling times. You’ll achieve a firm, creamy filling that boasts the ideal balance of sweet and tart, creating an unforgettable citrusy treat.
Get Our Best Recipes Weekly!
Join thousands of food lovers and get delicious recipes delivered to your inbox.
Gather Your Essentials: Ingredients for a Perfect Key Lime Pie
For the Irresistible Graham Cracker Crust
- 1 ½ cups graham cracker crumbs
- ¼ cup granulated sugar
- 6 tablespoons unsalted butter, melted
These simple ingredients combine to form a sturdy, buttery base that complements the tangy filling. The right ratio of butter and crumbs is vital for preventing sogginess once pre-baked.
The Zesty, Tangy Key Lime Filling Core
- 1 (14-ounce) can sweetened condensed milk
- ½ cup fresh Key lime juice (about 6-8 Key limes)
- 4 large egg yolks
- 1 tablespoon Key lime zest (optional, from about 2 limes)
The magic happens when the acid from the Key lime juice reacts with the sweetened condensed milk and egg yolks. This creates a natural thickening process for our perfectly set filling without needing cornstarch.
Fresh Key lime juice is paramount; its distinct tartness and aroma elevate this pie beyond comparison. Key limes are smaller and more aromatic than regular Persian limes, offering a unique, bright flavor.
The Dreamy Whipped Cream Topping & Garnish
- 1 cup heavy cream, very cold
- 2 tablespoons powdered sugar
- ½ teaspoon vanilla extract
- Lime slices for garnish
- A pinch of extra graham cracker crumbs for dusting (optional)
Achieving perfect stiff peaks for your whipped cream topping relies on cold ingredients and equipment. This ensures a light, airy finish that beautifully balances the pie’s tartness.
Essential Tools for Your Key Lime Pie Adventure
9-inch Pie Plate
A standard 9-inch pie plate ensures an ideal filling-to-crust ratio and allows for even baking and cooling of your Classic Key Lime Pie.
Mixing Bowls (Medium & Large)
You’ll need a medium bowl for combining crust ingredients and a large one for thoroughly whisking the luscious filling.
Whisk
A sturdy whisk is crucial for smoothly emulsifying the filling ingredients, ensuring a homogenous and lump-free mixture.
Electric Mixer (Handheld or Stand)
An electric mixer makes whipping heavy cream to stiff peaks quick and effortless, creating a light, airy topping.
Measuring Cups and Spoons
Accuracy in measurements is key for both the crust and filling to achieve the perfect texture and flavor balance in this homemade Key Lime Pie.
Zester or Microplane
This tool is essential for extracting the fragrant Key lime zest, ensuring you capture maximum citrus aroma without including any bitter white pith.
Citrus Juicer
To efficiently extract the ½ cup of fresh Key lime juice, a citrus juicer is highly recommended, making the process much easier.
Your Step-by-Step Guide to Classic Key Lime Pie Perfection
Prepare the Crust for a Sturdy Foundation
In a medium bowl, combine your graham cracker crumbs and granulated sugar. Pour in the melted butter and mix until the crumbs are evenly moistened, resembling wet sand.
Press the mixture firmly and evenly into the bottom and up the sides of your 9-inch pie plate. Aim for a compact layer that will withstand slicing.
Crucial Step: Bake the crust in a preheated oven at 350°F (175°C) for 8 minutes, then remove and let it cool completely on a wire rack. This pre-bake is essential for preventing a soggy bottom and guaranteeing a firm, stable base that won’t crumble during slicing.
Craft the Tangy Key Lime Filling
In a large bowl, whisk together the sweetened condensed milk and egg yolks until they are well combined and smooth. This creates the creamy foundation for your tangy pie.
Gradually pour in the fresh Key lime juice, whisking constantly as you do. You’ll notice the mixture thickening slightly as the acid from the lime juice begins to react with the other ingredients, initiating the setting process.
If desired, stir in the Key lime zest now for an extra layer of bright aroma and intensified citrus flavor throughout your Classic Key Lime Pie.
The “Firmness Fix”: Baking Your Pie Just Right
Pour the prepared Key lime filling into your cooled, pre-baked graham cracker crust. Ensure the filling is evenly distributed across the base.
Key to Firm Slices: Bake the pie in the preheated oven at 350°F (175°C) for just 10-12 minutes. The edges should appear set, but the very center of the pie should still have a slight jiggle when gently shaken. This brief bake prevents a rubbery texture while ensuring the filling sets beautifully as it cools.
The Ultimate Secret Weapon: Chilling to Perfection
Remove the pie from the oven and let it cool completely on a wire rack at room temperature. This gradual cooling is important for the filling’s final texture.
Do NOT Rush This Step! Once cooled, place the pie in the refrigerator to chill for a minimum of 6 hours, but ideally overnight. This extended chilling period is paramount for the filling to fully set and firm up, guaranteeing clean, beautiful slices every single time you cut into your homemade Key Lime Pie.
Whip Up Your Cloud-Like Topping
Before serving, ensure your mixing bowl and beaters are thoroughly chilled; this greatly aids in achieving the perfect whipped cream.
In the chilled bowl, whip the very cold heavy cream, powdered sugar, and vanilla extract on high speed until stiff peaks form. The cream should hold its shape firmly.
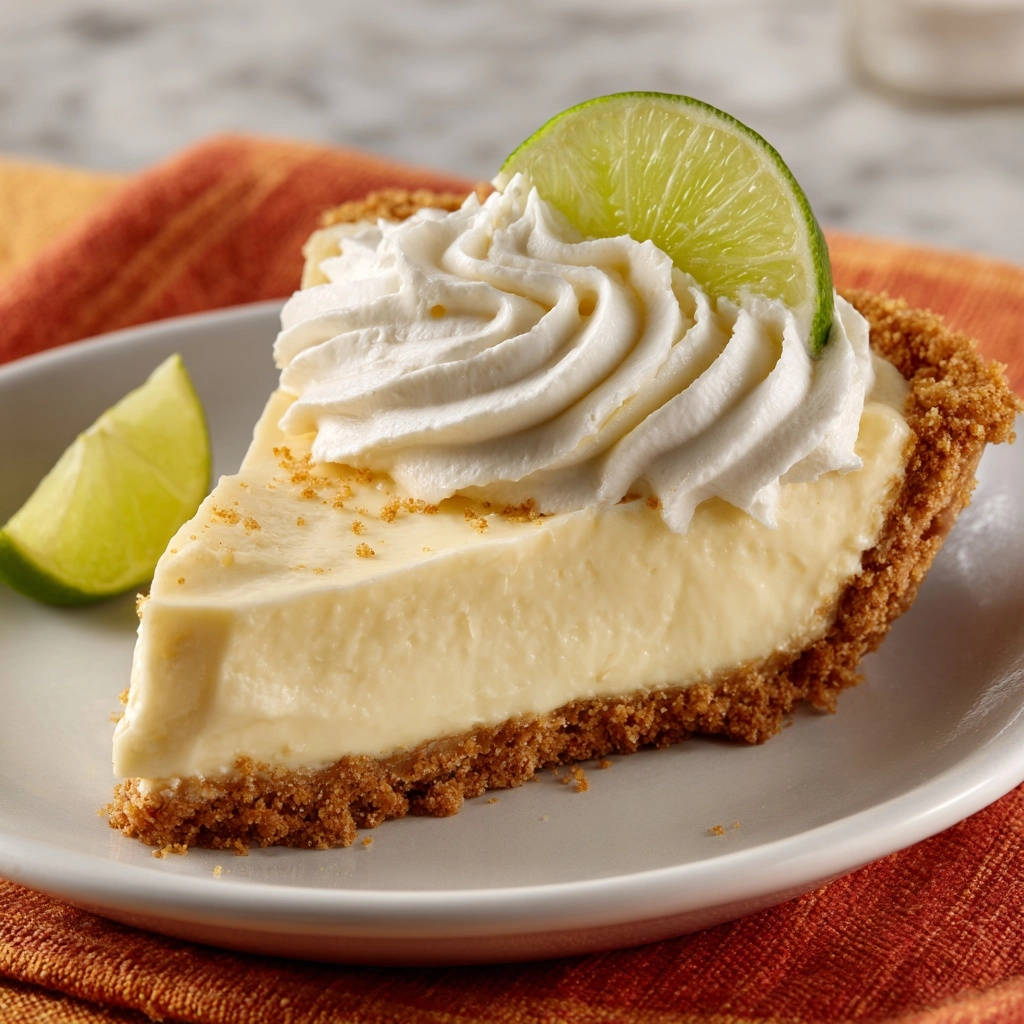
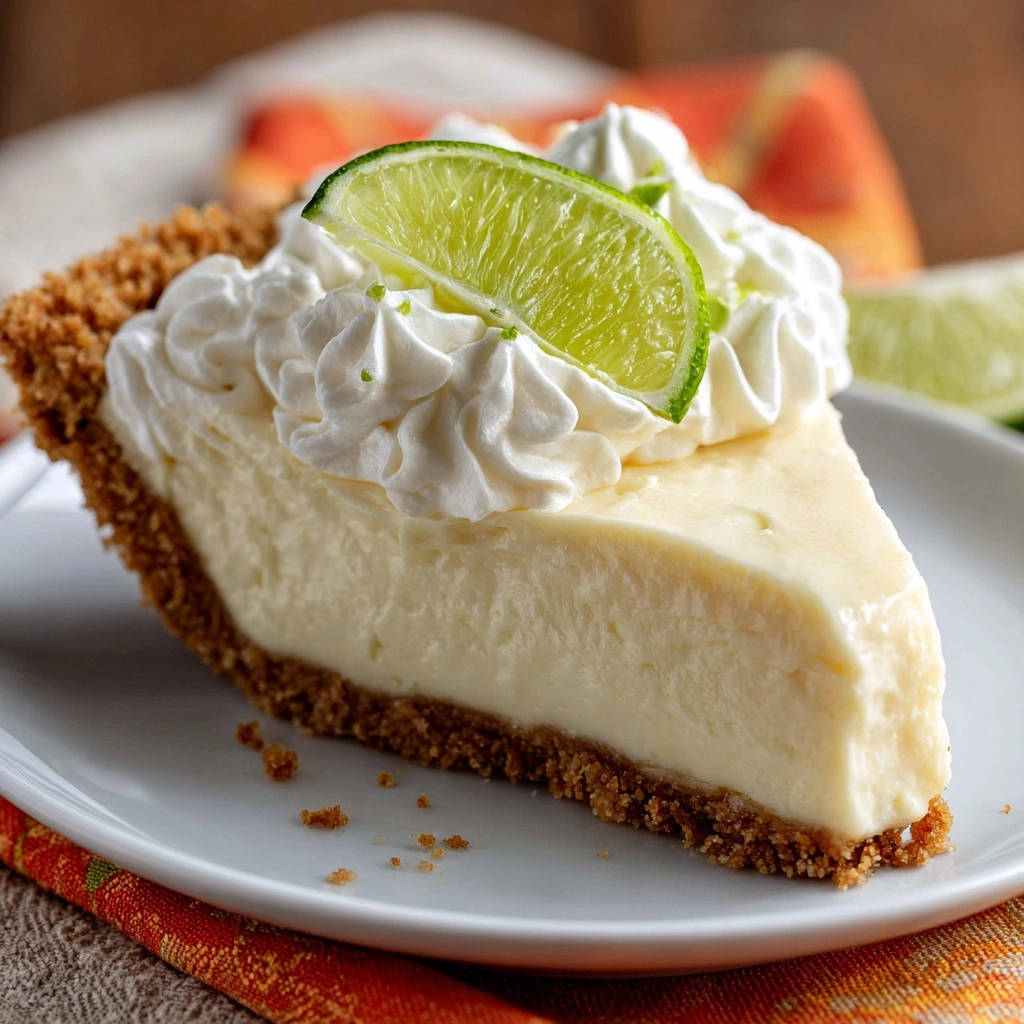
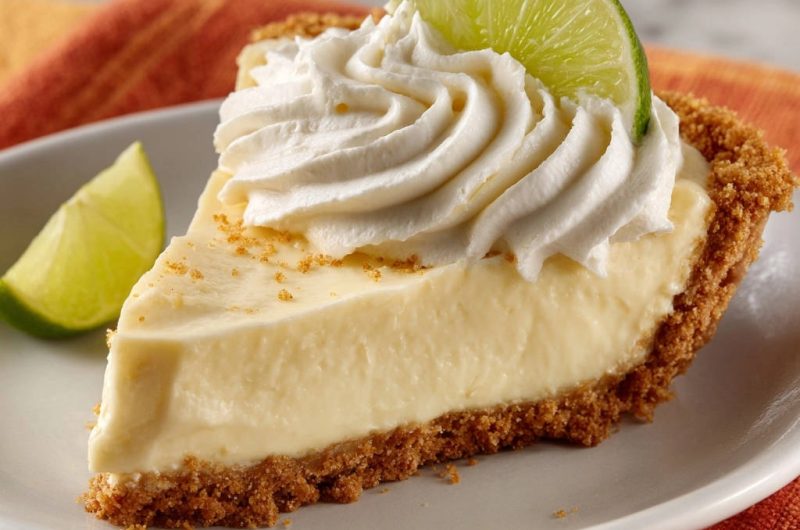
Slice, Garnish, and Savor Your Masterpiece
Using a sharp, clean knife, cut generous portions of the well-chilled pie. For bakery-perfect, smooth cuts, wipe the blade clean with a damp cloth between each slice.
Top each slice generously with your freshly whipped cream, a vibrant fresh lime slice, and a light dusting of extra graham cracker crumbs if desired.
Prepare for compliments as you enjoy your perfectly firm, tangy, and absolutely delicious Classic Key Lime Pie!
What to Try Next
Round out your meal with these complementary dishes.
- For a zesty protein to balance the tartness, consider this Sticky Ginger Lime Chicken with its satisfying glaze.
- If you’re craving something savory and comforting, our Classic Chicken Pot Pie features a golden, flaky crust that complements any sweet finish.
Chef’s Secrets & Pro Tips for an Unforgettable Key Lime Pie
Fresh Key Lime Juice is Non-Negotiable
While bottled options exist, fresh Key lime juice provides the authentic, vibrant tang this pie is famous for. Its natural acidity is also crucial for initiating the filling’s setting reaction and achieving a perfectly set filling.
Don’t Skimp on the Chill Time
The minimum 6-hour chill, or better yet, overnight, is the secret weapon for firm, sliceable pie. This allows the lime juice and condensed milk to fully set and solidify to a creamy texture.
Pre-Bake Your Crust for Superior Results
Even if some recipes skip it, pre-baking your graham cracker crust sets the butter in the crumbs. This creates a waterproof barrier, preventing a soggy bottom and providing a sturdy foundation for slicing this tangy dessert.
Mind the Bake Time: Slight Jiggle is Key
Overbaking can lead to a rubbery, unpleasant filling. The center should still have a slight wobble when gently shaken; it will continue to set as it cools and during the essential refrigeration period.
Chill Your Whipping Cream & Equipment
For the fluffiest, most stable whipped cream, always use very cold heavy cream, straight from the fridge. Chilling your mixing bowl and beaters for 10-15 minutes beforehand will also make a significant difference in achieving stiff peaks quickly.
Master the Perfect Slice
Always use a sharp, warm knife for clean cuts. Run the knife under hot water and wipe it clean between each slice to get bakery-perfect, smooth cuts that showcase your perfectly set filling.
Troubleshooting Common Key Lime Pie Conundrums
My Pie Slices are Runny or Collapse!
This is almost always due to insufficient chilling time. The filling needs at least 6 hours, and ideally overnight, in the refrigerator to fully set and achieve its firm, sliceable texture.
Ensure you used the correct amount of fresh Key lime juice. Too little acid won’t trigger the setting reaction as effectively, leading to a looser filling.
The Crust is Crumbly or Soggy!
A crumbly crust often means you didn’t press it firmly enough into the pie plate or didn’t use enough melted butter. Ensure it forms a solid, even layer against the bottom and sides.
A soggy crust is usually prevented by the crucial pre-baking step. Make sure your graham cracker crust was fully baked and cooled completely before adding the filling to create a barrier.
My Whipped Cream Isn’t Getting Stiff!
The most common culprit is warm cream or warm equipment. Always use very cold heavy cream (straight from the fridge) and chill your mixing bowl and beaters for 10-15 minutes beforehand.
Ensure you’re using heavy cream, not half-and-half or light cream, as only heavy cream has enough fat content to whip properly to stiff peaks.
Your Key Lime Pie Questions Answered: FAQs
Can I use bottled Key lime juice?
While fresh Key lime juice is highly recommended for authentic flavor and optimal setting, you can use bottled Key lime juice in a pinch. However, be aware that the flavor may not be as vibrant or complex as fresh.
What if I can’t find Key limes?
If Key limes are unavailable, you can substitute with regular Persian lime juice. For the best flavor, you might want to increase the amount slightly (e.g., to ¾ cup) and add a bit more zest for that distinctive aroma that makes a Classic Key Lime Pie.
How do I know when the pie is set?
After the brief bake, the edges of the pie should appear set and slightly puffed, but the very center should still have a slight jiggle, like gelatin. It will firm up completely during the extended chilling process in the refrigerator.
How long does Key Lime Pie last?
Properly stored in the refrigerator, this Classic Key Lime Pie will maintain its quality for 3-4 days. Cover it loosely with plastic wrap to prevent it from drying out or absorbing refrigerator odors.
Can I freeze Key Lime Pie?
Yes, you can! Wrap the cooled pie (without the whipped cream topping) tightly in plastic wrap, then in foil. It can be frozen for up to 1 month. Thaw in the refrigerator overnight before topping and serving.
Storing Your Key Lime Pie & Make-Ahead Tips
Once your Classic Key Lime Pie is fully chilled, store it in the refrigerator. A loose covering of plastic wrap will protect it from odors and drying out, keeping the filling perfectly set.
This pie is an excellent make-ahead dessert. You can prepare and bake the pie a full day in advance, allowing for maximum chilling time overnight, which is crucial for its firm texture.
Prepare the whipped cream topping just before serving to ensure it’s at its freshest and fluffiest. This ensures your homemade Key Lime Pie is always presented at its best.
Ready to Impress? Share Your Classic Key Lime Pie Masterpiece!
You now possess the secrets to creating a truly spectacular Classic Key Lime Pie with guaranteed firm slices. No more culinary disappointments, just perfectly tangy, sweet, and firm pie every time.
I encourage you to try this recipe and experience the joy of cutting into a perfectly set Key lime dessert. Share your creations and tell me how this method transformed your pie-making!
Classic Key Lime Pie
Course: DessertCuisine: AmericanDifficulty: easy8
servings20
minutes20
minutes450
kcal480
minutesSay goodbye to runny slices! This recipe reveals the secret to a perfectly firm, tangy Classic Key Lime Pie that holds its shape like a champ. Enjoy bakery-perfect results every single time with guaranteed firm slices.
Ingredients
For the Crust:
1 ½ cups graham cracker crumbs
¼ cup granulated sugar
6 tablespoons unsalted butter, melted
For the Filling:
1 (14-ounce) can sweetened condensed milk
½ cup fresh Key lime juice (about 6-8 Key limes)
4 large egg yolks
1 tablespoon Key lime zest (optional, from about 2 limes)
For the Topping:
1 cup heavy cream, very cold
2 tablespoons powdered sugar
½ teaspoon vanilla extract
Lime slices for garnish
A pinch of extra graham cracker crumbs for dusting (optional)
Directions
- Prepare the Crust: In a medium bowl, combine the graham cracker crumbs and granulated sugar. Pour in the melted butter and mix thoroughly until the crumbs are evenly moistened. Press the mixture firmly and evenly into the bottom and up the sides of a 9-inch pie plate. For the guaranteed firm crust that supports your slices, bake in a preheated oven at 350°F (175°C) for 8 minutes, then remove and let cool completely. This crucial step sets the butter and crumbs, creating a solid base that won’t crumble or get soggy.
- Make the Filling: In a large bowl, whisk together the sweetened condensed milk and egg yolks until well combined and smooth. Gradually pour in the Key lime juice, whisking constantly until the mixture thickens slightly. The acid in the lime juice will naturally react with the condensed milk and egg yolks to start the thickening process. If using, stir in the Key lime zest.
- Bake the Pie (The Firmness Fix!): Pour the filling into the cooled, pre-baked crust. This next step is key to those firm slices. Bake the pie in the preheated oven at 350°F (175°C) for just 10-12 minutes, or until the edges are set but the center still has a slight jiggle. This brief bake sets the filling just enough to ensure it becomes wonderfully firm without overcooking, preventing a rubbery texture.
- Chill to Perfection: Remove the pie from the oven and let it cool completely on a wire rack at room temperature. Once cooled, place the pie in the refrigerator to chill for a minimum of 6 hours, but ideally overnight. This extended chilling period is the ultimate secret weapon for guaranteed firm slices. The filling needs this time to fully set and firm up, allowing for clean, beautiful cuts every time. Do NOT rush this step!
- Prepare the Topping: Before serving, in a chilled bowl with chilled beaters, whip the cold heavy cream, powdered sugar, and vanilla extract on high speed until stiff peaks form.
- Serve: Slice the well-chilled pie using a sharp, clean knife (wiping the blade between slices helps!). Top each slice generously with whipped cream, a fresh lime slice, and a light dusting of graham cracker crumbs, if desired. Enjoy your perfectly firm and tangy Key Lime Pie!
Notes
- Extended chilling is crucial for guaranteed firm slices and clean cuts.