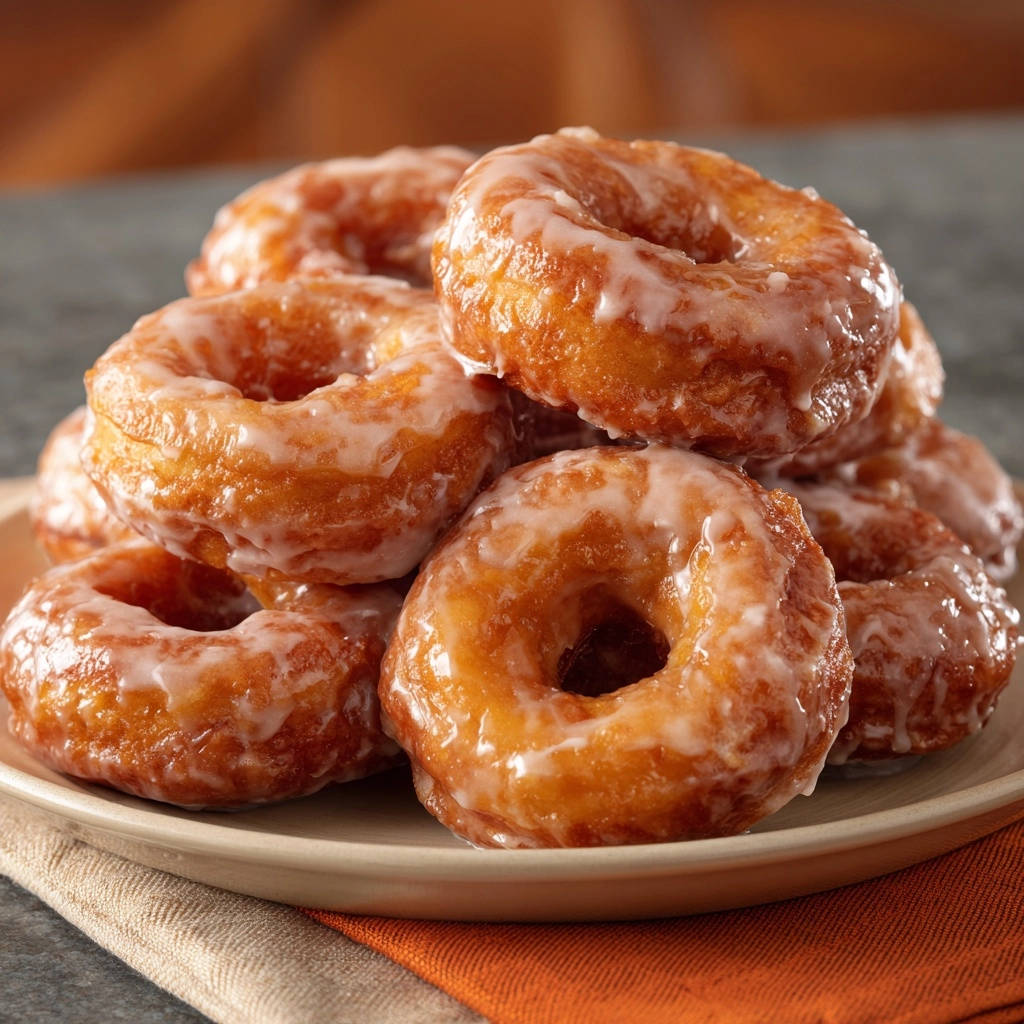
Classic Glazed Donuts: Guaranteed Fluffy Perfection
There’s a special joy in homemade treats, but if you’ve ever tried making Classic Glazed Donuts only to end up with dense, heavy rings, you know the disappointment. I’ve been there, but I’m thrilled to share the secrets to truly fluffy, melt-in-your-mouth bakery-style donuts, right from your own kitchen.
This recipe transforms common donut-making frustrations into triumphs, focusing on meticulous dough handling and precise frying temperatures. Get ready to experience the unmatched delight of unbelievably light and airy Classic Glazed Donuts, perfect for any occasion.
Why This Classic Glazed Donut Recipe Delivers Unbeatable Fluffiness
This recipe isn’t just another donut guide; it’s a meticulously crafted path to perfection, engineered to overcome the common pitfalls of homemade donut making. We specifically target the “guaranteed fluffy every time” promise by focusing on key, often overlooked, details.
Get Our Best Recipes Weekly!
Join thousands of food lovers and get delicious recipes delivered to your inbox.
The secret lies in a balanced approach to yeast activation, controlled proofing stages, and a precise understanding of oil temperature. These elements work synergistically to create a dough that rises beautifully and fries into a cloud-like texture.
You’ll discover that a slightly longer second proof is your ultimate “fluff guarantee,” allowing the dough to develop significant air pockets. Combined with expert frying techniques, this recipe ensures your Classic Glazed Donuts are never dense, but always light and exquisitely airy.
Essential Tools for Your Homemade Donut Adventure
Having the right equipment makes all the difference in achieving bakery-quality Classic Glazed Donuts. These tools help ensure consistency and success in every step.
The Precision of a Candy Thermometer
Accurate oil temperature is paramount for perfect frying results, preventing greasy or burnt donuts and ensuring they cook through evenly. Without it, you risk either raw centers or overcooked, oil-logged donuts.
Donut Cutter: For Uniform Shapes
While a dedicated donut cutter is ideal for classic shapes and uniform size, ensuring even cooking, you can improvise. Easily use two different sized round cutters, such as cookie cutters, a drinking glass, or even a clean bottle cap, to create your Classic Glazed Donuts.
Stand Mixer (Optional) or Strong Arms
A stand mixer with a dough hook offers efficiency and consistent kneading, making dough development effortless. However, kneading by hand allows for tactile feedback, helping you truly understand the dough’s consistency and develop its crucial gluten structure effectively.
Heavy-Bottomed Pot or Dutch Oven
A sturdy, thick-bottomed pot is essential for safely deep-frying. Its robust construction helps maintain a stable oil temperature, which is critical for preventing uneven cooking and achieving that perfect golden crust on your homemade donuts.
The Building Blocks: Ingredients for Irresistible Classic Glazed Donuts
Each ingredient in this recipe plays a vital role in creating the perfect texture and flavor of your Classic Glazed Donuts. Understanding their purpose elevates your baking game.
For the Fluffy Dough
These components are carefully selected to ensure a tender, airy crumb that melts in your mouth.
Active Dry Yeast: This is the crucial leavening agent responsible for the light and airy crumb of your donuts. Ensuring its freshness and proper activation is the first, most important step to successful proofing.
Warm Milk: Providing the ideal temperature (105-115°F) for yeast activation, warm milk also contributes to the dough’s hydration and softness. Its precise temperature is critical; too hot will kill the yeast, too cold won’t activate it.
Granulated Sugar & Melted Butter: Sugar not only sweetens the dough but also feeds the yeast, aiding in its activity and giving the donuts a beautiful golden hue. Melted butter contributes significantly to the donut’s tenderness, richness, and overall flavor, keeping the dough incredibly soft.
Large Egg: An egg adds essential richness, helps with the dough’s structure, and provides moisture, contributing to that desirable tender crumb. Using a room temperature egg integrates more smoothly into the dough.
Vanilla Extract & Salt: These are essential flavor enhancers. Vanilla adds a warm, comforting aroma and depth, while salt balances the sweetness, prevents blandness, and actually strengthens the gluten structure in the dough, contributing to a better rise.
All-Purpose Flour: The primary structural component of the donut, all-purpose flour provides the necessary gluten for elasticity and chew. The exact amount used can influence the final texture, so a gentle hand is key.
Crafting the Signature Glaze
These simple ingredients combine to create that iconic, perfectly sweet and glossy glaze that defines Classic Glazed Donuts.
Powdered Sugar: Also known as confectioners’ sugar, this forms the smooth, fine base for the glaze. It dissolves easily, ensuring a silky, lump-free finish that adheres beautifully to the warm donuts.
Milk or Water: Used to adjust the glaze’s consistency, allowing you to achieve a thinner, more translucent coating or a thicker, opaque one. Start with the suggested amount and add more gradually until your desired consistency is reached.
Vanilla Extract (for Glaze): Just like in the dough, vanilla extract enhances the sweet flavor and aroma of the glaze. It adds a subtle depth that perfectly complements the rich donut flavor, making the Classic Glazed Donuts truly irresistible.
Your Step-by-Step Journey to Perfect Classic Glazed Donuts
Follow these detailed steps carefully, and you’ll be rewarded with the lightest, fluffiest Classic Glazed Donuts imaginable.
-
Activate the Yeast: In a large bowl, combine 1/2 cup warm milk (about 105-115°F / 40-46°C) and 1 teaspoon of granulated sugar. Sprinkle the active dry yeast (2 and 1/4 teaspoons) over the top and let it sit for 5-10 minutes until a foamy layer appears on the surface.
This crucial step confirms your yeast is alive and potent, setting the foundation for a proper rise and ultimately, beautifully fluffy Classic Glazed Donuts. If it doesn’t foam, your yeast may be expired or the milk too hot/cold, and you should start over.
-
Mix the Dough: To the foamy yeast mixture, add the remaining 1/4 cup granulated sugar, 1/4 cup melted butter, 1 large room temperature egg, 1 teaspoon vanilla extract, and 1 teaspoon salt. Whisk briefly to combine these wet ingredients thoroughly.
Gradually add 2 and 1/2 cups of all-purpose flour, mixing with a sturdy wooden spoon or a stand mixer with a dough hook until a shaggy dough forms. Ensure all wet ingredients are well combined before introducing flour to promote even mixing and gluten development.
-
Knead to Perfection: Turn the shaggy dough out onto a lightly floured surface and knead by hand for 5-7 minutes until it’s smooth, elastic, and no longer sticky. A perfectly kneaded dough will spring back slowly when gently poked with a finger.
Alternatively, knead in a stand mixer with a dough hook for 3-5 minutes on medium speed. Proper kneading develops the gluten structure, which is absolutely essential for the donut’s signature fluffy, airy, and slightly chewy texture.
-
First Rise for Airiness: Lightly grease a clean, large bowl with a little vegetable oil. Place the kneaded dough in the bowl, turning it once to coat the entire surface with oil, preventing a dry crust.
Cover the bowl with plastic wrap or a clean kitchen towel and let it rise in a warm, draft-free place for 1 to 1.5 hours, or until it has visibly doubled in size. This initial bulk fermentation allows the yeast to work its magic, building flavor and creating the initial air pockets fundamental for ultimate airiness in your Classic Glazed Donuts.
-
Shape Your Donuts: Gently punch down the risen dough to release the accumulated air. Turn it out onto a lightly floured surface and using a rolling pin, roll the dough evenly to about 1/2 inch thick.
Using a 3-inch donut cutter or two different sized round cutters (e.g., a drinking glass and a bottle cap), cut out the donut shapes and the smaller holes. Carefully transfer the cut donuts and holes to baking sheets lined with parchment paper, ensuring they are not crowded to allow for their second rise.
-
The Crucial Second Rise (The Fluff Guarantee!): This is the most vital step for achieving that incredible, airy texture unique to Classic Glazed Donuts. Cover the cut donuts loosely with plastic wrap or a clean kitchen towel and let them rise again in a warm, draft-free spot for another 30-45 minutes.
They should look visibly puffy and almost doubled in size, feeling very light and delicate when gently lifted. Do not skip this step! Under-proofed donuts will be dense and heavy, while over-proofed donuts can collapse in the oil and absorb too much fat, leading to a greasy result.
-
Prepare for Frying: Towards the end of the second rise (about 10-15 minutes before you expect them to be ready), begin heating 3-4 inches of vegetable oil in a large, heavy-bottomed pot or Dutch oven over medium heat to a precise 350°F (175°C).
Use a candy thermometer to monitor the temperature precisely. Maintaining this exact temperature is absolutely key to preventing greasy, dense donuts and ensuring a uniformly golden, fluffy result. Too low and they soak oil; too high and they burn outside, stay raw inside.
-
Fry to Golden Perfection: Gently lift the risen donuts from the parchment paper – they will be delicate! Carefully slide 2-3 donuts into the hot oil, ensuring you do not overcrowd the pot, which would significantly drop the oil temperature.
Fry for 1-2 minutes per side, until they are beautifully golden brown and puffed up. Use a slotted spoon or spider to carefully flip them. The precise oil temperature ensures they puff up beautifully without absorbing too much oil, delivering that perfect texture.
-
Drain Excess Oil: As each batch finishes frying, remove the golden Classic Glazed Donuts with a slotted spoon and place them on a wire rack set over a baking sheet to drain any excess oil. This setup allows air circulation and prevents the bottom of the donuts from becoming soggy.
This allows any residual oil to drip away, contributing to a lighter, less greasy finished Classic Glazed Donut, enhancing its melt-in-your-mouth quality.
-
Whip Up the Glaze: While the donuts are cooling slightly (but still warm), whisk together 2 cups of powdered sugar, 1/4 cup milk or water, and 1/2 teaspoon vanilla extract in a shallow bowl until the mixture is completely smooth and free of lumps.
Adjust the consistency with a tiny bit more liquid for a thinner glaze or more powdered sugar for a thicker, more opaque coating, if desired. The perfect glaze should be thick enough to coat, but still run slightly.
-
Glaze and Serve: Dip each warm donut into the prepared glaze, turning to coat both sides evenly. Allow any excess glaze to drip off briefly before placing them back on the wire rack for the glaze to set slightly.
Glazing them while still warm helps the glaze adhere beautifully and melts slightly into the donut for ultimate deliciousness and a perfectly smooth finish. Serve your Classic Glazed Donuts immediately for the best fluffy, fresh taste and experience!
Chef’s Secrets: Elevating Your Classic Glazed Donut Game
Beyond the steps, these expert tips will ensure your Classic Glazed Donuts are consistently exceptional, reflecting true mastery of the craft.
The Magic of Room Temperature Ingredients: Always ensure your milk, egg, and butter are at the correct temperature as specified. This ensures optimal yeast activity, resulting in a lively, well-risen dough, and a properly emulsified, cohesive mixture that bakes beautifully.
Don’t Over-Flour Your Surface: When kneading and rolling, use just enough flour to prevent the dough from sticking. Incorporating too much additional flour will alter the dough’s hydration, making your Classic Glazed Donuts dry, tough, and less enjoyable.
Gentle Handling for Fluffiness: Once the dough has undergone its first rise, handle it as little and as gently as possible. Aggressive handling can deflate the delicate air bubbles formed during proofing, which are absolutely key to achieving that signature fluffiness.
Testing Oil Temperature Without a Thermometer: While a thermometer is highly recommended, if you’re in a pinch, drop a small pinch of dough into the hot oil. It should sizzle gently and float to the top within a few seconds, indicating the oil is roughly at the right frying temperature.
Get Creative with Glaze Variations: The base glaze is a perfect canvas for flavor experimentation. Suggest adding a tablespoon of finely grated lemon or orange zest, a pinch of warm cinnamon, or a tablespoon of rich espresso powder to the glaze for delightful and unique flavor profiles that perfectly complement your Classic Glazed Donuts.
Common Donut Dilemmas & Quick Fixes
Even experienced bakers encounter challenges. Here are solutions to common issues you might face when making Classic Glazed Donuts.
My Donuts Are Dense and Heavy
This is often due to under-proofing, meaning the dough wasn’t given enough time (particularly during the crucial second rise) to adequately develop air and expand. It can also happen if the oil temperature is too low, causing the donuts to absorb too much oil instead of quickly puffing up and setting.
Ensure both rises are sufficient-look for visibly puffy, light dough. Rigorously maintain the oil at 350°F (175°C) to allow for proper expansion and cooking, preventing oil absorption and ensuring a fluffy interior.
My Donuts Are Greasy
Greasy Classic Glazed Donuts typically result from frying at too low a temperature. When the oil isn’t hot enough, the donut absorbs oil before it has a chance to cook through and set its internal structure.
Always use a candy thermometer to keep the oil at the precise 350°F (175°C). Additionally, ensure you don’t overcrowd the pot, as this can rapidly drop the oil temperature, leading to a greasy batch.
The Glaze Isn’t Setting Properly
If your glaze is too thin, it won’t set well and might run off the donuts. Another common reason is dipping the donuts when they are too hot, which causes the glaze to melt and soak in rather than adhere and firm up on the surface.
Adjust the glaze consistency with more powdered sugar if needed, whisking until it’s thick enough to coat a spoon but still pourable. Allow your Classic Glazed Donuts to cool slightly (they should still be warm to the touch, not hot) before dipping for the best setting results.
Donuts Are Unevenly Browned
Uneven browning can happen if the oil temperature isn’t consistent throughout the pot, or if the donuts aren’t flipped precisely at the right time. Cold spots in the oil or leaving one side in for too long will create disparities.
Use a heavy-bottomed pot or Dutch oven, which distributes heat more evenly. Monitor the temperature closely with a thermometer and fry in small batches (2-3 donuts at a time) to maintain consistent heat distribution and allow each Classic Glazed Donut to cook uniformly.
Serving, Storage, and Make-Ahead Tips for Your Classic Glazed Donuts
Maximize your enjoyment and convenience with these practical tips for your homemade Classic Glazed Donuts.
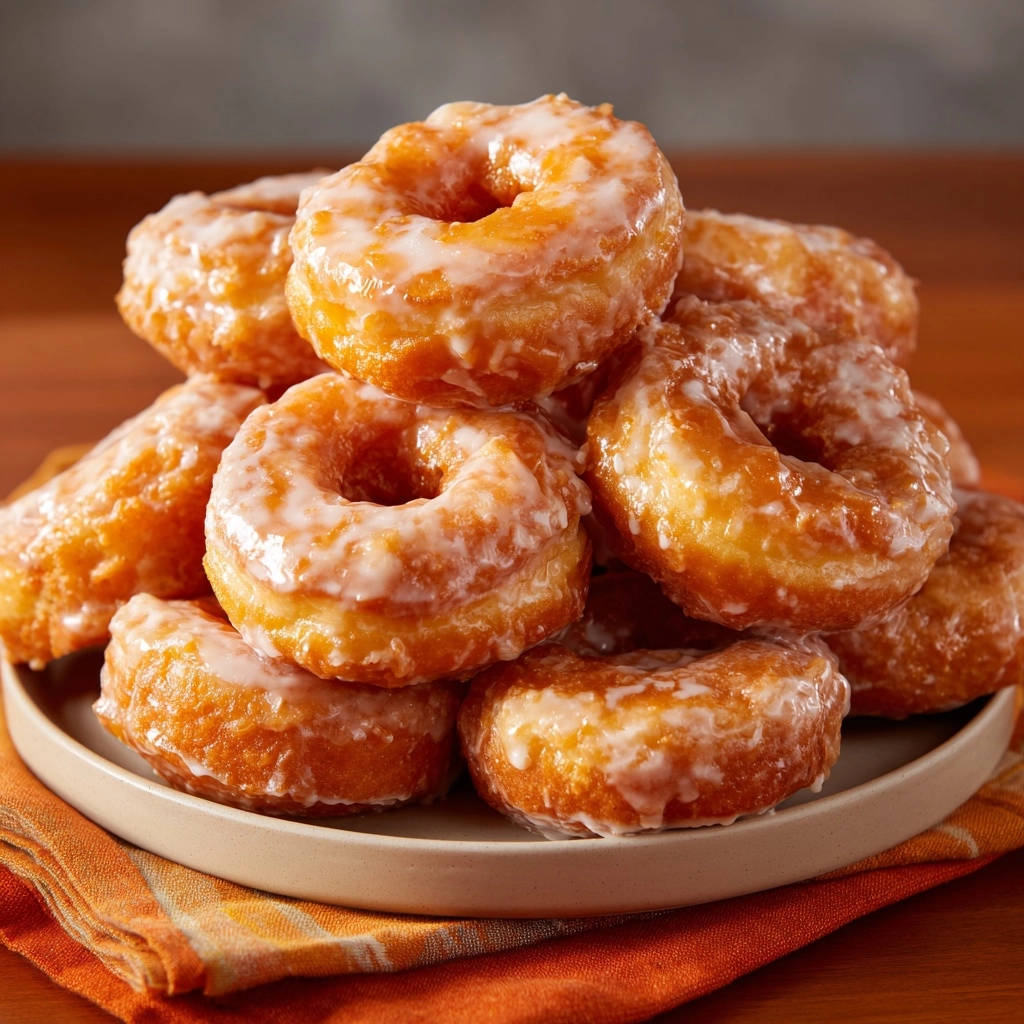
Best Ways to Enjoy Your Freshly Made Classic Glazed Donuts
These donuts are truly at their peak when served warm, shortly after glazing. At this point, they are at their absolute fluffiest, the glaze is perfectly soft and slightly melted, creating an unbeatable sensory experience.
Pair them with a steaming hot cup of coffee for a delightful breakfast or brunch, a tall glass of cold milk for a comforting treat, or plate them as a show-stopping dessert for any special occasion. Their irresistible freshness makes them a crowd-pleaser.
Storing Leftover Classic Glazed Donuts
While best enjoyed fresh, leftover Classic Glazed Donuts can be stored in an airtight container at room temperature for up to 2 days. This helps maintain their softness and prevents them from drying out too quickly.
Note that the glaze might absorb some moisture over time and become slightly sticky or even dissolve a little. However, the delicious flavor and underlying softness of the donut will still be enjoyable, perhaps with a quick warm-up in the microwave.
Can I Make Classic Glazed Donuts Ahead?
Yes, you absolutely can prepare the dough the night before. After the kneading step, place the lightly oiled dough in a covered bowl and let it undergo its first rise slowly in the refrigerator overnight. This cold proofing can also enhance flavor development.
In the morning, simply punch it down and proceed with shaping and the second rise as directed in the recipe. You can also freeze fried (unglazed) donuts for up to a month in an airtight container. Thaw at room temperature, then glaze and serve. For an even fresher experience, freeze the un-fried, shaped donuts after their second rise, then thaw partially and fry.
Frequently Asked Questions About Classic Glazed Donuts
Here are answers to common questions, helping you confidently tackle your Classic Glazed Donuts project.
Can I use instant yeast instead of active dry yeast?
Yes, you can substitute instant yeast for active dry yeast at a 1:1 ratio. If using instant yeast, you typically don’t need to activate it in warm milk first; you can add it directly to the flour mixture. However, performing the activation step with active dry yeast is a reliable way to ensure your yeast is alive and active before committing to the full recipe.
What if I don’t have a donut cutter?
No problem at all! You can easily improvise to shape your Classic Glazed Donuts. Use two round cookie cutters of different sizes (e.g., a 3-inch cutter for the main donut shape and a 1-inch cutter for the hole). Alternatively, the rim of a drinking glass can serve as the main cutter, and a small bottle cap or a piping nozzle can perfectly create the center hole.
Can I bake these donuts instead of frying them?
While you certainly can bake yeast donuts, they won’t yield the same classic fried texture and rich flavor that makes Classic Glazed Donuts so iconic and beloved. This recipe is specifically designed for deep-frying to achieve that signature airy, melt-in-your-mouth experience with a golden crust.
How do I know when the dough has risen enough for each proof?
For the first rise, the dough should visibly double in size. For the second rise (after shaping), the individual donuts should look significantly puffy and feel very light when gently lifted. A reliable “poke test” involves gently poking the dough with a floured finger; if the indentation slowly springs back halfway, it’s perfectly proofed. If it springs back completely, it needs more time. If it deflates, it’s likely over-proofed.
Can I make other glaze flavors?
Absolutely! The base vanilla glaze is incredibly versatile and serves as a fantastic foundation. You can easily customize it by adding cocoa powder for a rich chocolate glaze, espresso powder for a coffee-flavored glaze, citrus zest and a touch of juice for a tangy, bright glaze, or a different extract like almond or maple for varied flavors. Get creative with your Classic Glazed Donuts!
Ready to Impress? Share Your Homemade Classic Glazed Donuts!
You’ve now mastered the art of making irresistibly fluffy, bakery-quality Classic Glazed Donuts right in your own kitchen! The satisfaction of biting into a warm, homemade donut, perfectly soft and sweet, is truly unmatched and a delicious reward for your efforts.
Don’t keep this delicious secret to yourself! We encourage you to share your donut-making journey and beautiful creations with us. Snap a photo, tell us about your experience, and inspire others to discover the joy and deliciousness of homemade Classic Glazed Donuts. Happy baking!
What Else to Make?
Since you enjoyed these fluffy donuts, explore more satisfying baked goods and comforting dishes.
- For a filling meal that shares a similar comforting quality, try the Classic Chicken Pot Pie with its golden crust.
- If you’re looking for another breakfast or brunch favorite, the Hearty Sausage & Cheese Breakfast Bake offers a satisfying start to the day.
Classic Glazed Donuts
Course: DessertCuisine: American CuisineDifficulty: easy4
12 donuts40
minutes20
minutes180
minutesAmerican Cuisine
Ingredients
For the Donuts:
2 and 1/4 teaspoons active dry yeast (one packet)
1/2 cup warm milk (about 105-115F)
1/4 cup granulated sugar, plus 1 teaspoon
1/4 cup unsalted butter, melted
1 large egg, room temperature
1 teaspoon vanilla extract
1 teaspoon salt
2 and 1/2 cups all-purpose flour, plus more for dusting
Vegetable oil, for frying (about 6-8 cups)
For the Glaze:
2 cups powdered sugar
1/4 cup milk or water
1/2 teaspoon vanilla extract
Directions
- Activate the Yeast: In a large bowl, combine the warm milk and 1 teaspoon of granulated sugar. Sprinkle the active dry yeast over the top and let it sit for 5-10 minutes until foamy. This shows your yeast is alive and ready to make fluffy donuts!
- Mix the Dough: To the yeast mixture, add the remaining 1/4 cup granulated sugar, melted butter, egg, vanilla extract, and salt. Whisk briefly to combine. Gradually add the all-purpose flour, mixing with a wooden spoon or a stand mixer with a dough hook until a shaggy dough forms.
- Knead: Turn the dough out onto a lightly floured surface and knead for 5-7 minutes until it’s smooth and elastic. It should spring back slowly when poked. Alternatively, knead in a stand mixer for 3-5 minutes. Proper kneading creates the gluten structure for a fluffy donut.
- First Rise: Lightly grease a clean bowl with a little vegetable oil. Place the dough in the bowl, turning once to coat. Cover the bowl with plastic wrap or a clean kitchen towel and let it rise in a warm, draft-free place for 1 to 1 and a half hours, or until doubled in size. This initial rise is fundamental for airiness.
- Shape the Donuts: Gently punch down the risen dough to release the air. Turn it out onto a lightly floured surface. Roll the dough to about 1/2 inch thick. Using a 3-inch donut cutter or two different sized round cutters (one for the donut, one for the hole), cut out the donuts. Carefully transfer the cut donuts and holes to baking sheets lined with parchment paper. Do not crowd them.
- Second Rise (The Fluff Guarantee!): This is the most crucial step for achieving that incredible, airy texture. Cover the cut donuts loosely with plastic wrap or a clean kitchen towel and let them rise again in a warm, draft-free spot for another 30-45 minutes. They should look visibly puffy and almost doubled in size, feeling very light when gently lifted. Do not skip this step! Under-proofed donuts will be dense, and over-proofed can collapse and absorb too much oil.
- Fry the Donuts: Towards the end of the second rise (about 10-15 minutes before you expect them to be ready to fry), begin heating 3-4 inches of vegetable oil in a large, heavy-bottomed pot or Dutch oven over medium heat to 350F (175C). Use a candy thermometer to monitor the temperature precisely. Maintaining this exact temperature is key to preventing greasy, dense donuts and ensuring a golden, fluffy result.
- Cook Perfectly: Gently lift the risen donuts from the parchment paper (they will be delicate) and carefully slide 2-3 donuts into the hot oil, ensuring not to overcrowd the pot. Fry for 1-2 minutes per side, until golden brown. Use a slotted spoon or spider to carefully flip them. The precise oil temperature ensures they puff up beautifully without absorbing too much oil.
- Drain: Remove the fried donuts with a slotted spoon and place them on a wire rack set over a baking sheet to drain any excess oil.
- Make the Glaze: While the donuts are cooling slightly, whisk together the powdered sugar, milk or water, and vanilla extract in a shallow bowl until smooth.
- Glaze and Serve: Dip each warm donut into the glaze, turning to coat both sides. Place them back on the wire rack for the glaze to set. Serve immediately for the best fluffy, fresh taste!
Notes
- Precise oil temperature and proper proofing are critical for achieving fluffy results without a greasy texture.