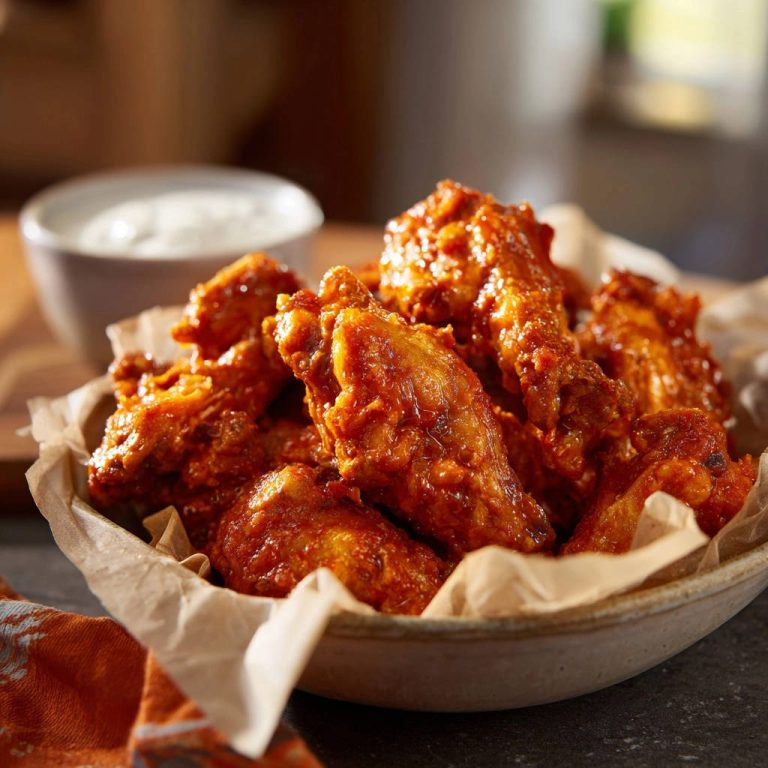
Sticky Glazed BBQ Chicken Wings: No More Soggy Skin!
As a lifelong wing enthusiast, I’ve battled countless batches of sad, soggy chicken wings, longing for that perfectly crisp skin and intensely sticky, caramelized glaze you get at your favorite BBQ joint.
This recipe for Sticky Glazed BBQ Chicken Wings is the culmination of years of testing, finally delivering restaurant-quality results right in your own kitchen – guaranteed to banish soggy skin and watery sauce forever.
Get ready for rave reviews and a new go-to recipe that will transform your wing game into legendary status, perfect for any gathering.
Get Our Best Recipes Weekly!
Join thousands of food lovers and get delicious recipes delivered to your inbox.
Beyond Basic: Why This Recipe Transforms Your Wing Game
The Crispy Skin Secret You’ve Been Waiting For
Soggy wings are a common culinary heartbreak, often caused by trapped moisture. Our method tackles this head-on with a multi-pronged approach that ensures every wing achieves an enviable crispness.
Thorough drying, strategic use of a wire rack for optimal air circulation, and a crucial initial high-heat bake work in harmony to render fat and crisp the skin before any glaze is even applied.
Unlocking the Ultimate Sticky, Caramelized Glaze
Achieving a truly sticky, flavorful glaze that adheres perfectly, rather than just sliding off, is an art. This recipe meticulously guides you through simmering your barbecue sauce until it thickens to an ideal, rich consistency.
The innovative two-stage glazing process, combined with a final high-temperature bake, ensures a beautiful caramelization and a deep, complex flavor that truly sticks to every delectable wing.
Effortless Entertaining with Irresistible Wings
These Sticky Glazed BBQ Chicken Wings are the ultimate crowd-pleaser, perfect for game days, casual get-togethers, or an impressive family dinner.
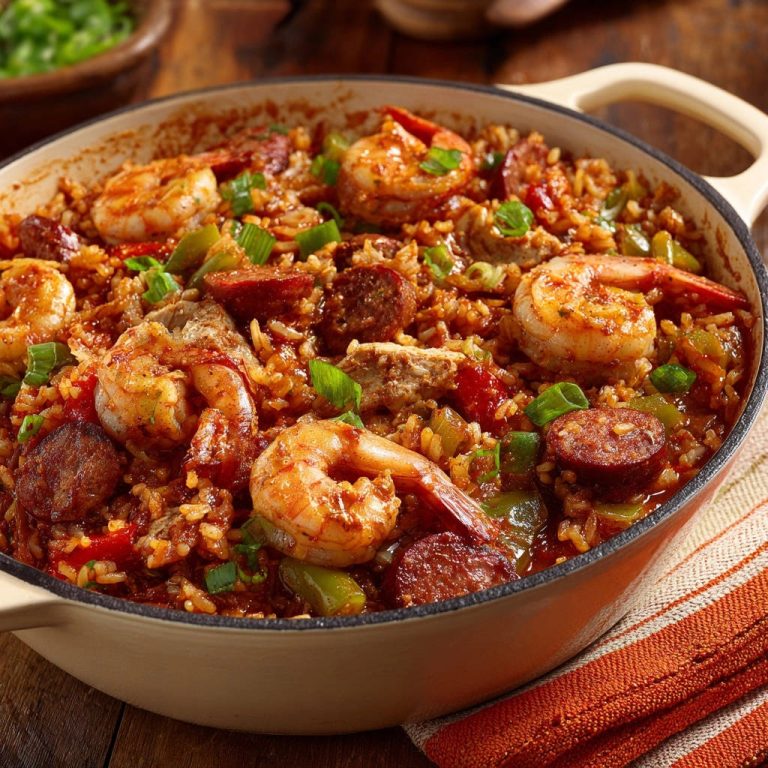
For a complete meal with chicken and veggies, explore sheet pan chicken and roasted veggies.
The robust flavors and satisfying texture guarantee an unforgettable eating experience that will have everyone reaching for more. You’ll be amazed at how easily you can create such an irresistible dish that feels restaurant-worthy.
The Building Blocks of Flavor: What You’ll Need
The Essential Wing Prep
We start with 2 pounds of chicken wings, separated into drumettes and flats, as they are easier to handle and cook more evenly. Patting them extremely dry is non-negotiable for crispy skin.
A tablespoon of neutral oil, like vegetable or canola, helps the seasonings adhere and promotes browning during the initial bake.
Pantry Staples for the Flavor Foundation
A simple yet effective blend of seasonings forms the base flavor. 1 teaspoon of salt and 1/2 teaspoon of black pepper are fundamental enhancers.
1 teaspoon of garlic powder and 1 teaspoon of onion powder infuse the wings with savory aromatic notes. 1/2 teaspoon of smoked paprika adds a beautiful color and a subtle smoky depth, complementing the BBQ glaze.
Crafting the Signature Sticky Glaze Base
The heart of our sticky glaze is 1 1/2 cups of good quality barbecue sauce. Choose a brand you love, as its flavor will shine through.
Optional but highly recommended is 2 tablespoons of brown sugar, which aids in caramelization, contributing to that desirable deep color and extra stickiness.
Finally, fresh chopped parsley provides a vibrant garnish, adding a touch of freshness and color to the finished dish.
What to Pair with Your Sticky Wings
Round out your meal with these complementary dishes that go wonderfully with BBQ chicken wings.
- For a creamy, comforting addition, try these Southern Baked Grits, featuring a satisfying golden crust.
- Enjoy the tender, flavorful depth of Smoked Turkey Collard Greens, a classic pairing that balances the richness of the wings.
Gearing Up: Essential Kitchen Tools for Perfect Wings
Large Baking Sheet: Essential for spreading wings in a single layer for even cooking, preventing overcrowding.
Aluminum Foil: For easy cleanup after baking, making your post-cooking routine much simpler.
Oven-Safe Wire Rack: Absolutely critical for air circulation around each wing. This prevents the bottoms from becoming soggy and promotes uniform crispness.
Large Mixing Bowls: Needed for both seasoning the raw wings and later for tossing the hot, crispy wings with the delicious glaze.
Small Saucepan: The perfect vessel for gently simmering and thickening your barbecue glaze to the ideal sticky consistency.
Tongs or Spatula: Indispensable for safely flipping wings during baking and for gently tossing them without damaging their crispy skin.
Your Step-by-Step Guide to Sticky Glazed BBQ Chicken Wings Perfection
Prepping the Wings for Optimal Crispness
Begin by preheating your oven to 400°F (200°C). Line a large baking sheet with foil, then place an oven-safe wire rack over it; this setup is crucial for success.
Pat the chicken wings extremely dry with paper towels. This step is paramount; any lingering moisture will steam the skin rather than allowing it to crisp up.
In a large bowl, toss the meticulously dried wings with 1 tablespoon of neutral oil, 1 teaspoon salt, 1/2 teaspoon black pepper, 1 teaspoon garlic powder, 1 teaspoon onion powder, and 1/2 teaspoon smoked paprika until every piece is evenly coated.
The Initial Bake: Setting the Crispy Foundation
Arrange the seasoned wings in a single layer on the prepared wire rack, ensuring that no pieces are touching. This spacing allows hot air to circulate freely around each wing.
Bake for 30-35 minutes, or until the wings are fully cooked through and the skin has begun to render its fat and crisp up nicely.
This initial bake is vital; it prevents soggy skin later by establishing a firm, crispy texture before the sticky glaze is introduced.
Simmering Your Way to a Sticky Glaze
While the wings are baking, turn your attention to the glaze. In a small saucepan over medium heat, combine 1 1/2 cups of barbecue sauce and the optional 2 tablespoons of brown sugar.
Bring this mixture to a gentle simmer, stirring occasionally, and allow it to cook for about 5-7 minutes. The sauce should visibly thicken and bubble gently.
This simmering process concentrates the flavors and is the secret to achieving that coveted super-sticky consistency for your Sticky Glazed BBQ Chicken Wings.
The First Glaze Application: Building Flavor
Once the wings are mostly cooked and have developed a slight crisp, carefully remove them from the oven. Increase the oven temperature to 425°F (220°C) for the final caramelization stage.
Transfer the hot, partially baked wings to a clean large bowl and pour approximately half of your now-thickened barbecue glaze over them.
Toss the wings gently but thoroughly to ensure every piece is coated with this initial layer of flavorful, sticky sauce.
Finishing Bake: The Art of Caramelization
Return the freshly glazed wings to the wire rack on the baking sheet, again ensuring they are arranged in a single, uncrowded layer.
Bake for another 10-15 minutes, flipping them once halfway through. This baking allows the glaze to set, intensify in flavor, and caramelize beautifully onto the wings.
For an even more intense, glistening, and sticky glaze, brush the remaining sauce onto the wings during the final 5 minutes of baking, building up those layers of flavor.
Watch them very closely during this stage! You want the glaze to caramelize to a gorgeous deep color and achieve a slightly charred exterior without burning, indicating perfect sticky glazed BBQ chicken wings.
Garnish and Serve: The Final Touch
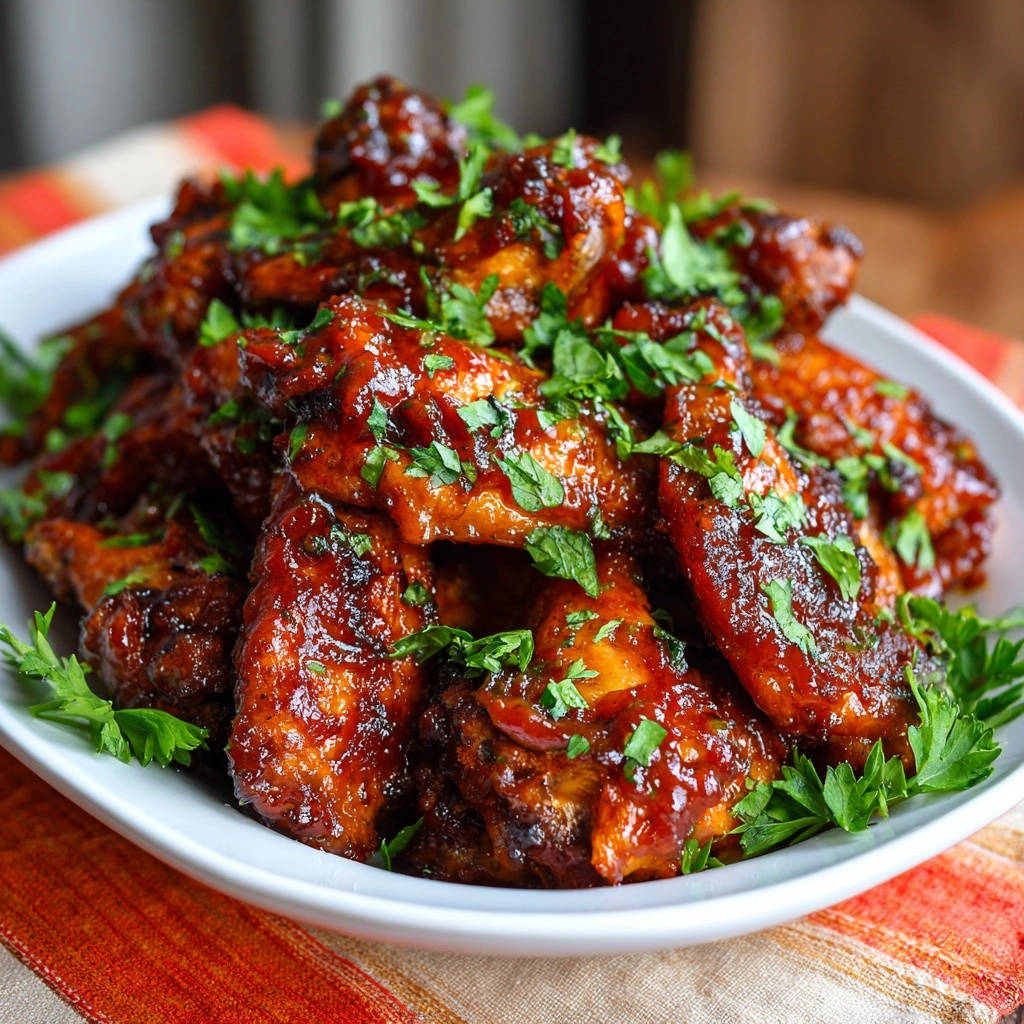
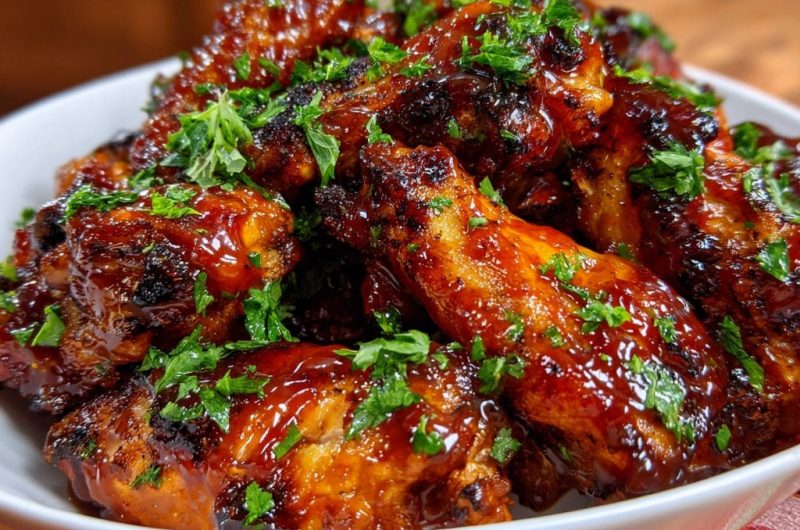
Remove the completed Sticky Glazed BBQ Chicken Wings from the oven. Allow them to rest for just a couple of minutes; this brief pause helps the hot glaze to firmly set.
Transfer the irresistible wings to a serving platter. For a fresh finish and a pop of color, sprinkle them generously with fresh chopped parsley.
Serve these perfectly glazed, crispy Sticky Glazed BBQ Chicken Wings immediately and prepare for the enthusiastic compliments that are sure to follow!
Chef’s Secrets: Mastering the Art of Sticky Glazed BBQ Chicken Wings
The Indispensable Dry-Pat Technique: Don’t underestimate the power of thoroughly patting your chicken wings dry with paper towels. Any residual moisture will steam rather than crisp, leading to that dreaded soggy skin, even with a wire rack.
Harnessing the Power of Air Circulation: Always use a wire rack set over a baking sheet. This allows hot air to circulate all around each wing, rendering fat and crisping the skin evenly. Without it, the bottoms can become soft and greasy, ruining the texture of your Sticky Glazed BBQ Chicken Wings.
Layering the Glaze for Maximum Stickiness: Our two-step glazing process is key. The initial toss provides a robust base layer of flavor, and the final brush-on during the last minutes of baking builds that extra thick, caramelized, and truly sticky coating that is the hallmark of perfect BBQ wings.
Avoiding Burnt Glaze: Watching for Perfection: BBQ sauce, especially with added brown sugar, can burn quickly at high temperatures. Keep a close eye on your wings during the final baking stage. You want a deep, caramelized color, not a charred black; if they’re browning too fast, you can loosely tent them with foil to prevent burning.
Solved! Common Wing-Making Challenges
Wings Not Crispy Enough?
If your wings aren’t reaching optimal crispness, revisit your initial prep. Ensure you pat the wings extremely dry with paper towels, and critically, always use a wire rack for proper air circulation.
Also, confirm your oven temperature is accurate and that the initial bake at 400°F (200°C) is sufficient to render fat and achieve that foundational crispness before any glaze is applied.
Glaze Too Runny or Not Sticking?
A runny glaze often indicates the sauce wasn’t simmered long enough. Cook the BBQ sauce and brown sugar for the full 5-7 minutes, allowing it to visibly thicken before applying it to your wings.
Additionally, ensure your base BBQ sauce is of good quality and already reasonably thick. Our two-stage glazing method also significantly helps to build layers of stickiness onto the Sticky Glazed BBQ Chicken Wings.
Uneven Cooking or Burning?
Uneven cooking can result from overcrowding the baking sheet. Always arrange wings in a single layer on the wire rack, ensuring no pieces are touching, to allow for even heat distribution around each wing.
If the glaze on your wings is burning, your oven might run hot, or you might be baking them too long during the final stage. Watch them closely and reduce baking time if needed; a slightly lower temperature for the final glaze bake (e.g., 400°F instead of 425°F) can also help if burning is a recurring issue.
What to Serve with Your Incredible Sticky Glazed BBQ Chicken Wings
These Sticky Glazed BBQ Chicken Wings are incredibly versatile and pair wonderfully with a variety of sides. For a truly classic barbecue experience, consider serving them alongside a creamy coleslaw, a vibrant, tangy potato salad, or crisp, sweet corn on the cob.
For more crowd-pleasing sides, consider this fluffy Jambalaya-style rice.
If you’re aiming for a lighter meal, a fresh green salad tossed with a bright vinaigrette offers a refreshing contrast to the rich, sticky glaze. Don’t forget to have plenty of extra napkins on hand for sticky fingers – it’s part of the fun!
Make Ahead & Storage Tips for Busy Cooks
Can I Make These Wings Ahead of Time?
You can certainly prepare and partially bake the wings (following Step 2) ahead of time. Allow them to cool completely, then store them uncovered in the refrigerator for up to 2 days.
When ready to serve, reheat them on the wire rack in a 400°F (200°C) oven until warmed through and crispy, then proceed with the glazing steps. The barbecue glaze can also be made ahead and stored in an airtight container in the refrigerator for up to a week, ready to be gently reheated before coating the wings.
Storing Leftover Sticky Glazed BBQ Chicken Wings
Store any leftover Sticky Glazed BBQ Chicken Wings in an airtight container in the refrigerator for up to 3-4 days. Ensure they are fully cooled before sealing the container to prevent condensation, which can lead to sogginess.
Reheating for Best Results
For the best reheating results that maintain crispness and stickiness, preheat your oven to 375°F (190°C). Place the wings on a wire rack over a baking sheet and heat for 10-15 minutes, or until warmed through and the glaze is re-sticky and caramelized.
Avoid reheating in the microwave, as this method will inevitably make the skin soggy and diminish the delicious texture of your Sticky Glazed BBQ Chicken Wings.
Your Burning Questions, Answered!
Can I use frozen chicken wings?
Yes, you can use frozen chicken wings, but they MUST be fully thawed and patted extremely dry before seasoning and baking. Attempting to bake them from frozen will result in soggy skin and uneven cooking, ruining the desired texture.
What kind of BBQ sauce works best?
The “good quality barbecue sauce” is subjective, but generally, a thicker, richer sauce will yield the best results for a sticky glaze. Avoid very thin or watery sauces, as they won’t adhere as effectively. Feel free to use your favorite brand or even a cherished homemade sauce!
How can I achieve extra spice?
To add more heat, incorporate a pinch of cayenne pepper or a dash of your favorite chili powder into your dry spice blend for the wings. You could also stir in a teaspoon of sriracha or a few drops of your preferred hot sauce directly into the simmering barbecue glaze for an extra kick.
Is it possible to prepare these wings in advance?
As mentioned in our “Make Ahead & Storage Tips,” you can certainly prepare parts of this recipe in advance! Baking the wings ahead of time and storing the pre-made glaze will save significant time on the day of serving, making entertaining a breeze.
Ready to Ditch the Takeout? Your Homemade Wing Journey Starts Now!
You’ve now unlocked the secrets to perfectly crispy, gloriously sticky Sticky Glazed BBQ Chicken Wings that will rival any restaurant’s offering. No more settling for soggy skin or drippy glaze – your homemade wings are about to become legendary.
Gather your ingredients, follow these proven steps, and prepare for a chorus of compliments. We encourage you to try this recipe, share your creations, and let us know how your ‘Sticky Glazed BBQ Chicken Wings’ turned out – we can’t wait to hear about your success!
Sticky Glazed BBQ Chicken Wings
Course: Main CourseCuisine: American CuisineDifficulty: easy4
servings15
minutes50
minutes60
minutesAmerican Cuisine
Ingredients
2 pounds chicken wings, separated into drumettes and flats
1 tablespoon neutral oil, like vegetable or canola
1 teaspoon salt
1/2 teaspoon black pepper
1 teaspoon garlic powder
1 teaspoon onion powder
1/2 teaspoon smoked paprika
1 1/2 cups good quality barbecue sauce
2 tablespoons brown sugar (optional, for extra caramelization)
Fresh chopped parsley for garnish
Directions
- Prepare the Wings: Preheat your oven to 400°F (200°C). Line a large baking sheet with foil for easy cleanup, then place an oven-safe wire rack over it. This rack is key for air circulation! Pat the chicken wings extremely dry with paper towels. This crucial step helps achieve crisp skin. In a large bowl, toss the dried wings with neutral oil, salt, pepper, garlic powder, onion powder, and smoked paprika until evenly coated.
- Crisp the Wings: Arrange the seasoned wings in a single layer on the prepared wire rack, ensuring no pieces are touching. Bake for 30-35 minutes, or until the wings are fully cooked and the skin has rendered fat and started to crisp up nicely. This initial bake is vital for preventing soggy skin later!
- Prepare the Glaze: While the wings are baking, in a small saucepan over medium heat, combine the barbecue sauce and optional brown sugar. Bring to a gentle simmer, stirring occasionally, and let it cook for about 5-7 minutes, until the sauce has slightly thickened and is bubbling gently. This concentrates the flavor and helps it become super sticky.
- Glaze and Caramelize: Once the wings are mostly cooked and slightly crispy, remove them from the oven. Increase the oven temperature to 425°F (220°C). In a clean large bowl, add the hot wings and pour about half of the thickened barbecue glaze over them. Toss gently to coat every wing thoroughly.
- Finish Baking: Return the glazed wings to the wire rack on the baking sheet. Bake for another 10-15 minutes, flipping them once halfway through. For an even more intense sticky glaze, brush the remaining sauce onto the wings during the last 5 minutes of baking. Watch them closely to ensure the sauce caramelizes to a beautiful deep color without burning. You want that gorgeous, sticky, slightly charred exterior.
- Serve: Remove the wings from the oven. Let them rest for a couple of minutes to let the glaze set. Transfer to a serving platter, sprinkle generously with fresh chopped parsley, and serve immediately. Prepare for rave reviews!
Notes
- Pat wings extremely dry and use a wire rack for guaranteed crisp skin.