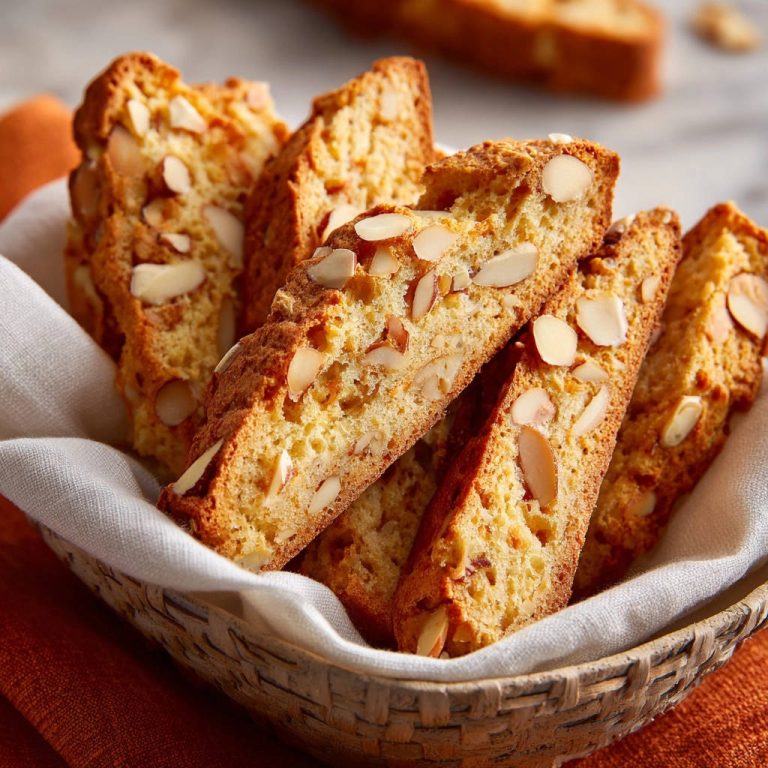
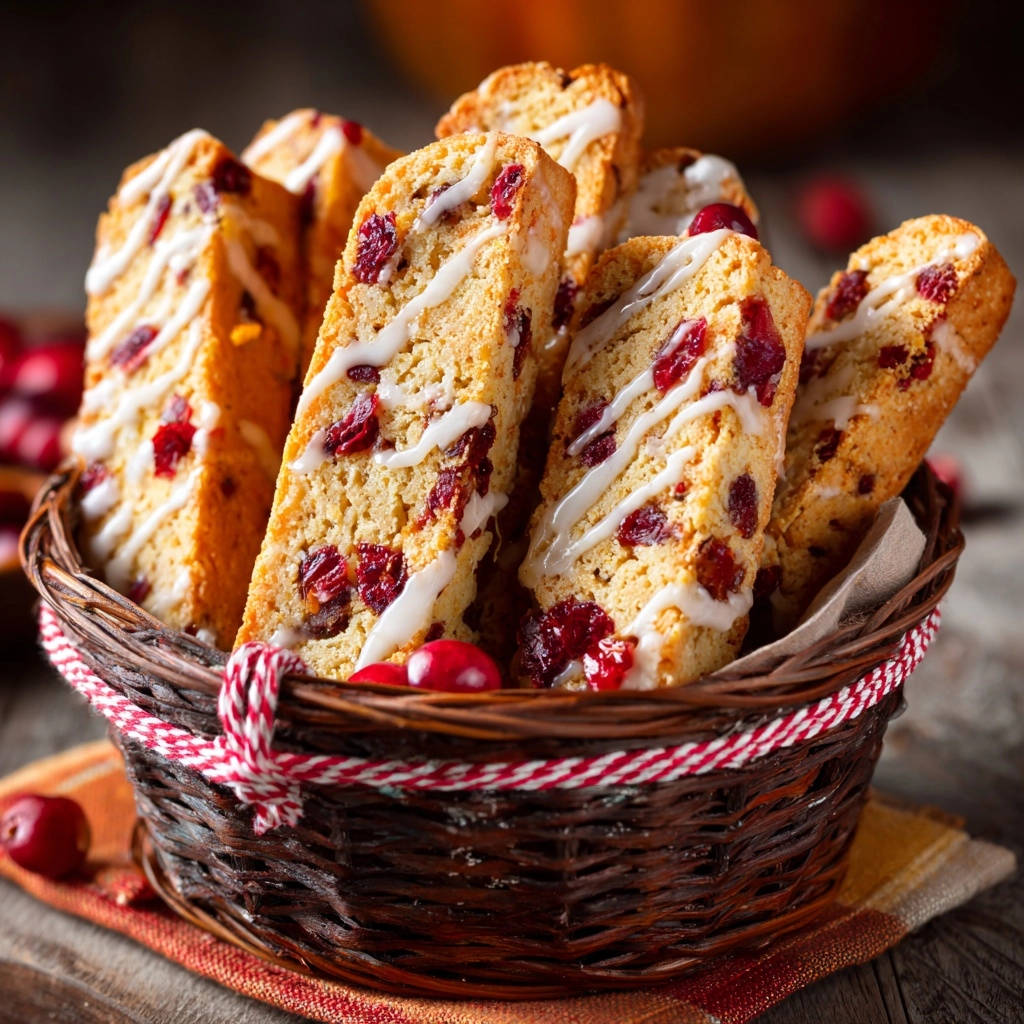
Cranberry Orange Biscotti: Perfectly Crisp, Never Hard!
As a seasoned baker, I’ve heard too many stories (and experienced a few myself!) of beautiful biscotti turning into regrettable, tooth-chipping bricks. That’s why I’m sharing my expert-perfected Cranberry Orange Biscotti recipe, featuring a crucial technique that guarantees an exquisitely crisp yet wonderfully tender interior every single time.
Get ready to impress with these truly exceptional, never-hard biscotti, perfect for dunking or simply savoring.
The Secret to Perfectly Crisp Cranberry Orange Biscotti (No More Bricks!)
What sets this Cranberry Orange Biscotti recipe apart is a carefully developed baking method focused on preventing the dreaded “rock-hard” texture, a common pitfall in biscotti making. We achieve an ideal crispness that yields gently, rather than snaps aggressively, offering a truly delightful bite.
Get Our Best Recipes Weekly!
Join thousands of food lovers and get delicious recipes delivered to your inbox.
The magic lies in controlling moisture loss, creating a tender crumb that still has that signature snap. This technique, combined with the vibrant flavors of sweet cranberries and bright orange, transforms a classic Italian cookie into an irresistible treat.
Beyond its perfect texture, the aroma alone is enough to transport you to a cozy, festive kitchen. These twice-baked cookies are a versatile delight, equally perfect for a morning coffee ritual, an afternoon tea, or as an elegant addition to any dessert platter.
Building Blocks of Flavor: Essential Ingredients for Your Biscotti
The Dry Foundation: Flour, Leavening, and Salt
All-purpose flour provides the essential structure for your biscotti, giving them their characteristic chew and form. Baking powder acts as our leavening agent, ensuring a gentle lift and a slightly open crumb that prevents density.
A touch of salt is crucial for balancing the sweetness and enhancing all the other flavors, making each bite more complex and satisfying.
Sweetness & Structure: Sugars and Eggs
The combination of granulated sugar and light brown sugar offers a nuanced sweetness and helps achieve that tender interior. Brown sugar, with its molasses content, adds moisture and a subtle caramel note.
Large eggs are vital binders, emulsifiers, and enrichers, contributing to both the structure and the lovely golden color of the biscotti. Their presence also provides that slightly higher liquid content essential for avoiding an overly dry dough.
Aromatic Delights: Butter, Vanilla & Orange Zest
Unsalted butter adds richness and a delicate buttery flavor, contributing to the overall tender texture. Vanilla extract provides a warm, classic sweetness that complements the other ingredients beautifully.
The star of the aroma, fresh orange zest, infuses the dough with bright, intense citrus notes. Always opt for fresh zest, as it delivers a vibrant, unmistakable flavor that dried zest simply cannot match.
Burst of Flavor: Dried Cranberries and Candied Orange Peel
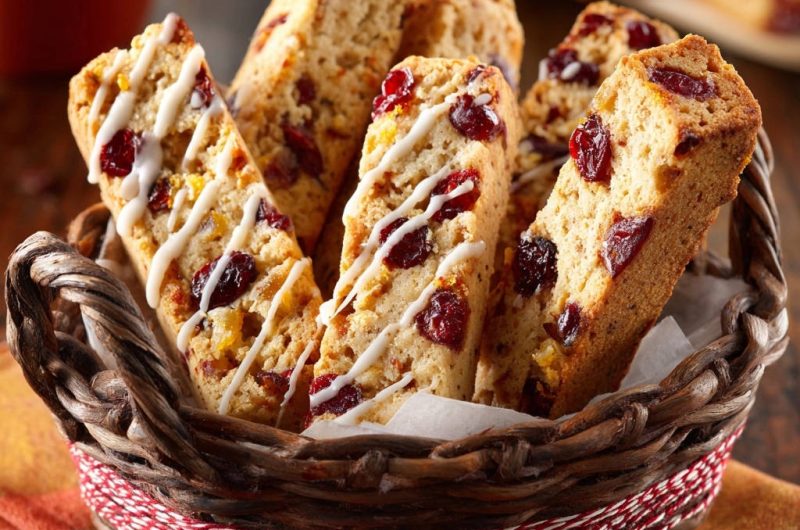
Dried cranberries bring a delightful tartness and chewy texture, creating a beautiful contrast with the sweetness of the dough. Their crimson color also adds a festive visual appeal.
Chopped candied orange peel provides concentrated bursts of sweet, aromatic citrus, amplifying the orange flavor and adding another layer of chewy texture. This inclusion elevates the cranberry orange biscotti to gourmet status.
The Drizzly Finish: Simple Glaze Components
A simple glaze made from powdered sugar, a splash of milk or water, and a hint of vanilla extract provides a beautiful finish. It adds an extra touch of sweetness and visual elegance without overwhelming the biscotti’s inherent flavors.
Essential Kitchen Tools for Biscotti Baking Success
-
Large Mixing Bowls: You’ll need at least two – one for your dry ingredients and another for your wet. This allows for thorough mixing before combining.
-
Whisk & Spatula/Wooden Spoon: A whisk ensures your dry ingredients are evenly blended and your wet ingredients are smooth. A sturdy spatula or wooden spoon is perfect for gently folding the dough to avoid overmixing.
-
Baking Sheet & Parchment Paper: A reliable baking sheet ensures even heat distribution. Parchment paper is indispensable for preventing sticking and making cleanup a breeze, especially for shaping and transferring the delicate logs.
-
Sharp Serrated Knife: This is arguably the most crucial tool for biscotti. A sharp serrated knife allows for clean, crumb-free slices, essential for perfectly shaped cranberry orange biscotti after the first bake.
-
Wire Cooling Rack: Essential for allowing your biscotti to cool completely and crisp up properly after the second bake. Air circulation is key to achieving that ultimate crispness.
Your Detailed Path to Perfectly Baked Cranberry Orange Biscotti
-
Preparation is Key: Preheat & Line Your Sheet
Preheat your oven to a precise 350°F (175°C) and line a baking sheet with parchment paper. This vital first step ensures your oven is at the correct temperature for the initial bake and prevents your dough from sticking.
-
Combine the Dry Ingredients
In a large bowl, whisk together the all-purpose flour, baking powder, and salt until thoroughly combined. Setting this aside ensures these leavening and seasoning agents are evenly distributed throughout your dough, which is crucial for a consistent rise and flavor.
-
Whisk Together the Wet Mixture
In a separate medium bowl, whisk granulated sugar, brown sugar, eggs, melted and cooled unsalted butter, vanilla extract, and fresh orange zest until smooth and well combined. This slightly higher liquid content is a key factor in achieving a tender biscotti texture later, preventing them from becoming overly dry.
-
Gently Combine Wet and Dry
Pour the wet ingredients into the dry ingredients. Mix with a wooden spoon or spatula until just combined, being careful not to overmix the dough. A slightly shaggy dough is perfectly acceptable and indicates you haven’t overdeveloped the gluten. Gently fold in the dried cranberries and candied orange peel until they are evenly distributed throughout the dough, ensuring every bite is flavorful.
-
Shape Your Biscotti Logs
Lightly flour your hands to prevent the sticky dough from adhering. Divide the dough in half. On the prepared baking sheet, shape each half into a log approximately 10-12 inches long and 2 inches wide, leaving adequate space between them for even baking and expansion.
-
The Initial Bake: Setting the Foundation
Bake for 25-30 minutes, or until the logs are lightly golden brown and feel firm to the touch. The goal here is to bake them through and set their shape without over-drying them at this crucial initial stage, laying the groundwork for tender biscotti.
-
The Crucial Cool-Down: Your Secret to Perfect Texture
Immediately reduce the oven temperature to 300°F (150°C). Remove the logs from the oven and let them cool on the baking sheet for at least 15-20 minutes, or until they are cool enough to handle comfortably but still slightly warm. Resist the urge to slice them hot! This proper cooling is the secret step; it prevents crumbling and allows for clean, even cuts, which leads to uniform drying in the second bake and ultimately, perfectly crisp biscotti.
-
Precise Slicing for Second Bake
Carefully transfer one cooled log to a cutting board. Using a sharp serrated knife, gently slice the log diagonally into 1/2-inch thick pieces. Repeat this process with the second log, ensuring consistent thickness for even crisping.
-
The Second Bake: Achieving Ultimate Crispness
Arrange the sliced biscotti cut-side down on the same parchment-lined baking sheet. Return the baking sheet to the preheated 300°F (150°C) oven. Bake for another 20-25 minutes, flipping them halfway through (around 10-12 minutes), until they are golden brown and feel firm and dry to the touch.
This low and slow second bake is what removes the remaining moisture and creates that perfect, satisfying crispness without making them hard as a rock. Keep a close eye on them; if they still feel slightly soft, bake for an additional 5-10 minutes, checking frequently to avoid overbaking.
-
Cooling for Final Crispness
Remove the biscotti from the oven and immediately transfer them to a wire rack to cool completely. They will continue to crisp up further as they cool, achieving their signature, delicate crunch that makes these cranberry orange biscotti so delightful.
-
Prepare the Drizzly Glaze
While the biscotti are cooling, prepare the glaze: In a small bowl, whisk together the powdered sugar, 1-2 tablespoons of milk or water, and 1/4 teaspoon of vanilla extract until smooth and drizzle-able. Adjust consistency as needed: add a tiny bit more liquid if too thick, or a tiny bit more powdered sugar if too thin, for a perfect drizzle.
-
The Grand Finale: Glaze & Enjoy!
Once the biscotti are completely cool, drizzle the prepared glaze over them in a decorative pattern. Let the glaze set completely before serving or storing in an airtight container. Enjoy your perfectly crisp, never-hard cranberry orange biscotti!
Chef’s Secrets: Elevate Your Cranberry Orange Biscotti Game
-
The Magic of Fresh Orange Zest
Always use fresh orange zest for the most vibrant and authentic citrus flavor in your biscotti. Zest only the bright orange part of the peel, carefully avoiding the bitter white pith underneath, for pure, intense aroma.
-
Don’t Overmix the Dough!
Overmixing develops gluten, which can lead to a tougher, denser biscotti texture, counteracting our goal of tender interiors. Mix until just combined; a slightly shaggy or sticky dough is perfectly fine and often indicates tenderness to come.
-
Invest in a Sharp Serrated Knife
A sharp serrated knife is indispensable for clean, crumb-free slices of your delicate biscotti logs. Use a gentle sawing motion rather than pressing straight down, which can cause the partially baked dough to crumble, ruining its shape.
-
Cooling Time is Sacred (Between Bakes)
Resist the urge to rush the crucial cooling process between the first bake and slicing. This step is fundamental to preventing breakage and ensuring perfectly shaped biscotti that hold their form during the second bake, leading to consistent crispness.
-
Mastering the Second Bake for Ultimate Crispness
The second, lower-temperature bake is where the true crispness of biscotti is achieved, by gently drying them out. Watch them closely, as oven temperatures can vary, and don’t hesitate to bake a few extra minutes if they still feel slightly soft; this ensures perfect crispness.
-
Get Creative with Add-ins (or Glaze Variations!)
While this recipe is a masterpiece as is, feel free to experiment! Consider adding a different citrus zest, nuts like pistachios or almonds, or even a white chocolate drizzle instead of the vanilla glaze for a unique twist to your Italian biscotti.
For another take on this classic, try cranberry white chocolate biscotti for a delightful twist.
Solving Your Biscotti Woes: Common Problems & Quick Fixes
Problem: My Biscotti are Too Hard!
This is often due to overmixing the dough, which develops too much gluten, overbaking during the first stage, or failing to allow proper cooling between the two bakes. Ensure you follow the specific cooling and baking temperature instructions carefully to maintain tenderness and avoid a rock-hard result.
Problem: My Biscotti Crumbled When I Sliced Them.
This usually happens if you slice the logs while they are still too hot, or if your knife isn’t sharp enough. Ensure the logs have cooled adequately as per the instructions, and always use a very sharp serrated knife with a gentle sawing motion for clean cuts.
Problem: My Biscotti aren’t Crispy Enough.
They likely need more time in the second bake. The “low and slow” approach is crucial for gently removing moisture. Don’t be afraid to extend the baking time by 5-10 minutes, checking frequently until they are firm and dry to the touch, indicating ultimate crispness.
Problem: The Dough Was Too Sticky to Handle.
A slightly sticky dough is normal for biscotti, indicating proper moisture content. Ensure your hands are lightly floured before shaping the logs to prevent sticking. Resist the urge to add too much extra flour to the dough itself, as this can lead to a dry finished product.
Beyond the Bake: Enjoying Your Cranberry Orange Biscotti
Perfect Pairings: How to Enjoy Your Biscotti
Cranberry Orange Biscotti are quintessential dunking cookies, perfectly complementing a strong cup of coffee or a frothy latte. Their crisp texture softens beautifully when dipped, releasing their vibrant flavors.
They are also excellent with a warm cup of herbal tea or a rich, dark hot chocolate. For an elevated experience, try them alongside a glass of vin santo or another sweet dessert wine, making for a sophisticated end to a meal.
Complementary Bites
Round out your meal with these delightful recipes featuring similar bright flavors.
- For a refreshing salad, consider the Juicy Cranberry Apple Chicken Salad, perfect for a lighter option.
- If you enjoy the combination of fruit and baked goods, try the Cranberry Pistachio Loaf for another sweet treat.
Storing for Optimal Freshness
To maintain their signature crispness and fresh flavor, store your Cranberry Orange Biscotti in an airtight container at room temperature. A cookie tin or a glass jar with a tight-fitting lid works perfectly to keep them fresh.
Avoid storing them near sources of humidity, as this can cause them to soften prematurely. When stored correctly, these delightful treats can last for several weeks, ready for whenever a craving strikes.
Can You Make Biscotti Ahead? (Freezing Options)
Biscotti are fantastic for making ahead! You can freeze the shaped dough logs (before the first bake) wrapped tightly in plastic wrap for up to 3 months. Thaw them slightly before baking as directed.
Fully baked and cooled Cranberry Orange Biscotti can also be frozen, with or without the glaze. Arrange them in a single layer on a baking sheet to freeze solid, then transfer to an airtight container or freezer bag for up to 2 months. Thaw at room temperature before enjoying.
Your Top Cranberry Orange Biscotti Questions Answered
Can I substitute dried cranberries for other fruits?
Yes, absolutely! Dried cherries, blueberries, or even finely chopped dried apricots would make delicious substitutions, offering different flavor profiles that still complement the orange. Just ensure they are similar in size to the cranberries for even distribution and texture.
If you’re exploring different dried fruits for this recipe, you might also enjoy the unique sweetness of cranberry white chocolate fudge.
What if I don’t have candied orange peel?
If candied orange peel isn’t available, you can omit it entirely and perhaps slightly increase the amount of fresh orange zest for a stronger citrus note. Alternatively, a tablespoon of finely chopped crystallized ginger could offer a delightful, spicy twist that pairs wonderfully with the orange and cranberry.
Is this recipe naturally gluten-free?
No, this recipe is designed with all-purpose flour and is not naturally gluten-free. However, biscotti recipes can often be adapted by using a good quality 1:1 gluten-free baking flour blend. Look for blends that include xanthan gum for best results in terms of structure and texture.
How long do Cranberry Orange Biscotti last?
Stored in an airtight container at room temperature, these biscotti will maintain their crispness and fresh flavor for up to 2-3 weeks. In fact, many find their flavor improves slightly over the first day or two as the flavors meld, making them perfect holiday treats.
Can I skip the glaze?
You certainly can! While the glaze adds an extra layer of sweetness and a beautiful visual touch, the biscotti are incredibly delicious on their own. For a simpler finish, a light dusting of powdered sugar is also a lovely option that highlights their rustic charm.
Ready to Bake? Share Your Cranberry Orange Biscotti Masterpiece!
Now that you’re armed with all the expert tips and precise steps, you’re ready to create the most incredible Cranberry Orange Biscotti. This recipe isn’t just about baking; it’s about crafting moments of pure, crisp joy with every bite.
I encourage you to embrace the process, trust the technique, and savor the stunning results. Don’t forget to share your beautifully twice-baked cookies with loved ones, or simply keep them all to yourself – you’ve earned it! I can’t wait to hear how these become your new favorite holiday treats.
Cranberry Orange Biscotti
Course: DessertCuisine: Italian CuisineDifficulty: easy4
approximately 40-48 biscotti20
minutes50
minutes120
minutesItalian Cuisine
Ingredients
2 cups all-purpose flour
1 teaspoon baking powder
1/4 teaspoon salt
1/2 cup granulated sugar
1/4 cup light brown sugar, packed
2 large eggs
2 tablespoons unsalted butter, melted and cooled
1 teaspoon vanilla extract
1 teaspoon orange zest (from about 1 medium orange)
1/2 cup dried cranberries
1/4 cup chopped candied orange peel
For the Glaze:
1/2 cup powdered sugar
1-2 tablespoons milk or water
1/4 teaspoon vanilla extract
Directions
- Preheat your oven to 350°F (175°C). Line a baking sheet with parchment paper.
- In a large bowl, whisk together the flour, baking powder, and salt. Set aside.
- In a separate medium bowl, whisk together the granulated sugar, brown sugar, eggs, melted butter, vanilla extract, and orange zest until smooth and well combined. This slightly higher liquid content is key to avoiding overly dry dough later.
- Pour the wet ingredients into the dry ingredients. Mix with a wooden spoon or spatula until just combined. Be careful not to overmix; a slightly shaggy dough is fine. Gently fold in the dried cranberries and candied orange peel until evenly distributed.
- Lightly flour your hands. Divide the dough in half. On the prepared baking sheet, shape each half into a log about 10-12 inches long and 2 inches wide, leaving some space between them.
- Bake for 25-30 minutes, or until the logs are lightly golden brown and firm to the touch. The goal here is to bake them through without drying them out too much.
- THIS IS THE CRUCIAL STEP for perfectly crisp, not hard, biscotti! Remove the logs from the oven and immediately reduce the oven temperature to 300°F (150°C). Let the logs cool on the baking sheet for at least 15-20 minutes, or until they are cool enough to handle but still slightly warm. Resist the urge to slice them hot! Cooling them properly prevents crumbling and allows for clean, even cuts, which leads to even drying later.
- Carefully transfer one cooled log to a cutting board. Using a sharp serrated knife, gently slice the log diagonally into 1/2-inch thick pieces. Repeat with the second log.
- Arrange the sliced biscotti cut-side down on the same parchment-lined baking sheet.
- Return the baking sheet to the preheated 300°F (150°C) oven. Bake for another 20-25 minutes, flipping them halfway through (around 10-12 minutes), until they are golden brown and feel firm and dry to the touch. Keep a close eye on them during this second bake. This low and slow second bake is what removes the moisture and creates that perfect, satisfying crispness without making them hard as a rock. If they still feel slightly soft, bake for an additional 5-10 minutes, checking frequently.
- Remove from the oven and transfer the biscotti to a wire rack to cool completely. They will crisp up further as they cool.
- While cooling, prepare the glaze: In a small bowl, whisk together the powdered sugar, milk (or water), and vanilla extract until smooth and drizzle-able. If it’s too thick, add a tiny bit more liquid; if too thin, add a tiny bit more powdered sugar.
- Once the biscotti are completely cool, drizzle the glaze over them. Let the glaze set before serving or storing in an airtight container. Enjoy your perfectly crisp, never-hard biscotti!
Notes
- Features a crucial two-bake technique for crisp, tender biscotti without being hard.