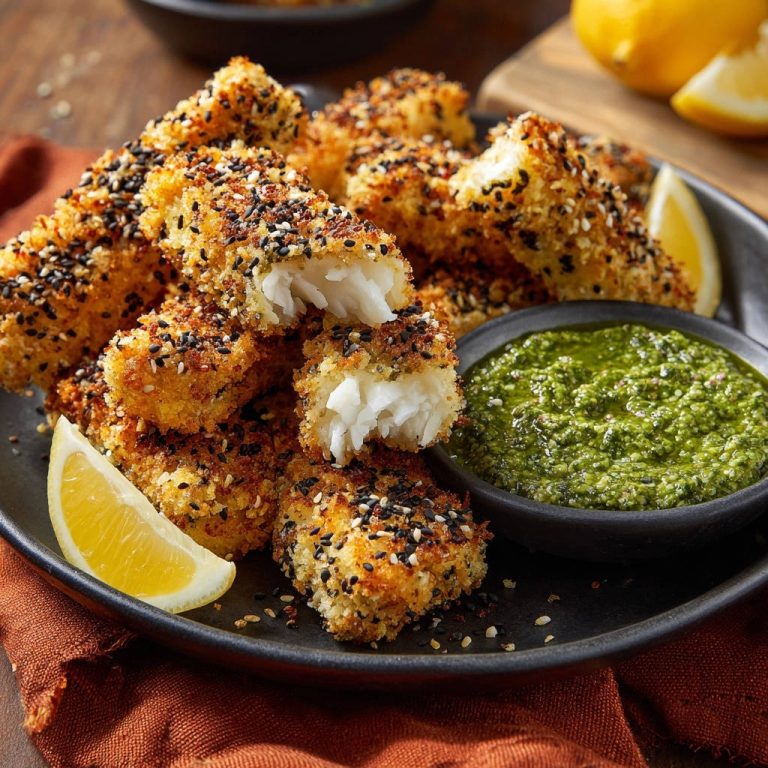
Golden Fried Cheese & Egg Bites: Gooey Yolk Perfection
There’s nothing quite like slicing into a perfectly fried bite to reveal a luscious, runny yolk embraced by melted, crispy cheese. If you’ve ever battled with an overcooked yolk or a cheesy explosion in the fryer, you know the struggle is real.
But fear not, because these Golden Fried Cheese & Egg Bites are the absolute game-changer. This recipe ensures a reliably gooey center and a golden, crunchy exterior every single time, making a showstopper that looks incredibly fancy but is truly approachable.
The Secret to Irresistible Golden Fried Cheese & Egg Bites (No More Rubber Yolks!)
This recipe isn’t just about frying cheese; it’s about culinary precision that delivers unparalleled results. We’ve cracked the code to prevent common pitfalls, guaranteeing success in your kitchen.
Get Our Best Recipes Weekly!
Join thousands of food lovers and get delicious recipes delivered to your inbox.
The core innovation lies in perfectly timing the egg and strategically freezing the cheesy shell. This duo protects the delicate yolk from overcooking while allowing the cheese to become molten and the exterior beautifully crisp.
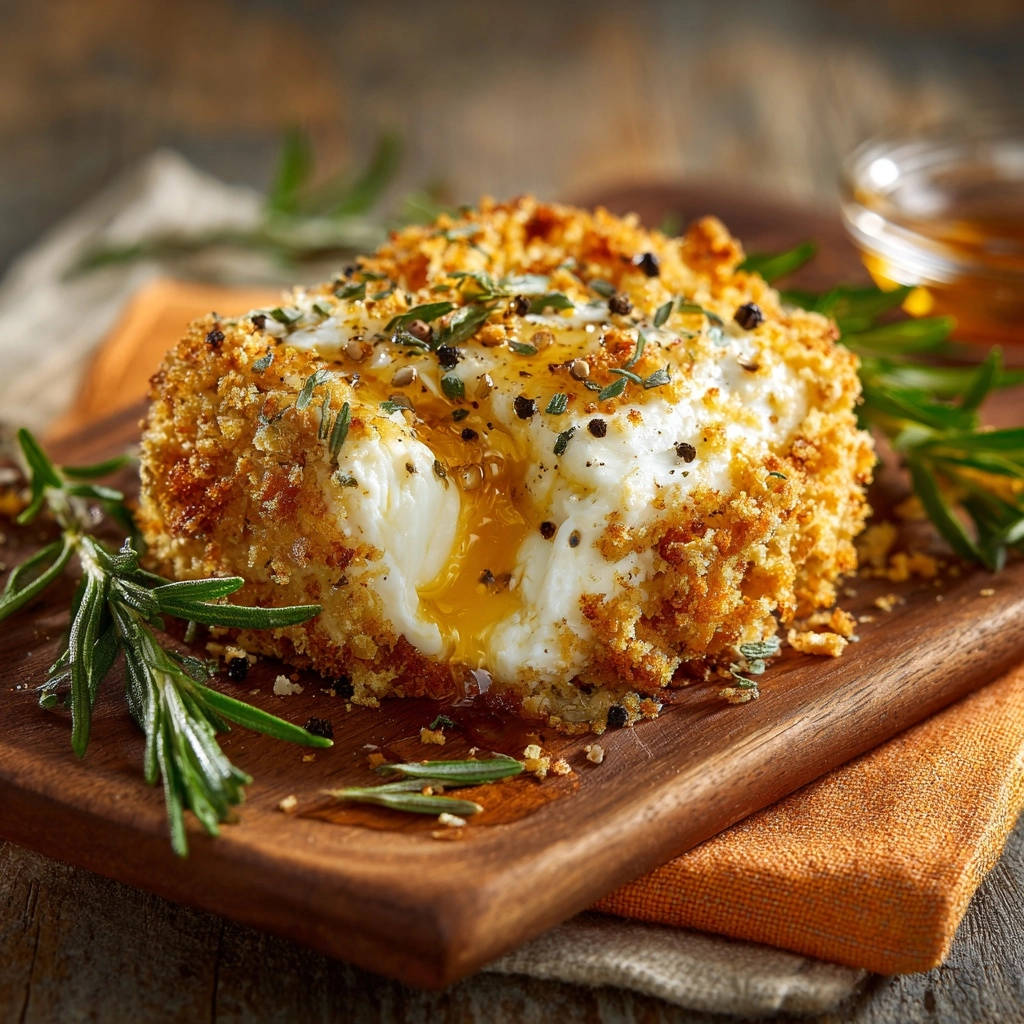
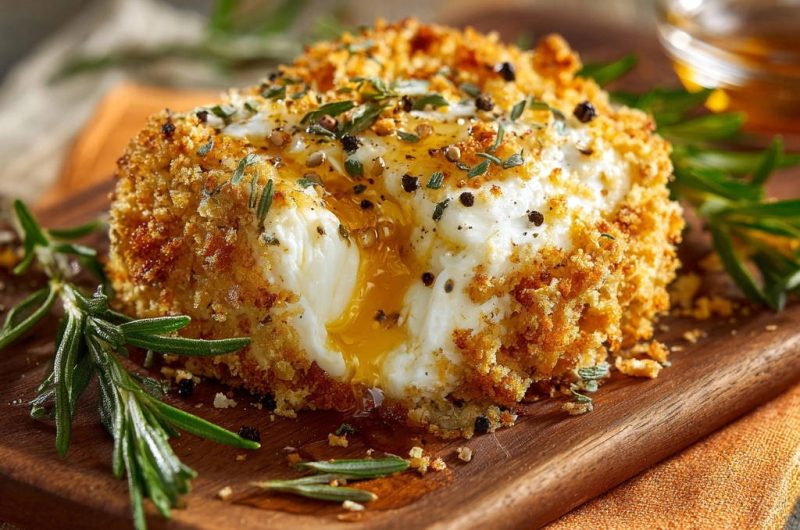
You’ll achieve that elusive “Instagram-worthy” cross-section: a vibrant, runny yolk contrasting with a warm, gooey cheese and a satisfyingly crunchy crust. These Golden Fried Cheese & Egg Bites elevate any brunch or appetizer spread.
Despite their sophisticated appearance, the steps are straightforward and designed for home cooks. You’ll gain confidence in deep-frying and impress everyone with your newfound expertise.
Building Your Bites: Key Ingredients for Golden Fried Perfection
The Star: The Perfectly Poached Egg Yolk
A single large, cold egg is the heart of this dish, specifically chosen for its ability to yield a beautifully runny yolk. Starting cold helps achieve a more consistent cook on the exterior while preserving the liquid center.
The Creamy Embrace: Choosing Your Soft Cheese
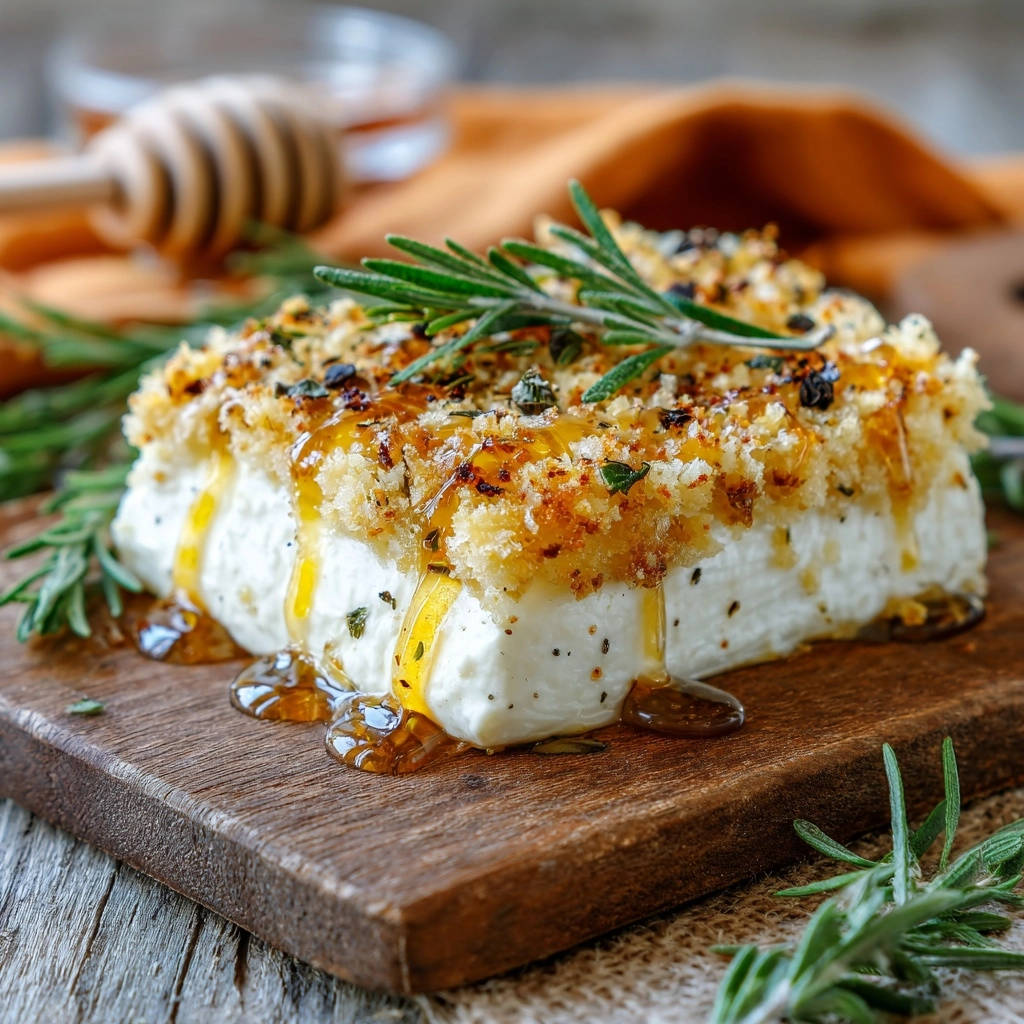
Soft goat cheese log (about 4 ounces) provides the ideal creamy texture and tangy flavor to perfectly encase the egg. Its pliability allows for easy shaping and creates a secure, flavorful shell.
If goat cheese isn’t your preference, consider other creamy soft cheeses like a mild, spreadable brie or camembert for a similar melt and richness.
Achieving the Golden Crunch: Breading Essentials
Panko breadcrumbs are non-negotiable for their superior crunch and airy texture compared to regular breadcrumbs. They create the ultimate golden, crispy exterior.
All-purpose flour provides the initial dry coating, ensuring the egg wash adheres effectively. This foundational layer is crucial for a complete and even breading.
A second large egg (whisked) acts as the vital binder, allowing the Panko to stick firmly to the cheese. It creates a seamless bridge between the flour and the crumbs.
Dried thyme and dried rosemary, along with freshly ground black pepper and a pinch of salt, infuse the breading with aromatic, savory notes. These seasonings perfectly complement the cheese and egg.
Flavor Enhancers & Frying Medium
Vegetable oil (about 2 cups) is essential for deep-frying, providing the necessary heat transfer for a quick, golden crisp. Its neutral flavor ensures the ingredients shine through.
Honey offers a delightful sweet counterpoint to the savory cheese and herbs, transforming these bites into a truly decadent experience. A generous drizzle is highly recommended.
Fresh rosemary sprigs and extra black peppercorns are not just for garnish; they add a final aromatic flourish and visual appeal, elevating the presentation.
Essential Kitchen Gear for Crafting Your Cheese & Egg Bites
Small pot: Ideal for precisely boiling the single egg.
Slotted spoon: Essential for carefully lowering and removing the delicate egg and fried bites from hot liquids.
Ice bath: A bowl of ice water is crucial for stopping the egg’s cooking process immediately.
Parchment paper: Prevents sticking when handling the cheese and breaded bites, especially during freezing.
Shallow dishes (3): Perfect for setting up an efficient breading station.
Medium saucepan or deep skillet: Needed for safely deep-frying the bites.
Kitchen thermometer: Absolutely critical for monitoring oil temperature, ensuring perfect frying results.
Paper towels: For draining excess oil after frying, keeping your bites crisp.
From Scratch to Stunning: Your Step-by-Step Guide to Golden Fried Cheese & Egg Bites
Step 1: The Delicate 6-Minute Yolk Secret
- Prepare Your Runny Yolk:
Carefully lower the cold large egg into a small pot of boiling water and boil for exactly 6 minutes for a beautifully soft and runny yolk.
Immediately transfer the egg to an ice bath for 5 minutes to stop the cooking. This prevents the yolk from setting further. Gently peel the egg once cooled, handling it with extreme care as the yolk will be very delicate inside.
Step 2: Sculpting the Cheesy Shell
- Prep the Cheese:
Divide the soft goat cheese into two equal portions. On a piece of parchment paper, flatten one portion into a disk large enough to wrap around the peeled soft-boiled egg.
Gently place the peeled egg in the center of the cheese disk, then carefully wrap the cheese around the egg, sealing it completely so the egg is fully enclosed. Use the second portion of cheese if needed to ensure full coverage and a smooth ball, leaving no gaps.
Step 3: The Triple-Threat Breading Station
- Bread the Cheese Ball:
Set up a breading station with three shallow dishes: one with flour, one with the remaining large egg (whisked), and one with Panko breadcrumbs mixed with dried thyme, dried rosemary, black pepper, and salt.
First, gently roll the cheese-wrapped egg in the flour, shaking off any excess. Next, dip it evenly in the whisked egg, ensuring full coverage. Finally, thoroughly coat it in the seasoned Panko breadcrumbs, pressing gently to make sure the crumbs adhere well to form a thick, even crust.
Step 4: The Freeze Factor – Why Chilling is Crucial
- Chill for Success:
Place the breaded cheese-egg ball on a small plate or baking sheet lined with parchment paper.
Crucially, freeze the ball for at least 30 minutes. This step is key to preventing the cheese from melting too quickly and the delicate yolk from overcooking, ensuring a perfectly contained, gooey center when fried.
Step 5: Frying to Golden-Brown Brilliance
- Fry to Golden Perfection:
Heat vegetable oil in a medium saucepan or deep skillet over medium-high heat until it reaches 350 degrees Fahrenheit. Use a kitchen thermometer for accuracy.
More Good Eats
Round out your meal with these other satisfying dishes.
- For a delightful start to your day, consider the Dreamy Ricotta Toast, which also promises perfect eggs.
- If you’re craving something comforting and cheesy, the Cheesy Chicken & Rice Bake offers creamy satisfaction.
Carefully lower the frozen breaded cheese-egg ball into the hot oil. Fry for 2-3 minutes, gently turning it occasionally with a slotted spoon, until it’s golden brown and crispy on all sides. This brief, hot fry quickly melts the cheese and crisps the exterior without further cooking the delicate yolk inside.
Step 6: The Honey Drizzle & Final Flourish
- Serve & Enjoy:
Using a slotted spoon, carefully remove the fried cheese ball and place it on a plate lined with paper towels to drain any excess oil. Serve immediately for the best texture.
Drizzle generously with honey and garnish with fresh rosemary sprigs and extra black peppercorns for that stunning finish. The true reveal is when you cut it open to display that glorious, runny yolk!
Chef’s Notes: Mastering Your Golden Fried Cheese & Egg Bites
Perfecting the Yolk: While 6 minutes is key, stovetop variations can occur. Always watch for a gentle boil, not a vigorous one, to prevent the egg from cracking during cooking. Consistent heat ensures a perfect yolk.
Sealing the Cheese: Any cracks or gaps in the cheese will lead to blowouts during frying, with melted cheese escaping into the oil. Ensure the egg is completely enveloped and the cheese seam is smooth and fully sealed before breading.
Breading Adhesion: Press the Panko gently but firmly onto the cheese ball. A well-adhered, thick coating is essential for a truly crisp exterior and acts as a barrier, preventing the cheese from escaping.
Don’t Skip the Freeze: This step is not optional! The frozen core gives the cheese enough time to crisp and brown beautifully before melting too much. This crucial chilling protects that delicate runny yolk.
Oil Temperature Control: Using a thermometer for oil temperature is paramount for perfect results. Oil that’s too cool will result in greasy, soggy bites, while oil that’s too hot will burn the exterior before the cheese has a chance to melt properly.
Serving Hot: These Golden Fried Cheese & Egg Bites are absolutely best enjoyed immediately after frying. This allows you to experience the full, irresistible contrast of the hot, crispy exterior and the warm, wonderfully runny interior.
Troubleshooting Your Bites: Solving Common Golden Fried Cheese & Egg Challenges
Why Did My Yolk Cook Too Much?
This typically happens if the egg was boiled for too long. Ensure you stick to the exact 6-minute boiling time for a cold, large egg.
Also, an insufficient ice bath or not transferring the egg immediately can cause residual heat to continue cooking the yolk. Make sure the egg is fully submerged in ice water for the full 5 minutes.
My Cheese Melted Out! Preventing Blowouts
Cheese melting out during frying is often due to an imperfect seal around the egg. Double-check that the cheese fully encases the egg with no visible cracks or seams before breading.
The freezing step is also critical here. If the cheese ball isn’t adequately frozen, the cheese will melt too quickly. Ensure it’s frozen for at least 30 minutes, or even longer if time allows.
Getting That Perfect Crispy Exterior
A soggy exterior usually means your oil wasn’t hot enough. Always use a kitchen thermometer to ensure the oil reaches precisely 350°F (175°C) before frying.
Frying too many bites at once can also drop the oil temperature. Fry one or two at a time to maintain optimal heat, ensuring a consistent, golden crisp.
Breading Not Sticking?
If your breading isn’t adhering well, ensure the cheese-wrapped egg is fully coated in flour first, with excess shaken off. This creates a dry surface for the egg wash.
The egg wash itself needs to fully coat the flour layer. Finally, press the Panko firmly around the entire surface, ensuring it’s thoroughly embedded for a robust crust.
Enjoying Your Bites: Serving Ideas, Variations, and Storage
Serving Suggestions & Flavor Pairings
These Golden Fried Cheese & Egg Bites are incredibly versatile. Beyond the honey drizzle, try a balsamic glaze for a sweet and tangy kick, or a spicy hot honey for an extra layer of flavor.
They pair beautifully with a light, fresh green salad, making them perfect for a sophisticated brunch. For a more indulgent experience, serve alongside a warm marinara sauce or a homemade sriracha mayo.
Creative Cheese & Herb Variations
Experiment with different soft cheeses! Brie, camembert, or even a soft cream cheese (perhaps with a touch of chives) can offer exciting new flavor profiles. Adjust herbs accordingly.
Instead of thyme and rosemary, consider fresh basil, oregano, or a blend of Italian herbs. A hint of garlic powder in the breading can also add savory depth.
Make-Ahead & Storage Tips
You can prepare the 6-minute eggs up to 2 days in advance, keeping them peeled and submerged in cold water in the refrigerator. This saves time on the day of cooking.
The breaded cheese-egg balls can be frozen for up to 2 weeks. Store them in an airtight container or freezer bag. Fry directly from frozen, adding an extra minute or two to the frying time to account for the colder core.
Golden Fried Cheese & Egg Bites FAQs: Your Questions Answered
Can I prepare the eggs ahead of time?
Yes, you can. The 6-minute soft-boiled eggs can be prepared up to 2 days in advance. Peel them gently and store them submerged in cold water in an airtight container in the refrigerator.
Is it possible to bake these instead of frying?
While frying gives the quintessential crispy exterior and rapid cheese melt, you could attempt baking. Preheat your oven to 400°F (200°C) and bake for about 10-15 minutes, or until golden.
However, baking may result in a slightly less crispy crust and a slower, less uniform melt of the cheese, potentially impacting the delicate runny yolk. Frying remains the recommended method for optimal results.
What’s the best way to reheat leftovers?
Reheating is tricky as the yolk will likely cook further. For best results, gently warm them in a preheated air fryer at 350°F (175°C) for 3-5 minutes, or in an oven until just warm and crisp.
The yolk will likely be soft-boiled rather than runny, but the cheese will still be delicious. Avoid microwaving, as it will make them soggy and overcook the yolk quickly.
Can I use a different breadcrumb?
Panko breadcrumbs are highly recommended for their light, airy, and extra-crispy texture. Regular breadcrumbs can be used in a pinch, but they will yield a denser, less dramatically crisp coating.
If using regular breadcrumbs, ensure they are finely ground and press them firmly for good adhesion. The final result may not have the same “shatteringly crisp” quality.
Your Golden Fried Cheese & Egg Bites Await: Get Cooking!
Now that you’re armed with all the secrets, tips, and troubleshooting advice, there’s nothing stopping you from creating these magnificent Golden Fried Cheese & Egg Bites. The journey from humble ingredients to a showstopping dish is incredibly rewarding.
Dive into your kitchen with confidence and prepare to dazzle your taste buds and guests alike. Don’t forget to share your gorgeous creations!
Golden Fried Cheese & Egg Bites
Course: AppetizerCuisine: AmericanDifficulty: medium4
1 bite45
minutes3
minutes350
kcal48
minutesAchieve perfect runny-yolk, crispy-cheese bites every time with this ingenious recipe. Say goodbye to rubbery yolks and exploding cheese! This showstopper looks fancy but is surprisingly easy to make.
Ingredients
1 large egg, cold (for the runny yolk center)
4 ounces soft goat cheese log (or similar creamy soft cheese)
1/2 cup Panko breadcrumbs
1 large egg (for breading)
1 tablespoon all purpose flour
1/2 teaspoon dried thyme
1/2 teaspoon dried rosemary
1/4 teaspoon freshly ground black pepper
Pinch of salt
2 cups vegetable oil, for frying
2 tablespoons honey, for serving
Extra fresh rosemary sprigs and black peppercorns, for garnish
Directions
- Prepare Your Runny Yolk (The Secret to No More Rubber Yolk!): Carefully lower the cold large egg into a small pot of boiling water. Boil for exactly 6 minutes for a beautifully soft and runny yolk. Immediately transfer the egg to an ice bath for 5 minutes to stop the cooking. Once cooled, gently peel the egg. The yolk will be very delicate and runny inside, so handle with care.
- Prep the Cheese: Divide the goat cheese into two equal portions. On a piece of parchment paper, flatten one portion into a disk large enough to wrap around the peeled soft-boiled egg. Gently place the peeled egg in the center of the cheese disk, then carefully wrap the cheese around the egg, sealing it completely so the egg is fully enclosed. Use the second portion of cheese if needed to ensure full coverage and a smooth ball.
- Bread the Cheese Ball: Set up a breading station: one shallow dish with flour, one with the remaining large egg (whisked), and one with Panko breadcrumbs mixed with dried thyme, dried rosemary, black pepper, and salt. First, gently roll the cheese-wrapped egg in the flour, shaking off any excess. Next, dip it in the whisked egg, ensuring full coverage. Finally, thoroughly coat it in the seasoned Panko breadcrumbs, pressing gently to make sure the crumbs adhere well.
- Chill for Success: Place the breaded cheese-egg ball on a small plate or baking sheet lined with parchment paper. Crucially, freeze the ball for at least 30 minutes. This step is key to preventing the cheese from melting too quickly and the yolk from overcooking, ensuring a perfectly contained, gooey center when fried.
- Fry to Golden Perfection: Heat the vegetable oil in a medium saucepan or deep skillet over medium-high heat until it reaches 350 degrees Fahrenheit. Carefully lower the frozen breaded cheese-egg ball into the hot oil. Fry for 2-3 minutes, gently turning it occasionally, until it’s golden brown and crispy on all sides. The brief, hot fry will melt the cheese and crisp the exterior without further cooking the delicate yolk inside.
- Serve & Enjoy: Using a slotted spoon, carefully remove the fried cheese ball and place it on a plate lined with paper towels to drain any excess oil. Serve immediately. Drizzle generously with honey and garnish with fresh rosemary sprigs and extra black peppercorns for that stunning finish. Cut it open to reveal that glorious, runny yolk!
Notes
- Freezing the cheese-egg ball for 30 minutes is crucial for a perfect gooey center and crispy exterior.