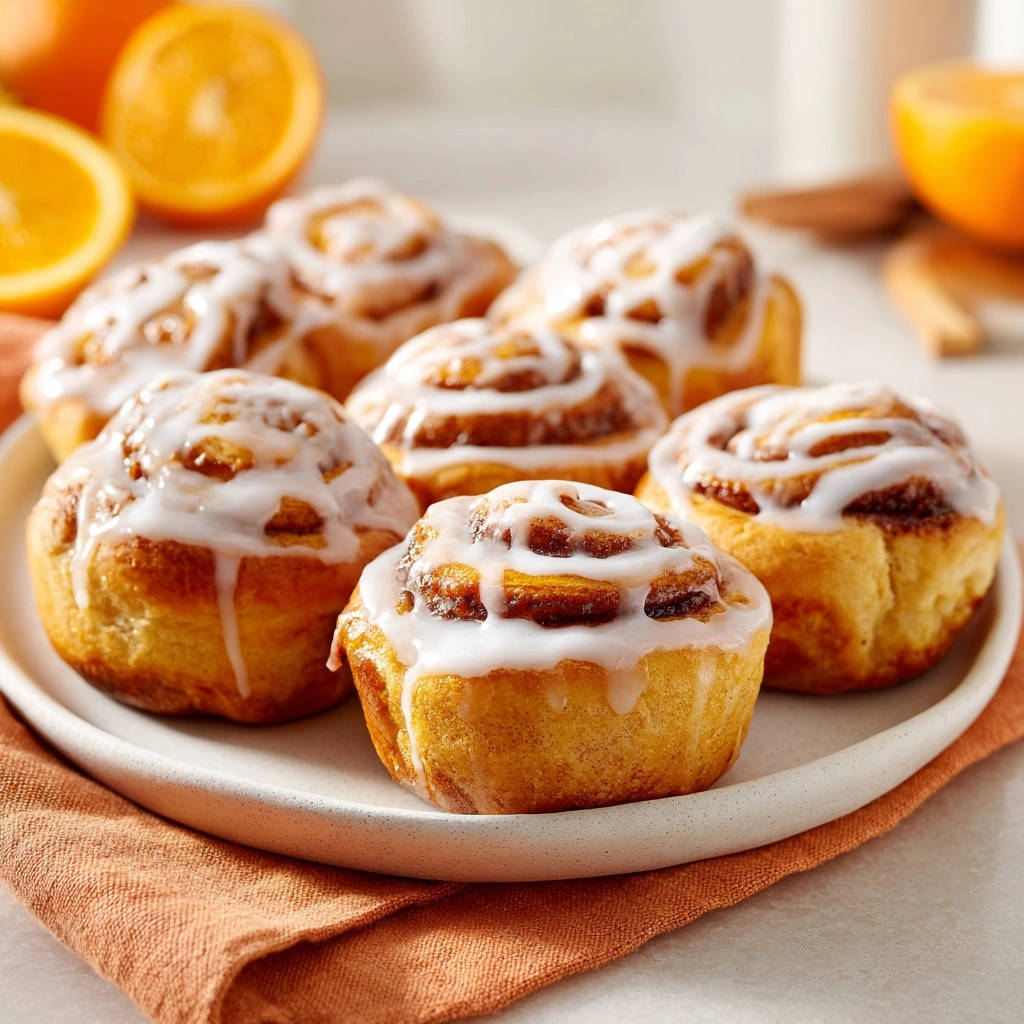
Ultimate Orange Cinnamon Rolls: Pillowy Perfection Every Time
Ever found yourself dreaming of those perfectly soft, melt-in-your-mouth cinnamon rolls, only to be met with dense, dry disappointments in your own kitchen? I’ve been there too! But what if I told you the secret to truly superior, bakery-style Ultimate Orange Cinnamon Rolls is within your reach?
This isn’t just another recipe; it’s a meticulously crafted guide to achieving that guaranteed pillowy texture and vibrant citrus kiss every single time, transforming your baking from frustrating to absolutely fabulous.
Beyond Basic: Why Our Orange Cinnamon Rolls Stand Out
The Secret to Guaranteed Fluffiness and a Melt-in-Your-Mouth Texture
Forget dry, heavy rolls. This recipe focuses on specific techniques, like extended kneading, that are paramount for developing the gluten structure. This creates an incredibly elastic dough, which in turn leads to a light, airy, and utterly fluffy interior.
Get Our Best Recipes Weekly!
Join thousands of food lovers and get delicious recipes delivered to your inbox.
Our precise approach to yeast activation and dual proofing stages ensures optimal rise. This allows for ample air pockets, resulting in that signature tender, melt-in-your-mouth experience you crave from Ultimate Orange Cinnamon Rolls.
That Signature Citrus Kiss: A Flavor You’ll Crave
What truly elevates these rolls is the bright, zesty infusion of fresh orange. We incorporate orange zest directly into the dough and fresh orange juice into the glaze.
This combination creates a refreshing counterpoint to the warm cinnamon spice, adding a layer of complexity and a burst of vibrant flavor. It’s a delightful twist that makes these homemade orange buns unforgettable.
Effortless Baking, Impressive Results: Designed for Home Bakers
We’ve broken down each step with expert insights and practical tips to ensure your success, even if you’re new to yeast baking. You’ll gain the confidence to create stunning, bakery-quality rolls right in your own kitchen.
This recipe provides clear guidance for achieving impressive results without undue complexity, making perfect Ultimate Orange Cinnamon Rolls an achievable dream for any home baker.
Gathering Your Toolkit: Key Ingredients for Heavenly Rolls
Dough Foundations: Flour, Yeast, and the Liquids
All-Purpose Flour: This is the structural foundation for our fluffy dough. It provides the necessary gluten development for elasticity and a light crumb.
Active Dry Yeast: The living leavening agent responsible for the spectacular rise of our rolls. Proper activation is key to its effectiveness.
Warm Milk & Butter: The milk hydrates the flour and activates the yeast, while the melted butter adds essential richness and tenderness. Maintaining the ideal temperature for the milk (105-115°F) is crucial for happy yeast.
Granulated Sugar & Salt: Sugar feeds the yeast, aiding in fermentation and contributing to the dough’s golden color. Salt balances the sweetness and enhances the overall flavor profile.
The Warm Spice Hug: Cinnamon-Brown Sugar Filling
Softened Butter: Provides the creamy base, allowing the filling to spread easily and adhere perfectly to the dough layers.
Packed Light Brown Sugar: Adds a deep, caramelized sweetness with subtle molasses notes, contributing to the rolls’ moistness.
Ground Cinnamon: The quintessential spice that delivers the comforting, aromatic heart of any classic cinnamon roll.
Zesty Sweetness: The Orange Glaze Finish
Powdered Sugar: Forms the smooth, fine base for our quick-setting, sweet icing. Its fine texture creates a silky glaze.
Milk & Fresh Orange Juice: These liquids control the glaze’s consistency, allowing for a delicate drizzle or a thicker, opaque coating. The orange juice introduces a bright, tangy counterpoint.
Orange Zest (Optional): Intensifies the natural citrus aroma and adds a beautiful speckled appearance to the final glaze.
Ingredient Spotlight: The Magic of Orange Zest
Orange zest isn’t just an optional extra; it’s a game-changer for these Ultimate Orange Cinnamon Rolls. Grated from the vibrant outer skin of the orange, it contains aromatic oils that infuse both the dough and icing with an incredibly fresh, bright fragrance and flavor.
This zest elevates the rolls, providing a lively, fragrant balance to the rich sweetness and warm spice. It makes these homemade orange buns truly shine.
More Orange & Spice
Continue the bright citrus and warm spice theme with these complementary bakes.
- For a delightful morning treat or afternoon snack, consider this Orange Cinnamon Swirl Loaf, sharing the same comforting flavors.
- You might also enjoy the rich texture of an Orange Swirl Bundt Cake, perfect for a special occasion.
Your Journey to Irresistible Orange Cinnamon Rolls: A Detailed Guide
-
Prepping for Success: Activating Your Yeast
In a large bowl, combine the warm milk, granulated sugar, and yeast. Stir gently and let it sit for 5-10 minutes until a foamy layer appears on top.
This foam is your first sign of active yeast, crucial for a good rise and ultimate fluffiness. If no foam forms, your yeast may be inactive, or your milk temperature was incorrect.
-
Crafting the Dough: The Art of Kneading for Fluffiness
Stir in the melted butter, egg, and orange zest. Gradually add 2 cups of the all-purpose flour and the salt, mixing until just combined and a shaggy dough forms.
Add the remaining flour, 1/2 cup at a time, incorporating it until the dough comes together and is no longer overly sticky. Turn the dough out onto a lightly floured surface and knead thoroughly for 8-10 minutes.
This extended kneading is the absolute secret to developing the gluten, which gives your rolls their incredible structure and that signature light, airy, and fluffy texture. The dough should become smooth, elastic, and spring back when gently poked. Avoid adding too much extra flour unless absolutely necessary, as over-flouring can lead to dry rolls.
-
The Patient Rise: First Proofing Essentials
Place the well-kneaded dough in a lightly oiled bowl, turning it once to coat. Cover the bowl tightly with plastic wrap and let it rise in a warm, draft-free place for 1 to 1.5 hours, or until it has visibly doubled in size.
This proper first rise is essential for creating those air pockets that make cinnamon rolls so tender. Patience here directly translates to a pillowy texture.
-
Assembling the Layers: Creating the Filling and Shaping
While your dough is rising, combine the softened butter, brown sugar, and ground cinnamon in a small bowl, mixing until well combined and spreadable.
Once the dough has doubled, gently punch it down to release the air. Turn it out onto a lightly floured surface and roll it into a large rectangle, approximately 12×18 inches. Spread the cinnamon-sugar filling evenly over the entire surface of the dough, leaving a small, half-inch border along one of the long edges.
Starting from the long edge opposite the border, tightly roll the dough into a log. Once rolled, pinch the seam firmly to seal it. For perfectly even and neat rolls, use a sharp, un-serrated knife or a piece of dental floss to cut the log into 12 even slices, each about 1.5 inches thick.
-
The Final Puff: Second Rise for Ultimate Texture
Arrange the cut rolls snugly, but with a little space between each, in a lightly greased 9×13 inch baking dish. Cover the dish again with plastic wrap and let the rolls rise in a warm place for another 30-45 minutes.
They should be noticeably puffy and almost touching each other. This second rise ensures the ultimate light texture after baking, contributing significantly to that pillowy perfection.
-
Baking to Golden Perfection: Avoiding Dryness
Preheat your oven to 375 degrees F (190 degrees C). Bake the rolls for 20-25 minutes, or until they are golden brown on top.
Pay close attention and DO NOT overbake! Overbaking is the number one cause of dry cinnamon rolls. They should be just lightly golden and soft to the touch in the center.
-
The Zesty Crown: Whipping Up the Orange Icing
While the rolls cool slightly, whisk together the powdered sugar, milk, orange juice, and optional orange zest until smooth.
Adjust the amount of milk for your desired consistency – a little thicker for a more opaque glaze, a little thinner for a delicate drizzle. Aim for a smooth, pourable consistency.
-
Glaze and Garnish: The Grand Finale
As soon as the rolls are warm (not piping hot, but definitely not cold), generously drizzle the homemade orange icing over them.
Serve immediately and enjoy the guaranteed fluffy, melt-in-your-mouth perfection of your Ultimate Orange Cinnamon Rolls!
Unlock Pro Secrets: Elevate Your Orange Cinnamon Roll Game
The Golden Temperature: Yeast Activation Success. Ensure your milk is truly between 105-115°F. Too hot kills the yeast; too cold won’t activate it, impacting your rise and the overall texture of your fluffy cinnamon rolls.
Don’t Over-Flour: Keeping Your Dough Tender. Only add flour to your kneading surface and to the dough as absolutely necessary. Excess flour leads to dense, dry rolls, defeating the goal of pillowy perfection.
Patience is Key: Understanding the Rise Times. Don’t rush the proofing. A truly doubled dough volume is critical for airy rolls. If your kitchen is cool, consider a proofing drawer or oven with the light on to create a warm environment.
The Dental Floss Trick for Perfect Slices. For cleaner, less squished rolls, use unflavored dental floss instead of a knife. Slide it under the log, cross the ends over the top, and pull to slice evenly.
The Ultimate Non-Dryness Baking Strategy. Trust the visual cues: light golden brown edges are your signal. A slightly underbaked center is often better than an overbaked, dry roll that loses its tender quality.
Glazing at the Right Moment. Apply icing when rolls are warm, not hot. Too hot will melt it completely and thin it out; too cold prevents it from melting slightly into the crevices for maximum deliciousness and absorption of the zesty glaze.
Solved! Common Orange Cinnamon Roll Challenges
My Rolls are Dense and Heavy
This is often due to insufficient kneading, which doesn’t develop enough gluten, or not allowing enough time for the dough to rise properly. Ensure your yeast is active and knead for the full 8-10 minutes until the dough is elastic.
Over-flouring during kneading can also make your dough dense. Try to use as little extra flour as possible, relying on the dough’s natural elasticity.
The Dough Isn’t Rising
Check the temperature of your milk during yeast activation; it might have been too hot (killing the yeast) or too cold (preventing activation). Also, ensure your yeast isn’t expired.
A warm, draft-free spot is crucial for proofing. If your kitchen is cold, find a warmer spot, perhaps in a turned-off oven with just the light on.
Rolls Spread Out Too Much During Baking
This can happen if the dough is too warm or over-proofed before baking, causing the gluten structure to relax excessively. Ensure your rolls are tightly rolled during shaping and not left to over-rise in the pan.
Properly spacing them in the pan also helps them rise upwards rather than outwards.
Icing is Too Thin or Too Thick
If your icing is too thin, gradually whisk in more powdered sugar, one tablespoon at a time, until it reaches your desired consistency for a luscious zesty glaze. For too thick icing, add a tiny splash more milk or orange juice, a teaspoon at a time, until smooth and spreadable.
Plan Ahead for Sweet Mornings: Make-Ahead & Storage Tips
Overnight Rolls: A Dream Come True
You can prepare the rolls up to the second rise, arrange them in the baking dish, cover tightly with plastic wrap, and refrigerate overnight (up to 12-18 hours).
In the morning, take them out, let them come to room temperature and rise for 1-1.5 hours in a warm spot, then bake as directed. This makes for an easy sweet breakfast treat.
Best Practices for Storing Baked Rolls
Store leftover baked and iced Ultimate Orange Cinnamon Rolls in an airtight container at room temperature for up to 2-3 days. This helps maintain their soft texture.
For best results, warm them briefly in the microwave for 15-30 seconds or in a low oven (250°F/120°C) for 10 minutes before serving to revive their tender quality.
Freezing for Future Indulgence
You can freeze unbaked rolls (after the second rise, arrange them in the baking dish, cover tightly, and freeze) for up to 1 month. Thaw overnight in the fridge, then let rise at room temperature before baking.
Baked rolls can also be frozen for up to 1-2 months. Wrap individual rolls tightly in plastic wrap and then foil. Reheat from frozen in a moderate oven until warmed through.
Beyond Breakfast: Creative Ways to Enjoy Your Orange Cinnamon Rolls
Classic Pairings for a Cozy Morning
Serve your warm, zesty cinnamon rolls with a cup of freshly brewed coffee, a comforting tea, or a tall glass of cold milk. These bakery-style rolls are perfect alongside fresh fruit for a balanced breakfast or brunch spread.
Dessert Delights: Serving Ideas
Elevate these rolls into a dessert by serving them warm with a scoop of vanilla bean ice cream that melts into the warm glaze. A dollop of whipped cream or a sprinkle of toasted pecans also adds texture and richness, making these homemade orange buns truly decadent.
Your Orange Cinnamon Roll Questions Answered
Can I use rapid-rise yeast instead?
Yes, you can often substitute rapid-rise (instant) yeast for active dry yeast. You may not need to activate it separately; you can usually mix it directly with the dry ingredients.
Your rise times might also be slightly shorter. Always follow the package directions for specific instructions when using instant yeast for fluffy cinnamon rolls.
What if I don’t have fresh oranges?
While fresh zest and juice are highly recommended for the best flavor, in a pinch, you can use good quality orange extract (a few drops) or dried orange peel (rehydrated) in the dough, and bottled orange juice for the icing.
The flavor won’t be as vibrant as fresh, but it will still be delicious and provide that citrus note.
Can I make these gluten-free?
Adapting this recipe to be fully gluten-free can be challenging, as gluten is crucial for the rolls’ fluffy texture and structure. You would need to use a specific gluten-free all-purpose flour blend designed for yeast breads.
This may require adjustments to liquid and rise times. Results may vary significantly from the original pillowy texture.
How do I know when the rolls are fully baked?
Look for golden brown tops and edges. The centers should feel soft and slightly springy when gently pressed. An internal temperature of about 190-200°F (88-93°C) indicates doneness, but relying on visual cues and touch is usually sufficient to avoid overbaking.
Your Ultimate Orange Cinnamon Roll Masterpiece Awaits!
You’ve journeyed through the secrets of crafting the most unbelievably fluffy and flavorful Ultimate Orange Cinnamon Rolls. From activating your yeast with precision to mastering the art of kneading and the critical timing of the rises, every step contributes to that guaranteed melt-in-your-mouth perfection and vibrant zesty glaze.
Now it’s your turn to bring this magic to life in your own kitchen. Gather your ingredients, follow these expert tips, and prepare to delight your taste buds and impress your loved ones with a batch of homemade orange buns that truly live up to their name. Share your creations and savor every sweet, pillowy bite!
Ultimate Orange Cinnamon Rolls
Course: PastryCuisine: American CuisineDifficulty: easy4
12 rolls45
minutes20
minutes180
minutesAmerican Cuisine
Ingredients
For the Dough:
3 1/2 cups all-purpose flour, plus more for dusting
1/4 cup granulated sugar
2 1/4 teaspoons active dry yeast (one packet)
1/2 teaspoon salt
1 cup warm milk (around 105-115 degrees F)
1/4 cup unsalted butter, melted and cooled
1 large egg, room temperature
1 teaspoon orange zest (from one orange)
For the Filling:
1/2 cup unsalted butter, softened
1/2 cup packed light brown sugar
1 tablespoon ground cinnamon
For the Icing:
1 1/2 cups powdered sugar
2-3 tablespoons milk
1 tablespoon orange juice (from one orange)
1/2 teaspoon orange zest (optional)
Directions
- Activate Yeast Correctly: In a large bowl, combine the warm milk (make sure it’s not too hot to kill the yeast, nor too cold to activate it!), granulated sugar, and yeast. Stir gently and let it sit for 5-10 minutes until a foamy layer appears on top. This foam is your first sign of active yeast, crucial for a good rise and ultimate fluffiness!
- Begin Dough Hydration: Stir in the melted butter, egg, and orange zest. Gradually add 2 cups of the all-purpose flour and the salt, mixing until just combined and a shaggy dough forms.
- Knead for Maximum Fluffiness: Add the remaining flour, 1/2 cup at a time, incorporating it until the dough comes together and is no longer overly sticky. Turn the dough out onto a lightly floured surface and knead thoroughly for 8-10 minutes. This extended kneading is the absolute secret to developing the gluten, which gives your rolls their incredible structure and that signature light, airy, and fluffy texture. The dough should become smooth, elastic, and spring back when gently poked. Avoid adding too much extra flour unless absolutely necessary, as over-flouring can lead to dry rolls.
- First Rise (Critical Proofing): Place the well-kneaded dough in a lightly oiled bowl, turning it once to coat. Cover the bowl tightly with plastic wrap and let it rise in a warm, draft-free place for 1 to 1.5 hours, or until it has visibly doubled in size. This proper first rise is essential for creating those air pockets that make cinnamon rolls so tender.
- Prepare Filling: While your dough is rising, combine the softened butter, brown sugar, and ground cinnamon in a small bowl, mixing until well combined and spreadable.
- Shape the Rolls: Once the dough has doubled, gently punch it down to release the air. Turn it out onto a lightly floured surface and roll it into a large rectangle, approximately 12×18 inches. Spread the cinnamon-sugar filling evenly over the entire surface of the dough, leaving a small, half-inch border along one of the long edges.
- Roll and Slice: Starting from the long edge opposite the border, tightly roll the dough into a log. Once rolled, pinch the seam firmly to seal it. For perfectly even and neat rolls, use a sharp, un-serrated knife or a piece of dental floss to cut the log into 12 even slices, each about 1.5 inches thick.
- Second Rise (Final Puff): Arrange the cut rolls snugly, but with a little space between each, in a lightly greased 9×13 inch baking dish. Cover the dish again with plastic wrap and let the rolls rise in a warm place for another 30-45 minutes, or until they are noticeably puffy and almost touching each other. This second rise ensures the ultimate light texture after baking.
- Bake (The Non-Dryness Check): Preheat your oven to 375 degrees F (190 degrees C). Bake the rolls for 20-25 minutes, or until they are golden brown on top. Pay close attention and DO NOT overbake! Overbaking is the number one cause of dry cinnamon rolls. They should be just lightly golden and soft to the touch.
- Make Icing: While the rolls cool slightly, whisk together the powdered sugar, milk, orange juice, and optional orange zest until smooth. Adjust the amount of milk for your desired consistency – a little thicker for a more opaque glaze, a little thinner for a delicate drizzle.
- Glaze and Serve: As soon as the rolls are warm (not piping hot, but definitely not cold), generously drizzle the homemade orange icing over them. Serve immediately and enjoy the guaranteed fluffy, melt-in-your-mouth perfection you just created!
Notes
- Key steps for ultimate fluffiness are proper yeast activation, thorough kneading, and avoiding overbaking.