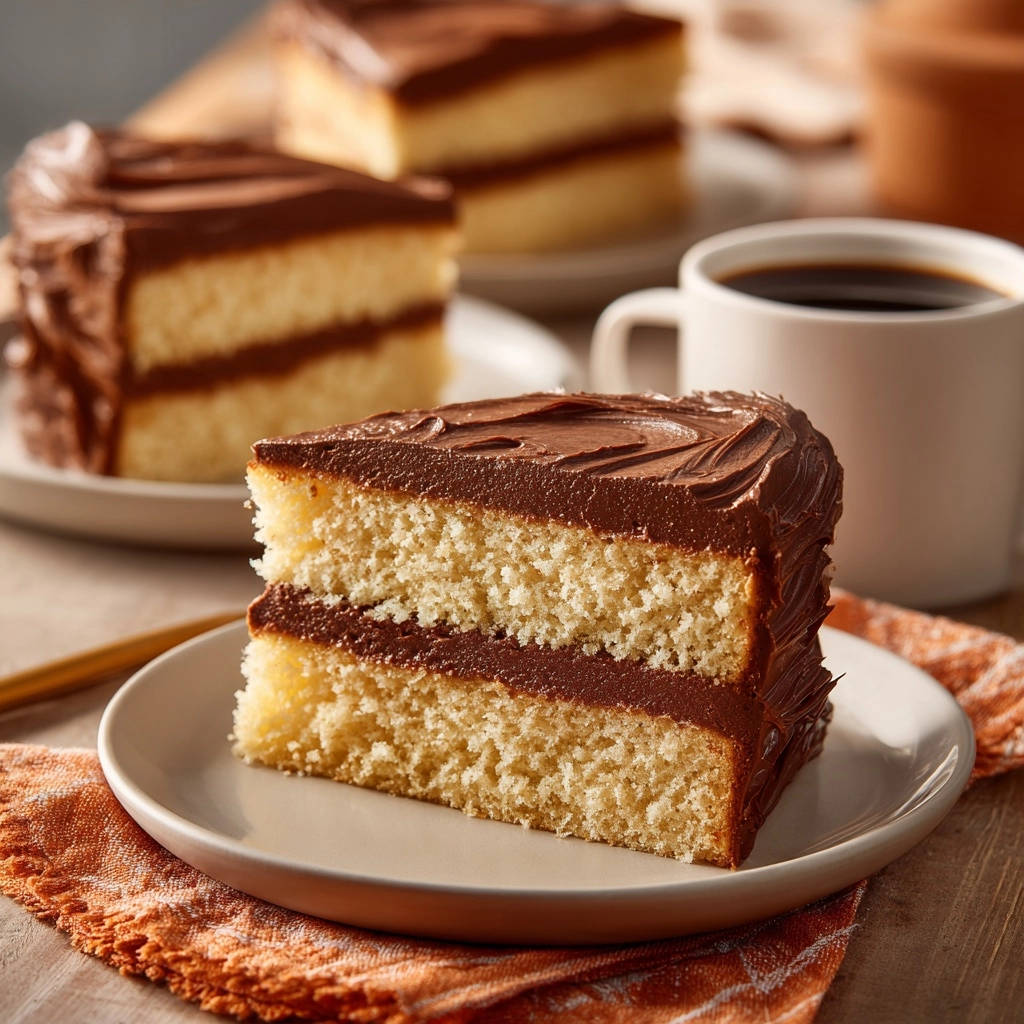
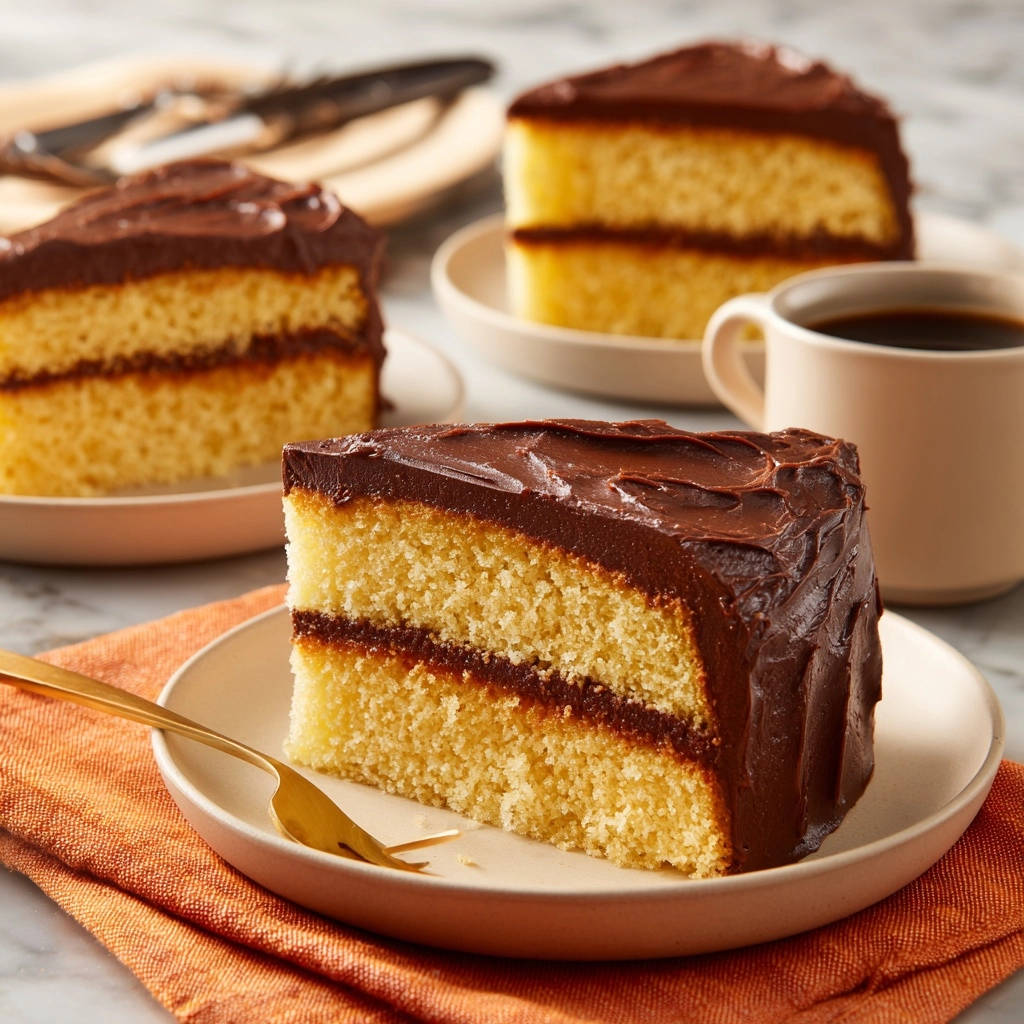
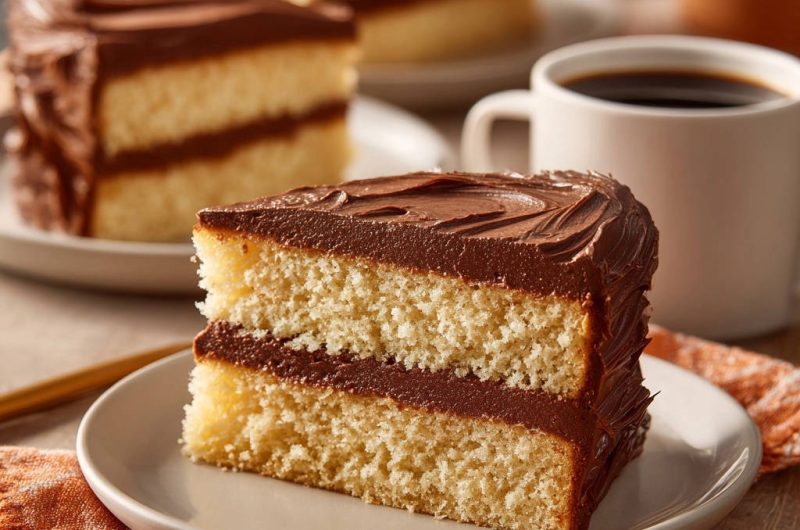
Classic Yellow Cake with Chocolate Frosting: Say Goodbye to Dry Cake!
I remember countless times yearning for that perfect slice of homemade cake – only to be met with a disappointing, dry crumb. That frustrating search for the ideal Classic Yellow Cake with Chocolate Frosting ends here. This recipe isn’t just another cake; it’s a meticulously crafted formula, featuring a secret moisture weapon, guaranteeing an unbelievably tender, melt-in-your-mouth experience every single time.
Unlock the Secret to Unbelievably Moist Yellow Cake
This recipe for Classic Yellow Cake with Chocolate Frosting stands apart from the rest. It focuses on specific techniques and a special ingredient to ensure unparalleled moisture and a truly tender crumb. Prepare to bake a cake that impresses everyone.
The “Secret Moisture Weapon”: How Sour Cream Transforms Texture
Sour cream is the unexpected hero in this classic yellow cake recipe. Its acidity interacts beautifully with the baking powder, promoting a more even rise and finer crumb structure.
Get Our Best Recipes Weekly!
Join thousands of food lovers and get delicious recipes delivered to your inbox.
The added fat content from the sour cream also enriches the batter, tenderizing the gluten and preventing the cake from becoming tough. This results in a truly luxurious, moist yellow cake without adding any extra density.
A Fluffy, Tender Crumb That Melts in Your Mouth
Forget dry, crumbly cakes that disappoint. This recipe delivers a light, airy crumb that remains incredibly tender and moist for days.
Each bite of this Classic Yellow Cake with Chocolate Frosting is designed to dissolve in your mouth, a testament to proper ingredient ratios and careful technique.
Why This Recipe Gets Rave Reviews (Every Single Time)
The consistent success of this yellow cake comes down to a few critical factors. Precision in measuring, the use of room temperature ingredients, and a specific mixing method all play vital roles.
By following these expert guidelines, you’ll consistently achieve a perfectly moist yellow cake that earns rave reviews from everyone who tries a slice.
Gathering Your Cake & Frosting Building Blocks
Quality ingredients are the foundation of any exceptional bake. Here’s a breakdown of what you’ll need and why each element is crucial for your Classic Yellow Cake with Chocolate Frosting.
For the Classic Yellow Cake: Essential Ingredients Explained
All-Purpose Flour: Provides the essential structure for your fluffy cake layers. Measuring it correctly is key to avoiding a dense cake.
Granulated Sugar: Sweetens the cake, but also contributes significantly to moisture and tenderness by attracting and holding onto water.
Baking Powder: Our primary leavening agent, ensuring a light and airy rise for a tender crumb.
Salt: Balances the sweetness and enhances all the other flavors in the yellow cake.
Unsalted Butter (softened): Adds richness and flavor. Creaming softened butter incorporates air, which is crucial for a light cake texture.
Large Eggs (room temperature): Bind ingredients, add structure, and contribute to the cake’s richness and color. Room temperature eggs emulsify much better.
Vanilla Extract: Provides the quintessential warm, comforting flavor that defines a classic yellow cake.
Whole Milk (room temperature): Hydrates the flour and adds moisture. Room temperature milk blends smoothly into the batter.
Sour Cream (room temperature): Our “secret moisture weapon” adds incredible richness, tang, and an unbelievably tender texture to the cake without making it heavy.
Crafting the Rich Chocolate Frosting: Your Ingredient Checklist
Unsalted Butter (softened): Forms the rich, creamy base of our homemade chocolate frosting.
Powdered Sugar (sifted): Provides sweetness and body. Sifting is crucial for a smooth, lump-free frosting.
Unsweetened Cocoa Powder (sifted): Delivers deep, intense chocolate flavor. Sifting prevents gritty clumps.
Whole Milk: Adjusts the consistency, ensuring the frosting is light and spreadable.
Vanilla Extract: Enhances the chocolate flavor and adds a touch of warmth.
Salt: A tiny pinch brightens the chocolate and balances the sweetness of the frosting.
Ingredient Notes & Smart Substitutions
Always prioritize room temperature ingredients for both the cake and frosting. This ensures proper emulsification, leading to a smooth batter and creamy frosting.
While this recipe calls for all-purpose flour, you can substitute cake flour for an even more delicate and tender crumb. Use 2 ½ cups plus 2 tablespoons of cake flour for every 2 ½ cups of all-purpose flour.
If you enjoy the richness of this cake, you’ll also appreciate the guaranteed fluffiness of the ultimate pistachio cake.
For the richest flavor and texture in your Classic Yellow Cake and homemade chocolate frosting, whole milk is recommended. However, 2% milk can be used if that is what you have on hand.
Essential Tools for Your Baking Success
Having the right equipment makes baking this Classic Yellow Cake with Chocolate Frosting a smooth and enjoyable process.
Electric Mixer: Handheld or stand mixer for creaming butter and achieving perfectly fluffy batter and frosting.
Mixing Bowls: At least two large bowls are essential for separating wet and dry ingredients and for making the frosting.
8-inch Round Cake Pans: Two pans of this size ensure even baking and perfect layers for stacking your beautiful cake. Proper preparation with grease and flour prevents sticking.
Wire Cooling Rack: Allows air to circulate around your cake layers, preventing condensation and ensuring they cool completely and evenly.
Sifter: Indispensable for creating a truly smooth, lump-free batter and silky chocolate frosting.
Wooden Skewer or Toothpick: Your reliable tool for accurately testing the doneness of your cake layers.
Your Step-by-Step Guide to Classic Yellow Cake Perfection
- Prepare Your Pans:
Preheat your oven to 350°F (175°C). Grease and flour two 8-inch round cake pans thoroughly, tapping out any excess flour. This meticulous preparation prevents sticking and ensures clean edges for your Classic Yellow Cake.
- Whisk the Dry Ingredients:
In a large bowl, whisk together the flour, granulated sugar, baking powder, and salt. Setting this aside ensures all leavening agents and flavorings are evenly distributed, a foundational step for a consistent crumb.
- Cream the Butter:
In a separate large bowl, use an electric mixer to cream together the softened unsalted butter until it’s light, fluffy, and pale yellow. This usually takes about 2-3 minutes and incorporates air, contributing to the cake’s light texture.
- Incorporate Eggs and Vanilla:
Add the large eggs one at a time to the creamed butter, beating well after each addition until fully incorporated. Stir in the vanilla extract. Using room temperature eggs and butter here is CRUCIAL for creating a smooth, emulsified batter that effectively holds moisture and prevents curdling.
- The Magic Moisture Method: Alternating Wet and Dry:
Gradually add the dry ingredients to the wet ingredients, alternating with the whole milk and sour cream. Begin and end with the dry ingredients. Mix on low speed just until combined. This alternating technique, combined with our “secret moisture weapon” sour cream, is vital for a moist Classic Yellow Cake.
CRITICAL: DO NOT OVERMIX! Overmixing develops too much gluten, which is the number one culprit for dry, tough cakes. Mix only until there are no visible streaks of flour, then stop immediately. The sour cream also adds incredible richness and moisture without making the cake dense.
- Divide and Prepare for Baking:
Divide the batter evenly between your two prepared cake pans. Gently tap the pans on the counter a few times to release any large air bubbles and ensure an even rise.
- Bake to Perfection (But Don’t Overbake!):
Bake for 28-32 minutes, or until a wooden skewer or toothpick inserted into the center of the cakes comes out clean. Again, DO NOT OVERBAKE! This is another critical step to prevent dryness. Keep a close eye on your cakes and pull them out as soon as they test clean.
- Cooling Your Cake Layers:
Let the cakes cool in their pans for 10-15 minutes. This allows them to set before inverting them onto a wire rack to cool completely. The cakes MUST be fully cool before proceeding to the frosting step to avoid a melted mess.
- Whip Up the Chocolate Frosting:
In a large bowl, cream the softened butter with an electric mixer until smooth. Gradually add the sifted powdered sugar and cocoa powder, beating until just combined. Sifting prevents lumps and ensures a silky smooth frosting for your Classic Yellow Cake with Chocolate Frosting.
- Achieve Fluffy Frosting Consistency:
Pour in the milk, vanilla extract, and salt. Beat on medium-high speed for 3-5 minutes, until the frosting is light, fluffy, and easily spreadable. Adjust milk slightly if needed for desired consistency.
- Assemble and Frost Your Masterpiece:
Once the cake layers are completely cool, place one layer on a serving plate. Spread about 1 cup of frosting evenly over the top. Place the second cake layer on top and frost the top and sides of the cake with the remaining frosting. Slice, serve, and enjoy your perfectly moist Classic Yellow Cake with Chocolate Frosting!
Chef’s Secrets: Elevate Your Yellow Cake & Frosting Game
Beyond the steps, these expert tips will truly elevate your Classic Yellow Cake with Chocolate Frosting from great to unforgettable.
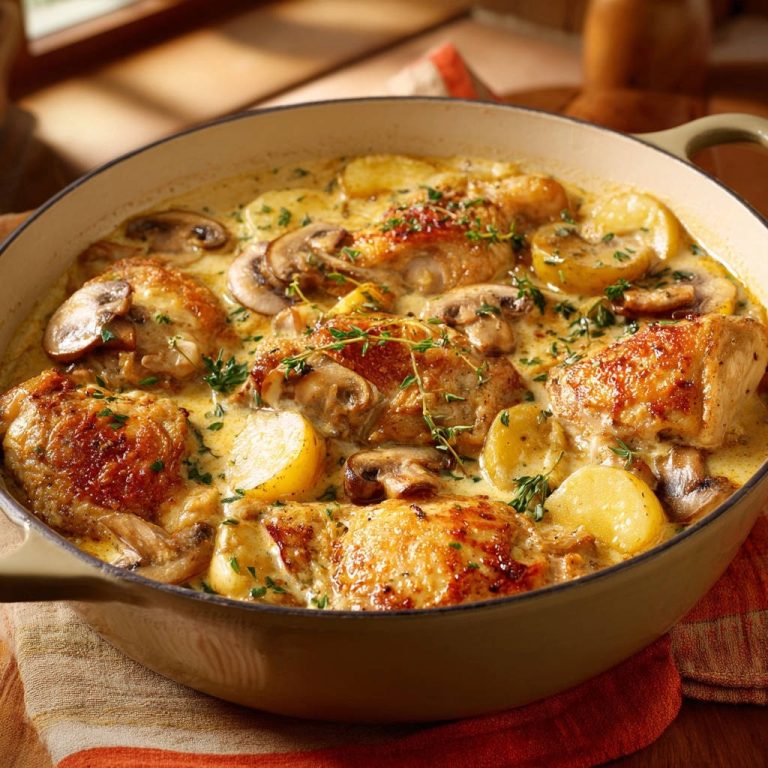
For another truly gooey treat, check out this fudgy caramel brownie pie.
Room Temperature is Key: Ensure butter, eggs, milk, and sour cream are at room temperature. This creates a smooth emulsion, preventing separation and leading to a more uniform, tender crumb for your Classic Yellow Cake.
Don’t Fear the Sifter: Sifting flour and cocoa powder breaks up lumps and aerates them, resulting in a lighter texture for both the cake and the frosting. It’s worth the extra step!
Measure Flour Correctly: Use the spoon-and-level method (spoon flour into a measuring cup, then level off with a straight edge) to avoid compacting the flour, which can lead to a dry, dense cake.
The Golden Rule: Don’t Overmix! As mentioned in the directions, overmixing develops gluten, making cakes tough. Mix just until ingredients are combined.
Testing for Doneness: Beyond the toothpick test, gently press the center of the cake. If it springs back, it’s likely done. A slight golden color on the edges is also a good indicator.
Chill the Frosting (If Needed): If your kitchen is warm and the frosting becomes too soft, chill it in the refrigerator for 15-20 minutes, then re-whip it briefly before frosting.
Common Cake Conundrums & How to Solve Them
Even experienced bakers encounter challenges. Here are solutions to common issues when baking a Classic Yellow Cake.
Why is My Classic Yellow Cake Dry?
The most common culprits for a dry cake are overmixing the batter or overbaking. Ensure you mix only until just combined and remove the cake from the oven as soon as a toothpick comes out clean. Room temperature ingredients also contribute significantly to moisture.
My Cake Layers Stuck to the Pan!
This usually happens due to insufficient greasing and flouring of the pans. Make sure to thoroughly grease every crevice and lightly flour, tapping out excess. Using parchment paper circles on the bottom of the pans offers extra insurance.
My Chocolate Frosting is Too Runny or Too Stiff!
If your frosting is too runny, gradually add more sifted powdered sugar, one tablespoon at a time, beating after each addition until desired consistency is reached. If it’s too stiff, add milk (or cream) a teaspoon at a time until it becomes perfectly spreadable.
Presenting & Preserving Your Masterpiece
Once your beautiful Classic Yellow Cake with Chocolate Frosting is complete, these tips will help you serve it elegantly and keep it fresh.
Elegant Serving Suggestions for Your Yellow Cake
This Classic Yellow Cake with Chocolate Frosting is beautiful on its own, but you can elevate it with a sprinkle of chocolate shavings, fresh berries, or a dusting of cocoa powder. Serve it alongside a scoop of vanilla bean ice cream for an extra special treat.
Storing Your Classic Yellow Cake for Maximum Freshness
Store your frosted Classic Yellow Cake at room temperature under a cake dome or in an airtight container for up to 3 days. If your kitchen is particularly warm, you can refrigerate it, but bring it to room temperature before serving for the best flavor and texture.
Make-Ahead Tips for Stress-Free Baking
You can bake the cake layers a day in advance. Once completely cooled, wrap them tightly in plastic wrap and store at room temperature. The chocolate frosting can also be made a day ahead and stored in an airtight container in the refrigerator, then re-whipped before use.
Frequently Asked Questions About Classic Yellow Cake
Here are answers to some common questions you might have about mastering this Classic Yellow Cake with Chocolate Frosting.
Can I use cake flour instead of all-purpose flour?
Yes, you can substitute cake flour for all-purpose flour in this Classic Yellow Cake recipe. Cake flour has a lower protein content, which can result in an even more tender and delicate crumb. You may need to adjust the amount slightly; typically, you’d use 2 ½ cups plus 2 tablespoons of cake flour for every 2 ½ cups of all-purpose flour.
Why are room temperature ingredients so important for this cake?
Room temperature butter, eggs, milk, and sour cream emulsify much better, creating a smooth, homogenous batter. This helps to trap air more effectively, leading to a lighter, fluffier cake. Cold ingredients can cause the batter to curdle, resulting in a dense or uneven texture in your Classic Yellow Cake.
Can I freeze the Classic Yellow Cake?
Yes, both frosted and unfrosted cake layers can be frozen. For unfrosted layers, wrap them tightly in plastic wrap and then foil. For frosted cake, freeze it uncovered until the frosting is firm, then wrap tightly in plastic wrap and foil. Thaw overnight in the refrigerator before serving. This is a great way to enjoy your Classic Yellow Cake with Chocolate Frosting for longer!
What’s the best way to sift powdered sugar and cocoa powder?
The best way is to use a fine-mesh sieve or a specific sifter. Place the powdered sugar and cocoa powder in the sieve, then gently tap or shake it over a bowl. This removes any lumps, ensuring a smooth frosting and preventing gritty texture in your Classic Yellow Cake’s topping.
Ready to Bake Your Best Classic Yellow Cake Yet?
Now that you’re armed with all the secrets to a truly moist, fluffy, and delicious Classic Yellow Cake with Chocolate Frosting, it’s time to preheat that oven! This recipe promises to deliver a show-stopping dessert that will earn you endless compliments and become a cherished family favorite.
More Sweet Ideas
Round out your dessert spread with these other chocolatey treats.
- For a fun, handheld chocolate creation, try these chocolate banana crepe roll-ups, perfect for easy serving.
- If you prefer a bar format, these chewy chocolate chip oatmeal bars offer a satisfying texture.
Don’t just bake; create a memory. Share your beautiful Classic Yellow Cake with Chocolate Frosting creations with us in the comments below, or tag us on social media. Happy baking!
Classic Yellow Cake with Chocolate Frosting
Course: DessertCuisine: AmericanDifficulty: medium12
servings45
minutes30
minutes650
kcal120
minutesEver dream of a homemade cake that’s unbelievably moist, tender, and melts in your mouth instead of leaving you with a dry, crumbly bite? This recipe locks in moisture like a champ, giving you that perfectly fluffy, delicious yellow cake with rich chocolate frosting you’ve always wanted. Get ready to bake a cake that gets rave reviews, every single time.
Ingredients
For the Cake:
2 ½ cups all-purpose flour
1 ½ cups granulated sugar
1 tablespoon baking powder
½ teaspoon salt
1 cup (2 sticks) unsalted butter, softened
3 large eggs, room temperature
2 teaspoons vanilla extract
1 cup whole milk, room temperature
½ cup sour cream, room temperature (our secret moisture weapon!)
For the Chocolate Frosting:
1 cup (2 sticks) unsalted butter, softened
4 cups powdered sugar, sifted
¾ cup unsweetened cocoa powder, sifted
½ cup whole milk
2 teaspoons vanilla extract
¼ teaspoon salt
Directions
- Preheat your oven to 350°F (175°C). Grease and flour two 8-inch round cake pans, tapping out any excess flour. This helps prevent sticking and keeps your cake edges clean.
- In a large bowl, whisk together the flour, granulated sugar, baking powder, and salt. Set aside.
- In a separate large bowl, using an electric mixer, cream together the softened butter until light and fluffy (about 2-3 minutes).
- Add the eggs one at a time, beating well after each addition until fully incorporated. Stir in the vanilla extract. Using room temperature eggs and butter here is CRUCIAL for a smooth batter that holds moisture.
- Now for the magic moisture method! Gradually add the dry ingredients to the wet ingredients, alternating with the milk and sour cream. Begin and end with the dry ingredients. Mix on low speed just until combined. This is the key: DO NOT OVERMIX! Overmixing develops too much gluten, which is the number one culprit for dry, tough cakes. Mix until there are no visible streaks of flour, then stop. The sour cream also adds incredible richness and moisture without making the cake dense.
- Divide the batter evenly between your prepared cake pans.
- Bake for 28-32 minutes, or until a wooden skewer or toothpick inserted into the center of the cakes comes out clean. Again, DO NOT OVERBAKE! This is another critical step to prevent dryness. Keep an eye on your cakes and pull them out as soon as they test clean.
- Let the cakes cool in the pans for 10-15 minutes before inverting them onto a wire rack to cool completely. The cakes MUST be fully cool before frosting.
- To make the frosting: In a large bowl, cream the softened butter with an electric mixer until smooth. Gradually add the sifted powdered sugar and cocoa powder, beating until combined.
- Pour in the milk, vanilla extract, and salt. Beat on medium-high speed for 3-5 minutes, until the frosting is light, fluffy, and spreadable.
- Once the cakes are completely cool, place one layer on a serving plate. Spread about 1 cup of frosting evenly over the top. Place the second cake layer on top and frost the top and sides of the cake with the remaining frosting. Slice and enjoy your perfectly moist masterpiece!
Notes
- Use room temperature ingredients. Do not overmix or overbake. Cakes must be fully cool before frosting.