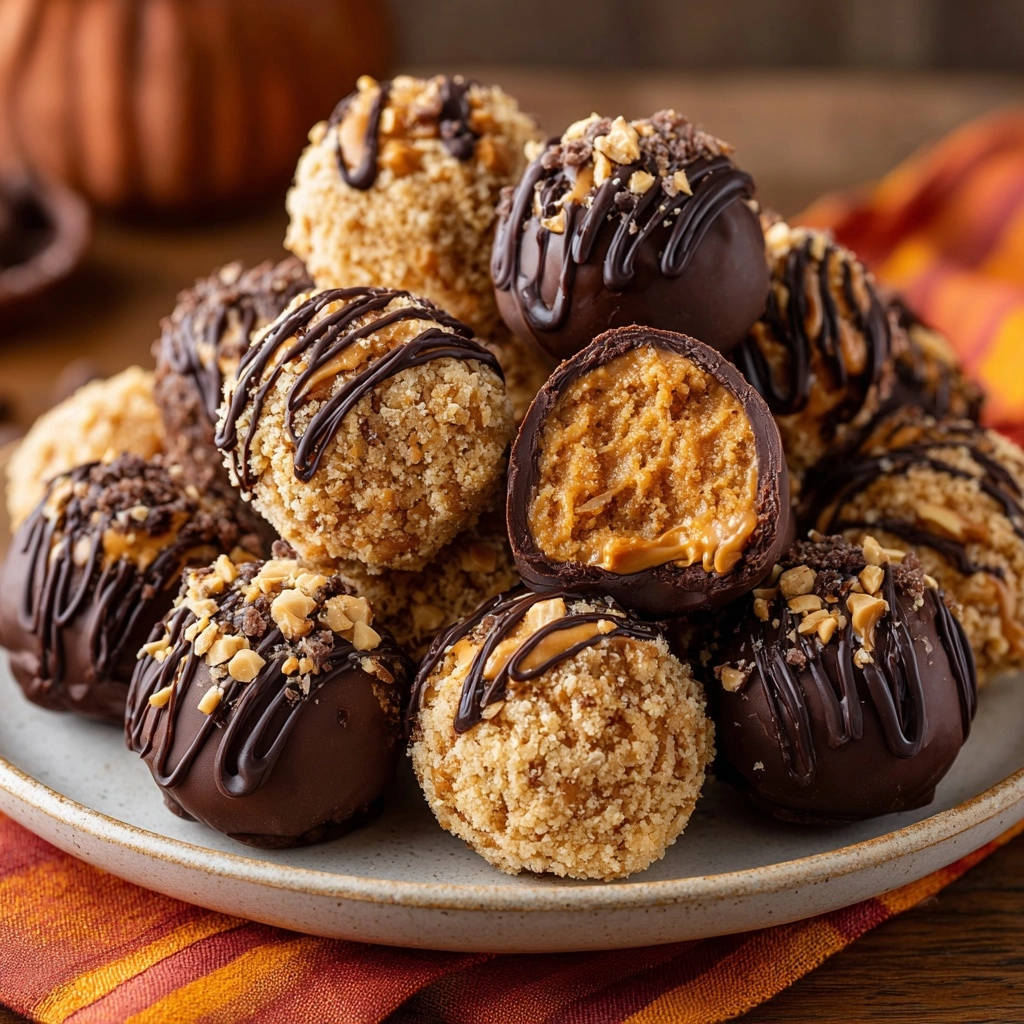
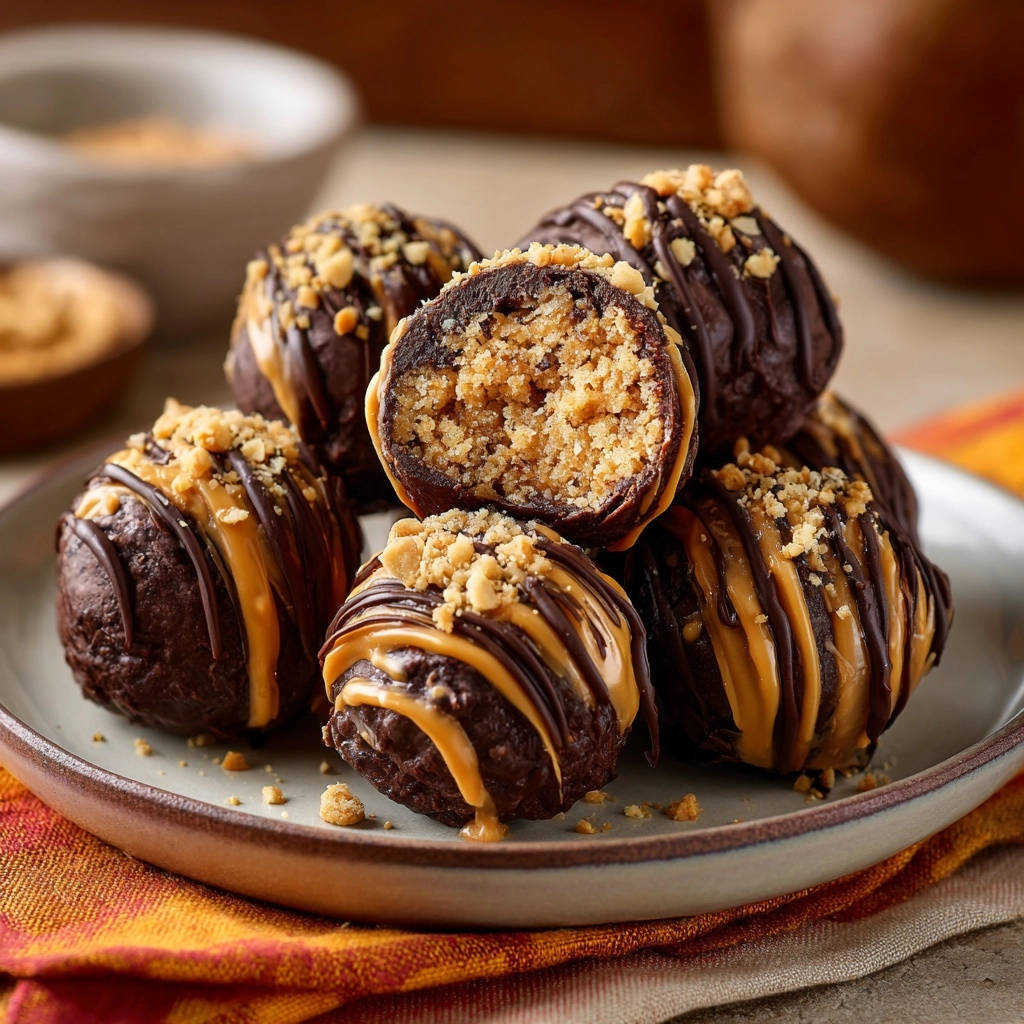
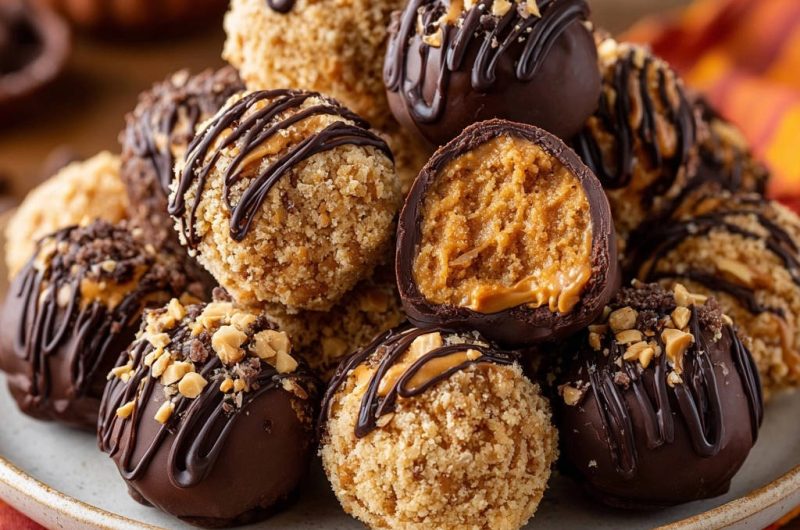
Decadent Peanut Butter Truffles: No-Fail Creamy Centers
Making Decadent Peanut Butter Truffles can be a delightful journey, but I’ve heard too many stories of crumbly fillings or sticky messes. This recipe is my trusted secret weapon, designed specifically to banish those frustrations and deliver perfectly creamy, firm, and easy-to-handle centers every time.
You’re about to create a batch of no-bake chocolate and peanut butter delights that are truly foolproof, impressive, and utterly delicious. Get ready for truffle perfection, the kind that melts in your mouth and leaves everyone asking for more.
Say Goodbye to Crumbly Fillings: Why This Recipe is Your New Truffle Go-To
The Promise of Perfect Texture: Creamy, Firm, & Never Greasy
Many homemade peanut butter treats struggle with consistency, often ending up either too dry and crumbly or excessively greasy. My method ensures a balanced, rich, creamy-but-firm peanut butter center.
Get Our Best Recipes Weekly!
Join thousands of food lovers and get delicious recipes delivered to your inbox.
We specifically aerate the fats and precisely incorporate powdered sugar to prevent a greasy mouthfeel. The result is a smooth, pliable filling that holds its shape beautifully and melts perfectly in your mouth.
Simplicity Meets Indulgence: No-Bake Delight Made Easy
Who said indulgence had to be complicated? These Decadent Peanut Butter Truffles are a joy to make, requiring no oven and minimal specialized equipment.
The straightforward steps and clear instructions make this recipe accessible for bakers of all skill levels. It’s truly a no-fuss path to a gourmet-tasting treat.
A Treat for Every Occasion: Versatile & Always Impressive
Whether you’re celebrating holidays, crafting a thoughtful homemade gift, or simply craving a sweet escape, these truffles fit every bill. Their elegant appearance belies their simple preparation.
They are a crowd-pleaser and versatile enough to customize with various toppings. These delightful homemade truffles always leave a lasting impression.
The Sweet Symphony: Essential Ingredients for Your Truffles
The Peanut Butter Heart: Creamy & Dreamy
The foundation of these truffles is creamy peanut butter. Its smooth texture is crucial for achieving that signature rich, melt-in-your-mouth filling.
Avoid natural, oil-separated peanut butter as it can make the truffle mixture too oily or unstable. Opt for a classic processed creamy variety for the best results.
Sweetness & Structure: Sugar and Butter Unveiled
Powdered sugar provides both sweetness and essential structure to our peanut butter filling. It dissolves seamlessly, contributing to the smooth texture without any graininess.
Softened unsalted butter adds richness and binds the ingredients together, creating a pliable, rollable dough. Ensuring it’s properly softened is key for smooth incorporation.
The Chocolate Shell: A Glossy Finish
Semi-sweet chocolate chips offer the perfect balance of sweetness to complement the peanut butter. Their quality directly impacts the final taste and appearance.
Coconut oil, though optional, is highly recommended. Just a touch creates a thinner, glossier chocolate coating that sets beautifully and resists cracking, elevating the visual appeal of your Decadent Peanut Butter Truffles.
Elevating Flavors: Vanilla, Coconut Oil, & Toppings
Vanilla extract adds a warm, aromatic depth that enhances both the peanut butter and chocolate flavors. It’s a subtle yet essential flavor enhancer.
Beyond its role in the chocolate, we love to finish these truffles with extra touches. Crushed roasted peanuts add a delightful crunch and intensify the nutty flavor, while cookie crumbs offer a different textural contrast. A simple drizzle of warm peanut butter provides an elegant finish and reinforces the core flavor.
More Sweet and Savory Ideas
If you enjoyed these peanut butter treats, explore more sweet creations or consider a savory contrast.
- For more no-bake sweetness, try these No-Bake Caramel Nut Clusters, offering a similar ease of preparation with a delightful crunch.
- To balance the sweetness, consider the Southern Baked Grits with Crispy Turkey, a rich and satisfying dish that complements chocolate flavors well.
Your Truffle Toolkit: Essential Equipment for Easy Making
-
Mixing & Whipping Essentials
You’ll need a large mixing bowl to accommodate the filling ingredients and a hand mixer for efficient, lump-free blending. These tools are fundamental for achieving the perfect creamy base for your Decadent Peanut Butter Truffles.
-
Shaping and Setting Aids
Parchment-lined baking sheets are vital for preventing sticking and easy handling of the truffles. A small scoop, approximately 1 tablespoon, ensures uniform sizing, which is key for consistent appearance and setting.
-
Melting & Dipping Gear
A microwave-safe bowl is essential for melting your chocolate quickly and safely. For dipping, a sturdy fork or specialized dipping tools will help you achieve a smooth, even coating without excess chocolate.
Crafting Your Decadent Peanut Butter Truffles: A Step-by-Step Guide
Mastering the Peanut Butter Filling: Your Crumbly Cure
In a large bowl, combine the creamy peanut butter, softened butter, and vanilla extract. Use a hand mixer on medium speed to beat until well combined and lightened, about 2-3 minutes. This aeration process is crucial; it fluffs the fats, preventing a dense, greasy texture later and setting the stage for perfectly creamy homemade truffles.
Gradually add the powdered sugar, one cup at a time, beating on low speed until fully incorporated. The key here is not to overmix once the sugar is in; beat just until a thick, cohesive dough forms. It should be firm enough to pull away from the sides of the bowl but still pliable. If it feels too dry, add a tiny bit more softened butter, a teaspoon at a time. If it’s too soft, add another tablespoon or two of powdered sugar until you reach a consistency that holds its shape, making it ideal for shaping.
The Chill Factor: Achieving Rollable Perfection
Cover the peanut butter dough and refrigerate for at least 30 minutes. This chilling step is essential. It firms up the mixture, making it much easier to roll into smooth balls without sticking to your hands or crumbling apart. Do not skip this for perfectly shaped Decadent Peanut Butter Truffles.
Shaping Sweet Spheres
Once chilled, scoop out small portions (about 1 tablespoon) of the peanut butter mixture. Roll them between your palms into uniform, smooth balls. Place the rolled balls on a parchment-lined baking sheet. Return them to the refrigerator while you prepare the chocolate, ensuring they remain firm for dipping.
Preparing Your Silky Chocolate Coating
In a microwave-safe bowl, combine the semi-sweet chocolate chips and coconut oil (if using). Microwave on medium power in 30-second intervals, stirring well after each, until the chocolate is completely melted and smooth. The coconut oil helps create a glossy, thin coating that sets beautifully and does not crack, ensuring a professional finish for your chocolate peanut butter treats.
The Grand Finale: Dipping, Drizzling, and Decorating
Take the chilled peanut butter balls from the fridge. Using a fork or a dipping tool, gently submerge each ball into the melted chocolate, tapping off any excess. Immediately transfer to the parchment-lined baking sheet.
While the chocolate is still wet, you can roll some in crushed peanuts or cookie crumbs, or sprinkle them on top. For the peanut butter drizzle, warm 1/4 cup of smooth peanut butter in the microwave for 15-20 seconds until pourable. Drizzle over the chocolate-coated truffles using a spoon or a piping bag with a tiny snip, adding a final touch of elegance.
The Final Chill: Setting for Success
Refrigerate the finished truffles for another 30 minutes, or until the chocolate coating is completely set. This ensures a firm, stable coating. Store these delicious peanut butter delights in an airtight container in the refrigerator for optimal freshness. Enjoy your perfectly creamy, non-crumbly homemade peanut butter truffles!
Unlock Truffle Perfection: Expert Tips & Clever Tricks
Temperature Matters: Butter & Peanut Butter Harmony
Always ensure your unsalted butter is genuinely softened, not melted. It should yield to gentle pressure. Similarly, room-temperature creamy peanut butter blends more smoothly, preventing lumps and ensuring a homogenous filling texture.
This temperature harmony is crucial for a perfectly emulsified mixture that forms the ideal foundation for your Decadent Peanut Butter Truffles.
The Art of the Perfect Roll
To achieve perfectly smooth, uniform truffle balls, work quickly to minimize warmth from your hands. If the mixture starts to stick, lightly grease your palms with a tiny amount of coconut oil or powdered sugar.
Rolling in small batches and returning any unused mixture to the fridge will also help maintain a firm consistency. This technique ensures beautifully shaped chocolate peanut butter delights.
Achieving a Flawless Chocolate Dip
Maintain your melted chocolate at a warm, pourable, but not scorching, temperature. Overheated chocolate can seize or become too thick. When dipping, submerge fully then gently tap the fork against the bowl edge to remove excess chocolate.
This tapping prevents pooling at the base and ensures a thin, even coating. Remember, the coconut oil significantly aids in achieving that desired glossy, crack-free finish on your homemade truffles.
Creative Coating Ideas Beyond Peanuts
While crushed peanuts are classic, don’t shy away from other delicious coatings. Consider vibrant sprinkles for a festive look, a contrasting white chocolate drizzle, or a dusting of cocoa powder for an elegant finish.
A sprinkle of sea salt flakes adds a sophisticated sweet-and-salty kick, or try finely chopped pretzels for an unexpected crunch. These additions allow you to personalize your Decadent Peanut Butter Truffles for any occasion.
Truffle Troubleshoot: Common Hurdles & Quick Solutions
“My Peanut Butter Filling is Too Crumbly!”
If your peanut butter mixture feels too dry and crumbly, it likely needs more fat to bind it. Add a tiny bit more softened unsalted butter, about a teaspoon at a time, beating gently until the desired pliable consistency is achieved.
“The Mixture is Too Sticky to Roll!”
Excess stickiness is often a sign the mixture is too warm or lacks sufficient dry ingredients. Ensure you’ve chilled the dough for the full 30 minutes, or even longer if your kitchen is warm. If still too soft, gradually beat in another tablespoon or two of powdered sugar until it firms up.
“My Chocolate Coating is Too Thick/Thin!”
If your melted chocolate is too thick, stir in another 1/2 teaspoon of coconut oil until it reaches a smooth, pourable consistency. If it seems too thin, it might be overheated or have too much oil; add a few more semi-sweet chocolate chips and melt gently until thickened.
“Why is My Chocolate Not Setting Firmly?”
Ensure your truffles are adequately chilled after coating; at least 30 minutes in the refrigerator is crucial. Verify the quality of your chocolate; older chocolate can sometimes struggle to set. Also, too much coconut oil can hinder setting, so measure precisely.
Your Most Asked Questions About Decadent Peanut Butter Truffles, Answered!
Can I use natural peanut butter for these truffles?
I highly recommend using creamy, processed peanut butter for these truffles. Natural peanut butter tends to separate its oils, leading to a mixture that can be too oily, inconsistent, and often too soft or crumbly to roll effectively, making the perfect texture harder to achieve.
How long do these Decadent Peanut Butter Truffles last?
When stored in an airtight container in the refrigerator, these Decadent Peanut Butter Truffles will stay fresh and delicious for up to 2 weeks. Their rich flavors actually deepen slightly over time.
Can I freeze peanut butter truffles?
Absolutely! Freeze the finished truffles in a single layer on a parchment-lined baking sheet until firm, then transfer them to an airtight freezer-safe container or bag. They can be frozen for up to 3 months. Thaw them in the refrigerator for a few hours before serving.
What other coatings or toppings can I use?
Get creative! Besides crushed peanuts or cookie crumbs, consider mini chocolate chips, toasted shredded coconut, a dusting of flaky sea salt, or even finely crushed potato chips for a sweet and salty crunch. A drizzle of white chocolate also adds a lovely visual contrast.
Are these truffles gluten-free?
Yes, these Decadent Peanut Butter Truffles are naturally gluten-free, provided you use gluten-free peanut butter and chocolate chips. If using cookie crumbs for coating, ensure they are certified gluten-free. Always check ingredient labels to confirm.
Storing Your Sweet Success & Creative Serving Ideas
Optimal Storage for Lasting Freshness
To preserve their exquisite flavor and texture, always store your Decadent Peanut Butter Truffles in an airtight container in the refrigerator. This keeps the chocolate firm and the peanut butter filling perfectly creamy, ready for whenever a craving strikes.
Make-Ahead Magic: Preparing Truffles in Advance
These truffles are fantastic for make-ahead convenience, ideal for busy holidays or upcoming events. You can prepare them up to two weeks in advance, storing them in the refrigerator. This allows you to spread out your kitchen tasks and enjoy stress-free entertaining.
Elegant Presentation & Serving Suggestions
Present your homemade truffles beautifully to elevate the experience. Arrange them in mini cupcake liners on a tiered dessert platter for a sophisticated display. They also make a stunning addition to a dessert board, alongside fresh berries, cheeses, and crackers.
Ready to Indulge? Your Decadent Peanut Butter Truffles Await!
You now possess the ultimate guide to creating truly Decadent Peanut Butter Truffles, free from the woes of crumbly fillings. It’s time to don your apron, gather your ingredients, and experience the pure joy of these irresistible chocolate peanut butter delights.
Dive in, create some magic, and share your delightful creations! I can’t wait to hear how these perfect homemade truffles transform your dessert table.
Decadent Peanut Butter Truffles
Course: DessertCuisine: American CuisineDifficulty: easy4
12-15 truffles45
minutes60
minutesAmerican Cuisine
Ingredients
1 cup creamy peanut butter
1/2 cup unsalted butter, softened
2 cups powdered sugar, plus more for dusting
1 teaspoon vanilla extract
12 ounces semi-sweet chocolate chips
1 tablespoon coconut oil (optional, for smooth melting)
1/2 cup finely crushed roasted peanuts or cookie crumbs (for coating)
1/4 cup smooth peanut butter, for drizzling
Directions
- Master the Filling Consistency (Your Crumbly Cure!): In a large bowl, combine the creamy peanut butter, softened butter, and vanilla extract. Use a hand mixer on medium speed to beat until well combined and lightened, about 2-3 minutes. This aerates the fats, preventing a greasy texture later. Gradually add the powdered sugar, one cup at a time, beating on low speed until fully incorporated. The key here is not to overmix once the sugar is in. Beat just until a thick, cohesive dough forms. It should be firm enough to pull away from the sides of the bowl but still pliable. If it feels too dry, add a tiny bit more softened butter, a teaspoon at a time. If it’s too soft, add another tablespoon or two of powdered sugar until you reach a consistency that holds its shape.
- Chill for Perfect Rolling: Cover the peanut butter dough and refrigerate for at least 30 minutes. This chilling step is essential. It firms up the mixture, making it much easier to roll into smooth balls without sticking to your hands or crumbling apart.
- Shape and Prep: Once chilled, scoop out small portions (about 1 tablespoon) of the peanut butter mixture. Roll them between your palms into uniform, smooth balls. Place the rolled balls on a parchment-lined baking sheet. Return them to the refrigerator while you prepare the chocolate.
- Chocolate Coating: In a microwave-safe bowl, combine the semi-sweet chocolate chips and coconut oil (if using). Microwave on medium power in 30-second intervals, stirring well after each, until the chocolate is completely melted and smooth. The coconut oil helps create a glossy, thin coating that sets beautifully and doesn’t crack.
- Dip and Decorate: Take the chilled peanut butter balls from the fridge. Using a fork or a dipping tool, gently submerge each ball into the melted chocolate, tapping off any excess. Immediately transfer to the parchment-lined baking sheet. While the chocolate is still wet, you can roll some in crushed peanuts or cookie crumbs, or sprinkle them on top. For the peanut butter drizzle, warm 1/4 cup of smooth peanut butter in the microwave for 15-20 seconds until pourable. Drizzle over the chocolate-coated truffles using a spoon or a piping bag with a tiny snip.
- Set and Enjoy: Refrigerate the finished truffles for another 30 minutes, or until the chocolate coating is completely set. Store in an airtight container in the refrigerator. Enjoy your perfectly creamy, non-crumbly homemade peanut butter truffles!
Notes
- Chilling steps are crucial for easy handling and perfect texture.