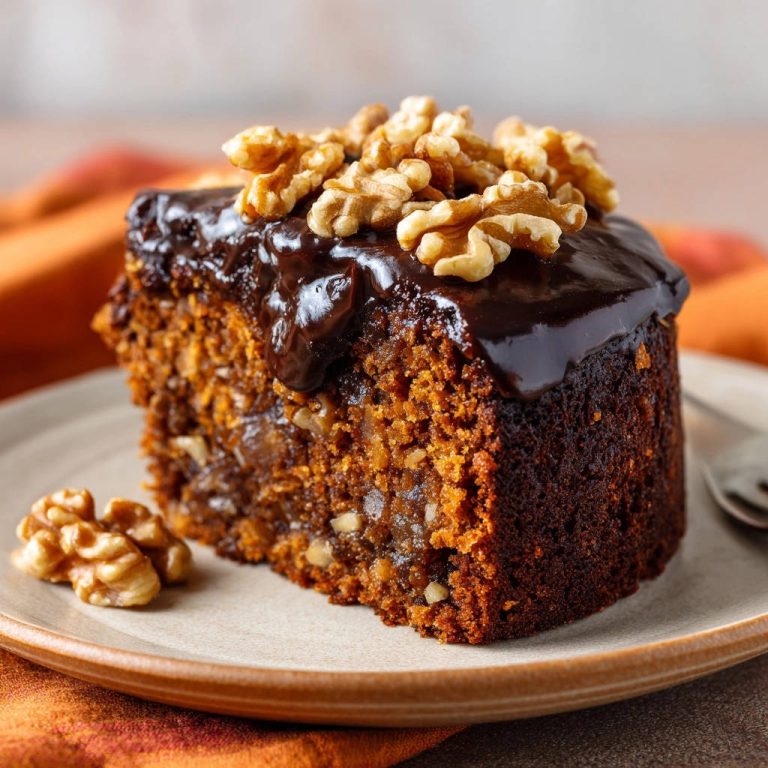
Double Chocolate Caramel Dream: Ultra-Moist Cake Perfection
Bakers, have you ever dreamed of a chocolate cake so moist it practically melts on your tongue, yet is incredibly stable and never, ever dry? I’ve certainly faced the heartbreak of a crumbly, parched chocolate cake more times than I care to admit. But with this Double Chocolate Caramel Dream, those days are a distant memory.
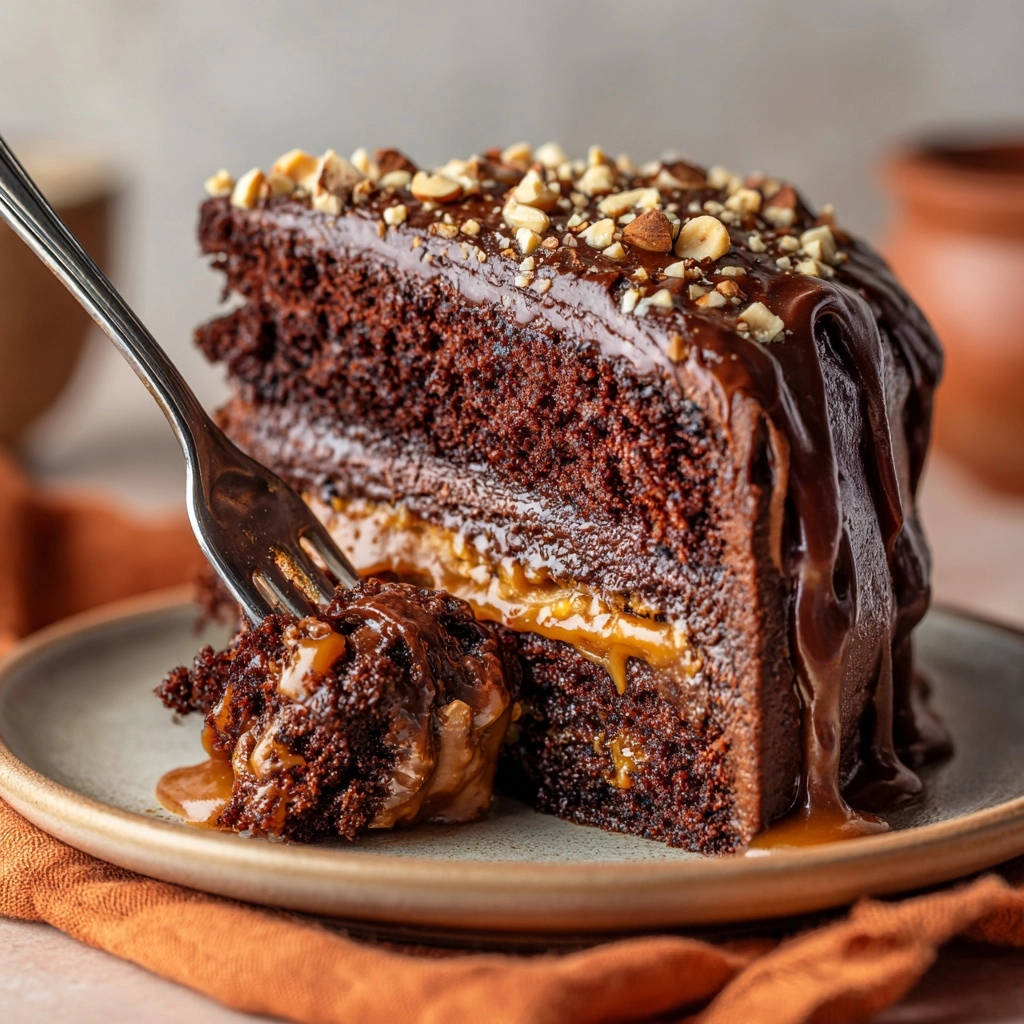
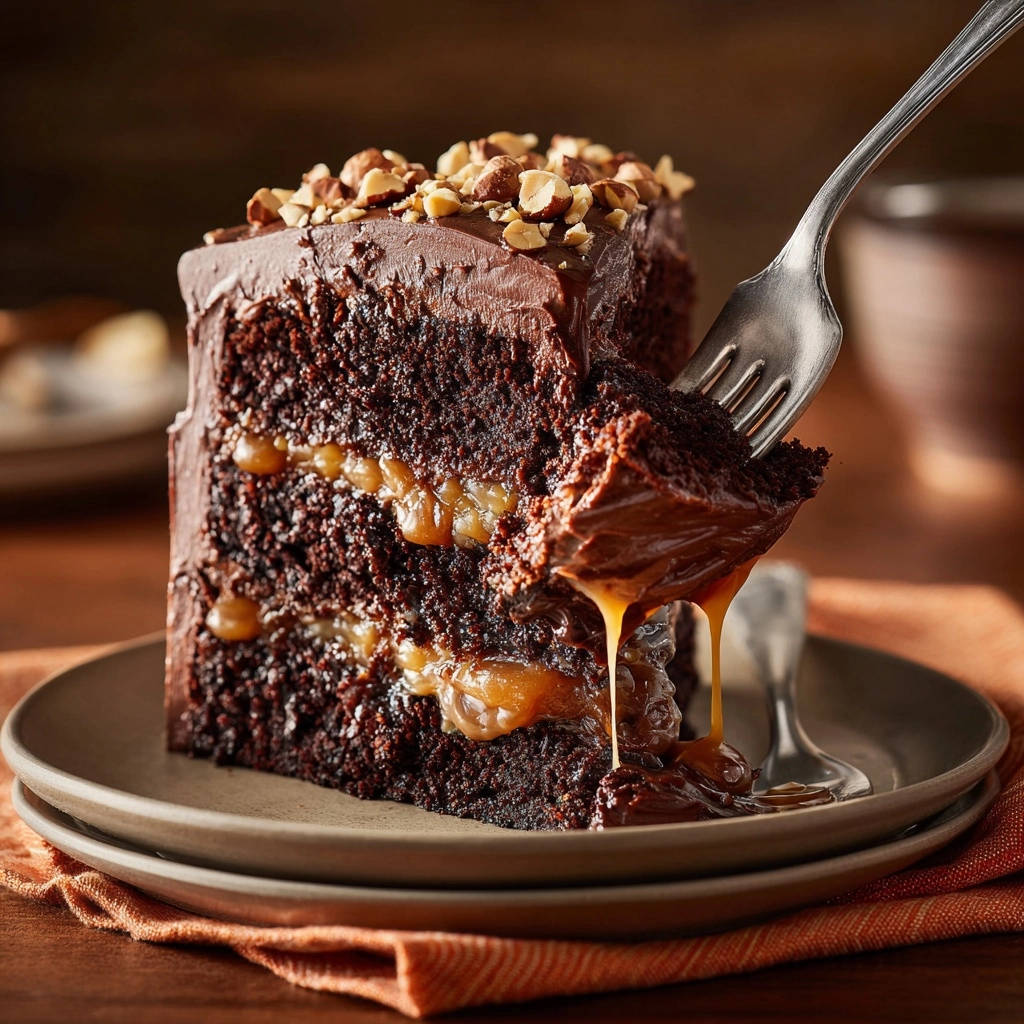
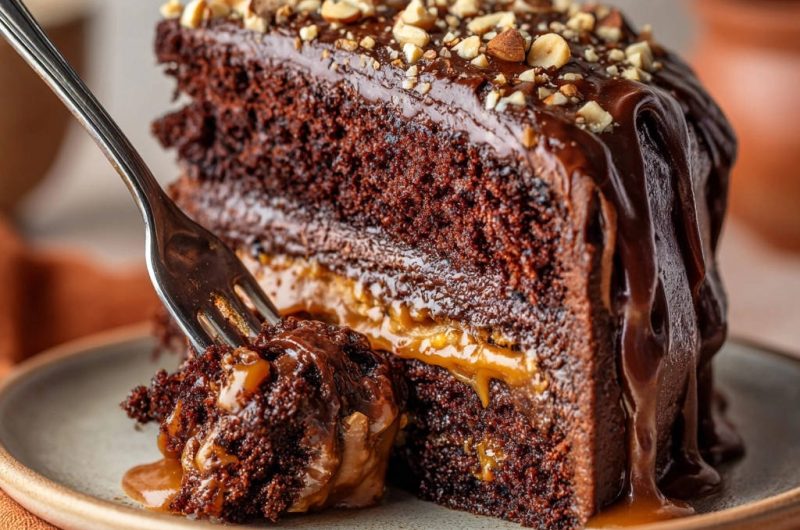
This isn’t just another cake recipe; it’s a testament to achieving ultimate indulgence, featuring a tender crumb, rich chocolate, gooey salted caramel, and a luscious ganache that will crown you the dessert champion. Prepare to master the art of the perfect, unbelievably moist chocolate cake.
Why This Double Chocolate Caramel Dream Will Be Your New Favorite
Beyond its stunning appearance, this recipe delivers an unparalleled sensory experience, making it a standout addition to your baking repertoire. It addresses common baking frustrations, ensuring a foolproof path to dessert glory.
Get Our Best Recipes Weekly!
Join thousands of food lovers and get delicious recipes delivered to your inbox.
The Secret to a Never-Dry Chocolate Cake
The quest for a truly moist chocolate cake ends here. This recipe incorporates a unique, game-changing technique that guarantees a tender, melt-in-your-mouth crumb every single time.
Say goodbye to the disappointment of dry, crumbly slices. Our method ensures your chocolate cake remains incredibly moist for days, challenging all previous baking experiences.
To achieve similarly irresistible results, consider this fudgy caramel brownie pie.
Layers of Decadence: Gooey Caramel & Rich Ganache
This cake is a symphony of textures and flavors. It features a layer of homemade, perfectly gooey salted caramel, offering a delightful counterpoint to the deep chocolate.
A silky, rich chocolate ganache cascades over the top, adding another layer of luxurious indulgence. The combination creates a truly unforgettable dessert experience.
For more ideas on avoiding dryness, explore the moist crumb of classic yellow cake.
Impress Your Guests with Minimal Effort (and Maximum Flavor)
While this Double Chocolate Caramel Dream looks incredibly impressive, it’s designed for achievable success in your home kitchen. The steps are straightforward, leading to professional-quality results.
You’ll produce a dessert that not only tastes extraordinary but also looks stunning, making it ideal for special occasions or simply elevating an everyday moment.
Complementary Flavors
After indulging in this rich chocolate cake, consider these satisfying main dishes for a complete meal.
- For a savory counterpoint, try this Sheet Pan Chicken & Roasted Veggies, a straightforward way to prepare a hearty meal.
- If you’re in the mood for something warm and spiced, this Chickpea & Pea Curry offers a different kind of depth.
Tools of the Trade: Equipping Your Kitchen for Cake Success
Having the right equipment makes all the difference in ensuring a smooth and enjoyable baking process. Gather these essentials before you begin.
Baking Essentials: Pans and Bowls
-
Two 8-inch Round Cake Pans: These are crucial for creating perfectly even layers. Ensure they are the correct size to prevent over-baking or overflowing.
-
Large Mixing Bowl: Essential for combining your dry ingredients thoroughly and eventually, the full cake batter. A spacious bowl prevents spills and allows for efficient mixing.
-
Medium Mixing Bowl: Perfect for whisking together the wet ingredients separately before incorporating them into the dry mixture. This helps in achieving a consistent batter.
Whisks, Spatulas, and Measuring Accuracy
-
Measuring Cups and Spoons: Precision is paramount in baking. Use accurate measuring tools for both dry and wet ingredients to ensure the right balance in your recipe.
-
Electric Mixer (Handheld or Stand): While not strictly essential, an electric mixer makes light work of combining ingredients smoothly and efficiently, especially for the cake batter.
-
Balloon Whisk: Ideal for aerating dry ingredients and thoroughly combining wet components by hand. A good whisk helps prevent lumps.
-
Rubber Spatula: Indispensable for scraping down the sides of bowls, ensuring all ingredients are fully incorporated, and gently folding the hot liquid into the batter.
The Saucepans for Silky Caramel and Ganache
-
Heavy-Bottomed Saucepan: Absolutely critical for making the salted caramel. Its even heat distribution prevents scorching and promotes a consistent, controlled caramelization process.
-
Small Saucepan: Needed for gently heating the heavy cream for your ganache. A smaller pan allows for quicker and more precise temperature control.
-
Heatproof Bowl: Use this to hold your chocolate chips for the ganache. It needs to withstand the heat of the freshly simmered cream without cracking or melting.
The Building Blocks of Flavor: Crafting Your Double Chocolate Caramel Dream
Understanding the role each ingredient plays elevates your baking from following instructions to mastering the craft. Every component contributes to the exquisite final result.
The Heart of the Cake: Flour, Sugar & Cocoa
-
All-Purpose Flour: Provides the fundamental structure and body for the cake. Its gluten content creates a tender yet sturdy crumb.
-
Granulated Sugar: Not just for sweetness, sugar also contributes significantly to the cake’s moisture and helps achieve a fine, soft texture.
-
Unsweetened Cocoa Powder: Delivers that deep, intense chocolate flavor. Using unsweetened cocoa allows you to control the overall sweetness of the cake.
Moisture & Structure: Wet Ingredients Explained
-
Milk: Adds richness and contributes to the cake’s tenderness and moistness, ensuring a luxurious mouthfeel.
-
Vegetable Oil: A silent hero for moisture, oil results in an incredibly soft and pliable crumb that stays moist longer than butter-based cakes.
-
Large Eggs: Act as emulsifiers, binding ingredients together and adding structure, richness, and leavening to the batter.
-
Vanilla Extract: Enhances and rounds out all the flavors, particularly the chocolate. High-quality vanilla makes a noticeable difference.
The Magic Touch: Hot Water or Coffee
This is arguably the most crucial ingredient for our ultra-moist chocolate cake. The hot liquid serves multiple vital purposes in achieving that perfect crumb.
It “blooms” the cocoa powder, intensifying its chocolate flavor, and thins the batter. This thin batter bakes into an unbelievably moist, tender, and delicate cake that defies dryness.
Crafting Liquid Gold: Salted Caramel Components
-
Granulated Sugar & Water: Form the base for caramelization. The water helps the sugar dissolve evenly before it starts to transform into amber liquid.
-
Heavy Cream (warmed): Added carefully to the hot caramel, it instantly cools the mixture, stopping the cooking process and creating a silky-smooth sauce. Warming it prevents seizing.
-
Unsalted Butter (cubed): Stirred in at the end, butter adds richness, gloss, and a velvety texture to the finished caramel, making it truly decadent.
-
Sea Salt: A pinch of sea salt perfectly balances the sweetness of the caramel. It enhances the flavor, preventing it from being overly cloying.
Glossy Perfection: Ganache Essentials
-
Semi-Sweet Chocolate Chips: The foundation for your rich ganache. Quality chocolate will yield the best flavor and texture.
-
Heavy Cream: When heated and poured over the chocolate, the warm cream melts the chips. Whisking then emulsifies the mixture into a smooth, shiny, and pourable ganache.
Crunchy Finish: Topping Options
Chopped Hazelnuts: These provide a delightful textural contrast and nutty flavor that perfectly complements the chocolate and caramel. Their slight bitterness cuts through the sweetness.
Other fantastic alternatives include toasted pecans, walnuts, chocolate shavings, or even a sprinkle of flaky sea salt for an extra pop of savory goodness.
Your Path to Double Chocolate Caramel Dream Perfection: A Detailed Guide
Prepping for Success: Pans & Oven
Begin by preheating your oven to 350°F (175°C). This ensures your cake starts baking immediately and evenly, preventing a dense bottom layer.
Properly prepare two 8-inch round cake pans by greasing them thoroughly and dusting with flour, ensuring every curve is coated. This crucial step guarantees an effortless cake release, preventing any sticking disasters.
Crafting the Cake Batter: Dry Meets Wet
In a large bowl, whisk together the all-purpose flour, granulated sugar, unsweetened cocoa powder, baking soda, baking powder, and salt. This aeration and even distribution of dry ingredients are key for a consistent crumb.
In a separate medium bowl, whisk together the milk, vegetable oil, eggs, and vanilla extract until they are fully combined and homogenous. This ensures all wet components are integrated before meeting the dry.
Pour the whisked wet ingredients into the dry mixture. Mix on low speed with an electric mixer until they are just combined. Do not overmix, as this can develop too much gluten, leading to a tough cake.
The Game-Changer: Ensuring Unbeatable Moistness
Here’s the secret to a perpetually moist cake: carefully pour 1 cup of hot water or hot brewed coffee into the batter. The batter will become noticeably thin, which is exactly what we want.
Mix on low speed until just smooth. This hot liquid blooms the cocoa powder, deepening its flavor, and creates an incredibly tender, delicate crumb that sets this Double Chocolate Caramel Dream apart. It eliminates any chance of a dry cake!
Baking and Cooling: Patience is a Virtue
Divide the thin, fluid batter evenly between your two prepared cake pans. Even distribution promotes uniform baking and creates beautifully level cake layers.
Bake for 30-35 minutes, or until a wooden skewer inserted into the center of a cake comes out with only moist crumbs attached, not wet batter. Overbaking is the enemy of moistness.
Allow the cakes to cool in their pans for 10 minutes before carefully inverting them onto a wire rack. This initial cooling in the pan helps them firm up, preventing breakage, and ensuring they cool completely before frosting.
Whipping Up the Salted Caramel Magic
While the cakes cool, begin your salted caramel. In a heavy-bottomed saucepan, combine 1 cup granulated sugar and 1/4 cup water over medium heat. Stir gently until the sugar dissolves completely.
Once dissolved, cease stirring and let the syrup cook undisturbed. Watch it carefully as it transforms from clear to a rich, deep amber color, typically taking 10-15 minutes. This is the caramelization process.
Immediately remove from heat and, with extreme caution, slowly pour in the 1/2 cup of warm heavy cream (it will bubble vigorously). Stir until smooth, then add 4 tablespoons cubed unsalted butter and 1/2 teaspoon sea salt, stirring until melted and fully combined. Allow the caramel to cool completely, thickening as it does so.
Creating a Glossy Chocolate Ganache
Place 1 cup semi-sweet chocolate chips in a heatproof bowl. In a small saucepan, heat 1/2 cup heavy cream until it just begins to simmer around the edges; do not boil.
Pour the hot cream over the chocolate chips and let it sit undisturbed for 5 minutes. This allows the heat to gently melt the chocolate.
After 5 minutes, whisk the mixture gently from the center outwards until it is completely smooth and glossy. You’ll achieve a beautiful, rich chocolate ganache perfect for drizzling.
Assembling Your Decadent Masterpiece
Once all components are completely cooled, place one cake layer on your chosen serving plate or cake stand. This first layer establishes the foundation for your Double Chocolate Caramel Dream.
Pour and spread a generous amount of the cooled salted caramel over the top of the first cake layer, ensuring an even coating. The cooled caramel will be thick enough to stay in place.
Carefully place the second cooled cake layer directly on top of the caramel-covered first layer. Center it for a neat finish.
Finally, pour the chocolate ganache over the top of the cake, allowing it to drip beautifully and naturally down the sides. Before the ganache sets, sprinkle the chopped hazelnuts evenly over the top for a delightful crunch. Serve immediately, or chill slightly if you prefer a firmer caramel.
Chef’s Secrets & Common Fixes for Your Double Chocolate Caramel Dream
Even experienced bakers encounter challenges. These tips and troubleshooting advice will help you achieve perfection every time.
Baking Wisdom: Achieving the Perfect Crumb
-
Don’t Overmix: Overmixing develops gluten, leading to a tough, dry cake. Mix until just combined after adding the hot liquid.
-
Measure Accurately: Use proper measuring cups for dry ingredients (leveling with a knife) and liquid measuring cups for wet. Baking is a science, and precision matters.
-
Know Your Oven: Oven temperatures can vary significantly. Consider using an oven thermometer to ensure your oven is truly preheated to 350°F (175°C).
-
Don’t Overbake: As soon as the skewer test comes out with moist crumbs, remove the cakes from the oven. Baking too long is the quickest way to a dry cake.
Caramel Chronicles: Preventing Seizing & Burning
-
Do Not Stir Sugar After Dissolving: Once the sugar and water are combined and simmering, resist the urge to stir. Stirring can cause sugar crystals to form, leading to grainy caramel.
-
Watch the Color Closely: Caramel can go from perfectly amber to burnt in seconds. Have your warm cream ready and remove from heat immediately once the desired deep amber color is achieved.
-
Warm the Cream: Ensure your heavy cream is warm before adding it to the hot caramel. Cold cream can cause the caramel to seize and clump up, making it hard to smooth out.
Ganache Grace: Smooth, Shiny & Drip-Worthy
-
Control Temperature: The cream should be hot enough to melt the chocolate but not boiling. Overheated cream can burn the chocolate or separate the ganache.
-
Gentle Whisking: Start whisking from the center, gradually expanding outwards, after the chocolate has had time to melt. Aggressive whisking can incorporate too much air, making the ganache dull.
-
Achieving the Drip: For perfect drips, ensure your ganache is warm and pourable, but not hot. A slightly cooler ganache will drip slower and set more beautifully.
Problem Solved: Common Cake Challenges
-
“Why is my cake dry?”: Revisit the hot water/coffee step. This is your insurance policy for moisture. Also, check your oven temperature and baking time to avoid overbaking.
-
“My caramel is grainy”: This usually happens from stirring the sugar syrup too much after it starts simmering, or not letting the sugar fully dissolve initially. Try a clean saucepan and resist stirring.
-
“My ganache is too thick/thin”: If too thick, add a tiny bit more warm cream (1 tsp at a time) and whisk. If too thin, allow it to cool slightly longer; it will thicken as it cools. For a thicker set, add a bit more chocolate next time.
Elevating Your Double Chocolate Caramel Dream: Variations & Presentation
This stunning cake is a fantastic canvas for your creativity. Experiment with different flavors and presentation styles to make it uniquely yours.
Creative Twists: Flavor Variations
-
Spiced Chocolate: Add a pinch of cinnamon or a tiny dash of cayenne pepper to the cake batter for a warm, subtle heat that complements the chocolate beautifully.
-
Espresso Kick: For an even deeper coffee flavor, swap a small amount of the hot coffee for a shot of espresso in the batter. You can also add a teaspoon of instant espresso powder.
-
Nutty Alternatives: While hazelnuts are classic, toasted pecans, walnuts, or even macadamia nuts would also make excellent crunchy toppings for this Double Chocolate Caramel Dream.
-
Dark Chocolate Ganache: For a more intense, less sweet chocolate experience, use a good quality dark chocolate (70% cocoa) for the ganache instead of semi-sweet chips.
Serving Suggestions: Pairing & Plating
-
A La Mode: Serve a slice with a scoop of premium vanilla bean ice cream or a dollop of freshly whipped cream. The cool, creamy contrast is divine.
-
Berry Bliss: A few fresh raspberries or strawberries on the side add a touch of color, tartness, and freshness, cutting through the richness.
-
Coffee Companion: This cake pairs perfectly with a strong cup of coffee or a rich espresso, balancing its sweetness with robust flavors.
-
Optimal Temperature: For the best texture, allow the cake to sit at room temperature for about 30 minutes before serving. This softens the caramel and ganache slightly.
Smart Storage: Keeping Your Cake Fresh
To keep your Double Chocolate Caramel Dream tasting its best, proper storage is key. Always use an airtight container to prevent the cake from drying out.
At room temperature, the cake will stay fresh for up to 2-3 days. For longer storage, refrigerate for up to 5 days. Be sure to bring it to room temperature for optimal flavor and texture before serving.
Make-Ahead Magic: Prep Like a Pro
Many components of this delicious cake can be prepared in advance, making assembly on the day of serving a breeze. This is perfect for entertaining.
The cake layers can be baked, cooled completely, and then tightly wrapped in plastic wrap and stored at room temperature for up to 2 days, or frozen for up to 2 weeks. The caramel and ganache can also be made a day or two ahead and stored in airtight containers in the refrigerator, then gently rewarmed or brought to room temperature before use.
Your Double Chocolate Caramel Dream Questions, Answered!
Can I use store-bought caramel?
While homemade salted caramel offers superior flavor and texture, you can certainly use a high-quality store-bought caramel sauce in a pinch. Just ensure it’s a thick, spoonable variety, not a thin syrup, for the best layering.
What if I don’t have coffee for the cake?
No coffee, no problem! The recipe explicitly states that hot water is an excellent substitute. The hot liquid’s primary role is to bloom the cocoa and thin the batter, ensuring that incredible moistness. Coffee simply adds another layer of flavor.
How long does the cake last and how should I store it?
This Double Chocolate Caramel Dream will last for 2-3 days at room temperature in an airtight container. For extended freshness, refrigerate it for up to 5 days. Always allow it to come to room temperature before serving for the best experience.
Can I make this Double Chocolate Caramel Dream gluten-free?
Yes, you can! Substitute the all-purpose flour with a good quality 1:1 gluten-free baking flour blend that contains xanthan gum. You may find the cake has a slightly different texture, but it should still be delicious and moist.
Why is my ganache not shiny or too thin/thick?
A dull ganache can result from over-whisking, incorporating too much air, or insufficient melting of chocolate. If it’s too thin, allow it to cool and thicken slightly. If too thick, gently warm it over a double boiler or in the microwave for a few seconds, adding a tiny bit more warm cream if needed, and whisk until smooth.
Ready to Impress? Share Your Double Chocolate Caramel Dream Masterpiece!
You now possess the secret to baking an unbelievably moist, utterly decadent Double Chocolate Caramel Dream. This isn’t just a dessert; it’s an experience waiting to be shared and savored.
Gather your ingredients, ignite your passion for baking, and create a masterpiece that will leave everyone in awe. We can’t wait to see your creations! Share your beautiful cakes with us in the comments below or tag us on social media.
Double Chocolate Caramel Dream
Course: DessertCuisine: AmericanDifficulty: medium12
servings45
minutes50
minutes550
kcal180
minutesUncover the secret to an unbelievably moist chocolate cake. This decadent Double Chocolate Caramel Dream features gooey salted caramel and a rich chocolate ganache, making every bite pure bliss. Say goodbye to dry cakes forever!
Ingredients
For the Cake:
2 cups all-purpose flour
2 cups granulated sugar
3/4 cup unsweetened cocoa powder
2 teaspoons baking soda
1 teaspoon baking powder
1 teaspoon salt
1 cup milk
1/2 cup vegetable oil
2 large eggs
1 teaspoon vanilla extract
1 cup hot water or hot brewed coffee
For the Salted Caramel Filling:
1 cup granulated sugar
1/4 cup water
1/2 cup heavy cream, warmed
4 tablespoons unsalted butter, cubed
1/2 teaspoon sea salt
For the Chocolate Ganache:
1 cup semi-sweet chocolate chips
1/2 cup heavy cream
For Topping:
1/2 cup chopped hazelnuts
Directions
- Preheat your oven to 350 degrees F (175 degrees C). Grease and flour two 8-inch round cake pans.
- In a large bowl, whisk together the flour, sugar, cocoa powder, baking soda, baking powder, and salt.
- In a separate medium bowl, whisk together the milk, vegetable oil, eggs, and vanilla extract until well combined.
- Pour the wet ingredients into the dry ingredients and mix on low speed until just combined. Do not overmix.
- Here’s the game-changer for an unbelievably moist cake: Carefully pour the hot water or hot brewed coffee into the batter. Mix on low speed until just smooth. The batter will be thin, but this is exactly what creates that incredible, tender crumb and ensures your cake is never dry!
- Divide the batter evenly between the two prepared cake pans.
- Bake for 30-35 minutes, or until a wooden skewer inserted into the center comes out with moist crumbs attached. Let the cakes cool in the pans for 10 minutes before inverting them onto a wire rack to cool completely.
- While cakes cool, make the Salted Caramel: In a heavy-bottomed saucepan, combine sugar and water over medium heat. Stir until sugar dissolves, then stop stirring. Cook until the syrup turns a rich amber color (about 10-15 minutes). Remove from heat and carefully pour in the warm heavy cream (it will bubble vigorously). Stir until smooth. Add the butter and salt, stirring until melted and combined. Let cool completely.
- Make the Chocolate Ganache: Place chocolate chips in a heatproof bowl. Heat heavy cream in a small saucepan until just simmering. Pour the hot cream over the chocolate chips and let sit for 5 minutes. Whisk until smooth and glossy.
- To assemble: Place one cooled cake layer on a serving plate. Pour and spread a generous amount of cooled salted caramel over the top. Place the second cake layer on top.
- Pour the chocolate ganache over the top of the cake, allowing it to drip beautifully down the sides.
- Sprinkle the chopped hazelnuts over the ganache before it sets. Serve immediately or chill slightly for firmer caramel.
Notes
- Ensure cakes and caramel are completely cool before assembly for best results.