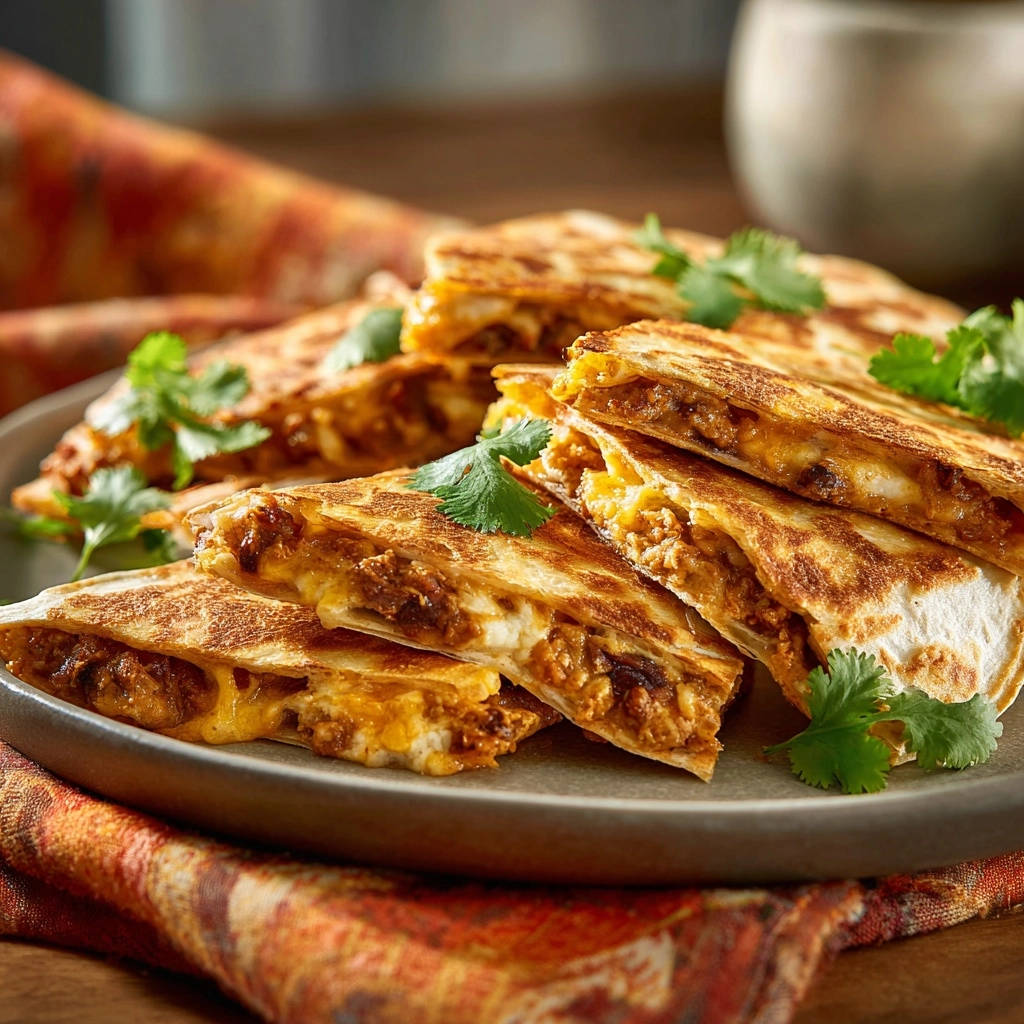
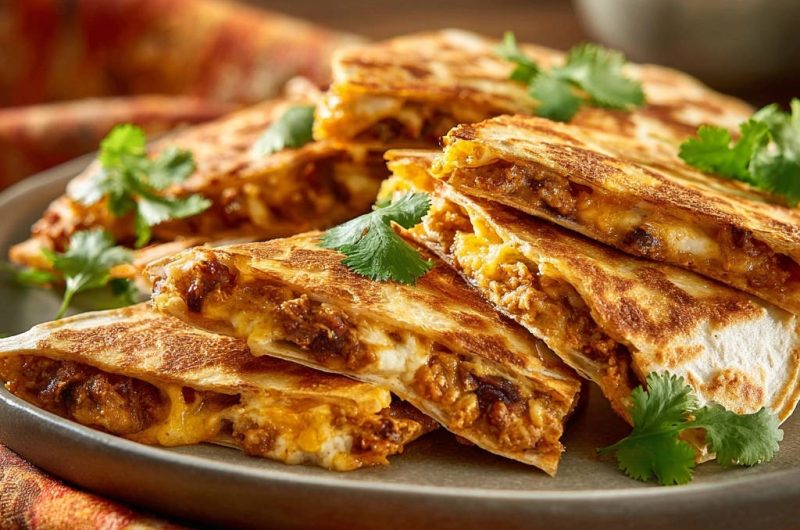
Easy Beef & Cheese Quesadillas: Crispy, Never Greasy!
As a food strategist, I’ve seen countless home cooks struggle with soggy or overly greasy quesadillas. It’s a common kitchen woe, but my recipe for Easy Beef & Cheese Quesadillas finally solves that problem, guaranteeing a perfectly golden, crispy tortilla with every bite.
This isn’t just another weeknight meal; it’s a game-changer, delivering restaurant-quality texture and rich flavor without the excess oil. Get ready to master the art of the perfect quesadilla and delight your family with this irresistible, crowd-pleasing dish.
Beyond the Basic: Why This Quesadilla Recipe Will Be Your New Favorite
The quest for a truly crispy quesadilla without it feeling heavy or greasy can often feel like an impossible culinary challenge. Too often, homemade versions fall flat, sacrificing crunch for convenience.
Get Our Best Recipes Weekly!
Join thousands of food lovers and get delicious recipes delivered to your inbox.
This recipe, however, is meticulously designed to overcome those common frustrations. It focuses on specific techniques that elevate a simple dish into an extraordinary one, ensuring your quesadillas are always a triumph.
The “Crispy, Not Greasy” Secret Unveiled
The secret lies in a few critical steps that prevent oil saturation and promote even browning. Thoroughly draining the seasoned ground beef filling is paramount to avoiding a greasy interior.
Coupled with cooking on medium-low heat in a clean, dry skillet, this method allows the tortilla to slowly toast to a beautiful golden crisp. Gentle pressing ensures maximum contact with the pan, optimizing that coveted crunch.
Quick, Easy, and Family-Approved Weeknight Wonder
These Easy Beef & Cheese Quesadillas aren’t just delicious; they are incredibly practical for busy schedules. The prep is straightforward, and the cooking time is minimal, making them an ideal weeknight dinner solution.
Their universal appeal ensures even the pickiest eaters will ask for seconds. This recipe delivers maximum flavor and satisfaction with minimal fuss, becoming a reliable staple in your meal rotation.
Gather Your Flavor Arsenal: Essential Ingredients
The quality of your ingredients plays a significant role in the overall taste and texture of your quesadillas. Choosing wisely ensures a delicious and satisfying result.
Each component is selected for its contribution to both flavor and the desired crispy, non-greasy outcome.
The Heart of the Filling: Savory Ground Beef & Aromatics
Opt for a leaner ground beef (85-90% lean) to minimize excess fat, which is key to a non-greasy quesadilla. This choice makes the crucial draining step even more effective.
If you enjoy tender beef, try these shredded beef tacos for another satisfying meal.
Finely diced onion and minced garlic form the aromatic foundation, infusing the beef with depth and sweetness as they cook down.
Spice it Up: Chili Powder & Cumin for Authentic Flavor
Chili powder provides a warm, earthy base with a hint of smoky spice, characteristic of Mexican-inspired cuisine. Cumin adds a distinctive, robust aroma that perfectly complements the beef.
These spices are easily adjustable; feel free to add more for a bolder profile or a pinch of cayenne for extra heat.
The Golden Wrapper: Choosing Your Flour Tortillas
Large flour tortillas are essential for this recipe, providing ample surface area for filling and folding without tearing. Look for fresh, pliable tortillas that will crisp up beautifully.
Their flexibility is crucial for holding the generous filling securely, while their neutral flavor allows the beef and cheese to shine.
Melted Perfection: Your Go-To Cheese Blend
A blend of shredded cheddar and Monterey Jack cheese offers the best of both worlds: sharp flavor from the cheddar and incredible melt from the Monterey Jack. A pre-shredded Mexican blend works equally well for convenience.
For an even better texture, explore these shredded beef and double cheese quesadillas.
Freshly shredded cheese often melts more smoothly and avoids the starchy additives found in some pre-packaged options, contributing to a superior cheese pull.
A Touch of Freshness: Cilantro for Garnish
Fresh cilantro brightens the rich flavors of the beef and cheese, adding a vibrant, herbaceous finish. Its fresh aroma and slight peppery notes provide a lovely contrast.
Garnish generously to enhance both the visual appeal and the overall freshness of your Easy Beef & Cheese Quesadillas.
Your Kitchen Toolkit: Essential Quesadilla Gear
Having the right tools can make all the difference in achieving perfectly cooked, crispy quesadillas with ease.
These are the fundamental items you’ll need to prepare and cook your Easy Beef & Cheese Quesadillas efficiently and effectively.
Tools for Crispy, Effortless Easy Beef & Cheese Quesadillas
-
Large Skillet: Essential for browning the ground beef and sautéing the aromatics. Its size allows for even cooking and easy stirring of the filling.
-
Clean, Dry Skillet (preferably non-stick): Crucial for cooking the quesadillas themselves. A well-seasoned non-stick pan minimizes the need for extra oil, contributing to the “not greasy” promise.
-
Sturdy Spatula: Necessary for pressing down on the quesadilla during cooking, ensuring even crisping and firm contact with the pan. It also aids in carefully flipping the filled tortillas.
Crafting Your Crispy Masterpiece: Step-by-Step Guide
Follow these detailed steps closely to achieve quesadillas that are perfectly crispy on the outside, gooey with cheese, and bursting with savory beef filling.
Each instruction is designed to guide you toward a flawless result, emphasizing the techniques that guarantee success.
Step 1: Building a Lean & Flavorful Beef Filling
Heat 1 tablespoon oil in a large skillet over medium-high heat. Add ground beef and finely diced onion.
Cook, breaking up the beef, until fully browned and the onion is softened. This is CRUCIAL: Drain off any excess grease thoroughly from the pan. This step is key to preventing greasy quesadillas later and ensuring a lighter texture.
Add minced garlic, chili powder, cumin, salt, and pepper to the beef. Cook for another 1-2 minutes, stirring, until the spices are fragrant. Remove from heat and set aside.
Step 2: Prepping Your Tortilla for the Skillet
Place a clean, dry skillet over medium-low heat. For the least greasiness and a truly crispy texture, use a well-seasoned non-stick pan and skip adding oil directly to the tortilla.
Alternatively, lightly brush just one side of a flour tortilla with a tiny amount of oil. Place the tortilla, brushed side down (or plain side down if using a dry pan), into the warm skillet.
Step 3: The Art of Layering: Cheese, Beef, More Cheese
Evenly sprinkle about 1/4 cup of shredded cheese over one half of the tortilla, leaving a small border at the edge.
Spoon about 1/4 to 1/3 cup of your prepared beef filling onto the cheese, ensuring it’s evenly distributed over that half.
Top the beef filling with another 1/4 cup of cheese. This layering technique ensures maximum melt and a perfectly gooey interior, binding the filling together effectively.
Step 4: Achieving the Golden Crisp (Crucial Heat Control)
Carefully fold the empty half of the tortilla over the filling, aligning the edges.
Cook for 4-6 minutes on this first side, pressing down gently but firmly with a sturdy spatula to ensure even contact and a good, consistent crisp.
The medium-low heat is key here; it allows the cheese to melt slowly and become wonderfully gooey without burning the tortilla or causing it to absorb too much oil, leading to that sought-after golden crust.
Step 5: The Perfect Flip & Final Melt
Carefully flip the quesadilla to cook the second side. Continue to cook for another 4-6 minutes, pressing gently with the spatula as before.
Cook until the tortilla is golden brown and perfectly crispy on both sides, and the cheese is completely melted, bubbly, and oozing slightly.
Step 6: Serve It Up: Resting, Cutting, & Garnishing
Remove the finished quesadilla from the skillet. Let it rest for just a minute on a cutting board; this brief rest helps the melted cheese set slightly, preventing it from all oozing out when cut.
Cut into wedges with a sharp knife or pizza cutter. Repeat the process with the remaining tortillas and filling. Garnish generously with fresh cilantro and serve immediately for that perfect crispy, non-greasy bite!
Chef’s Secrets: Elevating Your Easy Beef & Cheese Quesadillas Game
Even with a solid recipe, a few expert tips can take your quesadilla game from great to absolutely unforgettable. These insights focus on enhancing flavor, texture, and versatility.
Incorporate these techniques to consistently achieve perfect homemade quesadillas that truly impress.
Mastering the “Crispy, Not Greasy” Promise Every Time
-
Drain Thoroughly: After browning the beef and onion, ensure you drain all rendered fat. This is the single most important step to prevent a greasy quesadilla.
-
Minimal to No Oil for Tortilla: For ultimate crispness, use a truly non-stick pan without any added oil for the tortilla. If your pan isn’t perfectly non-stick, a very light brush of oil on one side of the tortilla is all you need.
-
Consistent Medium-Low Heat: Patience is a virtue here. Cooking at too high a heat will burn the tortilla before the cheese melts and crisps. Medium-low heat allows for a gradual, even browning and melting.
Creative Filling Variations for Every Palate
-
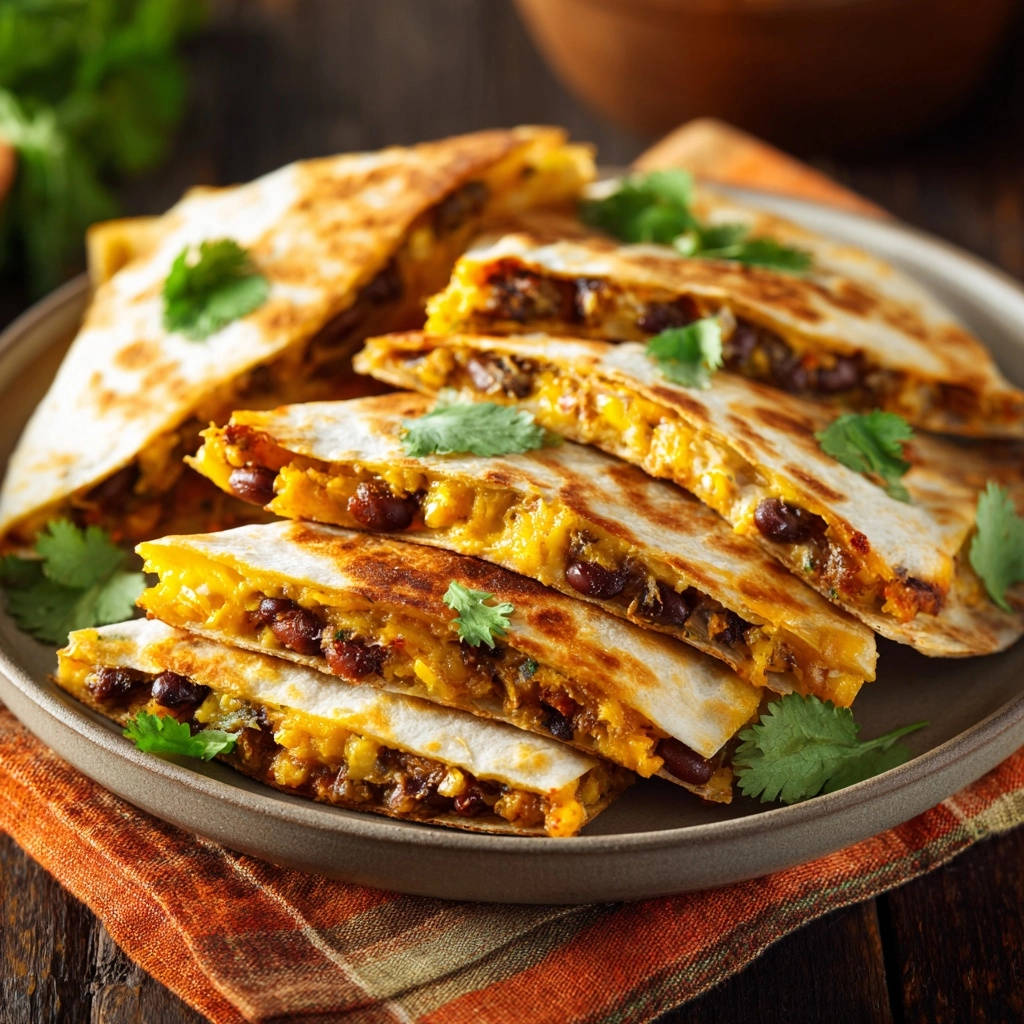
Add Vegetables: Incorporate finely diced bell peppers, corn, or black beans into the beef mixture for added texture and nutrients. Sauté them with the onion and garlic.
-
Spice It Up: For a kick, add finely diced jalapeños (seeds removed for less heat, left in for more) to the beef filling. A pinch of smoked paprika can also deepen the flavor profile.
-
Protein Swaps: While these are Easy Beef & Cheese Quesadillas, feel free to experiment with ground chicken, turkey, or even shredded pork for a different take.
Achieving the Ultimate Cheese Pull
-
Grate Your Own Cheese: Freshly grated cheese melts more smoothly and evenly than pre-shredded varieties, which often contain anti-caking agents that can hinder melt.
-
Mix Your Cheeses: Combining a good melting cheese (like Monterey Jack, Oaxaca, or Colby) with a flavorful one (like sharp cheddar or Pepper Jack) yields both an amazing pull and robust taste.
-
Layer Strategically: Placing cheese both under and over the beef filling ensures that the meat is enveloped in melted cheese, maximizing the gooey factor and creating a perfect seal.
Beyond the Plate: Serving Suggestions & Perfect Pairings
These cheesy beef quesadillas are delicious on their own, but pairing them with classic accompaniments and complementary side dishes can transform them into a complete and satisfying meal.
What to Try Next
Round out your meal with these satisfying recipes.
- For a warm and filling starter, consider the Loaded Potato Soup, offering a velvety smooth texture that complements the cheesy quesadillas.
- If you’re craving something hearty, this Creamy Southwest Chicken Chili brings a touch of spice and tender chicken that pairs well with beef and cheese.
Consider these suggestions to elevate your dining experience and provide a delightful contrast of flavors and textures.
Classic Toppings and Dipping Sauces
-
Cool Sour Cream: A dollop of sour cream or Greek yogurt provides a refreshing, tangy counterpoint to the rich beef and cheese.
-
Fresh Salsa: A chunky tomato salsa, pico de gallo, or a vibrant tomatillo salsa adds brightness and a hint of acidity that cuts through the richness.
-
Creamy Guacamole: Homemade guacamole offers a luxurious, creamy texture and healthy fats, along with a burst of fresh avocado flavor.
-
Spicy Hot Sauce: For those who love extra heat, a dash of your favorite hot sauce provides an invigorating kick.
Side Dishes That Complete the Meal
-
Simple Green Salad: A light, crisp green salad with a zesty lime vinaigrette offers a refreshing balance to the hearty quesadillas.
-
Mexican Rice: A classic side, perfectly seasoned Mexican rice provides a comforting and familiar accompaniment.
-
Black Beans or Refried Beans: Serve a side of seasoned black beans or creamy refried beans for a complete and satisfying Mexican-inspired meal.
Planning Ahead: Make-Ahead & Storage Tips
These Easy Beef & Cheese Quesadillas are excellent for meal prepping, allowing you to enjoy a quick and delicious meal even on the busiest days. Proper storage ensures freshness and quality.
Can You Prep the Filling in Advance?
Absolutely! The savory beef filling can be prepared up to 3 days in advance. Cook it as directed, let it cool completely, then store it in an airtight container in the refrigerator.
This makes assembly on a weeknight incredibly fast, significantly cutting down on active cooking time for your weeknight dinner.
Storing Leftover Easy Beef & Cheese Quesadillas
Leftover quesadillas can be stored in an airtight container in the refrigerator for up to 2-3 days. For best results, allow them to cool completely before storing to prevent sogginess.
To reheat, use a dry skillet over medium-low heat to crisp them up again, or pop them in a toaster oven or air fryer. The microwave will make them soft, so it’s not recommended if you desire crispness.
Troubleshooting Your Quesadilla Journey
Even with the best intentions, sometimes things don’t go exactly as planned. Here are solutions to common quesadilla mishaps, ensuring your next batch of Easy Beef & Cheese Quesadillas is perfect.
Problem: My Quesadilla is Soggy!
Solution: Ensure you thoroughly drained all excess grease from the beef filling. Lingering fat is the primary culprit. Also, double-check your cooking temperature; if it’s too low, the tortilla can absorb too much oil, and if too high, it won’t crisp evenly.
Problem: The Tortilla is Burning Before the Cheese Melts!
Solution: Your heat is likely too high. Reduce to medium-low. Using pre-shredded cheese can help it melt faster, or you can loosely cover the skillet with a lid for a minute or two to trap heat and speed up melting, then remove the lid to crisp the tortilla.
Problem: Filling is Falling Out!
Solution: You might be overfilling. Stick to the recommended 1/4 to 1/3 cup of filling per half-tortilla for manageable portions. Also, ensure you’re pressing down gently but firmly with a spatula during cooking to help seal the edges and compact the filling.
Your Quesadilla Questions Answered
You’ve got questions, and I’ve got answers! These common inquiries will further empower you to create the best Easy Beef & Cheese Quesadillas every time.
What’s the best cheese for Easy Beef & Cheese Quesadillas?
A blend of Monterey Jack and sharp cheddar offers excellent melt and flavor, providing that perfect stretch and rich taste. Mexican blend cheeses, specifically designed for dishes like this, are also a convenient and tasty option.
Can I use corn tortillas instead of flour?
While possible, corn tortillas will yield a different texture – usually less pliable and more prone to breaking when folded. Flour tortillas are recommended for this recipe’s “crispy, not greasy” goal, as they crisp more uniformly and stay intact.
Is it possible to bake quesadillas instead of frying?
Yes, you can! Preheat your oven to 400°F (200°C). Lightly brush the outside of the filled tortillas with a tiny amount of oil, then place them on a baking sheet. Bake for 10-15 minutes, flipping halfway, until golden brown and crispy.
How do I make Easy Beef & Cheese Quesadillas spicy?
To add heat, incorporate a pinch of cayenne pepper or a dash of chipotle powder into the beef filling along with the other spices. You can also include finely diced jalapeños (with seeds for more heat) with the onion. A drizzle of your favorite hot sauce after cooking also works wonders!
Ready to Impress? Share Your Easy Beef & Cheese Quesadillas Masterpiece!
Now that you’re armed with the secrets to perfectly crispy, non-greasy Easy Beef & Cheese Quesadillas, it’s time to transform your weeknight meals and impress everyone at your table!
Dive into this recipe and discover how simple it is to achieve restaurant-quality results right in your own kitchen. Your family and friends will rave about the irresistible flavor and satisfying crunch of these ultimate cheesy beef quesadillas.
Don’t forget to share your creations with us in the comments below! We love hearing about your culinary successes and any delicious twists you add to this perfect quesadilla recipe. Happy cooking!
Easy Beef & Cheese Quesadillas
Course: Main CourseCuisine: MexicanDifficulty: easy4
servings15
minutes45
minutes550
kcal60
minutesSay goodbye to soggy quesadillas! Discover the secret to perfectly golden, crispy tortillas with melted cheese and a flavorful, lean beef filling. This recipe guarantees delicious results without the greasy mess.
Ingredients
1 tablespoon oil (for beef)
1 lb ground beef
1 small onion, finely diced
2 cloves garlic, minced
1 teaspoon chili powder
1/2 teaspoon ground cumin
Salt and black pepper to taste
8 large flour tortillas
2 cups shredded cheese (such as cheddar, Monterey Jack, or Mexican blend)
Fresh cilantro, for garnish
Directions
- Prepare the Flavorful, Lean Filling: Heat 1 tablespoon oil in a large skillet over medium-high heat. Add ground beef and diced onion. Cook, breaking up the beef with a spoon, until the beef is fully browned and the onion is softened. This next step is CRUCIAL for a non-greasy quesadilla: drain off any excess grease thoroughly from the pan. This prevents your quesadillas from becoming heavy and oily later. Add minced garlic, chili powder, cumin, salt, and pepper to the beef. Cook for another 1-2 minutes, stirring, until fragrant. Remove from heat and set aside.
- Assemble the Quesadilla: Take a clean, dry skillet and place it over medium-low heat. You can either lightly brush one side of a flour tortilla with a tiny amount of oil, or for the least greasiness, use a well-seasoned non-stick pan and skip the oil altogether for the tortilla step. Place the tortilla, brushed side down (or plain side down if dry pan), into the warm skillet.
- Layer for Maximum Melt & Crisp: Evenly sprinkle about 1/4 cup of shredded cheese over one half of the tortilla. Spoon about 1/4 to 1/3 cup of your prepared beef filling onto the cheese. Top the beef filling with another 1/4 cup of cheese.
- The Golden Crisp Method: Carefully fold the empty half of the tortilla over the filling. Cook for 4-6 minutes on this first side, pressing down gently with a spatula to ensure even contact and a good crisp. The medium-low heat is key here; it allows the cheese to melt slowly and become gooey without burning the tortilla or causing it to absorb too much oil.
- Flip and Finish: Carefully flip the quesadilla. Cook for another 4-6 minutes on the second side, continuing to press gently, until the tortilla is golden brown and perfectly crispy on both sides, and the cheese is completely melted and bubbly.
- Serve: Remove the finished quesadilla from the skillet, let it rest for just a minute, then cut into wedges. Repeat with the remaining tortillas and filling. Garnish generously with fresh cilantro and serve immediately for that perfect crispy, non-greasy bite!
Notes
- Crucial steps for non-greasy, crispy results include thoroughly draining beef grease and cooking on medium-low heat.