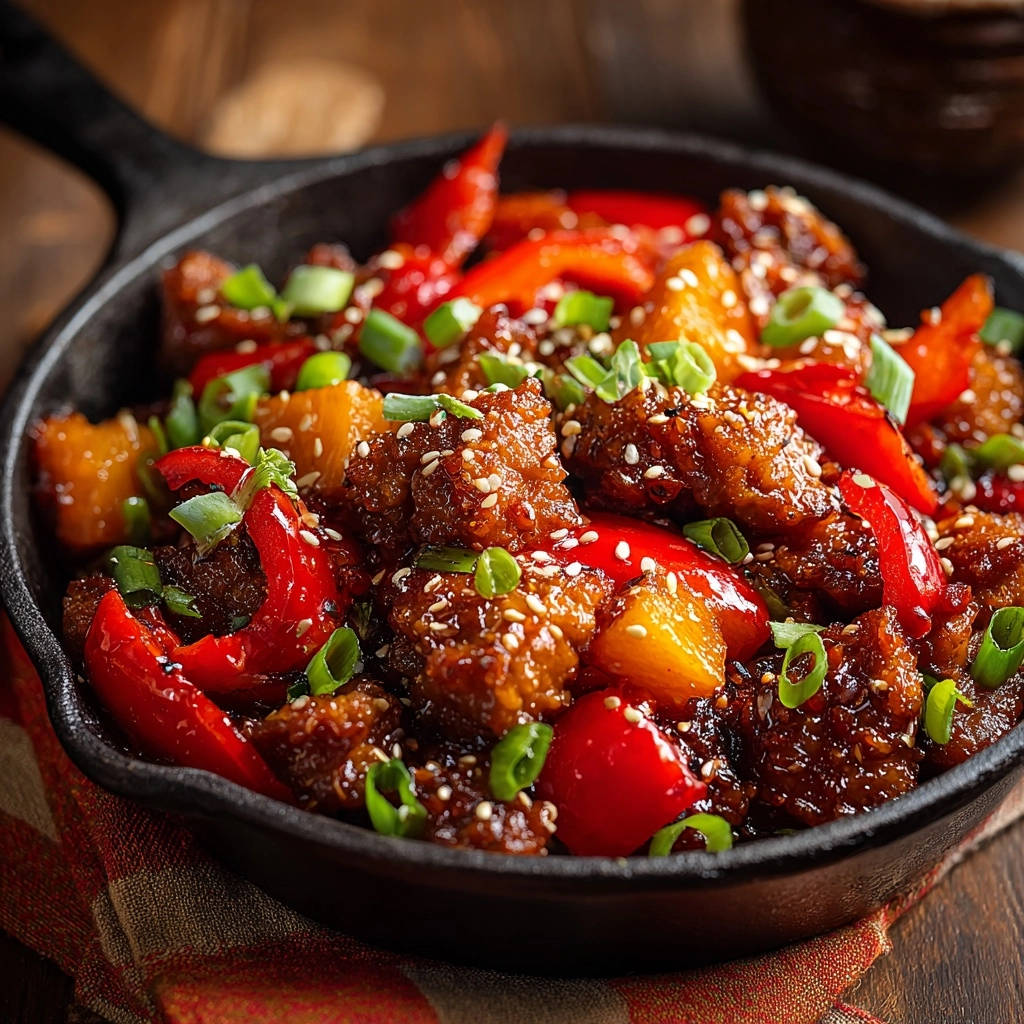
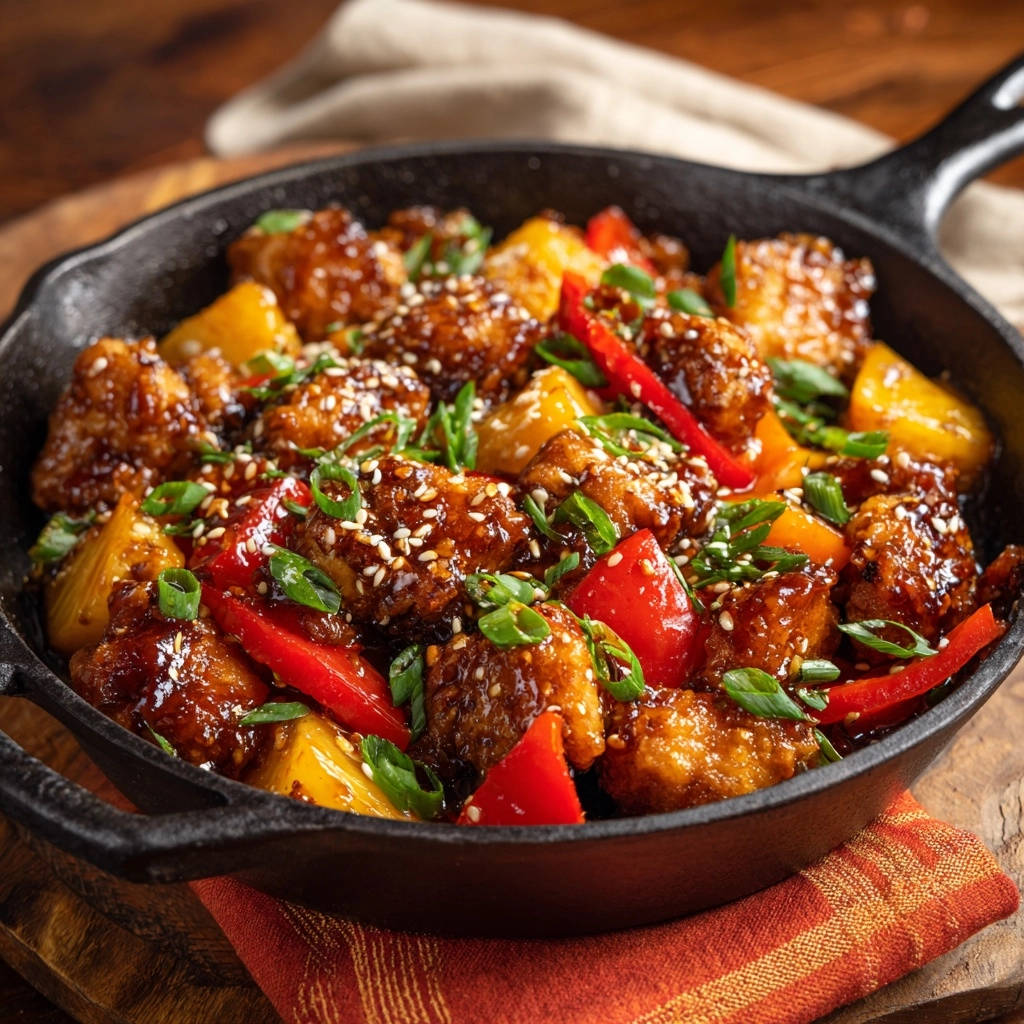
Sweet & Tangy Crispy Chicken: Master the Perfect Crunch
Ever dreamed of homemade Sweet & Tangy Crispy Chicken that rivals your favorite takeout, without the frustrating “soggy chicken” aftermath? I’ve been there, striving for that perfect crunch only to see it vanish the moment the sauce hit. But with this recipe, those days are over.
I’ve perfected the technique to ensure your chicken stays incredibly crispy, even when generously coated in its vibrant, irresistible sauce. Get ready to create a truly spectacular dish that will impress everyone at your table.
Unlock the Secret to Crispy, Never-Soggy Sweet & Tangy Chicken
This isn’t just another sweet and sour chicken recipe; it’s a masterclass in texture and flavor. We’re addressing the age-old problem of soggy chicken head-on, ensuring every bite delivers that satisfying crunch you crave.
Get Our Best Recipes Weekly!
Join thousands of food lovers and get delicious recipes delivered to your inbox.
For another satisfying chicken dish, explore this creamy chicken mushroom gnocchi.
The secret lies in a meticulous two-stage coating process and strategic resting periods on a wire rack. This allows for optimal air circulation, locking in the crispness that truly sets this dish apart from typical takeout versions.
Beyond the texture, this recipe boasts a perfectly balanced sweet and tangy sauce. It’s rich, glossy, and bursting with fresh aromatics, making it an undeniable family favorite.
Your Pantry Checklist: Ingredients for Flavor & Texture
For the Chicken: The Foundation of Crispness
1.5 lbs boneless skinless chicken breast or thighs: Opt for high-quality chicken, cut into uniform 1-inch pieces. Consistency in size ensures even cooking and browning.
1/2 cup cornstarch & 1/4 cup all-purpose flour: This precise blend forms the dual-layer coating that becomes incredibly crispy when fried. The cornstarch provides that signature delicate crunch.
1 large egg & 1/4 cup water: These wet ingredients create a binder, helping the dry coating adhere securely to the chicken. This adhesion is crucial for a robust crisp crust.
1/2 teaspoon salt & 1/4 teaspoon black pepper: Basic seasonings to flavor the chicken from within, ensuring every bite is delicious even before the sauce.
3 cups vegetable oil, for frying: Choose a neutral-flavored oil with a high smoke point, like canola, peanut, or grapeseed oil. This ensures clean-tasting, perfectly fried chicken.
For the Sauce: A Symphony of Sweet & Sour
1 red bell pepper: Adds a beautiful color, a touch of natural sweetness, and a pleasant tender-crisp texture to the finished dish.
1 cup canned pineapple chunks, drained: Essential for the sweet-tart element, pineapple brings a bright, fruity acidity that complements the sauce perfectly.
1/2 cup apple cider vinegar (or rice vinegar): Provides the characteristic tanginess, balancing the sweetness and adding a vibrant zing. Apple cider offers a slightly fruitier note.
1/4 cup soy sauce (low sodium preferred): Contributes umami depth and savory notes, enhancing the overall flavor profile. Low-sodium options give you more control over saltiness.
1/2 cup brown sugar, packed: Delivers the primary sweetness and a lovely molasses undertone, creating that classic sweet and tangy flavor. Packing it ensures accurate measurement.
2 tablespoons ketchup: Adds a touch of tomatoey richness, extra sweetness, and a slight tang, deepening the sauce’s complexity.
1 tablespoon cornstarch & 1/4 cup water (for slurry): These create the cornstarch slurry, which is vital for thickening the sauce to a glossy, desirable consistency.
1 teaspoon grated fresh ginger & 2 cloves garlic, minced: Fresh aromatics are non-negotiable here. They infuse the sauce with pungent, warm, and spicy notes that are foundational to authentic sweet and tangy flavor.
1 tablespoon vegetable oil: Used to sauté the bell pepper and aromatics, helping to build the initial flavor base for the sauce.
For the Garnish: Freshness and Finish
2 tablespoons chopped green onions: Provide a fresh, mild onion flavor, a pop of vibrant green color, and a delicate textural contrast. They awaken the palate.
1 tablespoon sesame seeds: Offer a nutty crunch and visual appeal, elevating the dish’s presentation and adding an extra layer of flavor complexity.
Essential Kitchen Companions for Your Frying Journey
Large Mixing Bowls: For preparing the chicken coating and whisking sauce components.
Wire Rack & Baking Sheet: Absolutely crucial for allowing air circulation to promote maximum crispness during resting stages.
Deep Skillet or Dutch Oven: Essential for safe and effective deep frying, ensuring consistent oil temperature and coverage.
Slotted Spoon or Spider: For safely removing fried chicken from hot oil.
Whisk: For smoothly combining ingredients, especially the cornstarch slurry.
Sharp Knife & Cutting Board: For preparing chicken and vegetables uniformly.
Measuring Cups & Spoons: For precise ingredient quantities, vital for balanced flavor.
Deep-Fry Thermometer: Highly recommended for maintaining consistent oil temperature, which is key to crispy, evenly cooked chicken.
Large Skillet or Wok: For cooking the sauce efficiently and quickly.
From Prep to Plate: Crafting Your Perfect Sweet & Tangy Crispy Chicken
- Prep the Chicken for Max Crispness:
Start by whisking together the wet ingredients (egg, water, salt, pepper) in one bowl, and the dry coating (cornstarch, flour) in another. This two-step process ensures a robust and adherent coating.
Dip each chicken piece thoroughly into the egg mixture, allowing excess to drip off, then dredge completely in the dry coating, pressing gently to secure an even layer. This firm coating is your first defense against sogginess.
Place all coated chicken pieces on a wire rack set over a baking sheet. This critical step allows the coating to air-dry slightly, forming a stronger bond and contributing significantly to the final crunch.
- Fry It Right (The Anti-Soggy Secret!):
Heat vegetable oil in a large deep skillet or Dutch oven to precisely 350°F (175°C). Maintaining the correct oil temperature is paramount for achieving crispness without making the chicken greasy.
Fry the chicken in small batches, taking care not to overcrowd the pan. Overcrowding drops the oil temperature, leading to steaming instead of frying, which makes chicken soft rather than crisp. Cook each batch for 4-6 minutes, turning occasionally, until perfectly golden brown and cooked through.
Remove fried chicken with a slotted spoon and return it to the wire rack. This second resting period is crucial; it allows excess oil to drain and air to circulate around the chicken, locking in that desirable crisp texture while you prepare the sauce.
- Whip Up the Sweet & Tangy Sauce:
In a small bowl, whisk cornstarch and water to create a smooth slurry. This slurry is your thickening agent, ensuring a glossy, cohesive sauce.
Heat a tablespoon of oil in a separate large skillet or wok over medium-high heat. Add the bell pepper and cook until it’s tender-crisp, then introduce the minced garlic and grated ginger, cooking just until fragrant. This builds the aromatic base for your sauce.
Stir in the apple cider vinegar, soy sauce, brown sugar, and ketchup, bringing the mixture to a gentle simmer. Add the drained pineapple chunks and let them warm through for 1-2 minutes, allowing their sweet-tartness to meld with the sauce base.
- Thicken and Combine:
Once the sauce is simmering, give your cornstarch slurry a final quick whisk to re-suspend any settled starch. Slowly pour the slurry into the simmering sauce while stirring constantly. This gradual addition and continuous stirring prevent lumps and ensures even thickening.
Continue to cook and stir for 1-2 minutes until the sauce visibly thickens and develops a beautiful, glossy sheen. As soon as it reaches this consistency, remove the pan from the heat to prevent over-thickening.
- The Final Crisp-Saving Step:
Crucially, only add the crispy fried chicken to the prepared sauce right before you are ready to serve. This is the ultimate secret to preventing the coating from becoming soggy.
Gently toss the chicken with the sauce until each piece is evenly coated. Work quickly to minimize the chicken’s exposure time to the sauce, preserving its crunch.
- Garnish and Serve Immediately!
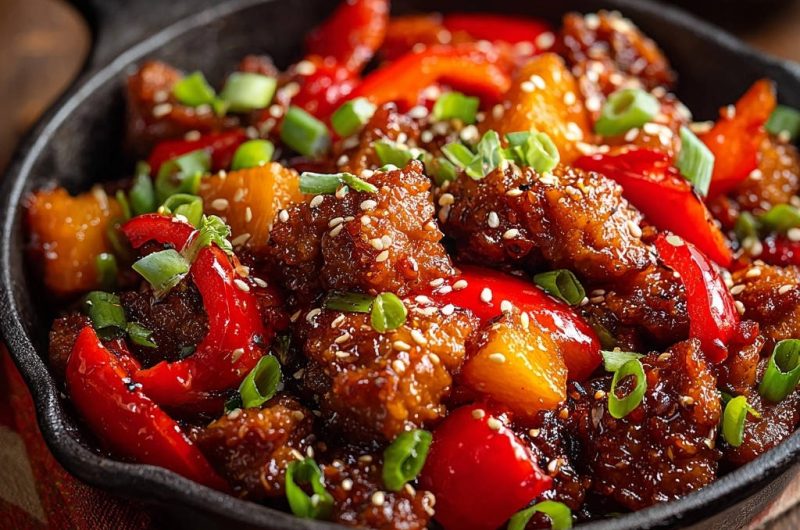
Garnish your finished Sweet & Tangy Crispy Chicken generously with chopped green onions and a sprinkle of sesame seeds. These additions provide fresh flavor, a pop of color, and a delightful textural contrast.
Serve immediately over your favorite rice or noodles to fully enjoy the incredible contrast of crispy chicken and luscious sauce.
For an extra layer of crispness, check out these crispy glazed chicken bites.
Chef’s Pro Tips: Elevate Your Crispy Chicken Experience
The Power of the Wire Rack: Don’t skip the resting steps on the wire rack! It’s the cornerstone of truly crispy chicken, allowing air to circulate and excess moisture/oil to drain.
Oil Temperature is Key: Invest in a deep-fry thermometer. Maintaining a consistent 350°F (175°C) prevents oily, soggy chicken (if too low) or burnt exteriors with raw interiors (if too high).
Don’t Overcrowd the Pan: Frying in batches is non-negotiable. Overcrowding drastically lowers oil temperature, leading to steaming instead of frying, which makes chicken soft rather than crisp.
Uniform Chicken Pieces: Cut your chicken into similarly sized 1-inch pieces. This ensures even cooking and consistent crispness across all batches.
Fresh Aromatics Make a Difference: Use fresh ginger and garlic. Their vibrant flavors are crucial to the sauce’s depth and cannot be fully replicated by powdered versions.
Taste and Adjust the Sauce: Before adding the chicken, taste your sauce. Adjust the brown sugar for sweetness, vinegar for tang, and soy sauce for saltiness to suit your preference.
Troubleshooting Your Sweet & Tangy Crispy Chicken
Why isn’t my chicken crispy?
Ensure your oil temperature was consistent at 350°F and you didn’t overcrowd the pan during frying. Always use the wire rack for resting the chicken both before and after frying, and only combine with the sauce immediately before serving.
My sauce is too runny or too thick.
If too runny, you may need a bit more cornstarch slurry; mix a teaspoon of cornstarch with a tablespoon of cold water and slowly stir into the simmering sauce. If too thick, thin it with a tablespoon of water or chicken broth at a time until the desired consistency is reached.
Chicken came out tough or dry.
This often happens from overcooking. Ensure chicken pieces are consistently sized and fry only until golden brown and cooked through (internal temperature of 165°F/74°C). Overcrowding can also lead to uneven cooking and tough spots.
The flavor balance isn’t quite right.
Taste the sauce before adding the chicken. If it’s too sweet, add a touch more vinegar or soy sauce. If too tangy, balance with a pinch more brown sugar. Freshness of ginger and garlic also heavily impacts the overall profile.
Serving Suggestions & Perfect Pairings
Fluffy White or Brown Rice: The classic pairing, perfect for soaking up every drop of that irresistible sauce.
Steamed or Roasted Vegetables: Broccoli, snap peas, asparagus, or bell peppers add a healthy crunch and vibrant color, balancing the richness of the chicken.
Simple Side Salad: A crisp green salad with a light vinaigrette offers a refreshing contrast and cuts through the richness of the dish.
Noodle Dishes: Serve over lo mein noodles or plain egg noodles for a heartier, comforting meal experience.
Planning Ahead: Storage & Make-Ahead Tips
Storing Leftovers for Future Enjoyment
Store any leftover Sweet & Tangy Crispy Chicken in an airtight container in the refrigerator for up to 3-4 days. For best results, store the chicken and sauce separately if possible, to help maintain the chicken’s crispness.
Best Ways to Reheat for Retained Crispness
To revive the crispness, reheat the chicken in a preheated oven at 375°F (190°C) for 10-15 minutes, or in an air fryer at 350°F (175°C) for 5-7 minutes, until heated through. Gently warm the sauce separately on the stovetop and combine just before serving. Avoid the microwave if you want to preserve the crispy texture.
Smart Steps for Make-Ahead Preparation
You can prepare the chicken pieces, coating them and resting them on the wire rack, up to an hour in advance. The sauce can also be made entirely ahead of time and stored in the refrigerator for up to 3 days, then gently reheated when ready to serve. This allows for quicker assembly on busy weeknights.
Your Top Questions Answered: Sweet & Tangy Crispy Chicken FAQs
Can I use different cuts of chicken?
Yes, boneless, skinless chicken thighs work wonderfully for this recipe. They tend to stay juicier than breast meat and offer a slightly richer flavor. Simply cut them into similar 1-inch pieces for even cooking.
Are there gluten-free or healthier sauce alternatives?
For a gluten-free option, ensure your soy sauce is gluten-free tamari and use a gluten-free all-purpose flour blend in the coating. For a slightly healthier sauce, you can reduce the brown sugar by a tablespoon or two and opt for low-sodium soy sauce. You can also incorporate more vegetables.
What if I don’t have a deep-fry thermometer?
While a thermometer is highly recommended, you can test the oil by dropping a tiny pinch of the flour coating into it. If it sizzles vigorously and floats to the top instantly, the oil is ready. If it browns too quickly, the oil is too hot; if it barely sizzles, it’s not hot enough.
Can I use a different type of oil for frying?
Yes, any neutral-flavored oil with a high smoke point is suitable, such as canola oil, peanut oil, or grapeseed oil. Avoid olive oil as its smoke point is too low for deep frying.
How can I make the sauce spicier?
To add heat, incorporate a pinch of red pepper flakes with the garlic and ginger, or stir in a teaspoon of Sriracha or your favorite chili garlic sauce into the simmering sauce. Adjust to your desired level of spice.
Ready to Delight? Your Sweet & Tangy Crispy Chicken Awaits!
You’ve now uncovered all the secrets to crafting a truly exceptional Sweet & Tangy Crispy Chicken. No more settling for soggy takeout or disappointing homemade versions. This recipe empowers you to achieve that elusive, satisfying crunch paired with a vibrant, irresistible sauce, right in your own kitchen.
Looking for More Chicken Creations?
If you enjoyed this crispy chicken, you might want to explore these other chicken dishes.
- For a comforting bowl of chicken goodness, try this Homestyle Chicken & Dumplings, featuring tender chicken and soft dumplings.
- If you prefer a heartier, saucier chicken meal, this Creamy Chicken Stew offers a rich and satisfying experience.
Imagine the smiles around your table as you serve up this restaurant-quality dish, knowing you’ve mastered every step to perfection. It’s a culinary triumph that’s surprisingly achievable and incredibly rewarding.
So, gather your ingredients, embrace the sizzle, and prepare to impress yourself and your loved ones. We can’t wait to hear about your crispy chicken adventures!
Don’t forget to share your creations and tag us with your perfectly crispy Sweet & Tangy Chicken masterpiece. Happy cooking!
Sweet & Tangy Crispy Chicken
Course: Main CourseCuisine: Chinese cuisineDifficulty: easy4
servings30
minutes40
minutes60
minutesChinese cuisine
Ingredients
For the Chicken:
1.5 lbs boneless skinless chicken breast or thighs, cut into 1-inch pieces
1/2 cup cornstarch
1/4 cup all-purpose flour
1 large egg
1/4 cup water
1/2 teaspoon salt
1/4 teaspoon black pepper
3 cups vegetable oil, for frying
For the Sauce:
1 red bell pepper, seeds removed and cut into 1-inch pieces
1 cup canned pineapple chunks, drained
1/2 cup apple cider vinegar (or rice vinegar)
1/4 cup soy sauce (low sodium preferred)
1/2 cup brown sugar, packed
2 tablespoons ketchup
1 tablespoon cornstarch
1/4 cup water
1 teaspoon grated fresh ginger
2 cloves garlic, minced
1 tablespoon vegetable oil
For Garnish:
2 tablespoons chopped green onions
1 tablespoon sesame seeds
Directions
- Prep the Chicken for Max Crispness: In a medium bowl, whisk together the egg, 1/4 cup water, salt, and pepper. In a separate bowl, combine the 1/2 cup cornstarch and 1/4 cup flour. Dip each chicken piece into the egg mixture, letting excess drip off, then dredge thoroughly in the cornstarch and flour mixture, pressing gently to ensure a good coating. Place coated chicken on a wire rack set over a baking sheet. This allows the coating to dry slightly, which is key for crunch.
- Fry It Right (The Anti-Soggy Secret!): Heat the 3 cups of vegetable oil in a large deep skillet or Dutch oven over medium-high heat until it reaches 350F. Fry chicken in batches, being careful not to overcrowd the pan. Cook for 4-6 minutes per batch, turning occasionally, until golden brown and cooked through. Remove chicken with a slotted spoon and place it back on the wire rack. This second resting on the rack is crucial. It lets any excess oil drain and the air circulate, keeping that coating crisp while you make the sauce.
- Whip Up the Sweet & Tangy Sauce: In a small bowl, whisk together the 1 tablespoon cornstarch and 1/4 cup water to create a slurry. Set aside. Heat 1 tablespoon of vegetable oil in a separate large skillet or wok over medium-high heat. Add the red bell pepper and cook for 2-3 minutes until slightly tender-crisp. Add the minced garlic and grated ginger, cooking for 30 seconds until fragrant. Stir in the apple cider vinegar, soy sauce, brown sugar, and ketchup. Bring to a simmer. Add the drained pineapple chunks and let simmer for 1-2 minutes.
- Thicken and Combine: Once the sauce is simmering, give the cornstarch slurry another quick whisk and slowly pour it into the sauce while stirring constantly. Cook for 1-2 minutes, stirring, until the sauce thickens and becomes glossy. Remove from heat immediately.
- The Final Crisp-Saving Step: Crucially, only add the crispy fried chicken to the sauce right before you’re ready to serve! Gently toss to coat the chicken and sauce contents evenly. This minimizes the time the crispy coating spends in the sauce, ensuring it stays crunchy.
- Garnish with chopped green onions and sesame seeds. Serve immediately over rice and enjoy that incredible, crispy, saucy chicken!
Notes
- For maximum crispness, let coated chicken dry on a wire rack and add fried chicken to the sauce *just before* serving.