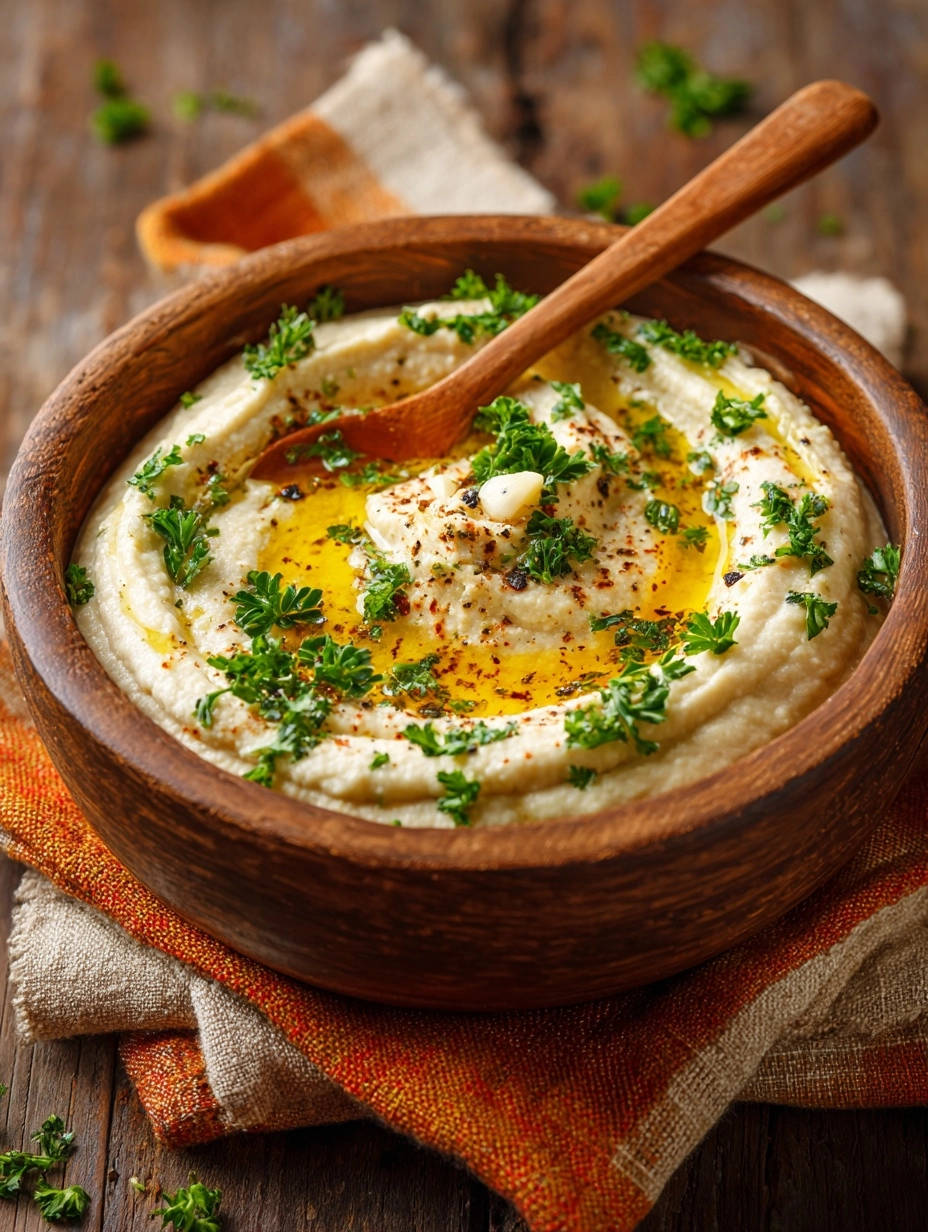
Homemade Hummus: Velvety Smooth Perfection!
For years, I struggled to achieve that impossibly creamy, silky texture in my Homemade Hummus, often ending up with a gritty, pasty spread. It felt like a culinary enigma, but I discovered the simple, transformative secret.
This recipe isn’t just another set of instructions; it’s a guaranteed path to a luxurious, velvety smooth dip that will elevate any meal or snack. Prepare to impress yourself and everyone you share it with.
Beyond Basic: Why This Hummus Will Change Your Dip Game
The Secret to Unrivaled Smoothness, Every Time
Many hummus recipes promise smoothness but deliver grainy results. Our method uniquely focuses on the precise aeration of tahini and the controlled introduction of ice-cold water.
Get Our Best Recipes Weekly!
Join thousands of food lovers and get delicious recipes delivered to your inbox.
These critical steps break down chickpea fibers more effectively, creating a truly light and airy consistency. Say goodbye to gritty textures forever.
Fresh, Wholesome Flavors You Control
Making Homemade Hummus puts you in charge of every ingredient, ensuring peak freshness and vibrant flavors. You can adjust the tanginess, garlic intensity, or salt to perfectly suit your palate.
This level of customization is simply unattainable with store-bought versions, allowing you to craft a dip that truly tastes homemade.
Effortless Elegance for Any Occasion
Despite its gourmet texture, this Homemade Hummus is surprisingly simple to prepare. It transforms humble ingredients into a sophisticated spread perfect for entertaining or daily enjoyment.
Serve it confidently as a crowd-pleasing appetizer or a healthy, flavorful addition to your weeknight meals.
Gather Your Essentials: Simple Ingredients, Incredible Taste
The Humble Chickpea: Canned vs. Dried Considerations
For convenience and consistent results in this recipe, we rely on canned chickpeas. They offer an excellent balance of flavor and ease, skipping the lengthy soaking and cooking process.
While dried chickpeas can be used, they require significant pre-preparation, making canned a smart choice for quick, velvety Homemade Hummus.
Tahini: The Creamy Cornerstone
Tahini, a paste made from ground sesame seeds, is indispensable for authentic hummus. It contributes a rich, nutty flavor and is crucial for achieving that signature creamy texture.
Opt for a good quality, runny tahini; thick or separated tahini can result in a drier, sometimes bitter, dip.
Citrus & Spice: Brightening Your Hummus Flavor Profile
Fresh lemon juice provides essential brightness and acidity, balancing the richness of tahini. Garlic offers a pungent, aromatic kick, which mellows beautifully during processing.
Salt enhances all the flavors, while ground cumin adds a warm, earthy depth. A pinch of black pepper rounds out the seasoning.
The “Magic” Ingredient: Very Cold Water for Velvety Texture
This is the true game-changer for a smooth texture. Very cold or ice water, slowly drizzled in, emulsifies with the tahini and chickpeas.
The cold temperature prevents the mixture from overheating during extended blending, ensuring a light, airy, and incredibly velvety consistency.
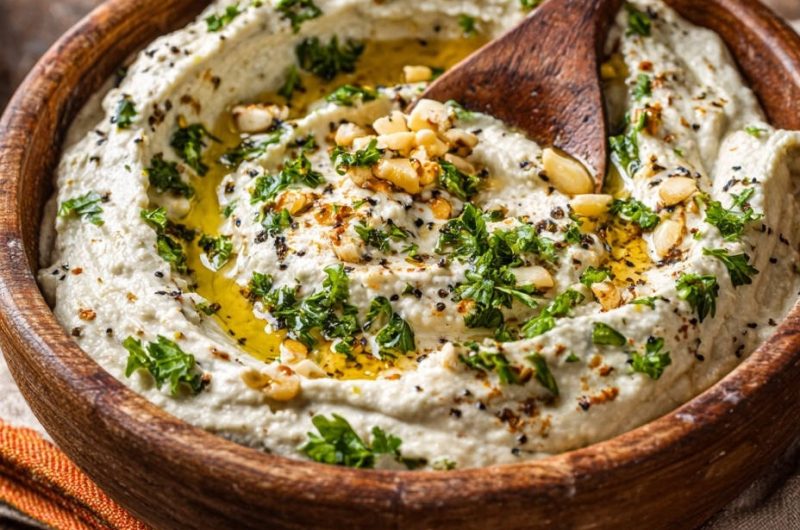
Garnishes: The Final Flourish of Flavor and Visual Appeal
Extra virgin olive oil adds a luxurious richness and a silky mouthfeel, plus visual appeal. Fresh parsley brings herbaceous freshness and a pop of color.
Lightly toasted pine nuts offer a delightful crunch and a subtle, buttery flavor, completing the Mediterranean experience of this creamy dip.
Essential Tools for Your Hummus Journey
The Mighty Food Processor (Your Best Friend)
A good quality food processor is absolutely crucial for this recipe. Its powerful blades and continuous processing are key to breaking down the chickpeas into an impossibly smooth paste.
Without it, achieving the desired velvety texture would be far more challenging, if not impossible.
Measuring Up: Cups, Spoons, and a Zester
Standard measuring cups and spoons ensure accurate ingredient ratios for perfect flavor balance. A lemon zester or juicer will help you extract maximum fresh juice.
These simple tools make the preparation process efficient and precise.
Crafting Creaminess: Your Step-by-Step Hummus Guide
Step 1: Aerate and Build the Flavor Foundation
In your food processor, combine tahini, fresh lemon juice, peeled garlic cloves, salt, and ground cumin. Process this mixture for a full minute, stopping once to scrape down the sides.
You’ll notice the mixture transforming, becoming lighter in color and almost fluffy. This initial aeration and thorough blending are vital for building an airy foundation and infusing the base flavors deeply.
Step 2: Unleash the Velvety Secret with Cold Water and Extended Blending
Add the rinsed and drained chickpeas to the food processor bowl. Begin processing, and here’s the pivotal technique for an incredible texture: while the processor is running, slowly drizzle in the very cold water (or ice water).
Continue processing for an extended 3 to 5 minutes, pausing occasionally to scrape down the sides. The combination of cold water and prolonged blending efficiently breaks down the chickpeas, yielding that coveted light, airy, and truly velvety smooth hummus.
Do not shorten this step; patience here is directly rewarded with a superior, creamy dip.
Step 3: Perfecting and Presenting Your Masterpiece
Once your hummus achieves its desired luxurious consistency, taste it thoroughly. Adjust the salt or lemon juice as needed to perfect the flavor balance, adding small amounts until it’s just right.
Transfer the finished hummus to a serving bowl. Using the back of a spoon, create a gentle swirl in the center, forming a small well for garnishes. Drizzle generously with extra virgin olive oil, then sprinkle with chopped fresh parsley, lightly toasted pine nuts, and a final pinch of black pepper for an inviting finish.
Chef’s Secrets: Elevate Your Homemade Hummus Game
Mastering the Cold Water Technique for Ultimate Smoothness
The colder the water, the better! Ensure your water is ice-cold, perhaps with a few ice chips, when you drizzle it in. Slowly adding it while the processor runs allows for perfect emulsification.
The Art of Peeling Chickpeas (An Optional but Ultra-Smoothness Trick)
For an absolutely unparalleled, ultra-silky texture, consider peeling your chickpeas. This tedious but rewarding step removes the fibrous skins, resulting in an even finer consistency.
Adjusting for Ultimate Flavor Balance: Salt & Lemon
Always taste your hummus before serving. If it tastes flat, it likely needs more salt; if it feels heavy, a touch more lemon juice will brighten it up. Adjust gradually until it sings.
Garnish for Impact: More Than Just Pretty
Don’t skip the garnishes! The olive oil adds essential richness, the parsley offers freshness, and the pine nuts provide a welcome textural contrast. These aren’t just for looks; they enhance the entire eating experience of your Homemade Hummus.
Don’t Stop Too Soon: The Power of Patience in Blending
The 3-5 minute blending time for the chickpeas is non-negotiable for that velvety smooth texture. Resist the urge to stop early, as every extra minute contributes to a silkier finish.
Common Hummus Hurdles & How to Conquer Them
“My Hummus Isn’t Smooth Enough!”
Ensure you processed the tahini base for a full minute, then blended the chickpeas with cold water for the recommended 3-5 minutes. Extended blending is key to breaking down the fibers effectively.
Double-check that your water was very cold when added. For ultimate smoothness, you can also try peeling the chickpeas before processing.
“It Tastes Too Bitter or Too Bland!”
Bitterness often stems from low-quality tahini or too much garlic. Use a good, fresh tahini and adjust garlic to your preference.
Blandness typically indicates a need for more salt or lemon juice. Taste and adjust in small increments until the flavors pop.
“Why Is My Hummus Too Thick (or Too Thin)?”
If your hummus is too thick, simply add a tablespoon or two of additional cold water, processing until you reach the desired consistency. For hummus that’s too thin, unfortunately, it’s harder to fix.
Your best bet is to add a few more chickpeas (if available) and process again, or slightly reduce the amount of water next time.
Savoring Your Creation: Serving, Storage & Make-Ahead Tips
Creative Ways to Serve Your Velvety Homemade Hummus
Beyond classic pita bread and crunchy vegetables, this creamy hummus shines in many dishes. Spread it on sandwiches, wraps, or toast for a flavorful base.
Dollop it onto grilled meats or roasted vegetables, or even thin it slightly with water for a delicious salad dressing.
Keeping It Fresh: Storing Your Hummus Properly
To keep your Homemade Hummus fresh, transfer it to an airtight container. Drizzle a thin layer of olive oil over the top before sealing; this creates a barrier against air and helps maintain moisture.
Store in the refrigerator for up to 5-7 days for best quality and safety.
Can You Make Hummus Ahead of Time?
Absolutely! Hummus is an excellent make-ahead dish, often tasting even better the next day as flavors meld. Prepare it a day or two in advance following the storage tips above.
If storing for longer, hold off on adding fresh garnishes like parsley and pine nuts until just before serving to maintain their crispness and vibrant color.
Your Top Homemade Hummus Questions, Answered
What kind of tahini is best for hummus?
Look for a smooth, pourable tahini made from 100% hulled sesame seeds. High-quality brands will often specify “stone-ground” or “Lebanese-style.” Its consistency and flavor significantly impact the final creamy texture of your velvety hummus.
Can I use dried chickpeas instead of canned for this recipe?
Yes, you can, but it requires more preparation. Dried chickpeas must be soaked overnight and then boiled until very tender, which can take 1-2 hours. Ensure they are exceptionally soft before processing to achieve the desired smoothness.
Is it possible to make hummus without a food processor?
While a food processor is highly recommended for this recipe’s signature texture, you could use a high-powered blender. Alternatively, a mortar and pestle offers a very traditional, rustic texture, but it will be much more laborious and less smooth.
How long does homemade hummus last in the fridge?
When stored correctly in an airtight container with a thin layer of olive oil on top, Homemade Hummus will typically last for 5 to 7 days in the refrigerator. Always trust your senses; if it smells off or discolors, it’s best to discard it.
Can I adjust the spiciness of my hummus?
Absolutely! To add a kick, incorporate a pinch of cayenne pepper or a dash of hot sauce during the blending process. You can also garnish your individual serving with a sprinkle of chili flakes for customizable heat.
Whip Up Your Own Velvety Hummus Today!
You now possess the secrets to creating the most luxurious, velvety Homemade Hummus right in your own kitchen. This isn’t just a recipe; it’s an invitation to elevate your culinary skills and delight your taste buds.
Gather your ingredients, trust the process, and prepare to enjoy a truly exceptional dip that will become a staple in your home. Your hummus journey to smooth perfection starts now!
More Delicious Ideas
If you enjoyed this velvety smooth hummus, consider these other satisfying dishes.
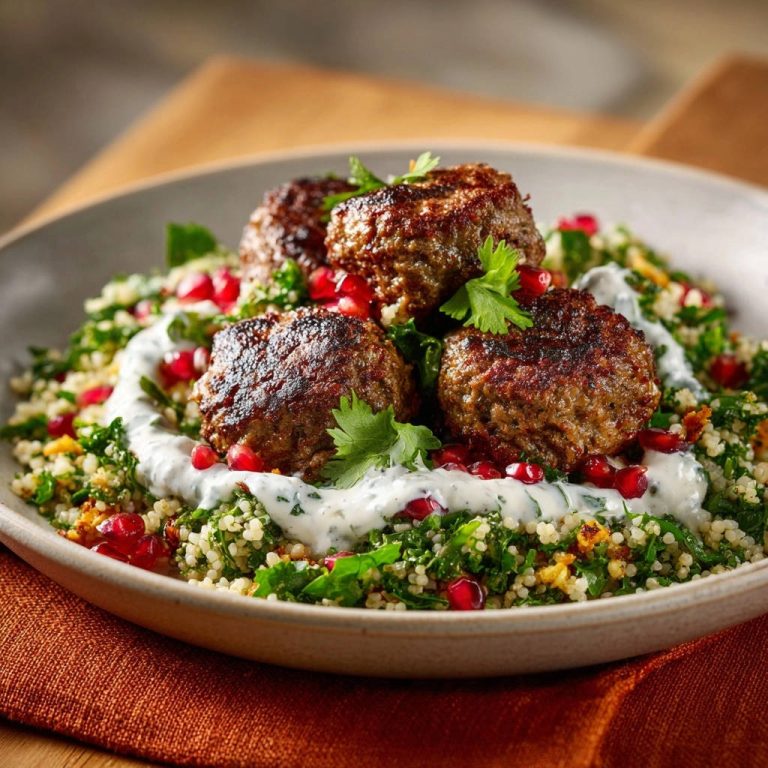
- For a hearty meal that also features Mediterranean flavors, try these Juicy Mediterranean Meatball Bowls.
- If you’re in the mood for something comforting and baked, our Classic Chicken Pot Pie with its flaky crust offers a different kind of delight.
Homemade Hummus
Course: AppetizerCuisine: MediterraneanDifficulty: easy4
servings10
minutes240
kcal20
minutesTired of gritty, pasty hummus? This recipe unlocks the simple secret to achieving an impossibly smooth, luxurious texture every time. Create a creamy, restaurant-quality dip right in your own kitchen.
Ingredients
1 can (15 ounces) chickpeas, rinsed and drained
1/4 cup tahini
2 cloves garlic, peeled
Juice of 1 lemon (about 3 tablespoons)
1/4 cup very cold water (or ice water)
2 tablespoons olive oil, plus more for drizzling
1/2 teaspoon salt, or to taste
1/4 teaspoon ground cumin
Pinch of black pepper
2 tablespoons fresh parsley, chopped, for garnish
1 tablespoon pine nuts, lightly toasted, for garnish
Directions
- Prep for Smoothness & Flavor Base: In the bowl of a food processor, combine the tahini, lemon juice, peeled garlic cloves, salt, and ground cumin. Process for about 1 minute, stopping to scrape down the sides as needed. You’ll see the mixture lighten in color and become almost fluffy, and the garlic will be finely minced and well combined. This initial aeration and thorough blending is a key step to building that airy, smooth foundation and infusing flavor.
- The Velvety Secret: Add the rinsed and drained chickpeas to the food processor. Start processing, and here is the absolute game-changer for texture: While the processor is running, slowly drizzle in the very cold water (or ice water). Continue to process for a full 3 to 5 minutes, stopping occasionally to scrape down the sides. The cold water, combined with extended blending, helps to break down the chickpeas more efficiently and creates an incredibly light, airy, and truly velvety smooth texture. Do not rush this step; patience here guarantees your perfect dip!
- Finish and Serve: Once your hummus has reached its desired creamy consistency, taste and adjust for salt or lemon juice if needed. Transfer the hummus to a serving bowl. Create a small swirl in the center with the back of a spoon. Drizzle generously with extra olive oil, then sprinkle with the chopped fresh parsley, toasted pine nuts, and a pinch of black pepper for garnish. Serve immediately with pita bread, fresh vegetables, or your favorite dippers!
Notes
- The secret to velvety smooth hummus is using very cold water and extended blending.