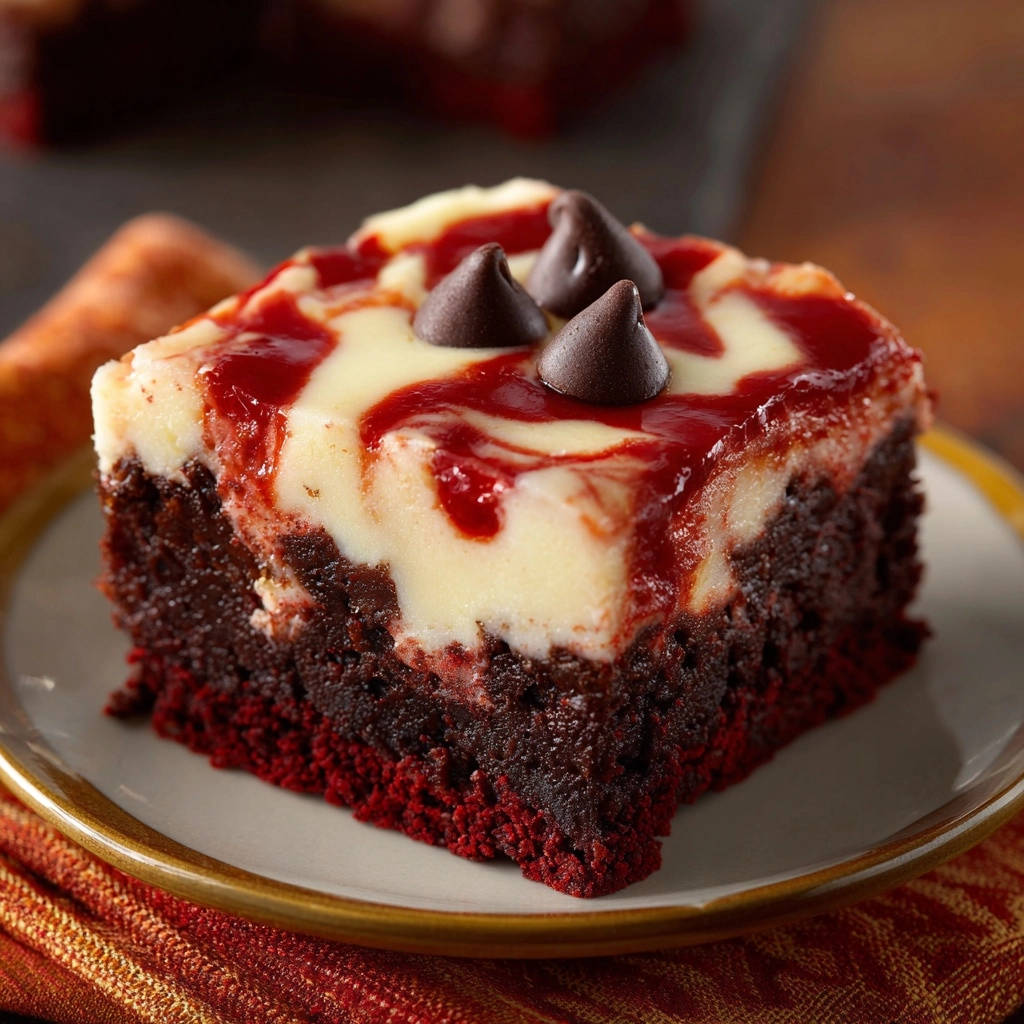
Swirled Red Velvet Cheesecake Bars: No More Sunken Layers!
Have you ever dreamed of those stunning, perfectly layered cheesecake bars, only to find your creamy cheesecake melting disastrously into the base? It’s a common baking heartbreak that I’ve personally experienced far too many times. But fear not, because I’ve finally cracked the code to making flawless Swirled Red Velvet Cheesecake Bars, ensuring beautifully distinct layers every single time.
This isn’t just another recipe; it’s a meticulously crafted guide designed to give you that coveted bakery-quality swirl and prevent dreaded sunken layers. Prepare to impress everyone with these vibrant, delicious treats, made with confidence and ease.
Why These Swirled Red Velvet Cheesecake Bars Will Be Your New Go-To
Cracked the Code: No More Sunken Cheesecake Layers!
The most frustrating part of layered bar recipes is when the cheesecake batter sinks into the base during baking. This recipe introduces a genius partial-baking step for the red velvet base, creating a sturdy foundation.
Get Our Best Recipes Weekly!
Join thousands of food lovers and get delicious recipes delivered to your inbox.
This crucial technique prevents the creamy cheesecake from absorbing into the cake layer, guaranteeing perfectly separated, distinct layers. You can confidently bake these without the usual anxiety about messy results.
Achieving That Stunning, Bakery-Quality Swirl
Visual appeal is key, and the elegant swirl is what makes these bars truly special. Our method ensures you get that beautiful, contrasting red velvet pattern against the creamy cheesecake.
A simple technique with reserved batter creates an impressive, professional-looking finish that will have everyone asking for your secret. It transforms a delicious dessert into an edible work of art.
The Perfect Harmony: Moist Red Velvet Meets Creamy Cheesecake
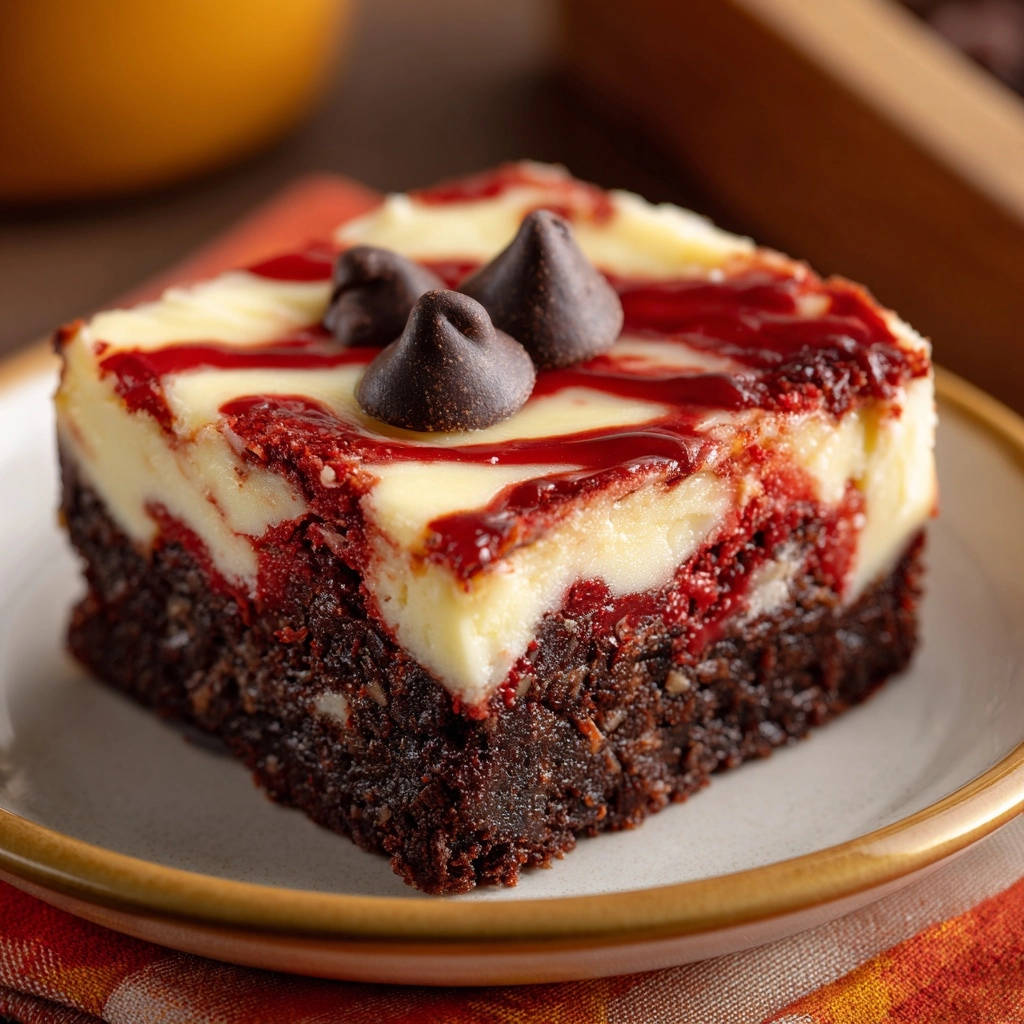
Beyond their beauty, these Swirled Red Velvet Cheesecake Bars offer an exquisite balance of textures and flavors. The rich, moist red velvet base perfectly complements the light, tangy creaminess of the cheesecake layer.
Each bite delivers a delightful contrast, making them an irresistible treat for any occasion. They strike the ideal balance between indulgence and refreshing creaminess.
Essential Kitchen Tools for Effortless Baking
Mixing & Prepping Your Red Velvet Base
To start, you’ll need two distinct mixing bowls: one large for dry ingredients and one medium for wet. A whisk is essential for thoroughly combining your dry components and liquid elements.
Accurate measuring cups and spoons are also critical to ensure precise ingredient ratios for the perfect batter consistency.
Crafting the Creamy Cheesecake Layer
For a silky smooth cheesecake layer, an electric mixer-either a handheld model or a stand mixer-is indispensable. This tool ensures your cream cheese is lump-free and perfectly aerated.
Baking & Finishing Your Masterpiece
An 8×8 inch baking pan is ideal for these bars, providing the perfect thickness. Don’t forget parchment paper with an overhang; it’s a lifesaver for easy removal.
A wire rack is necessary for even cooling, and a sharp knife will be your best friend for achieving clean, neat cuts once the bars are chilled.
If you’re also looking for a rich, creamy treat, check out these pumpkin cheesecake bars.
The Building Blocks of Flavor: Inside Your Swirled Red Velvet Cheesecake Bars
For the Rich & Vibrant Red Velvet Base
-
All-Purpose Flour: This forms the essential structure of your base, ensuring a tender and substantial cake crumb. It provides the necessary gluten development for stability.
-
Cocoa Powder & Red Food Coloring: This dynamic duo delivers the iconic red velvet color and a subtle, distinctive chocolate flavor. Use a high-quality gel food coloring for the most vibrant hue.
-
Baking Soda: Critical for leavening, baking soda reacts with the acidic buttermilk to create lift, resulting in a light and airy texture. It contributes to the tender crumb.
-
Buttermilk: It adds moisture, a delicate tang, and reacts with the baking soda for perfect leavening. If unavailable, mix 1/2 tsp lemon juice into regular milk and let it sit for 5 minutes.
-
Melted Butter, Eggs & Vanilla: These provide richness, bind the ingredients together, and infuse the base with delightful aromatic depth. Always opt for pure vanilla extract for the best flavor.
Crafting the Dreamy Cheesecake Layer
-
Softened Cream Cheese: This is the star ingredient for a smooth, lump-free, and incredibly creamy cheesecake. Ensure it’s truly at room temperature for optimal mixing.
-
Granulated Sugar & Egg: Sugar sweetens the cheesecake, while the egg provides structure and acts as a binder. Be mindful not to overmix the egg once added, as it can lead to cracks.
-
Vanilla Extract: Pure vanilla extract significantly enhances the creamy, sweet flavors of the cheesecake. It adds a warm, inviting aroma.
The Finishing Flourish: Swirl & Garnish Elements
-
Reserved Red Velvet Batter: This small portion of batter is your secret weapon for creating that gorgeous, contrasting swirl. It’s set aside specifically for its decorative purpose.
-
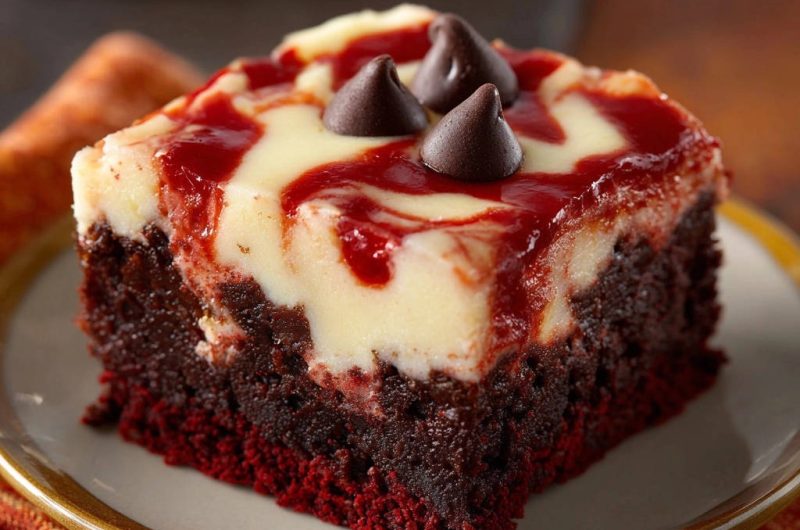
Chocolate Chips or Kisses: These are optional but add a lovely textural contrast and visual appeal. Consider other garnishes like a dusting of cocoa, fresh berries, or white chocolate shavings for variety.
Your Path to Perfection: Crafting Swirled Red Velvet Cheesecake Bars, Step-by-Step
-
Preparation: Setting the Stage for Success
Preheat your oven to 350°F (175°C) and prepare your 8×8 inch baking pan. Line it meticulously with parchment paper, making sure to leave an overhang on all sides. This simple trick makes lifting the cooled bars out incredibly easy.
-
Building the Vibrant Red Velvet Base
In a large bowl, whisk together the dry ingredients: flour, 1 cup sugar, cocoa powder, baking soda, and salt. In a separate medium bowl, combine the wet ingredients: melted butter, eggs, vanilla extract, buttermilk, and red food coloring. Gently pour the wet mixture into the dry ingredients and mix with a spoon or spatula until just combined. Avoid overmixing to keep the base tender and prevent toughness.
For a similarly smooth frosting, consider trying this Pistachio Dream Cheesecake recipe.
-
The “Sinking Solution”: Partial Baking for a Sturdy Foundation
Pour about three-fourths of the red velvet batter into your prepared pan and spread evenly. Bake for 10-12 minutes, just until the edges are set but the center remains slightly soft. This critical partial bake forms a stable foundation, ingeniously preventing your creamy cheesecake from sinking. Set aside the remaining 1/4 cup of red velvet batter for the swirl.
-
Whipping Up the Velvety Cheesecake Filling
While the base is partially baking, beat the softened cream cheese and 1/2 cup granulated sugar with an electric mixer until light and smooth. Beat in the remaining egg and vanilla extract until just combined. Do not overmix this mixture once the egg is added, as excess air can lead to cracks in your final cheesecake layer.
-
The Art of the Swirl: Assembling Your Masterpiece
Carefully pour the creamy cheesecake mixture over the warm, partially baked red velvet base. Dollop spoonfuls of the reserved red velvet batter onto the cheesecake layer, spacing them out strategically. Use a butter knife or a thin skewer to gently swirl the red velvet batter into the cheesecake, creating your desired pattern without overmixing. Add chocolate chips or kisses on top now, if using, by gently pressing them into the surface.
-
Final Bake: Achieving Golden Perfection
Return the pan to the oven and bake for an additional 25-30 minutes. The cheesecake edges should appear set, and the center will have a slight jiggle when gently shaken. This indicates it’s perfectly cooked through without being overbaked, which can lead to a dry texture.
-
The Chilling Secret: Flawless Setting & Clean Cuts
Remove the pan from the oven and allow the bars to cool completely on a wire rack at room temperature. This step is crucial for flavor and structural integrity. For fully set layers and perfect, clean cuts, chill the bars in the refrigerator for at least 2 hours (or even better, overnight) before proceeding. This guarantees those distinct layers and firm texture you’re aiming for.
-
Ready to Enjoy: Lifting, Cutting, and Serving
Once thoroughly chilled, use the parchment overhang to gently lift the entire slab of bars from the pan and transfer to a cutting board. Trim the edges if desired for a super neat presentation, then cut into neat squares. Serve and savor your perfectly Swirled Red Velvet Cheesecake Bars!
Chef’s Secrets: Elevate Your Swirled Red Velvet Cheesecake Bars Game
-
The Temperature Tango for Cream Cheese: Always use truly softened cream cheese for the cheesecake layer. If it’s too cold, it won’t beat smooth, leading to lumps and a grainy texture. If it’s too warm, the mixture can become runny and lack structure.
-
Don’t Overmix Anything: Overmixing the red velvet batter develops gluten, which can lead to a tough, dry base. Similarly, overmixing the cheesecake batter incorporates too much air, making it prone to cracking during baking and cooling.
-
Mastering the Swirl: For distinct, beautiful swirls, don’t overdo it with the knife or skewer. A few gentle, deliberate passes are enough to create an elegant pattern without fully blending the layers. Less is often more for visual impact.
-
High-Quality Red Food Coloring: For that vibrant, bakery-red hue, invest in a good quality gel food coloring. These are highly concentrated, allowing you to achieve a rich color without adding excess liquid that could alter batter consistency.
-
Clean Cuts Every Time: For perfectly sharp edges on your bars, dip your knife in hot water and wipe it clean between each cut. This simple trick prevents the cheesecake from sticking and tearing, giving you professional-looking slices.
Common Questions & Troubleshooting Your Bars
Why Did My Cheesecake Layer Still Sink?
If your cheesecake layer still sank, the red velvet base likely wasn’t partially baked enough to create a firm foundation. Ensure the edges are visibly set during the initial bake, creating a sturdy barrier. Additionally, not chilling the bars completely can cause the cheesecake to slump as it’s cut or handled, making layers appear less distinct.
More Sweet & Savory Ideas
Round out your meal with these recipes that complement the richness of red velvet cheesecake.
- For a satisfying start to the day, consider making a Hearty Sausage & Cheese Breakfast Bake, perfect for a hearty brunch.
- If you’re in the mood for a comforting main course, the Cheesy Chicken & Rice Bake offers a creamy experience without being dry.
My Cheesecake Cracked – What Went Wrong?
Cheesecake cracks are often caused by overmixing the cheesecake batter, which incorporates too much air that expands and contracts during baking. Overbaking can also dry out the cheesecake, making it more prone to cracking as it cools. Finally, a drastic temperature change from a hot oven to a cold counter can shock the delicate cheesecake, leading to fissures; allow it to cool gradually.
How Do I Get a Really Vibrant Red Color?
For the most vibrant red in your Swirled Red Velvet Cheesecake Bars, opt for a high-quality gel food coloring. These are much more concentrated than liquid food colors, allowing you to achieve a rich, deep hue without adding excess moisture to your batter. Add it gradually, stirring until your desired shade is reached.
Can I Make These Gluten-Free?
Yes, you can adapt this recipe to be gluten-free. Substitute the all-purpose flour with a 1:1 gluten-free baking flour blend that already contains xanthan gum. The rest of the ingredients and steps should remain the same, but always check your specific GF flour blend’s recommendations as some may absorb liquids differently.
Serving, Storing, and Making Ahead: All You Need to Know
Elegant Serving Suggestions
These Swirled Red Velvet Cheesecake Bars are stunning on their own, requiring little adornment. For an elevated presentation, consider a light dusting of cocoa powder, a scattering of fresh raspberries, or a dollop of freshly whipped cream. A delicate drizzle of melted white chocolate also makes for a delightful and elegant touch.
Keeping Your Bars Fresh: Storage Tips
Store leftover Swirled Red Velvet Cheesecake Bars in an airtight container in the refrigerator for up to 3-4 days to maintain optimal freshness. For longer storage, you can freeze individual bars wrapped tightly in plastic wrap and then foil for up to 1 month. Thaw them slowly in the refrigerator before serving to preserve texture.
Can You Prepare These in Advance?
Absolutely! These Swirled Red Velvet Cheesecake Bars are an excellent make-ahead dessert, perfect for entertaining or busy schedules. You can prepare them a full day or two in advance, keeping them chilled in the refrigerator until you’re ready to serve. In fact, an overnight chill often enhances the flavors and ensures the firmest, cleanest cuts.
Swirled Red Velvet Cheesecake Bars FAQs
What is the best way to cut clean bars?
For pristine, professional-looking cuts, ensure your Swirled Red Velvet Cheesecake Bars are thoroughly chilled, ideally for at least 2 hours or overnight. Use a long, sharp knife, dipping it in hot water and wiping it clean after each slice. This technique prevents sticking and dragging, giving you perfect squares every time.
Can I use a different size pan?
You can use a 9×13 inch pan for thinner bars, but you will need to adjust baking times accordingly (likely shorter for both the base and overall bake). For a smaller yield, you could halve the recipe for a 7×7 inch pan. Always keep a close eye on visual cues for doneness rather than strictly adhering to timings.
How long do Red Velvet Cheesecake Bars last?
Properly stored in an airtight container in the refrigerator, these delicious Swirled Red Velvet Cheesecake Bars will maintain their quality and freshness for 3 to 4 days. They can also be frozen for longer storage, ensuring you always have a delightful treat on hand.
Is buttermilk essential, or are there substitutes?
Buttermilk contributes significantly to both the moist texture and the classic tangy flavor of red velvet, reacting with the baking soda for crucial lift. If you don’t have it, you can easily make a quick substitute: add 1/2 tablespoon of lemon juice or white vinegar to 1/2 cup of regular milk, stir, and let it sit for 5-10 minutes until it slightly curdles before using.
Your Dessert Journey Starts Here: Share Your Creation!
Now that you’re armed with the secrets to perfectly distinct layers and an irresistible swirl, it’s time to create your own batch of Swirled Red Velvet Cheesecake Bars! This recipe isn’t just about baking; it’s about confidently crafting a dessert that truly impresses, without the worry of sunken layers or imperfect results. Get ready to experience the joy of bakery-quality baking right in your own kitchen!
We’d absolutely love to see your stunning, bakery-worthy creations. Share your photos and experiences in the comments below, or tag us on social media using #SwirledRedVelvetCheesecakeBars. Happy baking, and prepare for those rave reviews!
Swirled Red Velvet Cheesecake Bars
Course: DessertCuisine: American CuisineDifficulty: easy16
bars25
minutes40
minutes300
minutesAmerican Cuisine
Ingredients
For the Red Velvet Base:
1 1/2 cups all-purpose flour
1 cup granulated sugar
1/2 cup unsweetened cocoa powder
1 teaspoon baking soda
1/2 teaspoon salt
1/2 cup unsalted butter, melted
2 large eggs
1 teaspoon vanilla extract
1/2 cup buttermilk (or regular milk with 1/2 tsp lemon juice mixed in, let sit 5 min)
1 tablespoon red food coloring
For the Cheesecake Layer:
8 ounces cream cheese, softened
1/2 cup granulated sugar
1 large egg
1 teaspoon vanilla extract
For the Swirl & Garnish:
1/4 cup red velvet batter (reserved from base)
3 chocolate chips or chocolate kisses (for topping)
Directions
- Preheat your oven to 350F (175C). Line an 8×8 inch baking pan with parchment paper, making sure to leave an overhang on the sides. This makes lifting the bars out super easy later!
- Make the Red Velvet Base: In a large bowl, whisk together the flour, 1 cup granulated sugar, cocoa powder, baking soda, and salt. In a separate medium bowl, whisk together the melted butter, 2 large eggs, 1 teaspoon vanilla extract, buttermilk, and red food coloring until smooth. Pour the wet ingredients into the dry ingredients and mix with a spoon or spatula until just combined. Be careful not to overmix!
- Partially Bake the Base (Your Sinking Solution!): Pour about three-fourths of the red velvet batter into your prepared pan and spread it evenly. Bake for 10-12 minutes, just until the edges are set but the center is still soft. This crucial partial bake creates a sturdy foundation, preventing your creamy cheesecake from sinking into the brownie later. Set aside the remaining 1/4 cup of red velvet batter for the swirl.
- Prepare the Cheesecake Layer: While the base is partially baking, beat the softened cream cheese and 1/2 cup granulated sugar in a medium bowl with an electric mixer until light and smooth. Beat in the remaining 1 large egg and 1 teaspoon vanilla extract until just combined. Do not overmix this, as it can make the cheesecake crack.
- Assemble and Swirl: Carefully pour the cheesecake mixture over the warm, partially baked red velvet base. Dollop spoonfuls of the reserved red velvet batter (about 1/4 cup) onto the cheesecake layer. Use a butter knife or a thin skewer to gently swirl the red velvet batter into the cheesecake mixture, creating a beautiful pattern. If using, place your chocolate chips or kisses on top now.
- Bake the Bars: Return the pan to the oven and bake for an additional 25-30 minutes, or until the cheesecake edges are set and the center has a slight jiggle when gently shaken.
- Cool Completely (Another Sinking Solution Step!): Remove the pan from the oven and let the bars cool completely on a wire rack. To ensure your cheesecake layer fully sets and keeps its gorgeous shape without slumping, chill the bars in the refrigerator for at least 2 hours before lifting them from the pan and cutting. This step guarantees those clean, distinct layers you’re dreaming of!
- Once thoroughly chilled, lift the bars out of the pan using the parchment overhang, cut into squares, and serve.
Notes
- Crucial partial bake and chilling steps ensure distinct, non-sinking layers for a stunning presentation.